Voxel Figure Creator
 Animation Store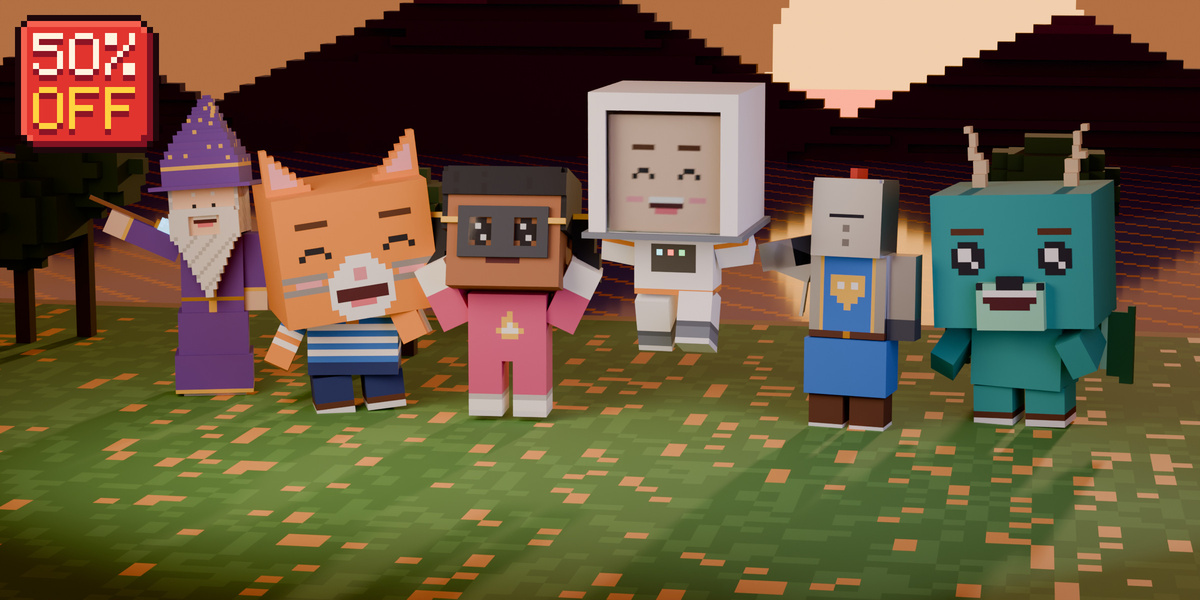
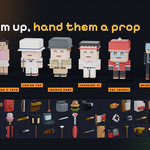
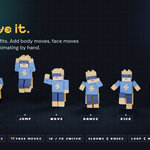
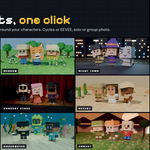
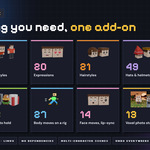
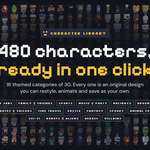
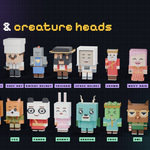
Voxel Figure Creator builds complete cube-made characters inside Blender. You get pixel-art faces that blink, emote and talk, plus voxel hair and hats, painted outfits and props. A one-click rig comes with ready-made moves, and a photo studio stages the result. Start from one of 480 characters or roll a random one, then change anything with a click. Everything stays editable until you convert it.
Why you'll love it
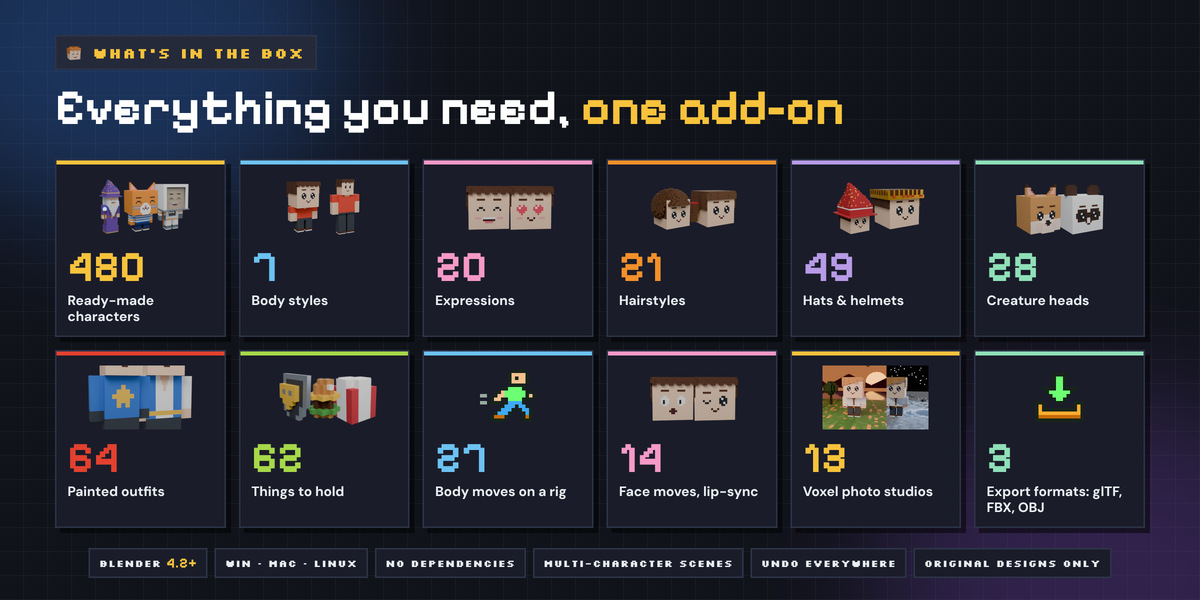
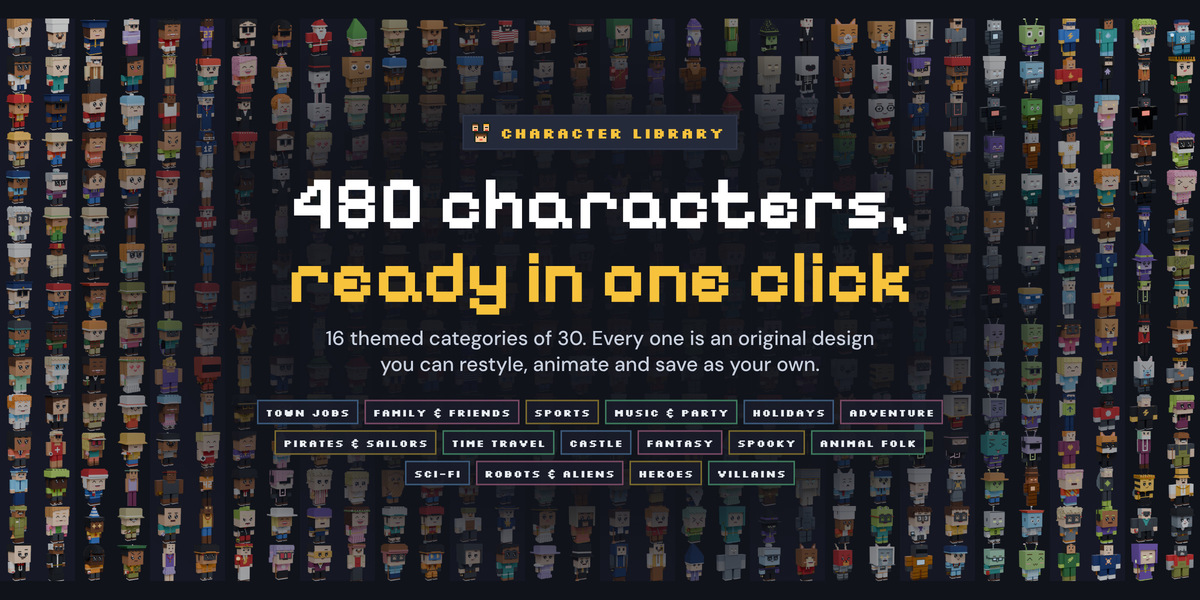
• Characters in one click. 480 original characters in 16 themed categories, from baristas and knights to robots, pirates and heroes.
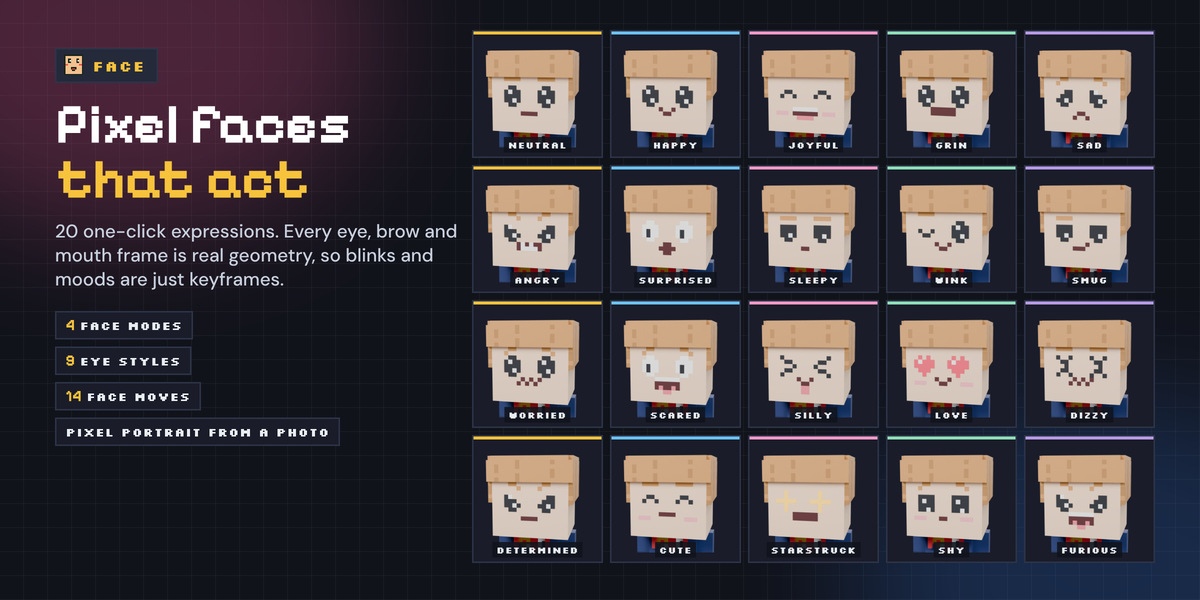
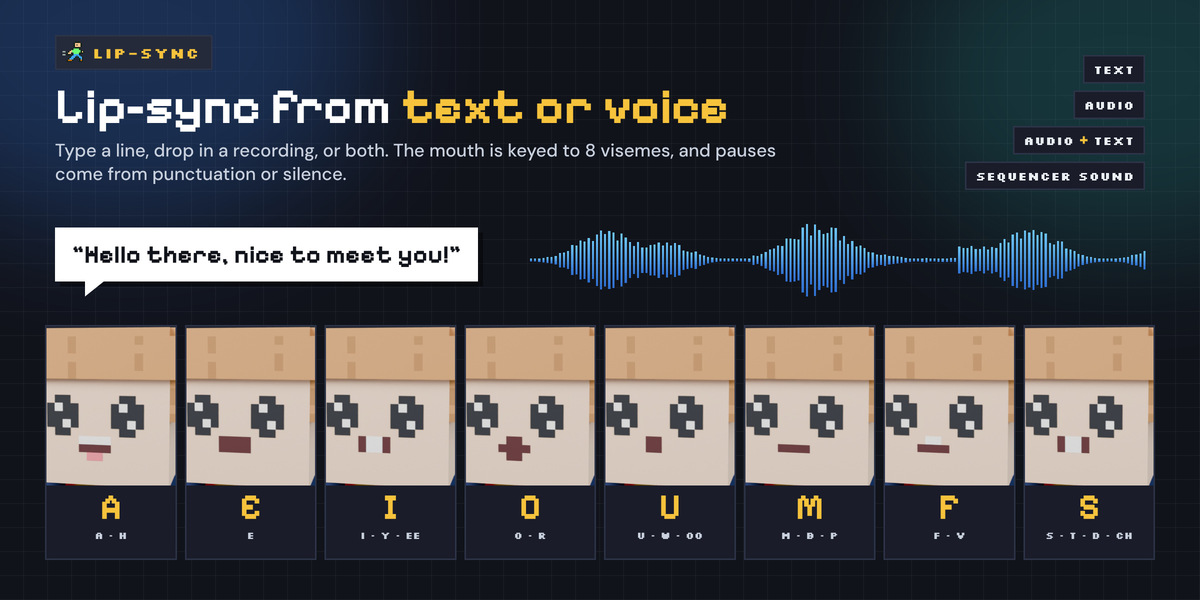
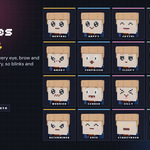
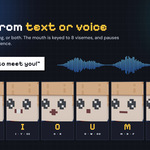
• Faces that act. 20 expressions, 14 face moves, and lip-sync from typed dialogue, a voice recording, or both.
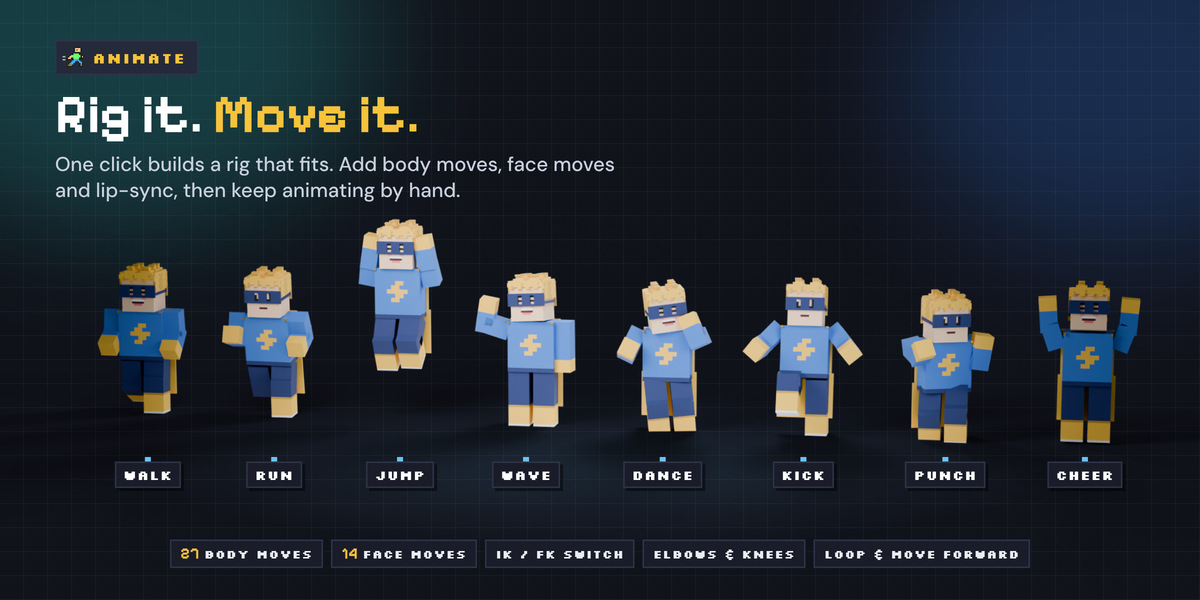
• Ready to animate. One click builds a rig with 27 body moves, such as walk, run, dance, wave and sword swing. Elbows and knees are optional and support IK/FK switching.
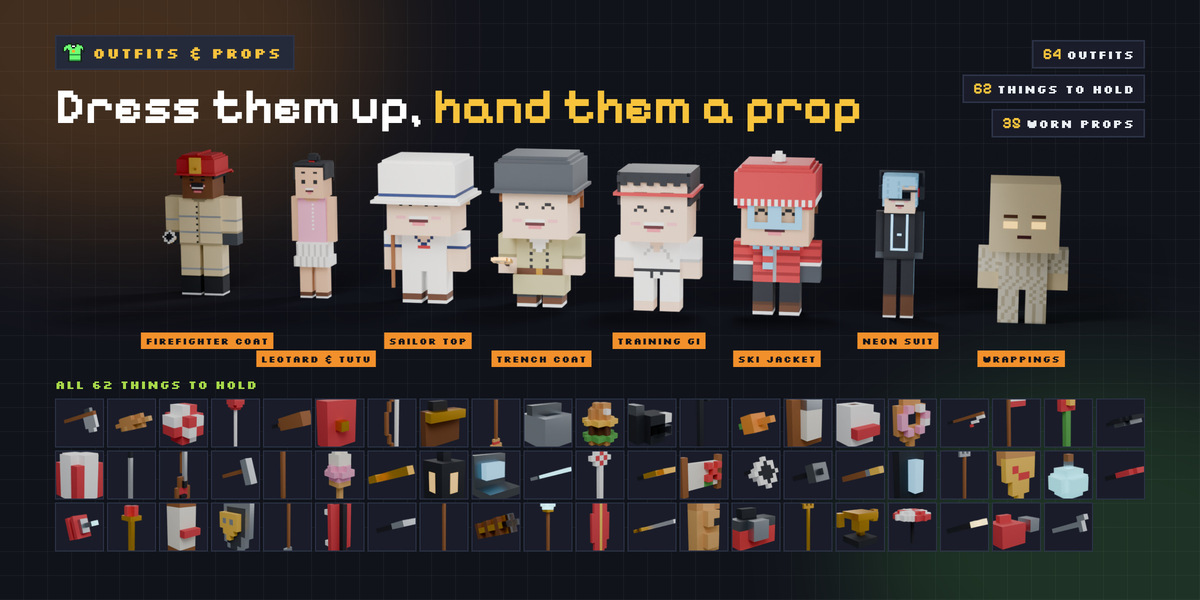
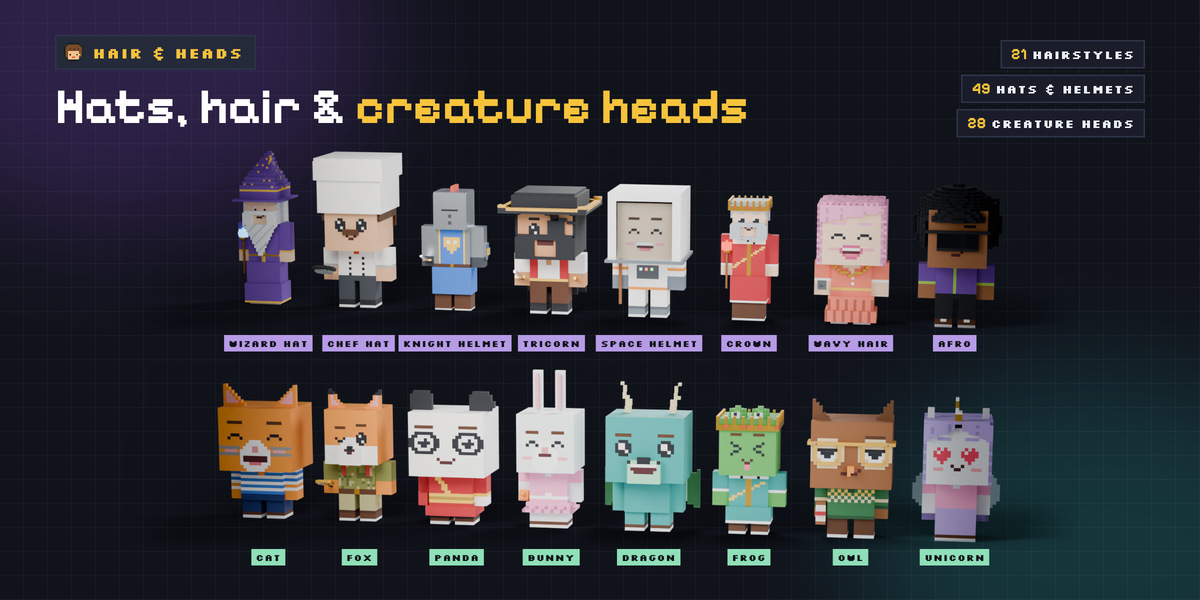
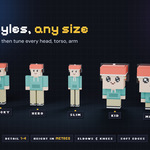
• Endlessly mixable. 7 body styles, 21 hairstyles, 49 hats and helmets, 64 outfits, 28 creature heads and 62 things to hold.
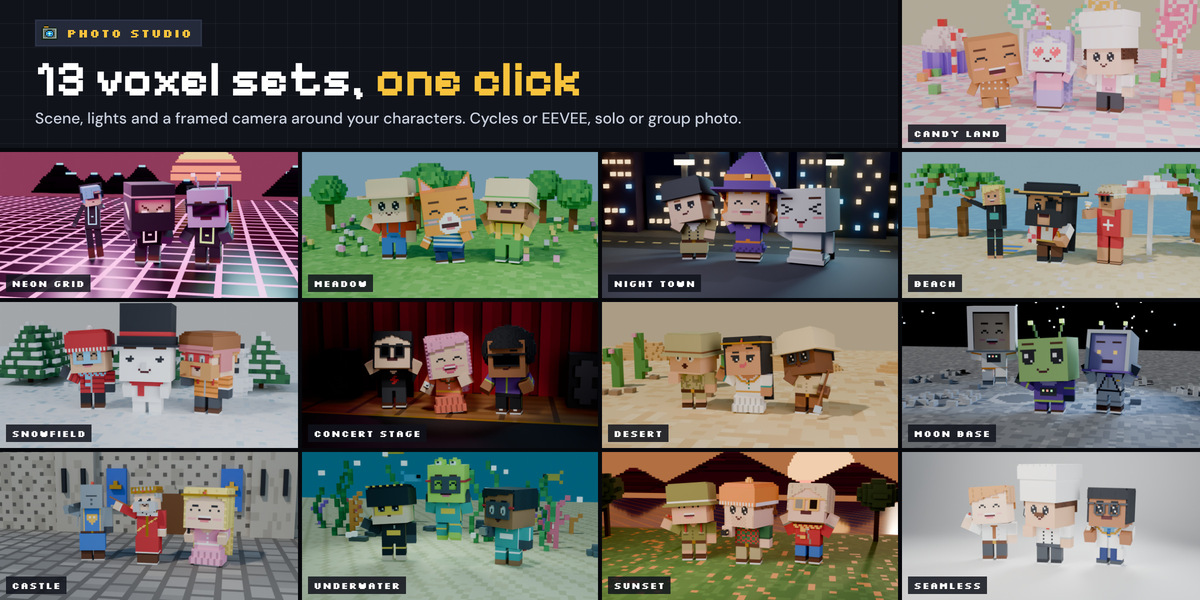
• Picture-ready. 13 voxel photo scenes, from a meadow to a moon base, each with lights and a framed camera.
• Game-ready export. Convert to plain meshes or one skinned mesh, then export to glTF, FBX or OBJ.
• A HUD that feels like a game. Floating voxel HUD windows open over the viewport with Ctrl Shift Y. The sidebar is split into tidy sections and pages.
How it works
• Open the sidebar (N) and pick the Voxel tab, or use Add › Voxel Figure.
• Pick a character from the library, or press Random Character.
• Change the body, face, outfit, hair, props and colours. The character rebuilds as you edit.
• Add a body move, a face move or lip-sync.
• Press Build Studio to stage a scene and render it, or export the character to your game engine.
Under the hood
• All meshes are generated in Python, with no Geometry Nodes, so they are plain geometry that is easy to edit and export.
• A greedy mesher merges faces and removes hidden ones, giving clean, watertight meshes.
• Rebuilds keep your modifiers, parenting and animation. Lock a part to protect your manual edits.
• Each character stores its own settings, so one scene can hold a whole cast.
• Every face frame is real geometry switched by a driven shape key. Blinks, expressions and lip-sync are keyframes on the character's face-frame properties.
• Every character, costume, emblem, prop and scene is an original design. No real people, and no characters from other works.
Complete feature list
• Character library: 480 ready-made characters in 16 categories of 30, plus your own saved presets.
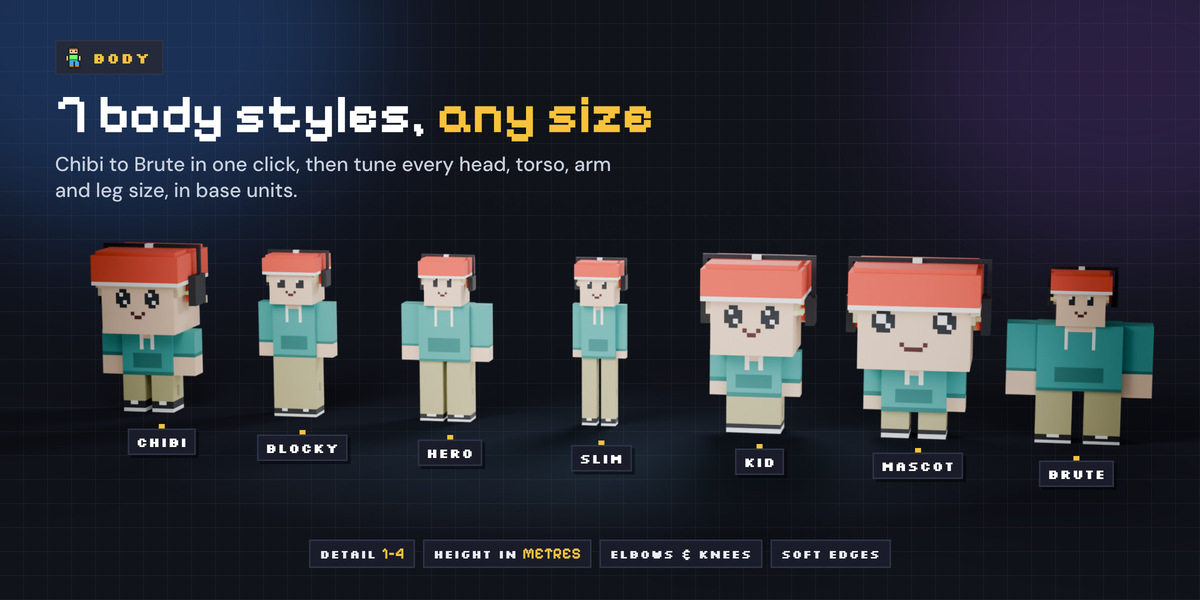
• Body styles (7): Chibi, Blocky, Hero, Slim, Kid, Mascot, Brute, plus fully custom proportions.
• Detail levels (4): voxels per base unit, from very chunky (1) to fine pixel faces (4).
• Face modes (3): Pixel, Raised, Painted.
• Expressions (20): one-click facial expressions.
• Face frames (40): 12 eye, 6 brow and 22 mouth frames, including 8 lip-sync visemes.
• Eye styles (9): Sparkle, Dot, Tall, Classic, Iris, Anime, Wide, LED, Button.
• Hairstyles (21): voxel shells with strands, spikes, curls, ponytails, buns and braids.
• Hats and helmets (49): hair tucks under automatically.
• Creature heads (28): ears, horns, snouts, beaks, manes and markings.
• Outfits (64): painted pixel by pixel, with skirts, coats and robes built in.
• Emblems and patterns (19 / 6): original 5×5 pixel emblems and repeating patterns.
• Legwear and shoes (10 / 7): separate from the outfit, or the outfit's own.
• Held items (62): one in each hand.
• Worn props (35): 8 glasses, 7 face items, 7 neck items, 12 back items, plus headphones.
• Colour palette (34): named voxel colours, plus 11 skin presets (4 fantasy) and custom colours.
• Body moves (27): ready-made rig animations, plus a turntable.
• Face moves (14): ready-made face animations.
• Lip-sync sources (3): Text, Audio, Audio + Text.
• Photo studio scenes (13): voxel sets with their own lights, world and camera.
• Export (3 + 3): Keep Separate, Single Mesh, Single Skinned Mesh; glTF/GLB, FBX, OBJ.
Every option by name
• Library categories: Town Jobs, Family & Friends, Sports, Music & Party, Holidays, Adventure, Pirates & Sailors, Time Travel, Castle, Fantasy, Spooky, Animal Folk, Sci-Fi, Robots & Aliens, Heroes, Villains.
• Expressions: Neutral, Happy, Joyful, Grin, Sad, Angry, Surprised, Sleepy, Wink, Smug, Worried, Scared, Silly, Love, Dizzy, Determined, Cute, Starstruck, Shy, Furious.
• Face details: 5 brow styles; noses (Dot, Shade, Block, Long, Button); blush; freckles; stubble; scar; sweat drop. There are 4 face paints, 6 beards and 4 mustaches. Teeth can be Normal, Buck Teeth, Fangs or none.
• Hairstyles: Buzz, Short, Side Part, Slicked, Spiky, Messy, Curly, Bowl, Bob, Curtains, Long, Wavy, Emo, Ponytail, Bun, Pigtails, Braid, Topknot, Mohawk, Afro, Receding.
• Hats and helmets: Cap, Backwards Cap, Beanie, Bucket Hat, Top Hat, Bowler, Wide Brim, Hard Hat, Peaked Cap, Chef Hat, Crown, Tiara, Wizard Hat, Party Hat, Beret, Graduation Cap, Propeller Cap, Headband, Flower Crown, Halo, Hood, Ninja Hood, Knight Helmet, Crested Helmet, Horned Helmet, Space Helmet, Tricorn, Bandana, Earmuffs, Fire Helmet, Pith Helmet, Pointed Brim Hat, Tassel Cap, Antenna Band, Ear Band, Festive Cap, Pointed Cap, VR Visor, Swim Cap, Sport Helmet, Gridiron Helmet, Racing Helmet, Diving Helmet, Striped Headcloth, Laurel Wreath, Jester Hat, Paper Hat, Sun Visor, Trapper Hat.
• Creature heads: Cat, Tiger, Dog, Bear, Panda, Bunny, Fox, Mouse, Pig, Monkey, Frog, Owl, Dragon, Imp, Unicorn, Robot, Alien, Sheep, Cow, Lion, Wolf, Penguin, Duck, Raccoon, Koala, Bee, Skull, Pumpkin.
• Outfits: Plain, T-Shirt, Tank Top, Shirt & Tie, Suit, Tuxedo, Waistcoat, Hoodie, Zip Jacket, Track Suit, Sweater, Striped Top, Plaid Shirt, Camouflage, Overalls, Dress, Gown, Cheer Outfit, Lab Coat, Scrubs, Chef Jacket, Officer Shirt, Hi-Vis Vest, Sports Jersey, Space Suit, Hero Suit, Armour, Tabard, Ninja Gi, Wrap Robe, Wizard Robe, Royal Robe, Buccaneer, Sailor Top, Toga, Poncho, Robot Body, Firefighter Coat, Pilot Shirt, Coveralls, Safari Shirt, Ranch Shirt, Wetsuit, Ski Jacket, Training Gi, Leotard & Tutu, Lifeguard Top, Clown Suit, Pyjamas, Blazer, Apron, Wrappings, Bone Suit, Scale Armour, Fur Tunic, Island Shirt, Trench Coat, Biker Jacket, Festive Suit, Pointed Tunic, Patchwork, Neon Suit, Flight Suit, Broad Collar.
• Emblems: Star, Heart, Bolt, Diamond, Flame, Moon, Sun, Leaf, Drop, Snowflake, Crown, Shield, Paw, Note, Smiley, Atom, Circle, Arrow, Spiral. Patterns: Dots, Checker, Pinstripes, Diagonal, Sparkles, Knit.
• Legwear: Trousers, Shorts, Bare Legs, Striped Stockings, Armour, Cargo, Track Pants, Suit, Scrubs, Robot. Shoes: Shoes, Boots, Sneakers, Sandals, Barefoot, Armoured, Slippers.
• Held items: Sword, Axe, Hammer, Shield, Spear, Bow, Wand, Staff, Light Blade, Ray Gun, Wrench, Shovel, Paintbrush, Spatula, Frying Pan, Microphone, Magnifying Glass, Fishing Rod, Key, Carrot, Book, Scroll, Mug, Phone, Trophy, Ball, Potion, Pizza Slice, Clipboard, Flower, Umbrella, Flag, Balloon, Ice Cream, Lollipop, Lantern, Briefcase, Bucket, Guitar, Camera, Bat, Racket, Hockey Stick, Golf Club, Surfboard, Skateboard, Broom, Pitchfork, Megaphone, Baguette, Trident, Walking Cane, Watering Can, Teddy Bear, Gift Box, Laptop, Toolbox, Burger, Donut, Sceptre, Spyglass, Map.
• Glasses: Round, Square, Sunglasses, Visor, Goggles, Monocle, Heart Shades, 3D Glasses. Face items: Eye Patch, Eye Mask, Face Mask, Clown Nose, Pipe, Bubble Gum, Bandage. Neck: Scarf, Bow Tie, Necklace, Medal, Flower Garland, Big Collar, Bell Collar.
• Back items: Cape (Plain, High Collar or Tattered), Backpack, Jetpack, Feather Wings, Bat Wings, Fairy Wings, Quiver, Sword on Back, Air Tanks, Shell, Tail, Guitar on Back.
• Body moves: Walk, Run, Sneak, Jump, Idle, Turn, Sit, Crouch, Wave, Point, Cheer, Clap, Dance, Nod, Head Shake, Look Around, Shrug, Salute, Bow, Think, Laugh, Punch, Kick, Sword Swing, Hammer, Push, Panic, plus Turntable.
• Face moves: Blink, Talk, Smile, Laugh, Surprise, Angry, Cry, Worried, Wink, Look Around, Sing, Sleepy, Love, Dizzy.
• Studio scenes: Seamless, Meadow, Night Town, Snowfield, Neon Grid, Desert, Beach, Moon Base, Concert Stage, Castle, Candy Land, Underwater, Sunset.
Install
• Download the zip.
• In Blender, open Edit › Preferences › Get Extensions.
• Open the drop-down arrow at the top right and choose Install from Disk... Pick the zip.
• Or drag the zip from your file browser into the Blender window.
• Check that Voxel Figure Creator is enabled under Add-ons.
• In the 3D Viewport press N and open the Voxel tab. The add-on is also in Add › Voxel Figure (Shift A).
Updating: install the new zip the same way, and it replaces the old version. Your saved presets live in the add-on's user folder, so they carry over.
Uninstalling: go to Preferences › Add-ons › Voxel Figure Creator, open the drop-down and choose Uninstall. To share a file with someone who doesn't own the add-on, run Export › Convert on its characters first.
Quick start
This takes you from an empty scene to a rendered, animated character in about a minute.
• Press N in the 3D Viewport and open the Voxel tab.
• Pick a category, browse the character carousel and press Create Character. It appears at the 3D cursor, and the sidebar switches to its character card.
• Or press Random Character to create a fresh look straight away. The same seed always gives the same character.
• Open Face › Expression and click a thumbnail, for example Joyful.
• Open Animate › Body Moves, choose Walk and press Add Body Animation. A rig is built for you. Press Space to play.
• Open Animate › Lip-Sync, leave the Source on Text, type a line of dialogue and press Generate Lip-Sync.
• Open Studio, pick a scene such as Meadow and press Build Studio. Then press the render button beside it, or F12.
Tip: press Ctrl Shift Y to open the floating Voxel HUD, so you can edit without leaving the viewport.
The sidebar: sections and pages
Everything lives in 3D View › Sidebar (N) › Voxel. With no character selected, the panel shows the character picker. Select any part of a character and it shows that character's card, then a grid of 10 sections, each with its own pages.
• Character card: name, preset and category, height, rig status, Auto Update, and Update, Random, Duplicate and Delete buttons. It warns you when the rig no longer matches the body.
• Page stepper: ◀ n/N ▶ moves through a section's pages, and All Pages shows them all at once. On the design pages, Reset sets the page back to its defaults.
• Characters in Scene: lists every character so you can select it, with toggles for the Target Frame and the Viewport Card.
• Presets (Library, My Presets, Randomize): apply any of the 480 characters. Save and load your own. Randomize with a seed and per-group locks.
• Body (Style & Size, Proportions, Pose): body style, height (Scale or Exact), Detail 1–4, Joints (Rigid or Elbows & Knees). Head, torso, arm and leg sizes in base units. Soft edges. Pose angles.
• Face (Style, Expression, Eyes, Brows & Mouth, Details, Creature): face mode, expressions, eye, brow and mouth styles and sizes. Nose, blush, freckles, face paint, beards, mustaches. Creature heads.
• Outfit (Outfit, Details, Legs & Shoes): outfit, emblem, pattern, belt, sleeves, gloves, stripes, jersey number. Leg details, legwear and shoes.
• Hair (Hair, Hair Shape, Headwear): hairstyle, fringe, length, volume, spikes, curls, extras such as ponytails and buns, hair texture. Hats, with height, brim, tilt, turn, decoration and Hair Under Hat.
• Props (In Hand, Worn): an item for each hand (size, tilt, shield emblem). Glasses, face items, neck items, back items, headphones. Attachment points for your own props.
• Colours (Skin & Finish, Palette): skin preset, 36 colour slots, the 34-colour Voxel Palette pop-up. Finish: Matte, Satin, Glossy or Unlit.
• Animate (Rig, Body Moves, Face Frames, Face Moves, Lip-Sync): generate or refit the rig, IK/FK. Add body or face moves. Set face frames by hand. Lip-sync.
• Studio (Photo Studio): scene, framing (Full Body or Portrait), engine, Group Photo, Build Studio and render.
• Export (Convert, Export, Lock Parts): Convert to Mesh, export to glTF/FBX/OBJ, and lock parts against regeneration.
Auto Update rebuilds the character a moment after each change. Turn it off on a heavy character, then press Update on the character card when you're ready. Colour changes don't rebuild the mesh; changing the Finish does.
Lock Selected (Export › Lock Parts) protects parts you have edited by hand from being regenerated. You can also use Lock Part (keep edits) under Properties › Object › Voxel Figure Part.
Voxel HUD
The Voxel HUD puts the editing tools over the viewport as game-style windows. Press Ctrl Shift Y, or click HUD in the 3D View header, to show or hide it.
• Dock: a launcher bar with one button per section. Drag its grip to move it, fold it, or close it.
• Windows: open as many as you like, in any viewport. Each one keeps its own section, page, position and scroll, separate from the sidebar.
• Window controls: drag the title bar to move a window, and double-click it to fold. Close with × or Esc. ◀ ▶ change the section, and the tabs change the page. The scrollbar and mouse wheel scroll.
• Sliders: hold Shift for fine steps or Ctrl to snap. Number fields accept simple maths such as 2*3 or pi.
• Galleries and palette: thumbnail and colour pop-ups work as they do in the sidebar.
• Undo: HUD edits are undoable. Undo, redo and loading a file are handled safely.
Viewport Card: a small panel in the bottom-right corner shows the active character's name, preset, height, rig and current page. It hides while the HUD is open.
Target Frame: corner brackets and a name tag mark the active character on screen. Both overlays follow the viewport's Overlays toggle.
Faces and expressions
Faces are pixel art drawn on the head, and every eye, brow and mouth frame is real geometry. Pick a face mode for the look, then an expression for the mood.
• Pixel: flat pixels on the head. Animated. Best for most characters.
• Raised: pixels stand out as small voxels. Animated. Best for close-ups and toy looks.
• Painted: baked into the head. Not animated. Best for games: the lightest mesh.
Expressions set the eyes, brows and mouth together. There are 20, from Happy to Starstruck, plus Custom for your own mix. Blush can be set to Auto, which turns it on for Love, Shy, Cute and Joyful.
Face frames (Animate › Face Frames) let you set each eye, each brow, the mouth and the gaze (Look Left/Right, Look Up/Down) by hand and keyframe them. Use Reset to Expression to go back.
Rig, moves and lip-sync
One click gives a character a rig and a looping move. Face moves and lip-sync are keyframes on the character itself, so they work with or without a rig.
The rig
• Generate Rig (Animate › Rig) builds a rig that fits the character. Adding the first body move also builds one, except Turntable, which spins the whole character instead.
• Rigid joints: an 8-bone rig (Root, Hips, Torso, Head, both arms and both legs). Each part is a solid block on its bone, so there is no weight painting.
• Elbows & Knees (the Joints setting on Body › Style & Size or Animate › Rig): two-block limbs and a 20-bone rig with IK hands and feet and pole targets. All to IK / All to FK switches without the pose jumping.
• With Auto Update on, size and style changes refit the rig for you. If the card warns that the rig doesn't match (for example after changing Height), press Refit.
Body moves
Pick a move and press Add Body Animation. Each move becomes its own action, so you can mix them in the NLA or the Action Editor.
• Cycle Length sets the speed. Strength scales the motion from 0.1 to 2.5. Loop adds a Cycles modifier. Move Forward adds travel to Walk, Run, Sneak and Push.
• Moves adapt to rigid or bending limbs; crouches use the knees when they exist.
• Turntable spins the whole character for product shots.
Face moves
Pick one of 14 face moves, such as Blink, Talk, Laugh or Dizzy, set Repeat, and press Add Face Animation. Face moves start at the current frame. Blink follows Blink Every (s) and varies the timing a little so it looks natural.
Lip-sync
• Text: letters become 8 mouth shapes (visemes). Vowels are held longer, and punctuation adds pauses. Use it when you only have a script.
• Audio: the loudness and tone of a recording choose the mouth shape and how open it is. Use it when you have a voice track but no script.
• Audio + Text: timing comes from the recording and the shapes come from the text. Use it when you have both. This gives the best result.
• Open Animate › Lip-Sync and choose the Source: Text, Audio or Audio + Text.
• Type the Dialogue. For audio, pick a file, or press Use Sequencer Sound to take a sound strip that is already in the Video Sequencer.
• Set the Start Frame. For text, set Letters / Second (14 is a natural pace).
• Press Generate Lip-Sync. With Auto Update on, editing the text regenerates it.
• Add Sound to Sequencer places the audio for you, so playback and render stay in sync.
Generating again clears the mouth keys inside the old and new lip-sync range; keys outside that range are kept. To fix single frames, use the A E I O U M F S buttons with Keyframe Visemes on.
Photo Studio
Photo Studio builds a voxel set, lights and a camera around your character in one click. Everything scales to the character's height.
• Open Studio and pick a scene.
• Choose Framing: Full Body, or Portrait for the head and torso.
• Choose the Engine: Cycles, EEVEE, or Keep to leave the render engine as it is.
• Turn on Group Photo to frame every character in the scene.
• Press Build Studio, then the render button beside it (or F12).
• Seamless: a curved white backdrop with soft key, fill and rim lights.
• Meadow: grassy tiles, flowers, round trees and a blue sky.
• Night Town: a street with lit windows, a lamp post and the moon.
• Snowfield: snow tiles, stepped pine trees and a snowman.
• Neon Grid: a glowing grid floor under a retro sunset, with pink and cyan rim lights.
• Desert: sand dunes, cacti and a hot sun.
• Beach: sand, sea, palm trees and a striped umbrella.
• Moon Base: grey craters, stars and a ringed planet.
• Concert Stage: a wooden stage, a red curtain, speakers and coloured lights.
• Castle: a cobbled courtyard, walls, towers and banners.
• Candy Land: a frosting floor, lollipop trees, candy canes and gumdrops.
• Underwater: coral, seaweed, fish and bubbles.
• Sunset: a grassy hill by a lake under a setting sun.
Set the render resolution before you press Build Studio, because the camera framing uses its aspect ratio. Build Studio also switches the view transform to AgX Punchy and, on Cycles, sets 96 samples with denoising. Pressing it again rebuilds the set for the current characters. The studio lives in its own Voxel_Studio collection, so it is easy to hide or delete.
Export for games and other apps
For a game engine, set Face › Style to Painted and convert to a Single Skinned Mesh, then export to glTF or FBX. That gives one light mesh on a simple rig.
• Keep Separate: ordinary objects, one per part. With Keep Face Animation on, the face frames stay switchable through custom properties on the root, which you can keyframe. Use it for further editing and animation in Blender.
• Single Mesh: one static mesh in the current pose. Hidden face frames, the rig and the empties are removed. Use it for props, 3D printing and still renders.
• Single Skinned Mesh: one mesh bound to the rig, each part at full weight on its bone. Use it for game engines and other 3D apps.
• Open Export › Convert, choose a mode and press Convert to Mesh. The character stops being editable by the add-on, so save a copy first if you may want to change its design.
• Open Export › Export and pick glTF / GLB, FBX or OBJ. The add-on selects the character's parts and opens Blender's exporter with "Selected Only" set.
You can also export without converting. Attachment Points (Props › Worn) add empties on the hands, head top and back, so you can parent your own props or snap engine sockets to them.
Tips & troubleshooting
Most surprises come from Auto Update being off, an outdated rig, or the Painted face mode.
• The character doesn't change when I edit it: turn on Auto Update on the character card, or press Update. Rebuilds wait while a part is in Edit or Sculpt mode.
• The rig and body don't line up after resizing: press Refit Rig (Animate › Rig).
• Blinks and expressions don't show: the Painted face mode is static. Switch to Pixel or Raised.
• Lip-sync is out of time with the sound: check the Start Frame, keep Add Sound to Sequencer on, and generate again after changing the scene frame rate.
• A hat hides too much hair, or not enough: set Hair Under Hat to Auto, Hide or Show.
• My manual mesh edits disappeared: select those parts and use Lock Selected before you edit again.
• The viewport feels slow: lower Detail, use the Painted face mode, or turn Auto Update off while you make many changes.
• The Viewport Card covers something: turn it off in Characters in Scene, or hide overlays in the viewport.
• Ctrl Shift Y clashes with another add-on: remap it under Preferences › Keymap › 3D View (the operator is vfc.hud), or use the HUD header button.
More tips:
• Shift D copies a whole character safely, and the copy gets its own identity. The Duplicate button on the character card builds a fresh character with the same settings beside the original.
• You can rename parts freely. The add-on tracks them by hidden tags, not by name.
• Save a look you like with Save on Presets › My Presets. Presets are JSON files that work in every .blend file.
• Turn off a group in Randomize (for example, Colours) to keep it while the rest changes.
-
$25
Single user
-
$60
Small team 2-5
-
$180
Studio 6-10
 Included
Includes 12 months of
- Support from Animation Store
- Product updates
Extend this product’s Support Period +12 months: 50% of product price
Have questions before purchasing?
Login to message
| Blender Extension Compatible | Yes |
| Dev Fund Contributor | |
| Published | about 9 hours ago |
| Blender Version | 4.1 - 5.2 |
| Extension Type | Add-on |
| Render Engine Used | Cycles, Eevee |
| License | GPL |
Discover more products like this
pixel art procedural character-generator lip sync low poly animation Facial Animation voxel character rig stylized voxel toy