Voxify | Mesh to Voxel Modifier
 MASSXRZ



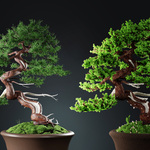
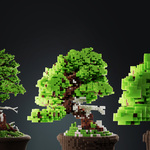
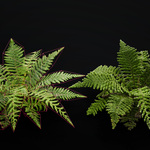
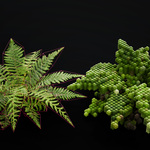
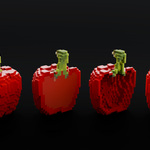
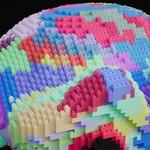
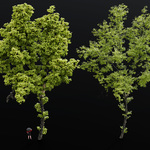
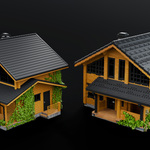
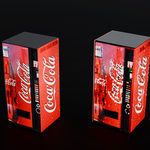
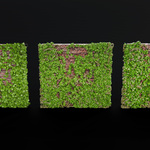
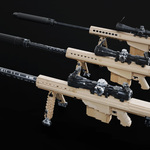

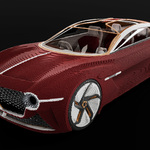
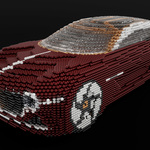

(Please make sure, Scale and Rotation of your object are applied, also check the dimension of your object and make sure they make sense considering your voxel size. voxelizing a fern which is the size of a house with a voxel size of 0.01m results in generating millions of voxels and possibly freezing or crashing your project. so either scale your fern down, hit Ctrl + A and apply your scale or incase it is in fact a house and not fern and the sizes are correct , simply set your voxel size to something higher.)
Please Note: (This modifier can not work with simple color materials or multi material objects, you must first bake all your Material/Colors into one texture and use that texture for Color transfer. (same goes for other maps as well.) For example it works perfectly with 3D scanned assets. but not meshes with multiple materials for different parts.)
General Setting
Parameter |
Description |
| Object To Voxelize | The source mesh object that will be converted into voxels. |
UV Name |
Name of the UV map to use for texture transfer from the original mesh to voxels. (This attribute can be read in the materials with an attribute node set to geometry for point clouds or instance for voxels.) |
| Interpolate UVs |
When enabled, If certain voxels are not capturing any UV information, those voxels will inherit the information of their nearest neighbor with accurate UVs. |
| Voxel Size | Size of each individual voxel cube (in Blender units). Smaller values = higher resolution. |
|
Viewport As Render As |
Display mode in the 3D viewport. (Point clouds are faster and more optimized to show/render.) Render mode for final output. |
| Custom Voxel |
Allows replacing standard cubes with custom mesh shapes (e.g. Building Bricks). (Domain size of the custom mesh must be 50cm by 50cm, this makes sure there are no overlaps.) |
|
Voxel Material Point Cloud Material |
Material assigned to generated voxel cubes.(Reads attributes on Instance.) Material assigned to generated Point clouds. (Reads attributes on geometry.) |
Voxelize
Parameter |
Description |
||||||||||||
| Generation |
Method for generating voxels. Exact, takes more time to calculate, often results in more accurate voxelization.
|
Prune
Parameter |
Description |
Prune |
Master switch for removing unwanted voxels based on various criteria. Will be Enabled by default incase of using Exact method of generation. |
| Method |
Pruning strategy: Ray cast, casts a ray from the voxel to it's nearest geometry surface, if the length of this ray is less than the voxel size, it keeps that voxel otherwise removes it. Distance, calculates the distance of the voxel to the nearest surface. (check both to make sure the results are desirable! |
| Prune Tolerance | Method for calculating the Prune Tolerance. Voxel Size is the same value as your voxel size. Custom allows for entering custom values for more control over the looks. lower values, more aggressive pruning. |
| Tolerance | If Prune Tolerance is set to custom, is the custom value for tolerance. |
| Insides |
Bypass, keeps whatever is generated as is. CullIn, culls/removes the voxels generated inside of the mesh. (on the backside of the faces.) KeepIn, keeps the voxels generated inside of the mesh. (on the backside of the faces.) (Useful for generating a static mesh, assembly animation for the insides, point cloud simulation, etc.) |
| Distance Tolerance |
If Insides are set to KeepIn, Distance tolerance decides how much of the insides will be kept. for example a Distance Tolerance of 0.05m keeps any voxel that is less than 0.05m far from the nearest surface. This will help in generating a static mesh for objects with no actual volume, such as the leaves of trees and other plants, you can set the Distance Tolerance to approximately the thickest part of your object for example the trunk of the tree. Alternatively you can set it to a small value, enough to generate at least three walls of voxels in total, then you can generate a static mesh, apply your modifier, go to edit mode, hit L while hovering your mouse over the main Mesh Island you want to keep to select that island entirely, hit control I to invert your selection and remove all the unwanted geometry. (A value of 0 means Infinite Distance Tolerance.) |
| Insides Name | Name of the voxels/points generated inside of the mesh, (and are being kept) this attribute can be used for color variation in materials, simulations, etc. |
| Mask With Texture | Enables pruning using an alpha texture as a mask. to prune the transparent areas of the mesh. |
| Alpha Texture | The Alpha/transparency Image texture used for masking/pruning. |
| Mask Tolerance | the threshold for masking/pruning with a texture, higher values = more aggressive pruning. |
Color
Parameter |
Description |
| Attribute01 | Name of the color attribute used in materials. |
| Color_RGB+A | Reads the colors from the presented texture map. this texture may include and Alpha channel. |
| Keep Alpha | Whether to keep the Alpha channel or not. |
Extra Attributes
Parameter |
Description |
| Extra Attributes Toggle | Enables transfer of additional textures. (e.g., roughness, metallic, etc ) to voxels. |
| Attribute02 | Name of the extra attributes used in materials. |
| Store |
Single, Transfer all the RGBA channels of a single texture map, useful for channel packed textures such as ORM. Multi, Select a different texture map for each Channel. That is for Instance, (R = Roughness - G = Metallic - B = .... - A = .... ). |
Assembly Animation
Parameter |
Description |
|
Assembly Animation Toggle |
Assembly animation for voxels being put together. | |
| Interpolation | Animation curve type, (linear or ease in/out) for how voxels appear over time. | |
| Progressive |
Creates a progression mask, so that no floating islands are made in the middle of the space. for instance for a tree, assembly starts from the bottom of the tree and slowly progresses to the rest of the branches and leaves. Watch the tutorial for learning how to use this feature. |
|
| Anim Factor | Global progress of the animation (0 = none, 1 = fully assembled). Can be keyframed. | |
| Speed Scale | Multiplier for animation speed when driven by time. the higher the value the faster the voxels move, thus there are less voxels in the air on each frame. (results in more intense motion blur.) | |
| Randomness | Randomizes the order in which voxels appear, creating a scattered build effect. Recommended, set this value to 0 while working with Progressive Assembly. | |
| Disk Distribution | When enabled, voxels assemble from a disk‑shaped region instead of a single point in space. | |
| Disk Radius | Initial radius of the Disk before the voxels are projected onto it. | |
| Disk Initial Position | Initial position of the Disk before the voxels are projected onto it. | |
| Scale | Scale of the Disk after the voxels are projected onto it. | |
| Start Location | position of the Disk/Point after the voxels are projected onto it. |
Progression Setting (if Progressive is enabled)
These values can be debugged by opening progression node in the geometry nodes panel. (please watch the tutorial.)
Parameter |
Description |
||||||||
| Iterations | Number of progressive steps to progress through the entire object, this value depends heavily on progression Size. | ||||||||
| Selection |
Where the progression starts from. Z Mask, Creates a mask on the Z axis of the mesh, (the progression will start from the bottom.) (ensure the origin point of your object is set to inside or bottom of your mesh.)
Index, Creates a mask from the selected point index.
|
||||||||
| Progression Size |
Domain which the progression uses to progress to other voxels/points. if you are culling the insides this value should often be your Voxel Size + (Voxel Size / 2) for instance for a voxel size of 0.1 the progression size will be 0.15. otherwise if you are bypassing or keeping the insides Voxel Size should work fine. |
||||||||
| Cleanup Unprogressed |
If certain voxels/points are floating far from the object, are not connected to the rest of the voxels or they are not within the domain of any progressed voxels, they will be removed to avoid their sudden appearance at the end frame of the animation. |
||||||||
| P Randomness | Randomness of progressive assembly. Recommended, set the default Randomness value to 0 while working with this value. |
Generate Static Mesh
Parameter |
Description |
| Generate Static Mesh |
Must be set to Voxels. Turns all the instances into one single static mesh which can be exported into other software. keeping the inside voxels ensures there is volume inside of the object, thus the insides will be removed as well. It is recommended to keep at least three walls of voxels so once you apply the modifier you will be easily able to keep the surface mesh and remove all other floating or unwanted meshes that are generated. To do so by go to edit mode, hit L while hovering your mouse over the main Mesh Island you want to keep to select that island entirely, hit control I to invert your selection and remove all the unwanted geometry. |
| Mesh Material | Material applied to the static mesh. (Reads attributes on geometry.) |
Fixed Animation
Parameter |
Description |
| Fixed Animation |
While voxelizing an animated object, the object will be voxelized all over again on each frame. By enabling this feature, you can pick the same object, but static (without it's animation) to be the Object To Voxelize. Then set your Animated Object to the same Object animated. This will make sure the voxels stay the same even after animation. If your Object expands or deflates in the animation it can cause the voxels to start overlapping or creating gaps. To fix this simply enable Generate Static Mesh. ( It won't be voxel art, but it has style :). ) |
| Animated Object | Object reference for the animation. |
Have questions about this product?
Login to message
| Sales | 40+ |
| Rating | 1 ratings |
| Dev Fund Contributor | |
| Published | 5 months ago |
| Blender Version | 5.1 |
| Render Engine Used | Cycles, Eevee |
| License | Royalty Free |
Discover more products like this
animation pointcloud cubify building bricks cube mesh-to-voxel voxelization voxel art bricks voxel generator voxel geometry nodes