 Makatopia
UPDATED v2.0: Weight Paint and Bones: A Blender Toolkit -> Weights and Bones
| Version 2.0 - Blender 4.3–5.0+ |
| Version 1.x - Blender 3.0–4.5 - Scroll down to see the legacy product section. |
The core functionality remains the same across versions.
What's New in v2.0
With the release of Blender 5.0, many existing features were broken due to API changes. While fixing them, I ended up adding new capabilities and reworking many of the existing ones. Overall, the user experience should be greatly improved. Here's what's new:
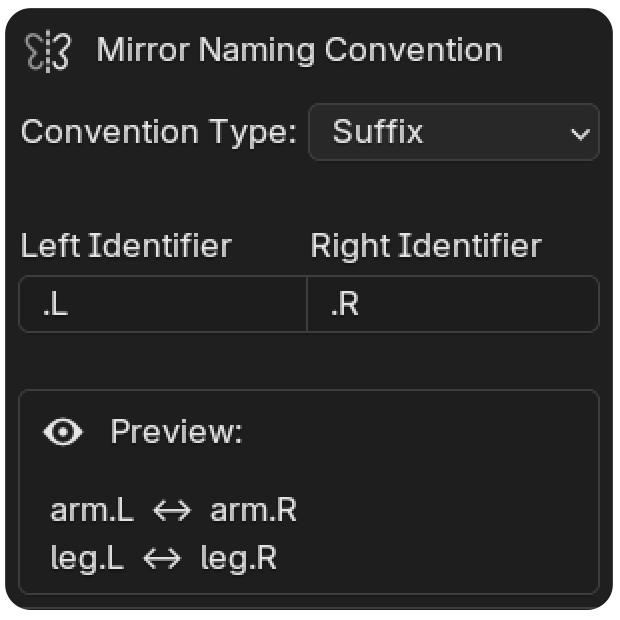
- Mirror Weights Panel - Completely redesigned and now works with any naming convention (suffix/prefix) and custom identifiers. No longer hardcoded to .L/.R! Configure your setup in the new 'Mirror Naming Convention' section in addon preferences.
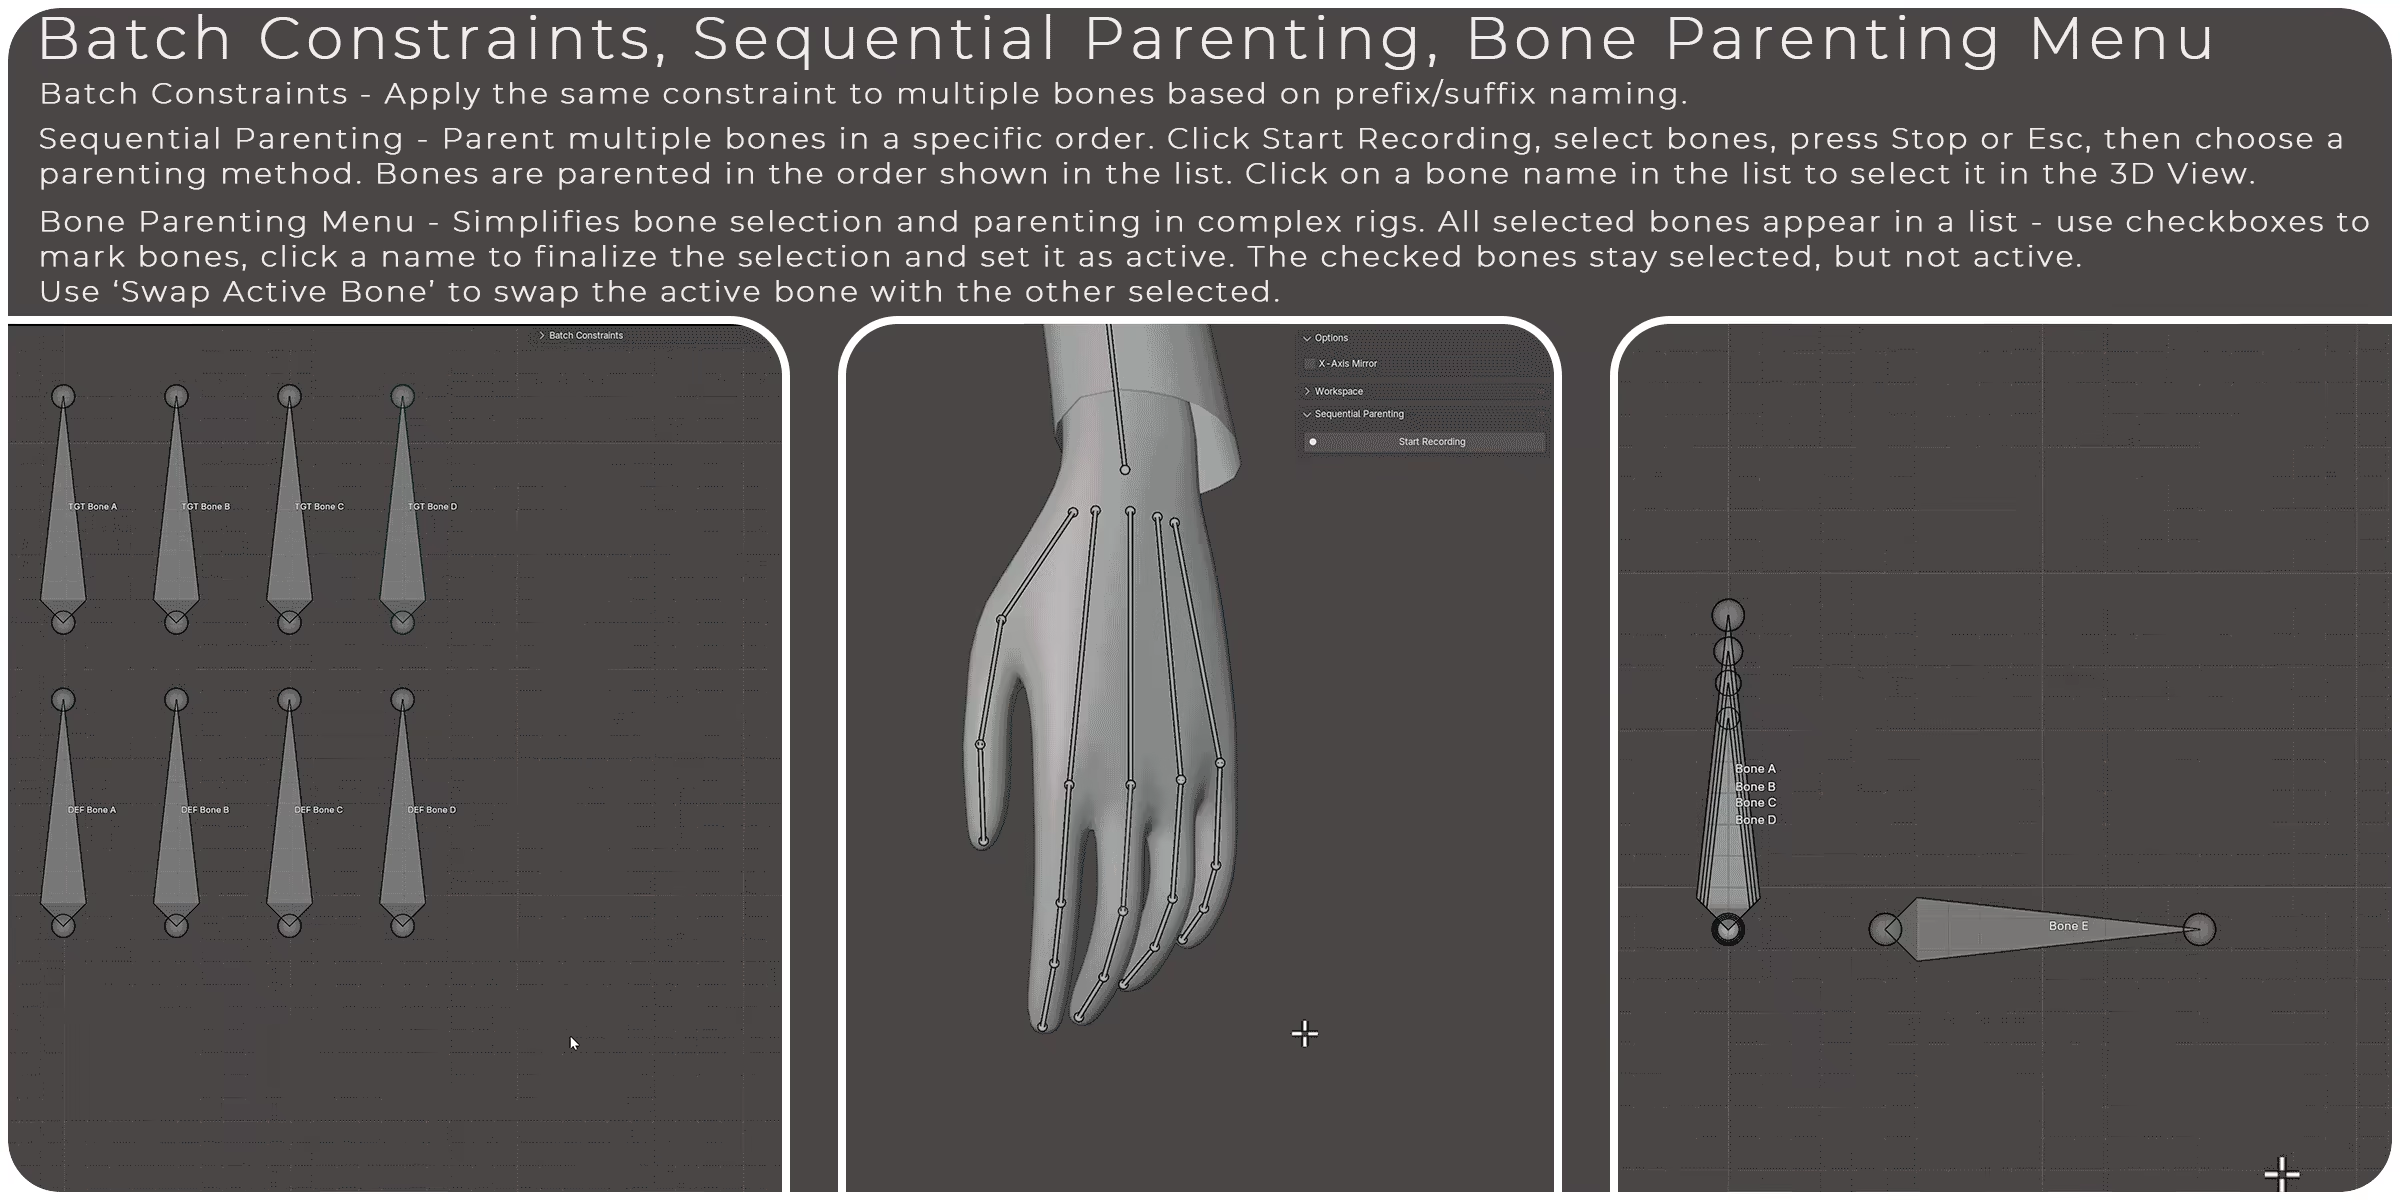
- Bone Parenting Menu - Reworked for cleaner UI and workflow
- Sequential Bone Parenting - Completely redesigned with more options and improved usability
- Batch Constraints - UI refresh and improvements
- Brush Pie Menu - Code optimization and bug fixes
- Addon renamed - "Weight Paint and Bones: A Blender Toolkit" -> "Weights and Bones"
- Addon Preferences - All keymaps now in one place, plus new 'Mirror Naming Convention' section
Introducing "Weights and Bones"
A Blender addon designed to streamline weight painting and rigging.
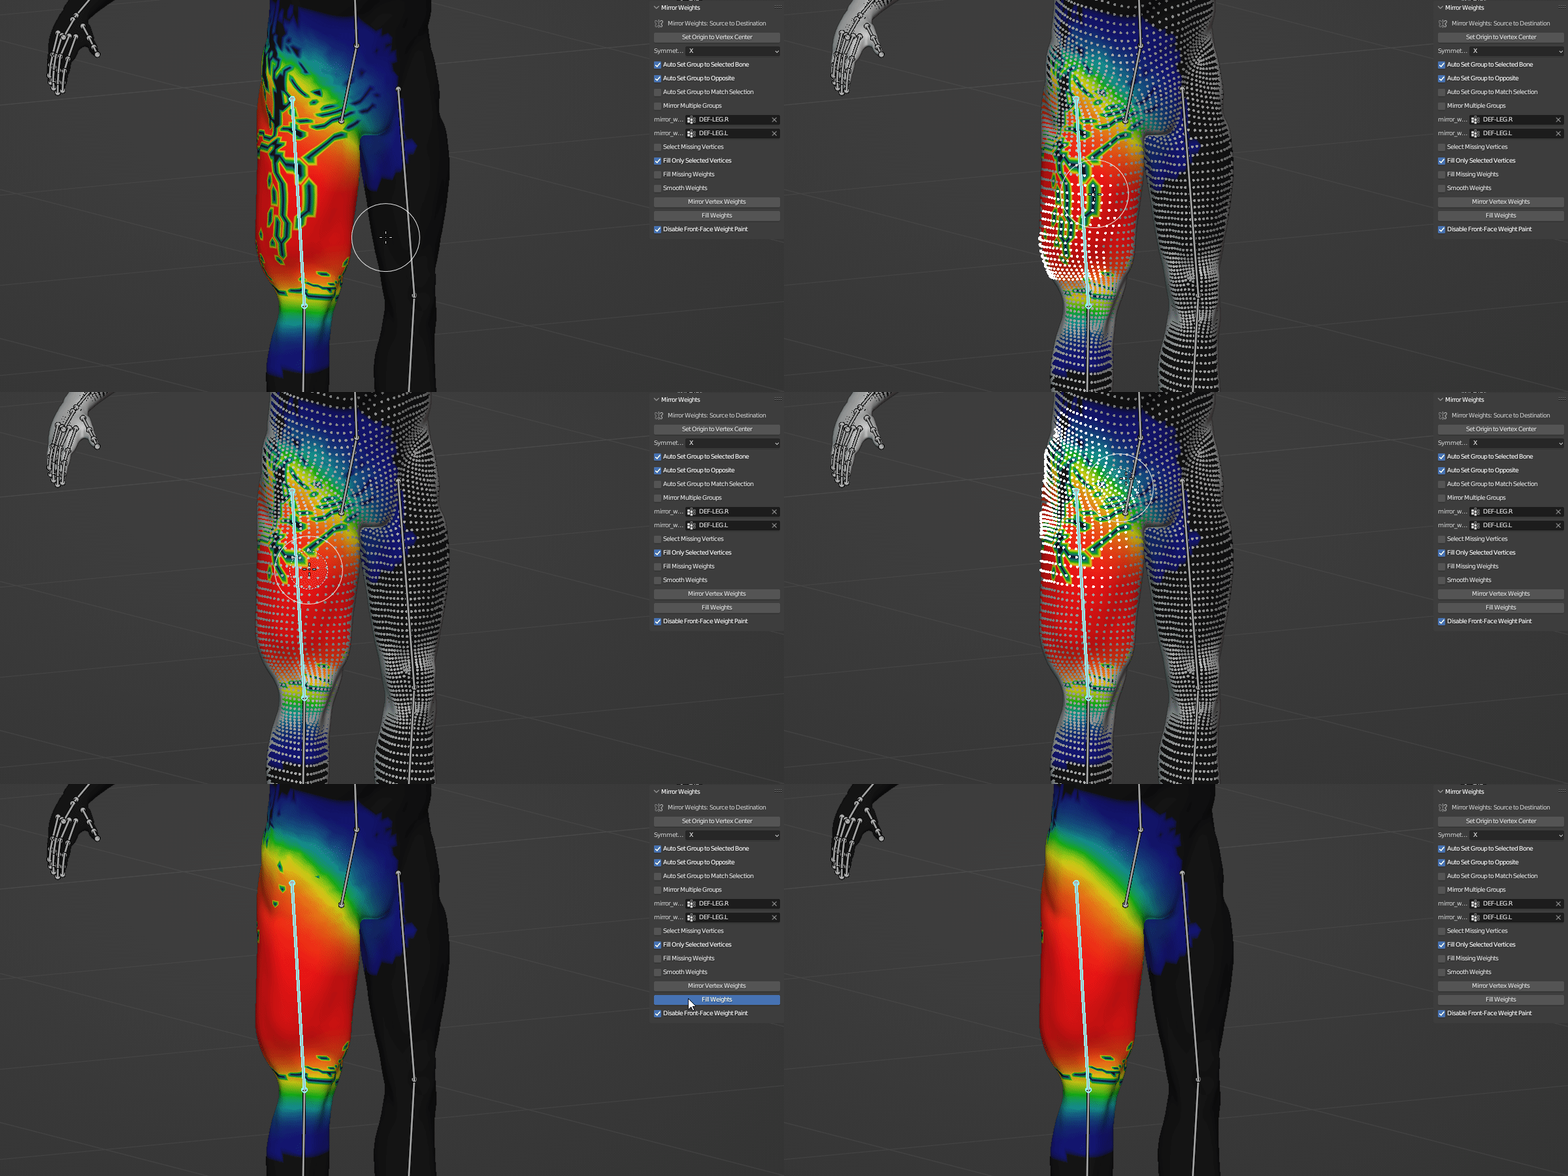
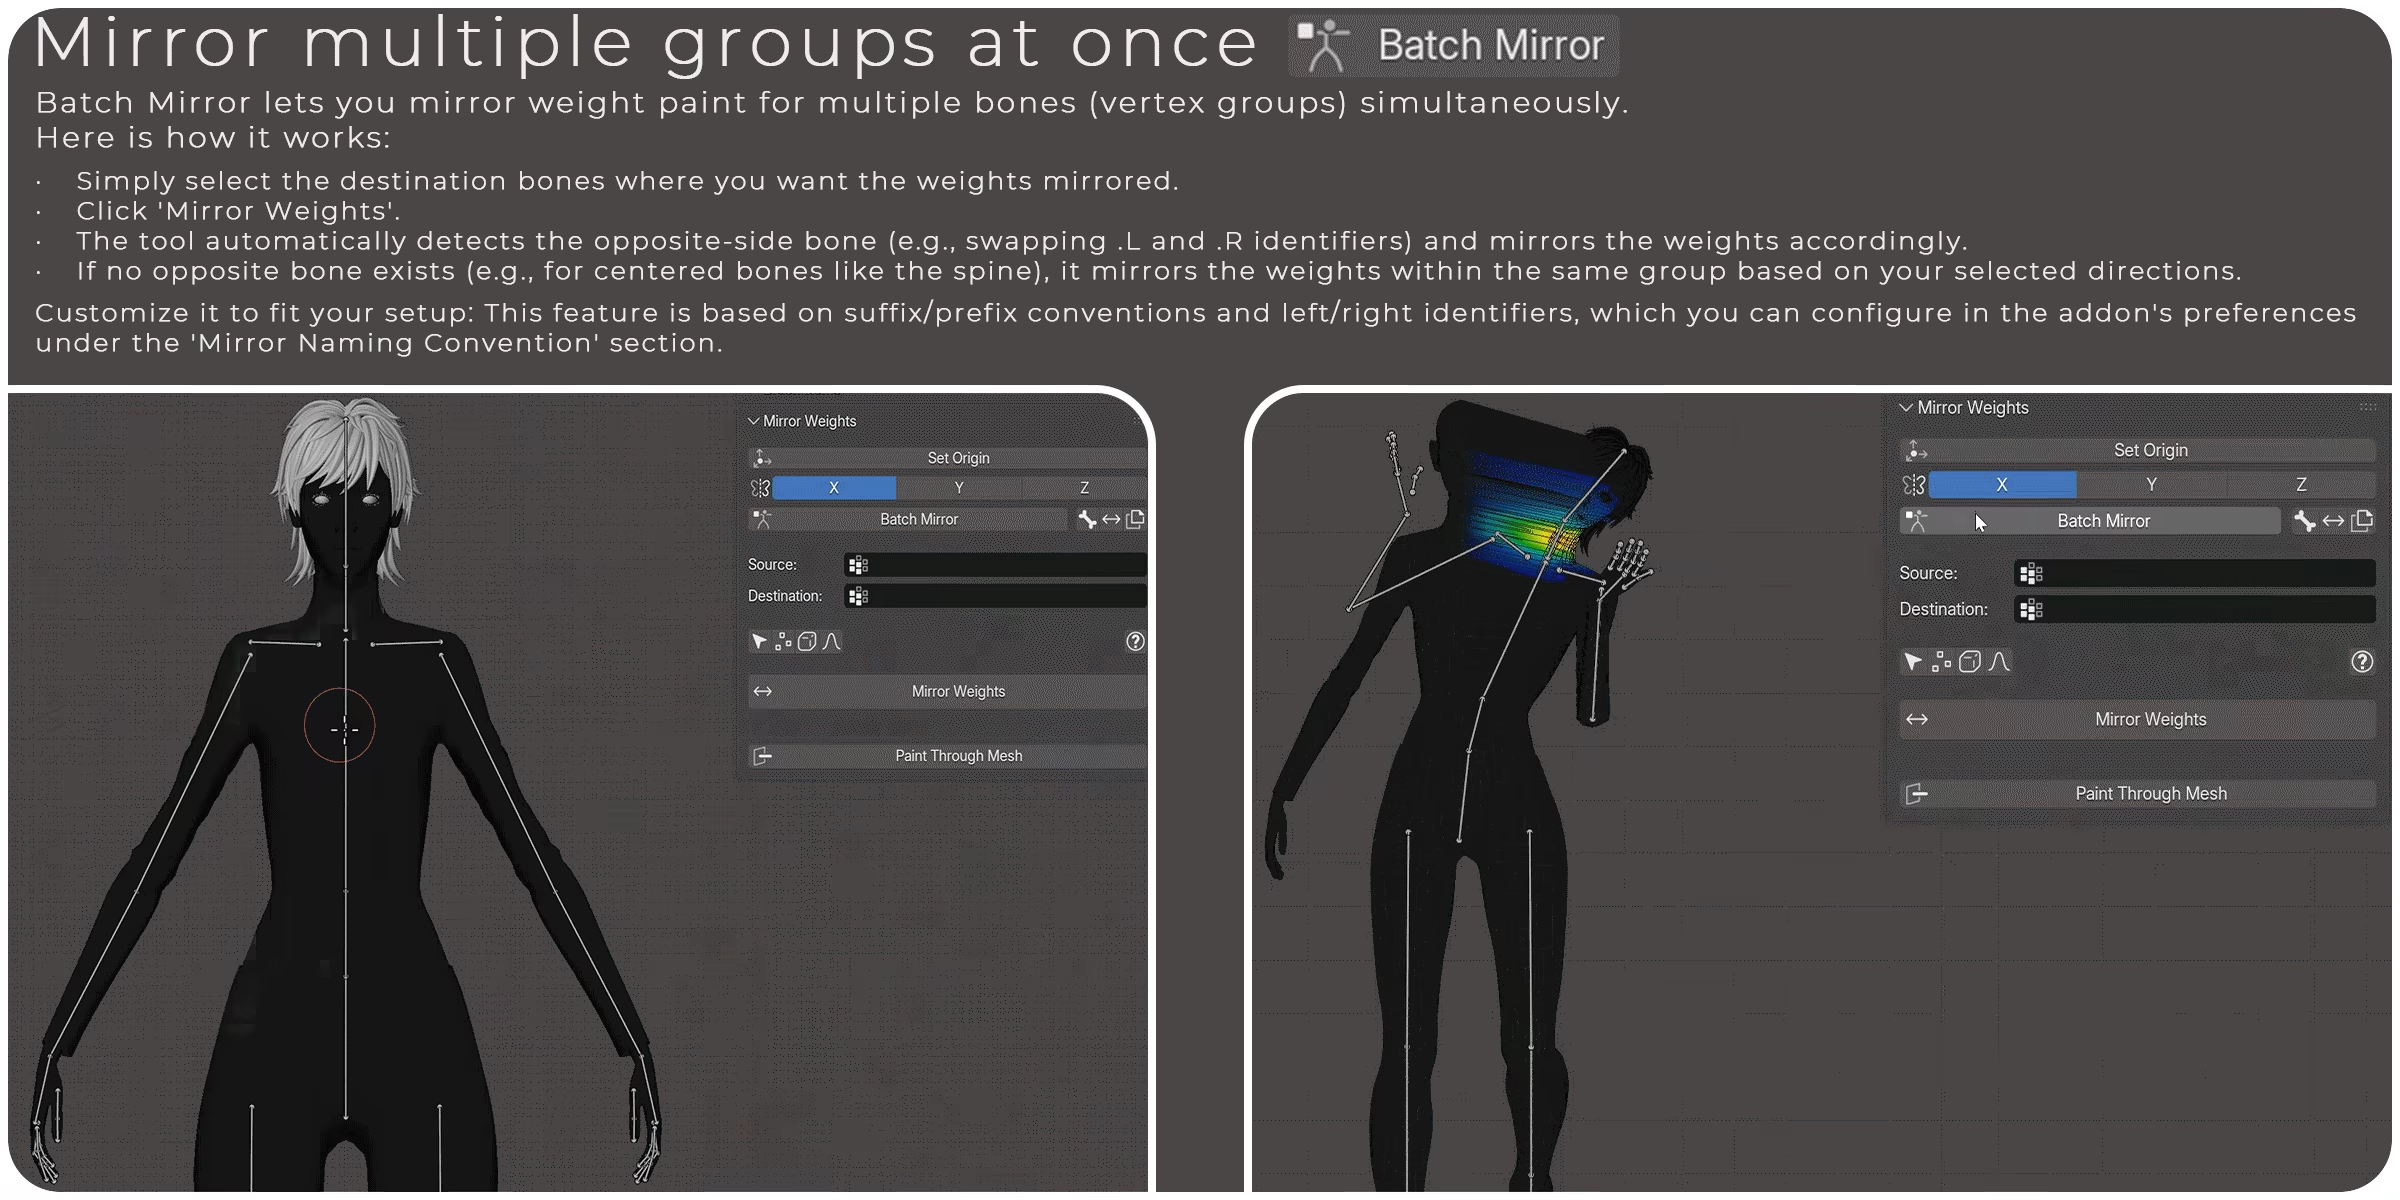
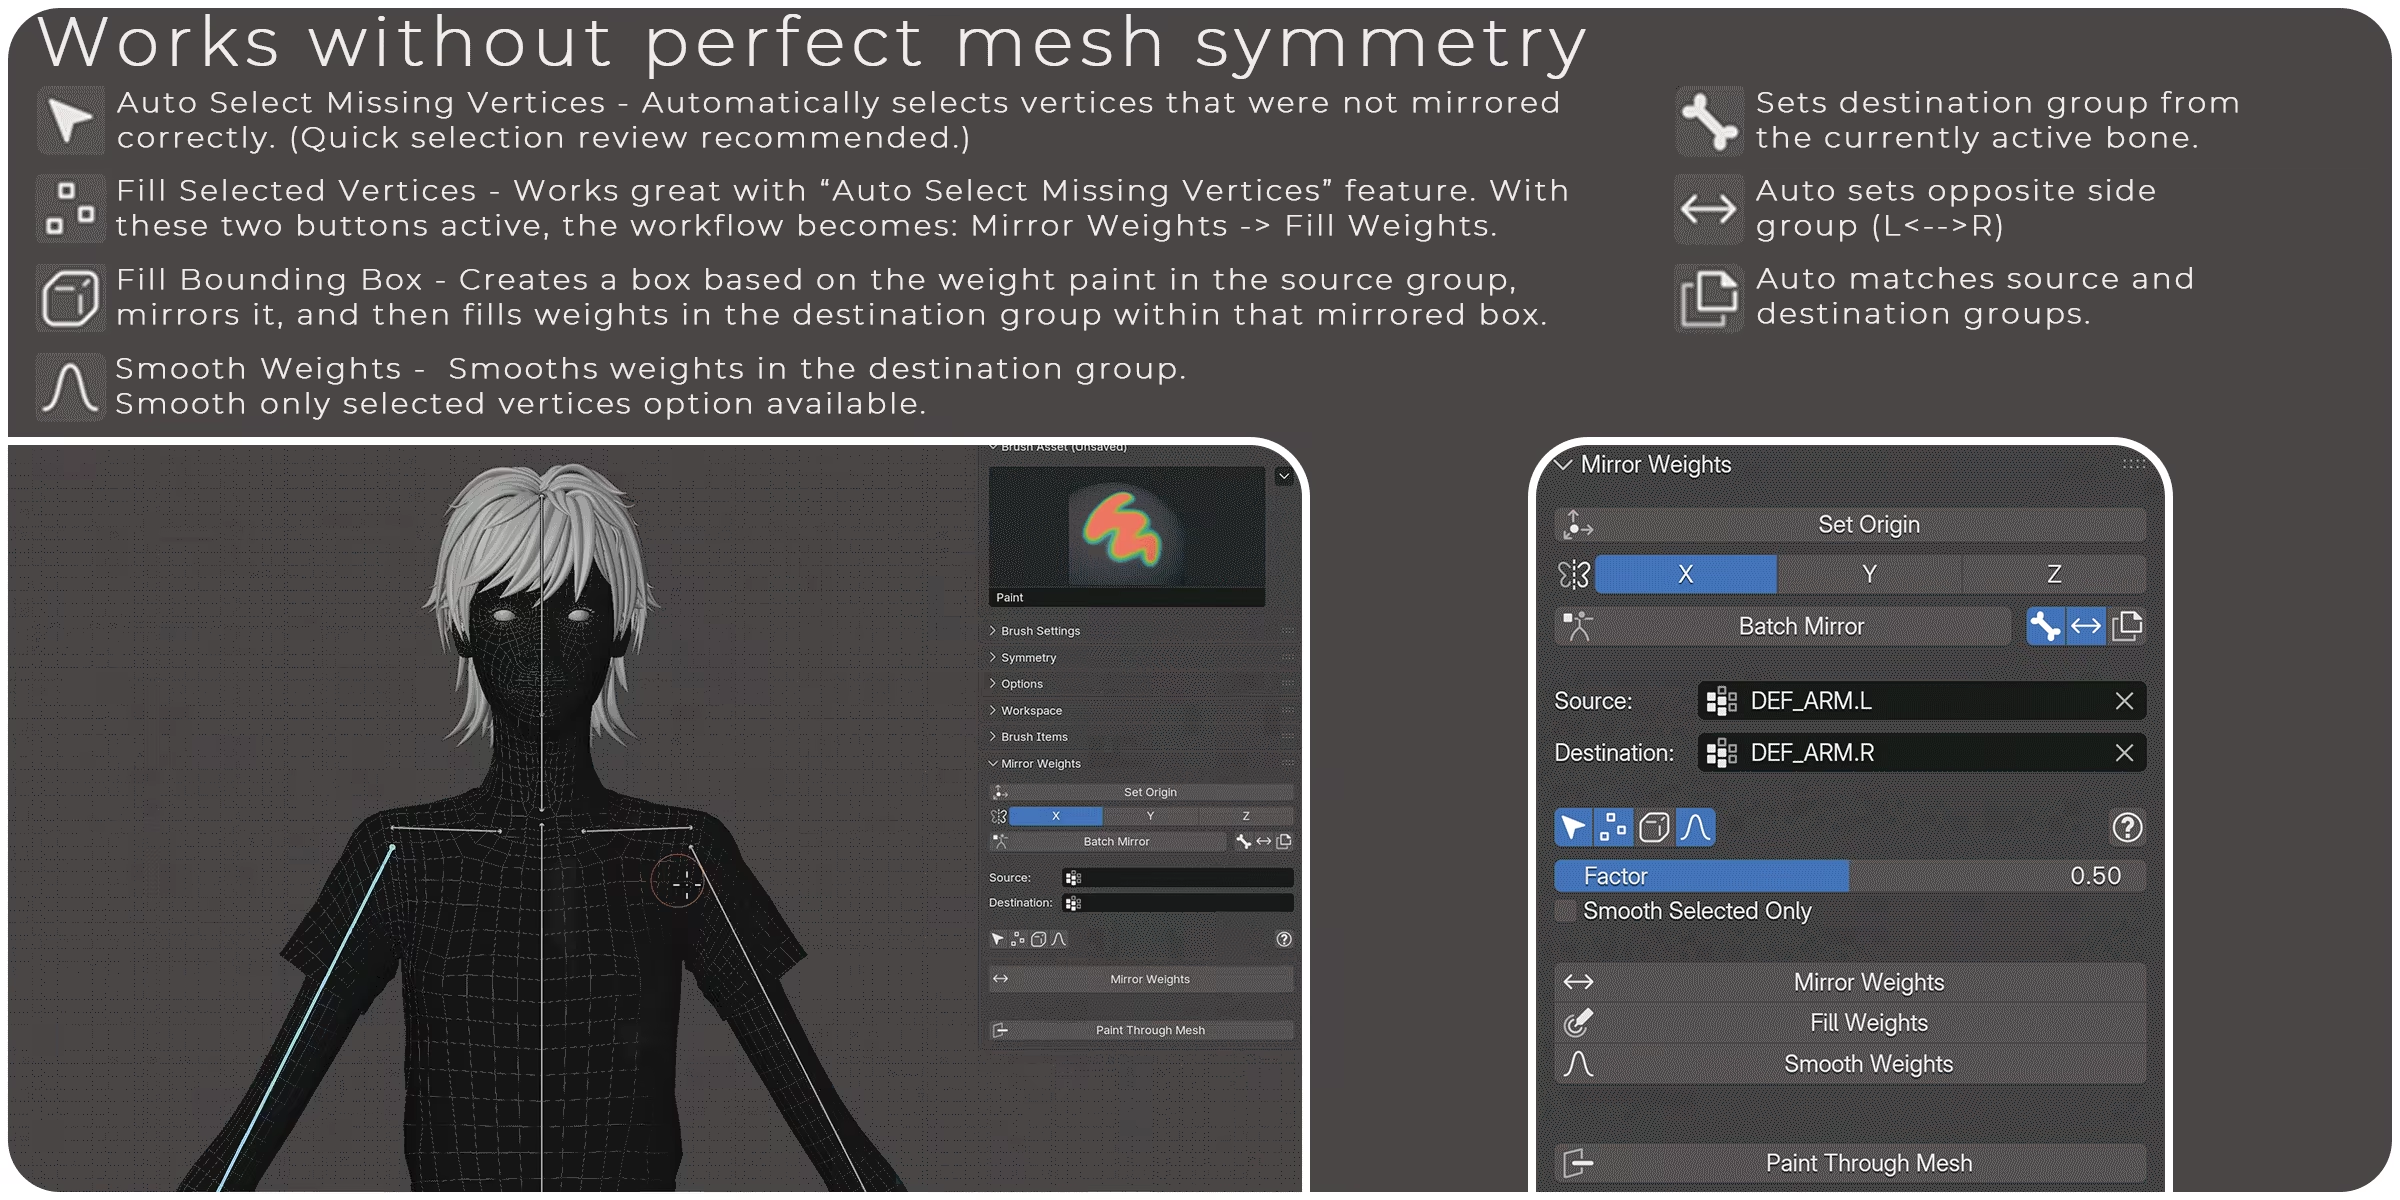
Its main feature is fast weight-paint mirroring that works even when the mesh isn’t perfectly symmetrical. It also includes handy tools like: Bone Parenting Menu, Batch Constraints, Sequential Bone Parenting, Brush Pie Menu, and more - simple but very effective features that can speed up your workflow.
Who is this for?
'Weights and Bones' is designed for anyone who uses Blender for weight painting or bone editing. Whether you are an animator, 3D artist, game developer, or someone who needs to create or modify 3D models with complex weight distributions or bone structures, this addon can be a practical tool in your workflow.
Video Demonstration
For a detailed walkthrough of 'Weight Paint and Bones: A Blender Toolkit' (now: 'Weights and Bones'), watch this comprehensive demonstration where I explain each feature in depth.
Note: This video was created for v1.0 and shows the old UI, but the core concepts remain the same in v2.0.
LEGACY VERSION (Blender 3.0–4.5)
The information below refers to version 1.x of this addon. It was written for the old UI, but most of it still applies to version 2.0, since the core concept hasn't changed.
If you're interested in seeing more examples of the addon in use, it's still worth checking out.
Key Features
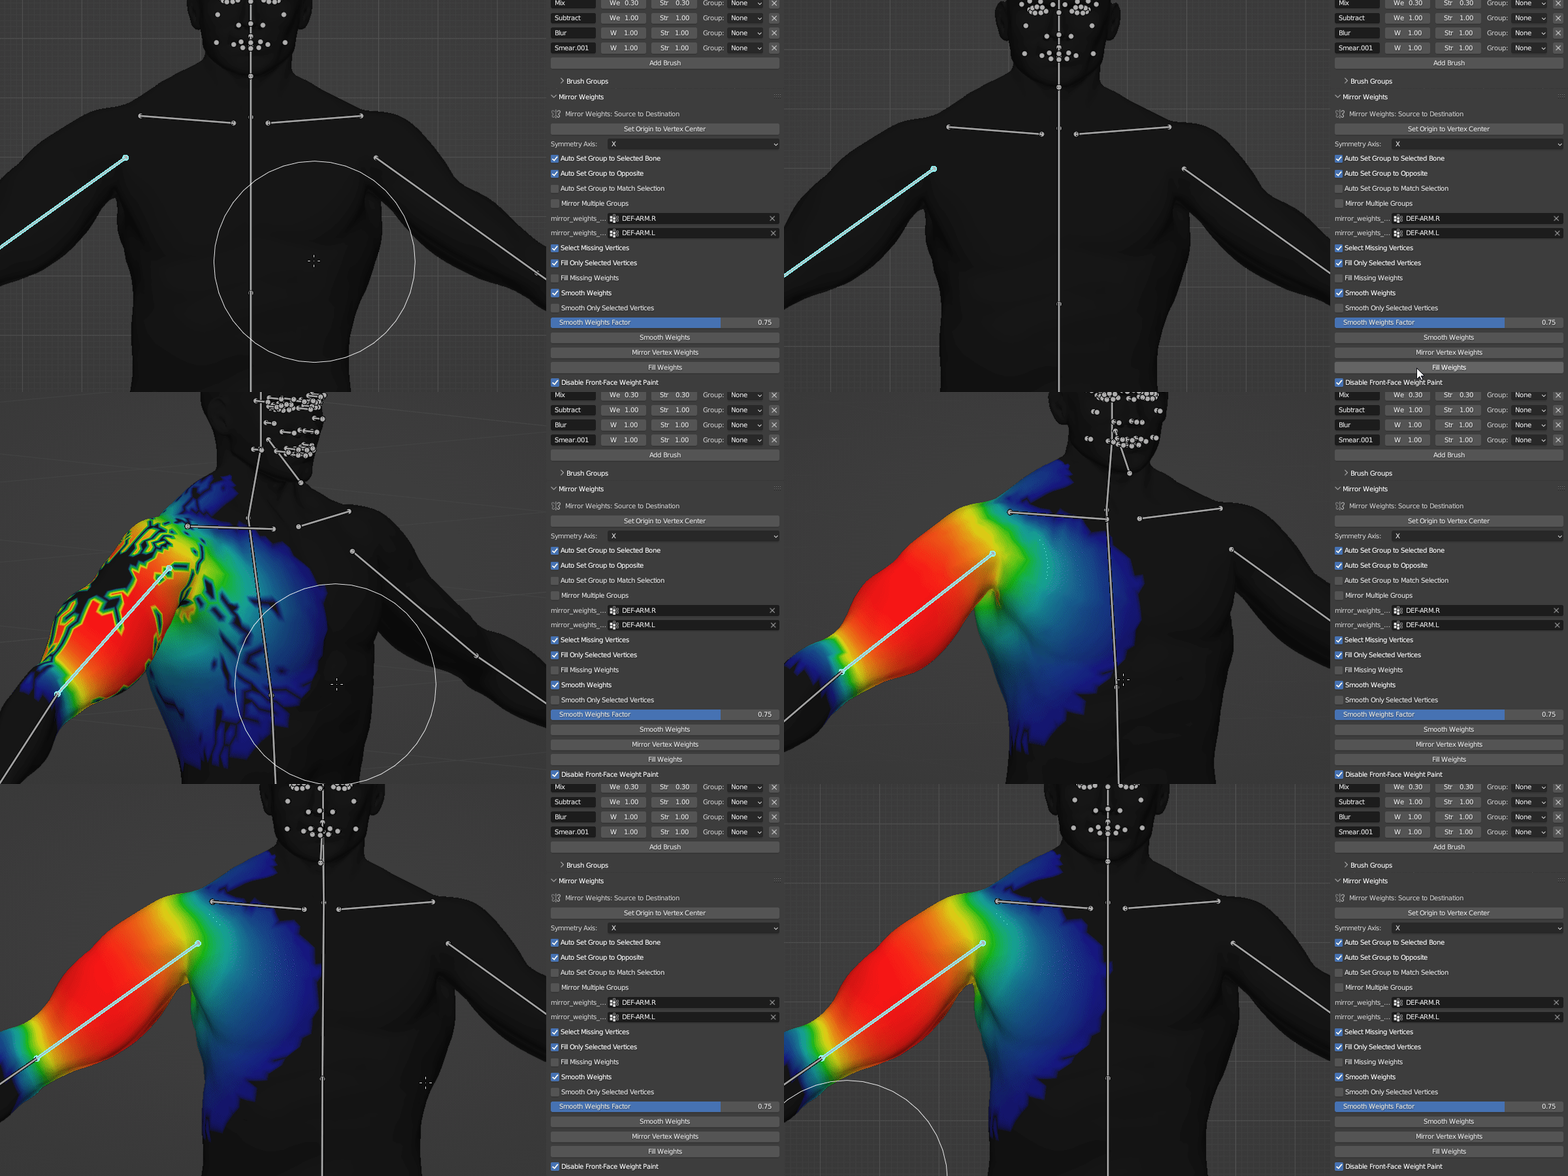
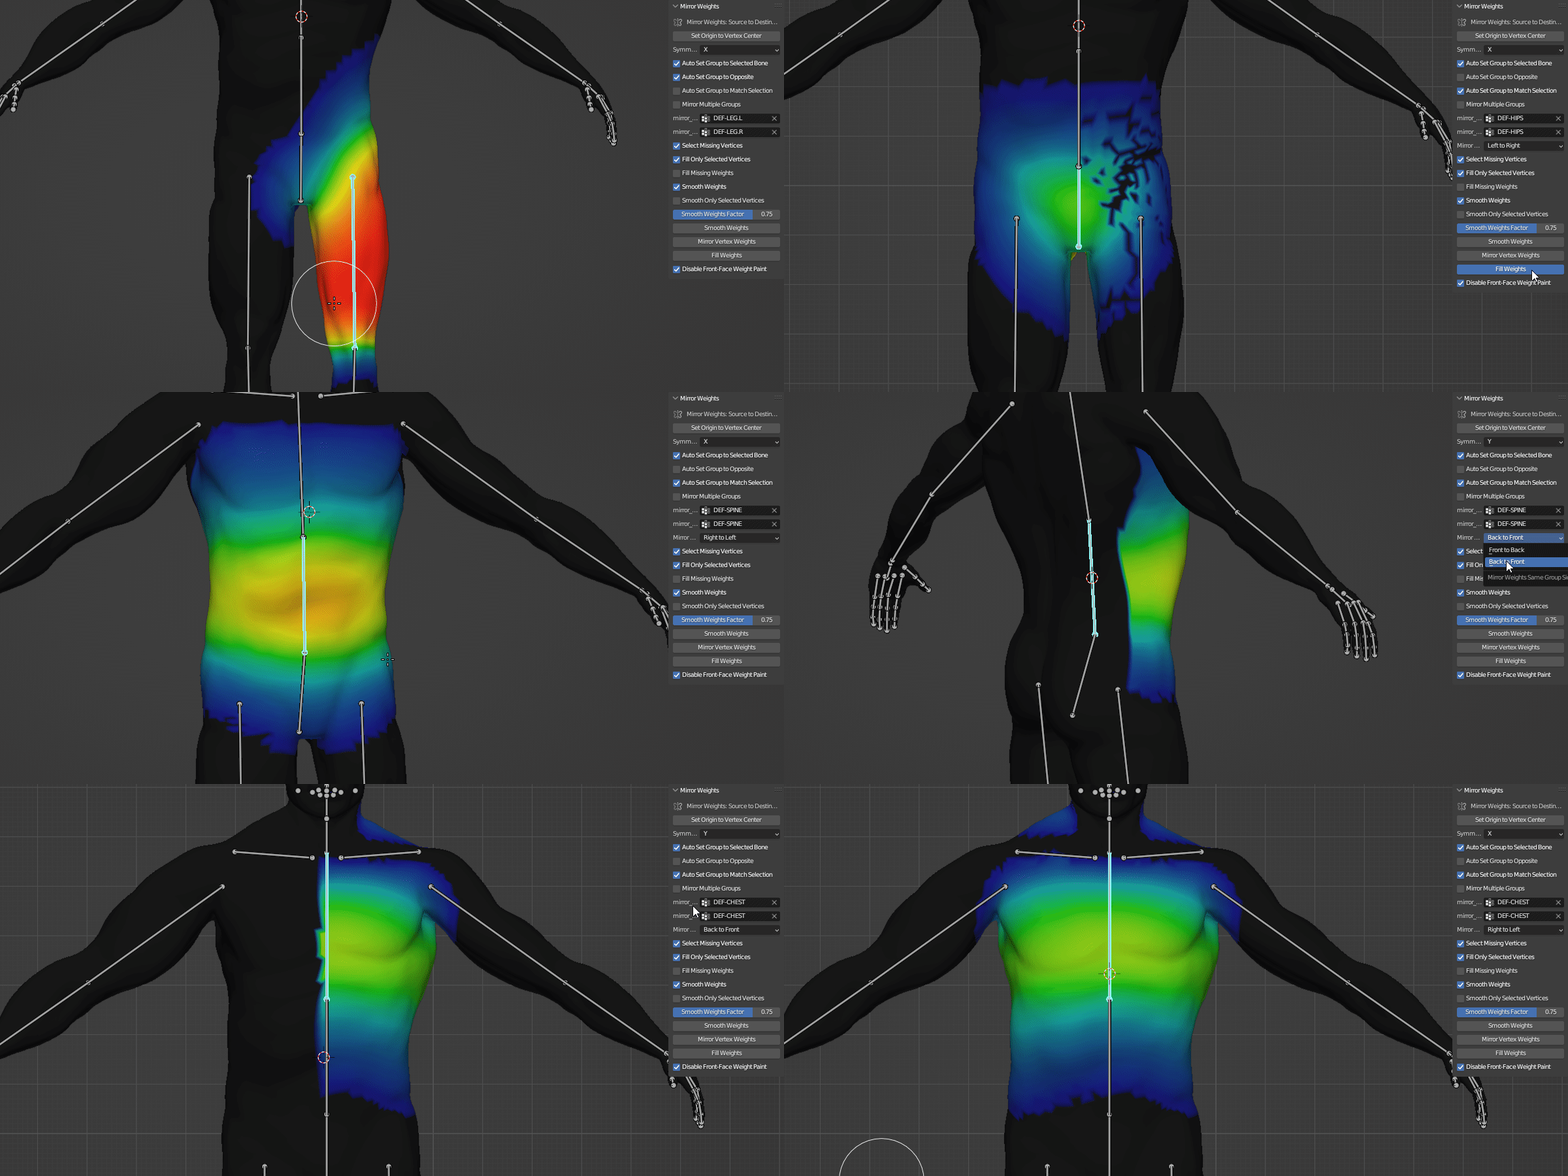
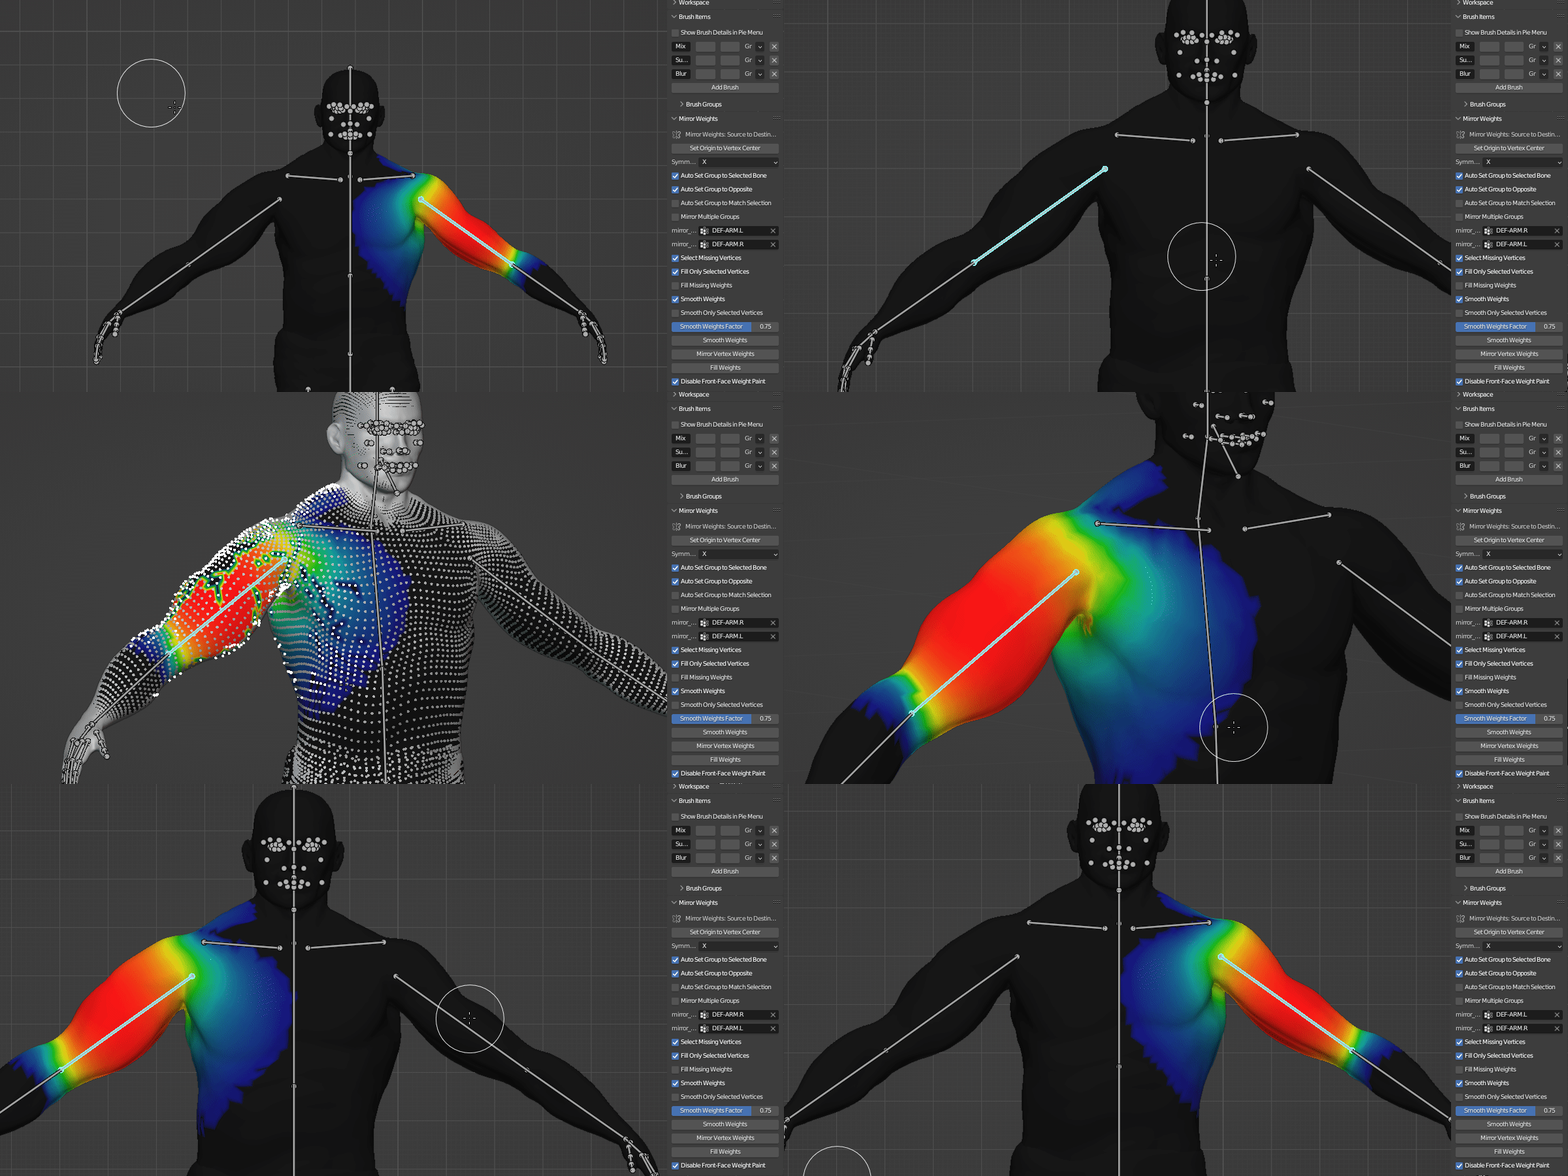
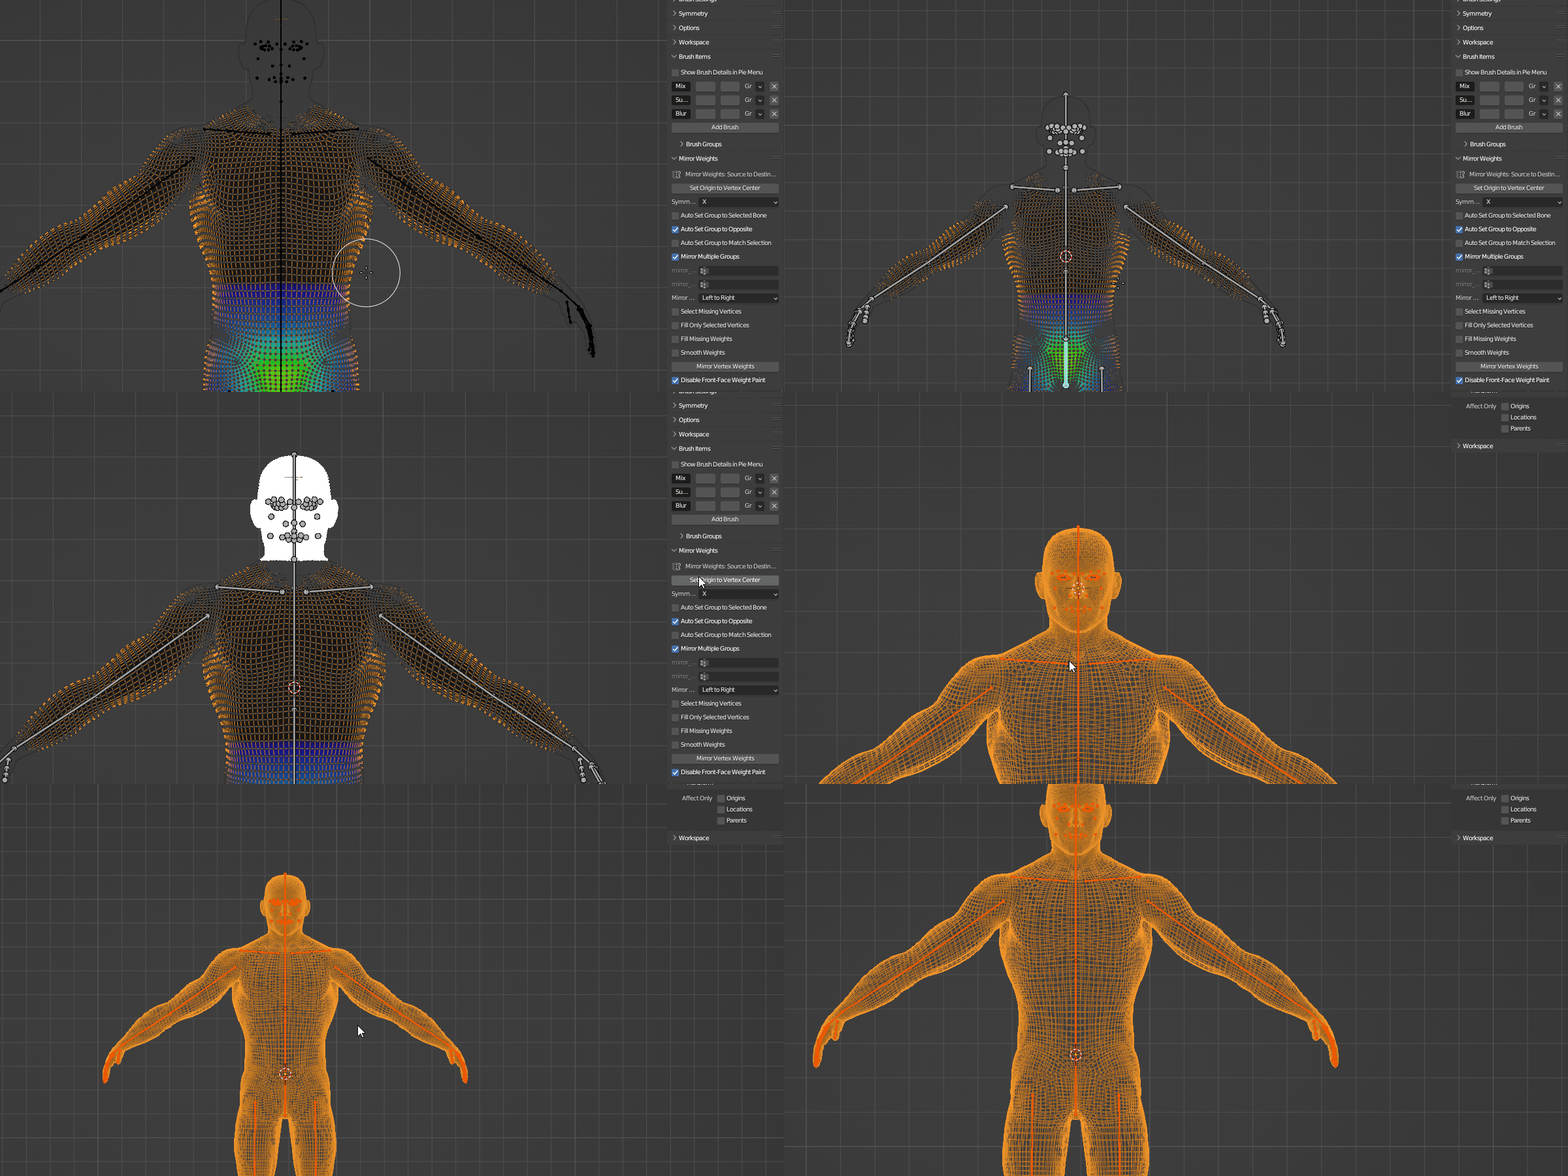
Asymmetric Weight Paint Mirroring: Mirrors weight paint accurately, even on asymmetrical meshes. This feature comes with several supportive tool:
-Fill Missing Weights: This feature allows you to fill vertices on the destination side, based on the weight paint from the source side.
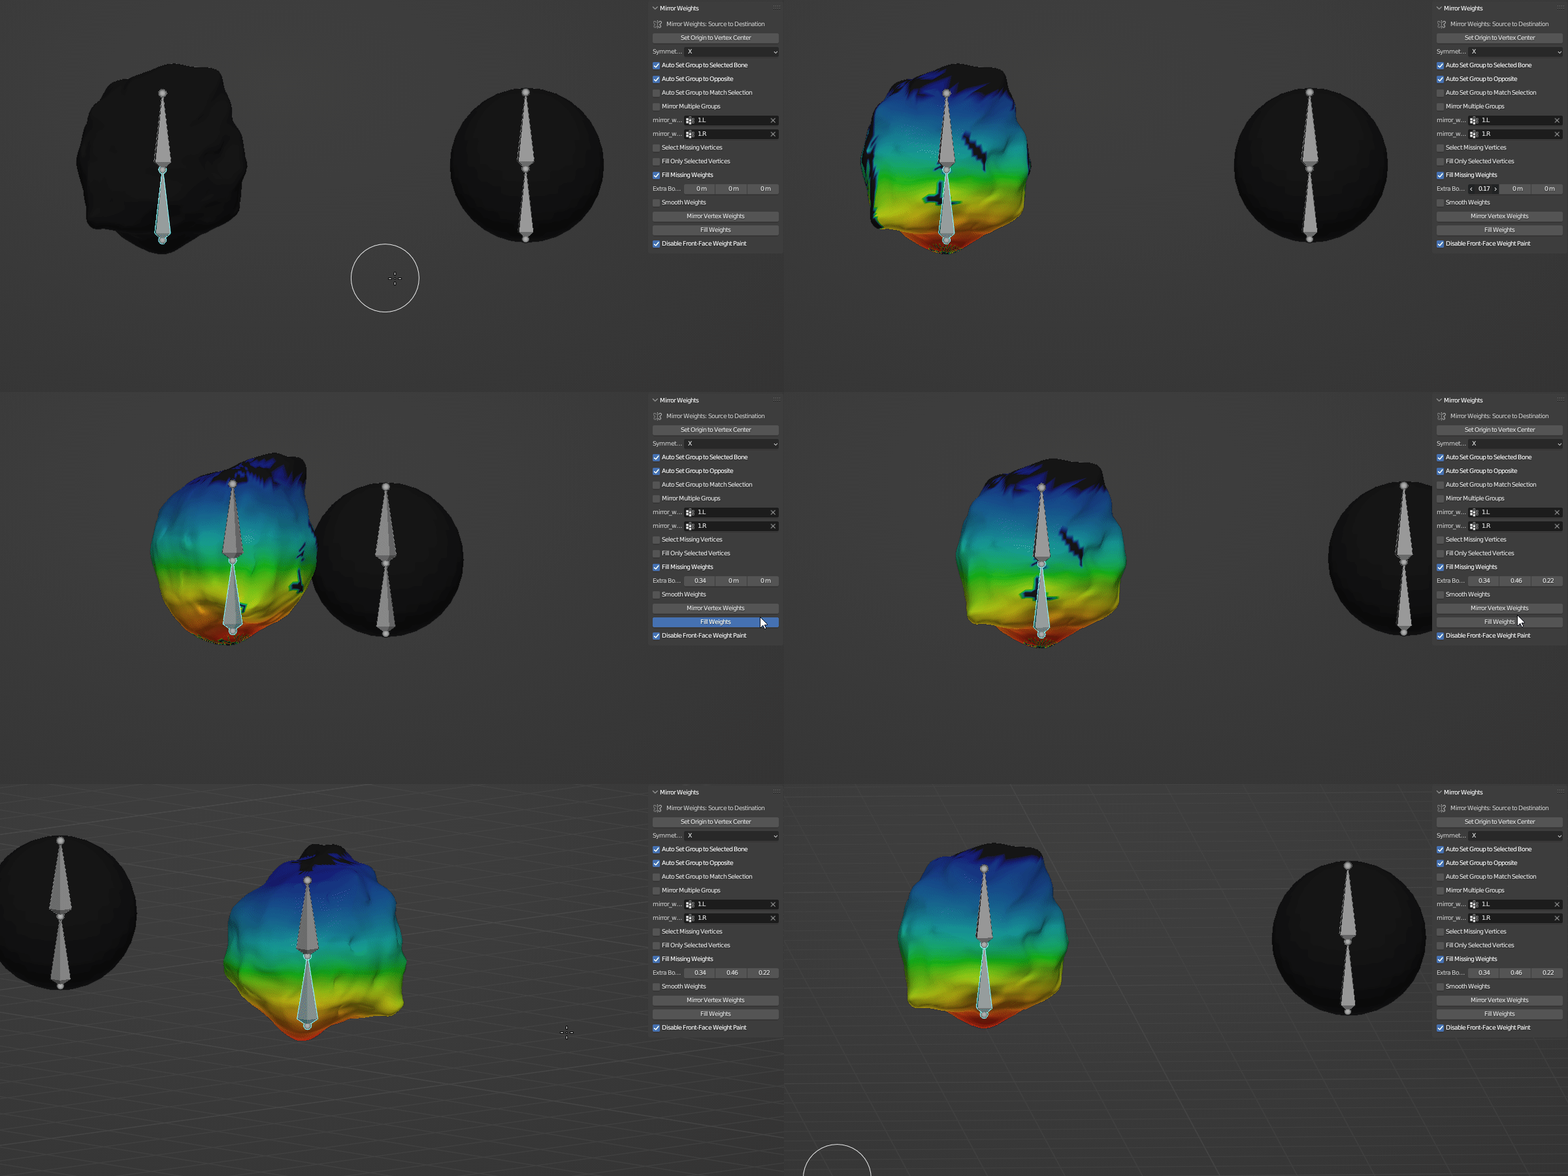
-Fill Only Selected Vertices: Choose to fill only selected vertices for more precision.
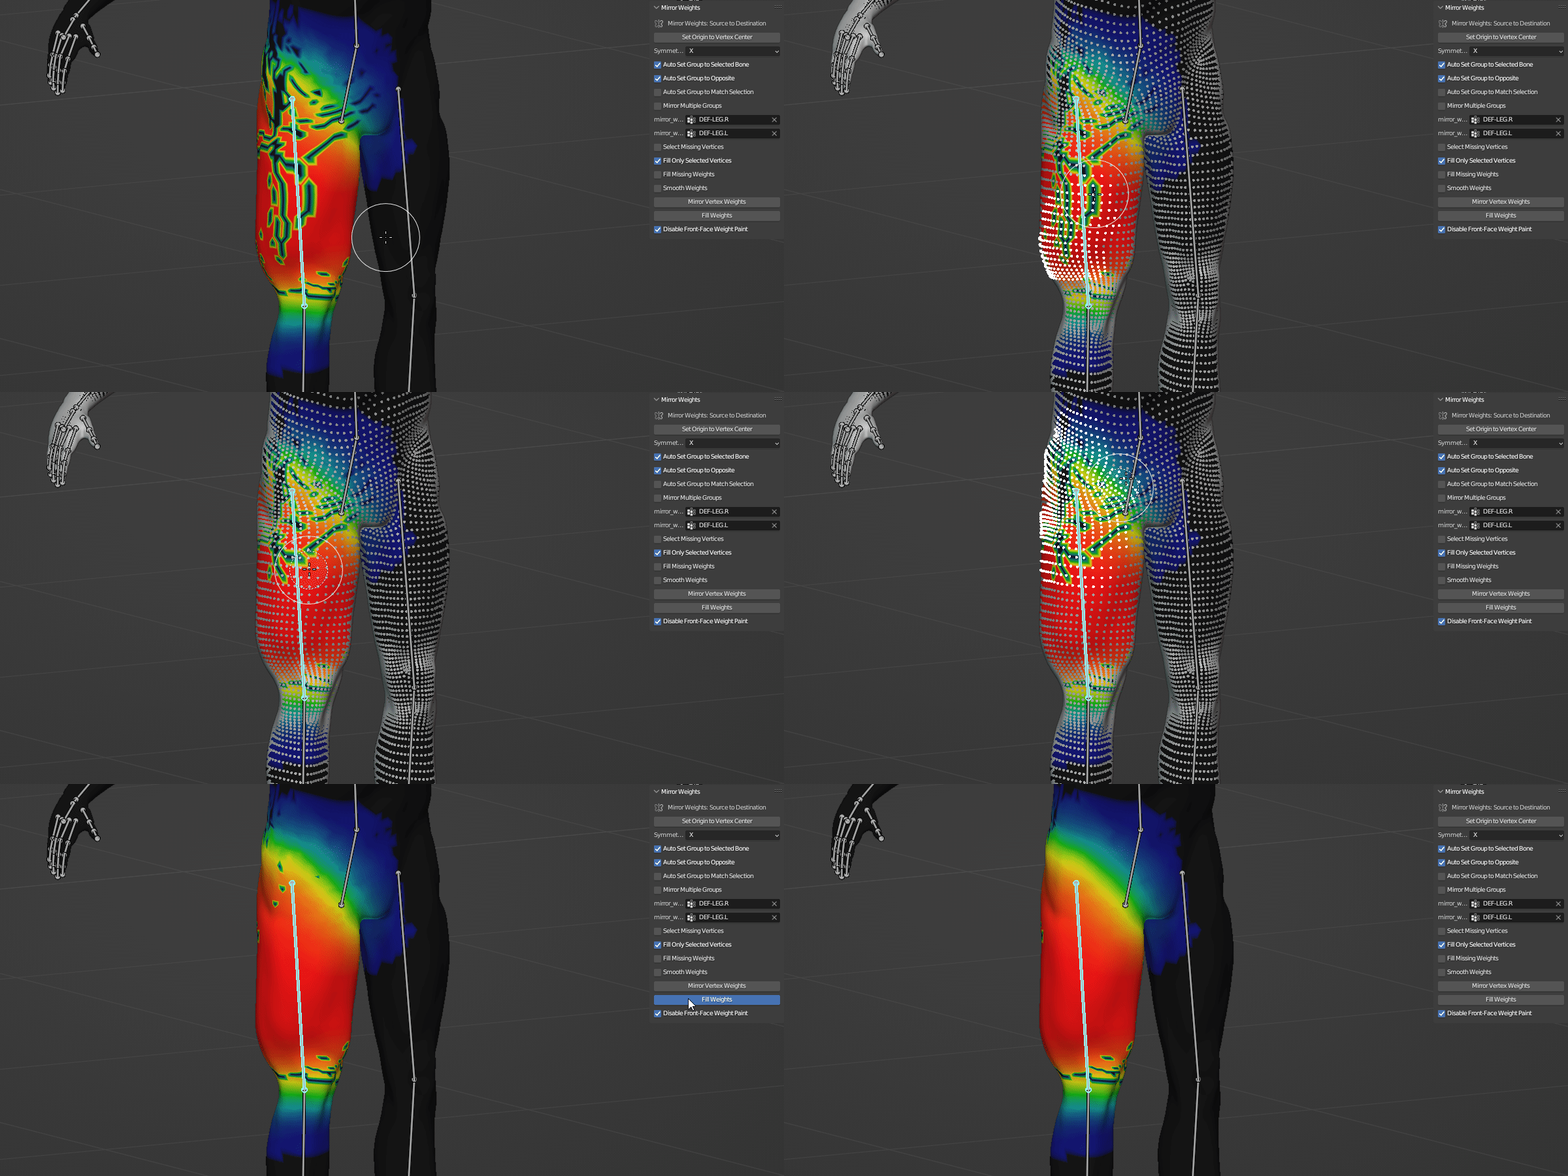
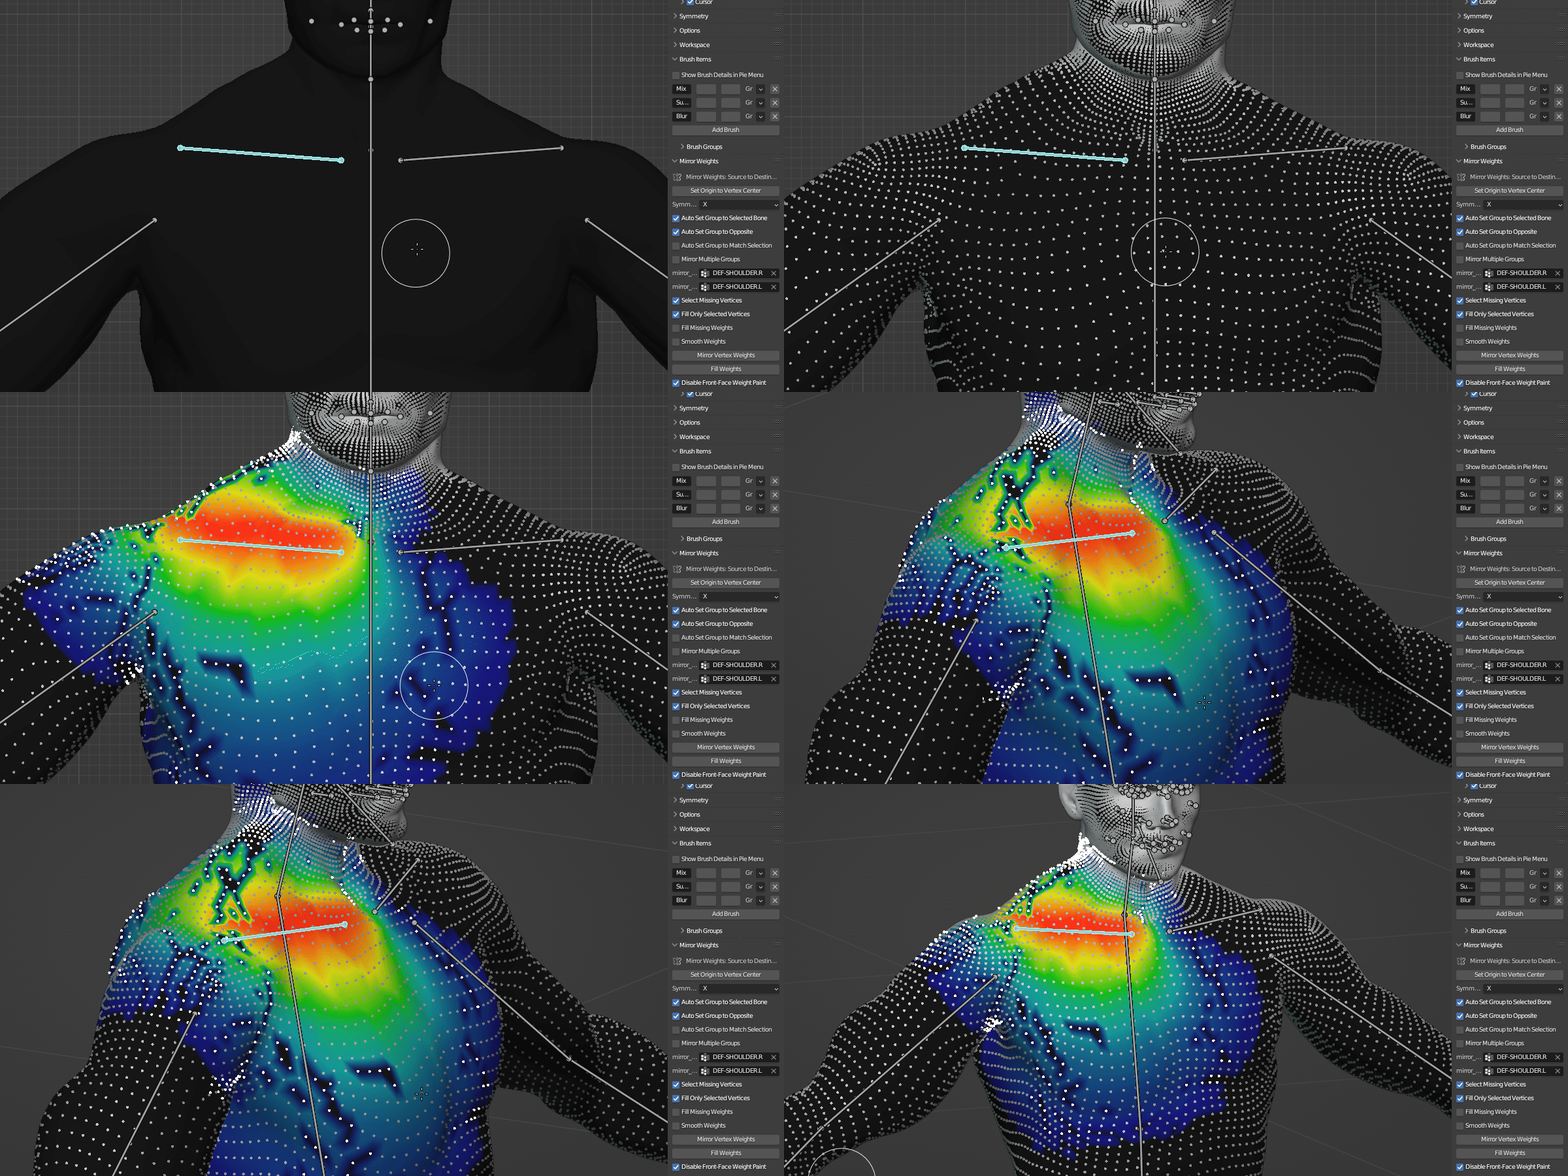
-Select Missing Vertices: Complementing the "Fill Only Selected Vertices" feature, this function automatically selects vertices that are missing weights in the destination group, enhancing the overall speed and efficiency of the weight paint mirroring process.
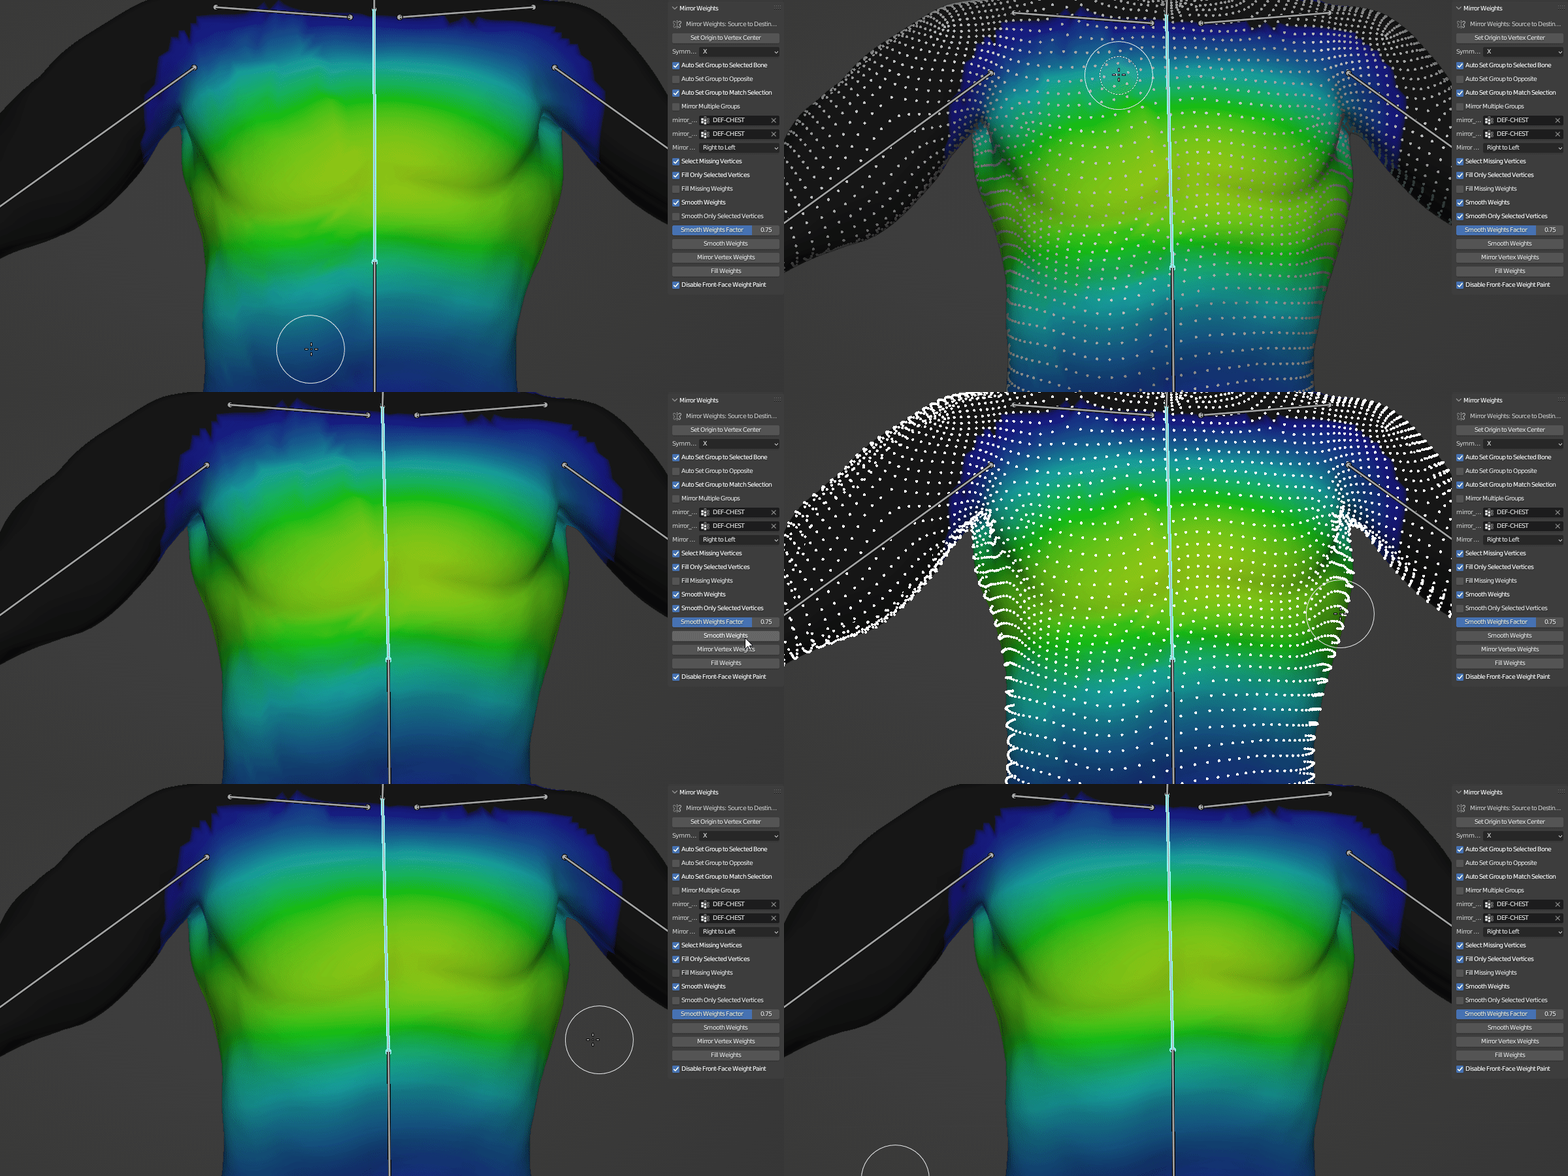
-Smooth Weights: A feature designed to refine the results by smoothing all the vertices in the destination group. An optional "Smooth Selected Vertices Only" control is available for users who wish to smooth a specific subset of vertices.
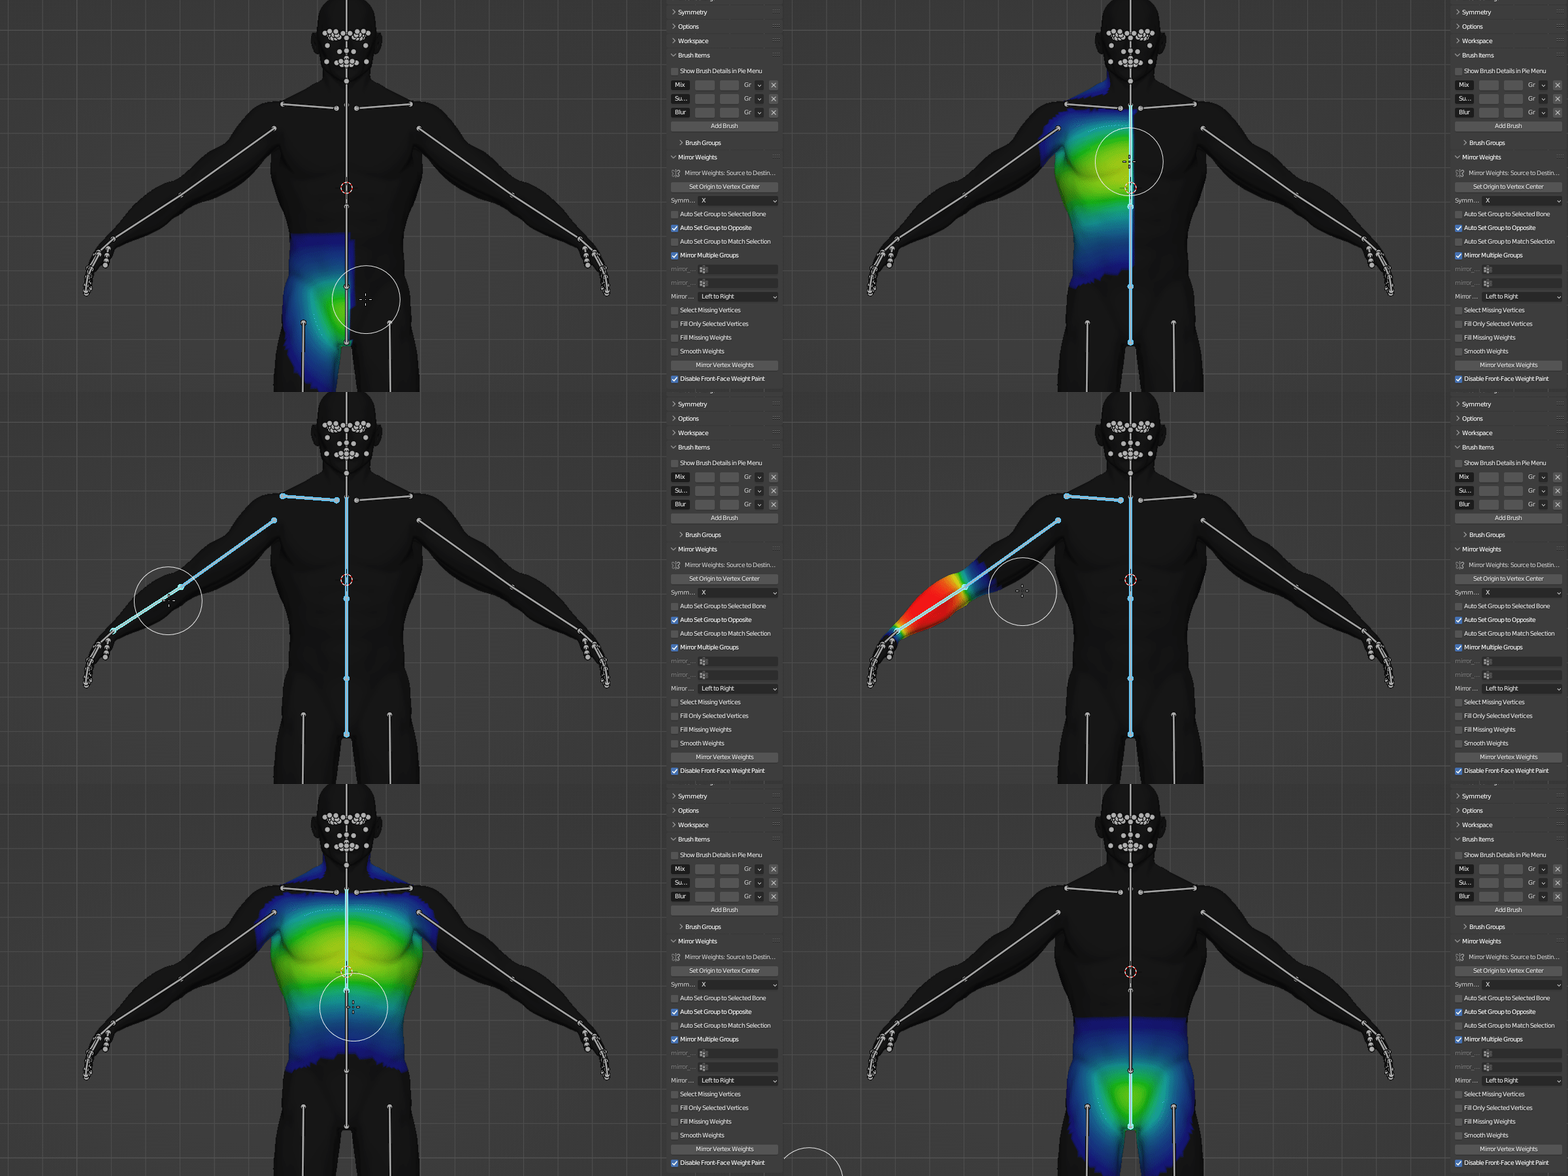
Mirror Multiple Groups: This feature allows users to select multiple groups for weight paint mirroring.
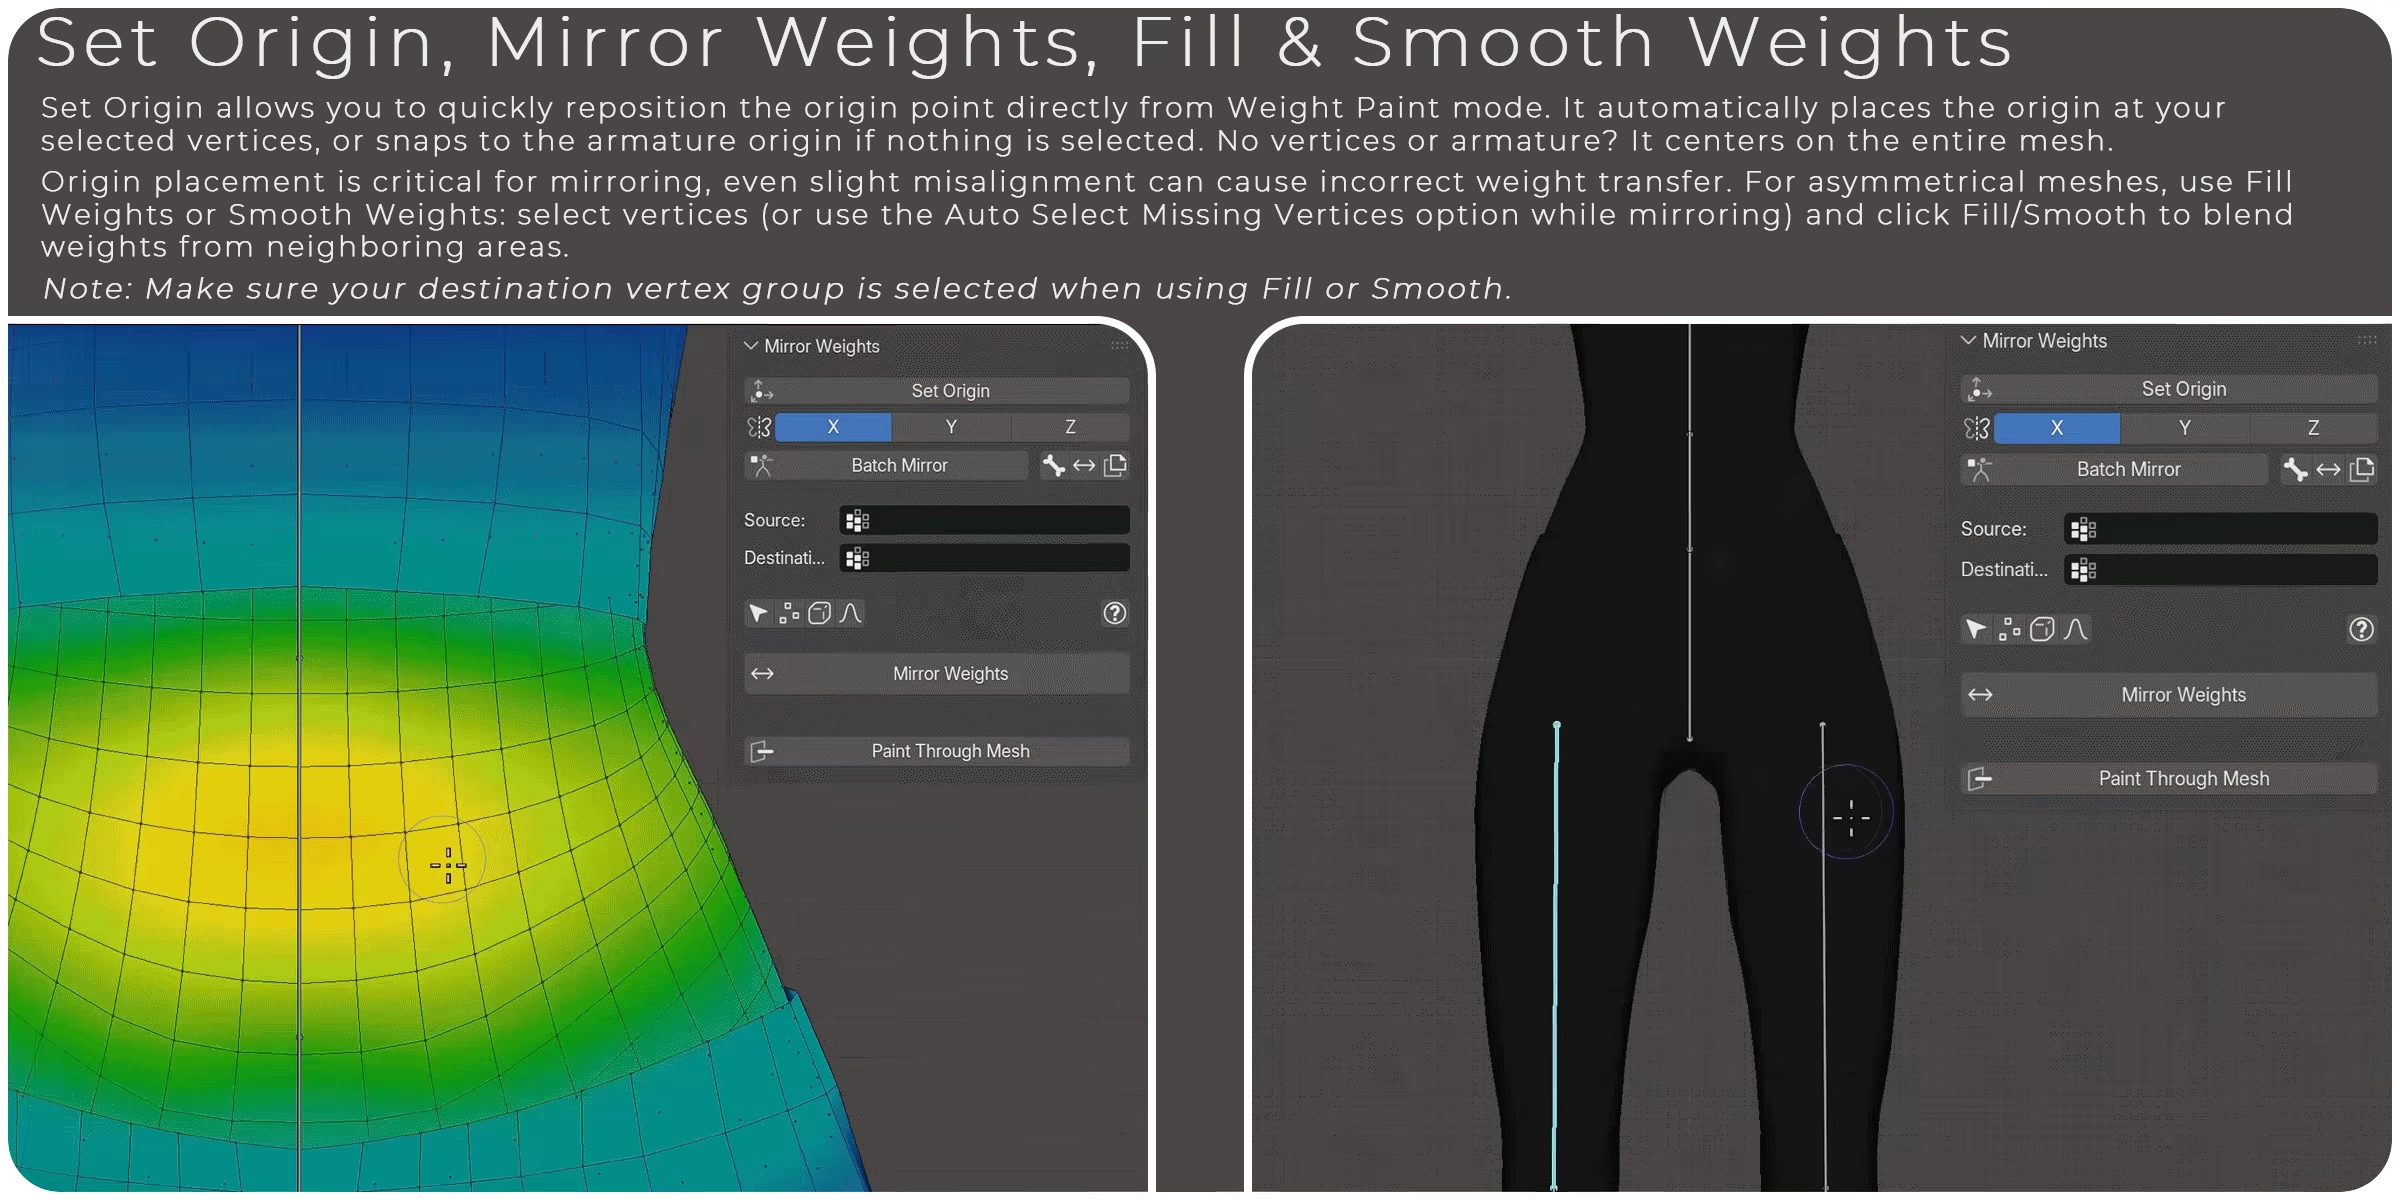
Quick Origin Positioning: This feature allows users to swiftly set the origin point to the center of selected vertices while in weight paint mode. This quick repositioning of the origin point enhances the efficiency of mirror operations, as they are based on the object's origin point.
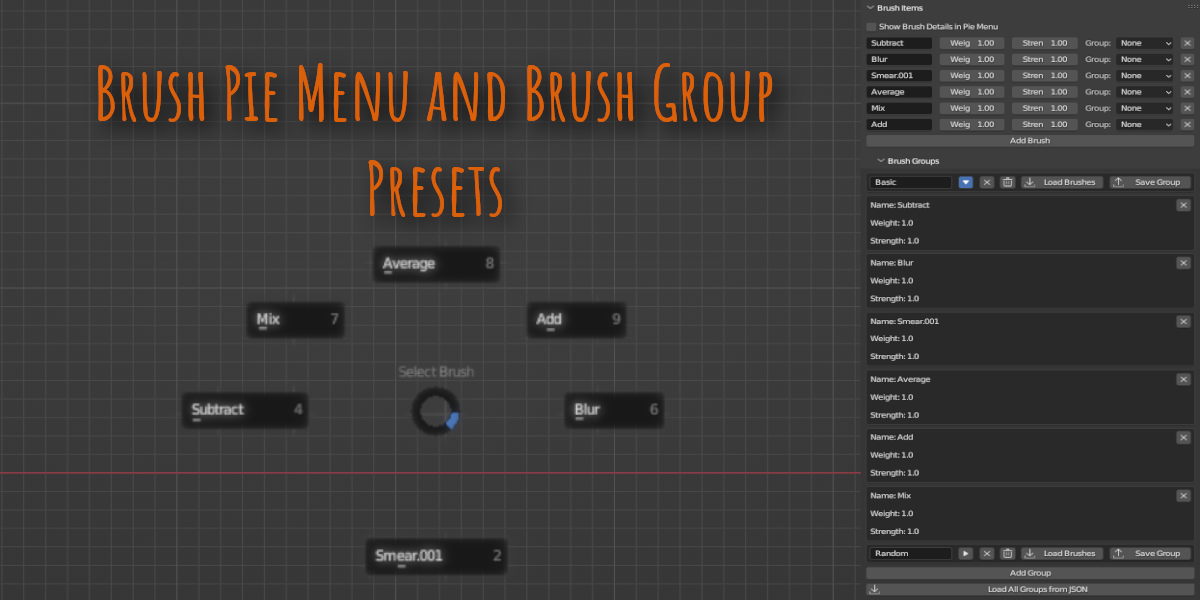
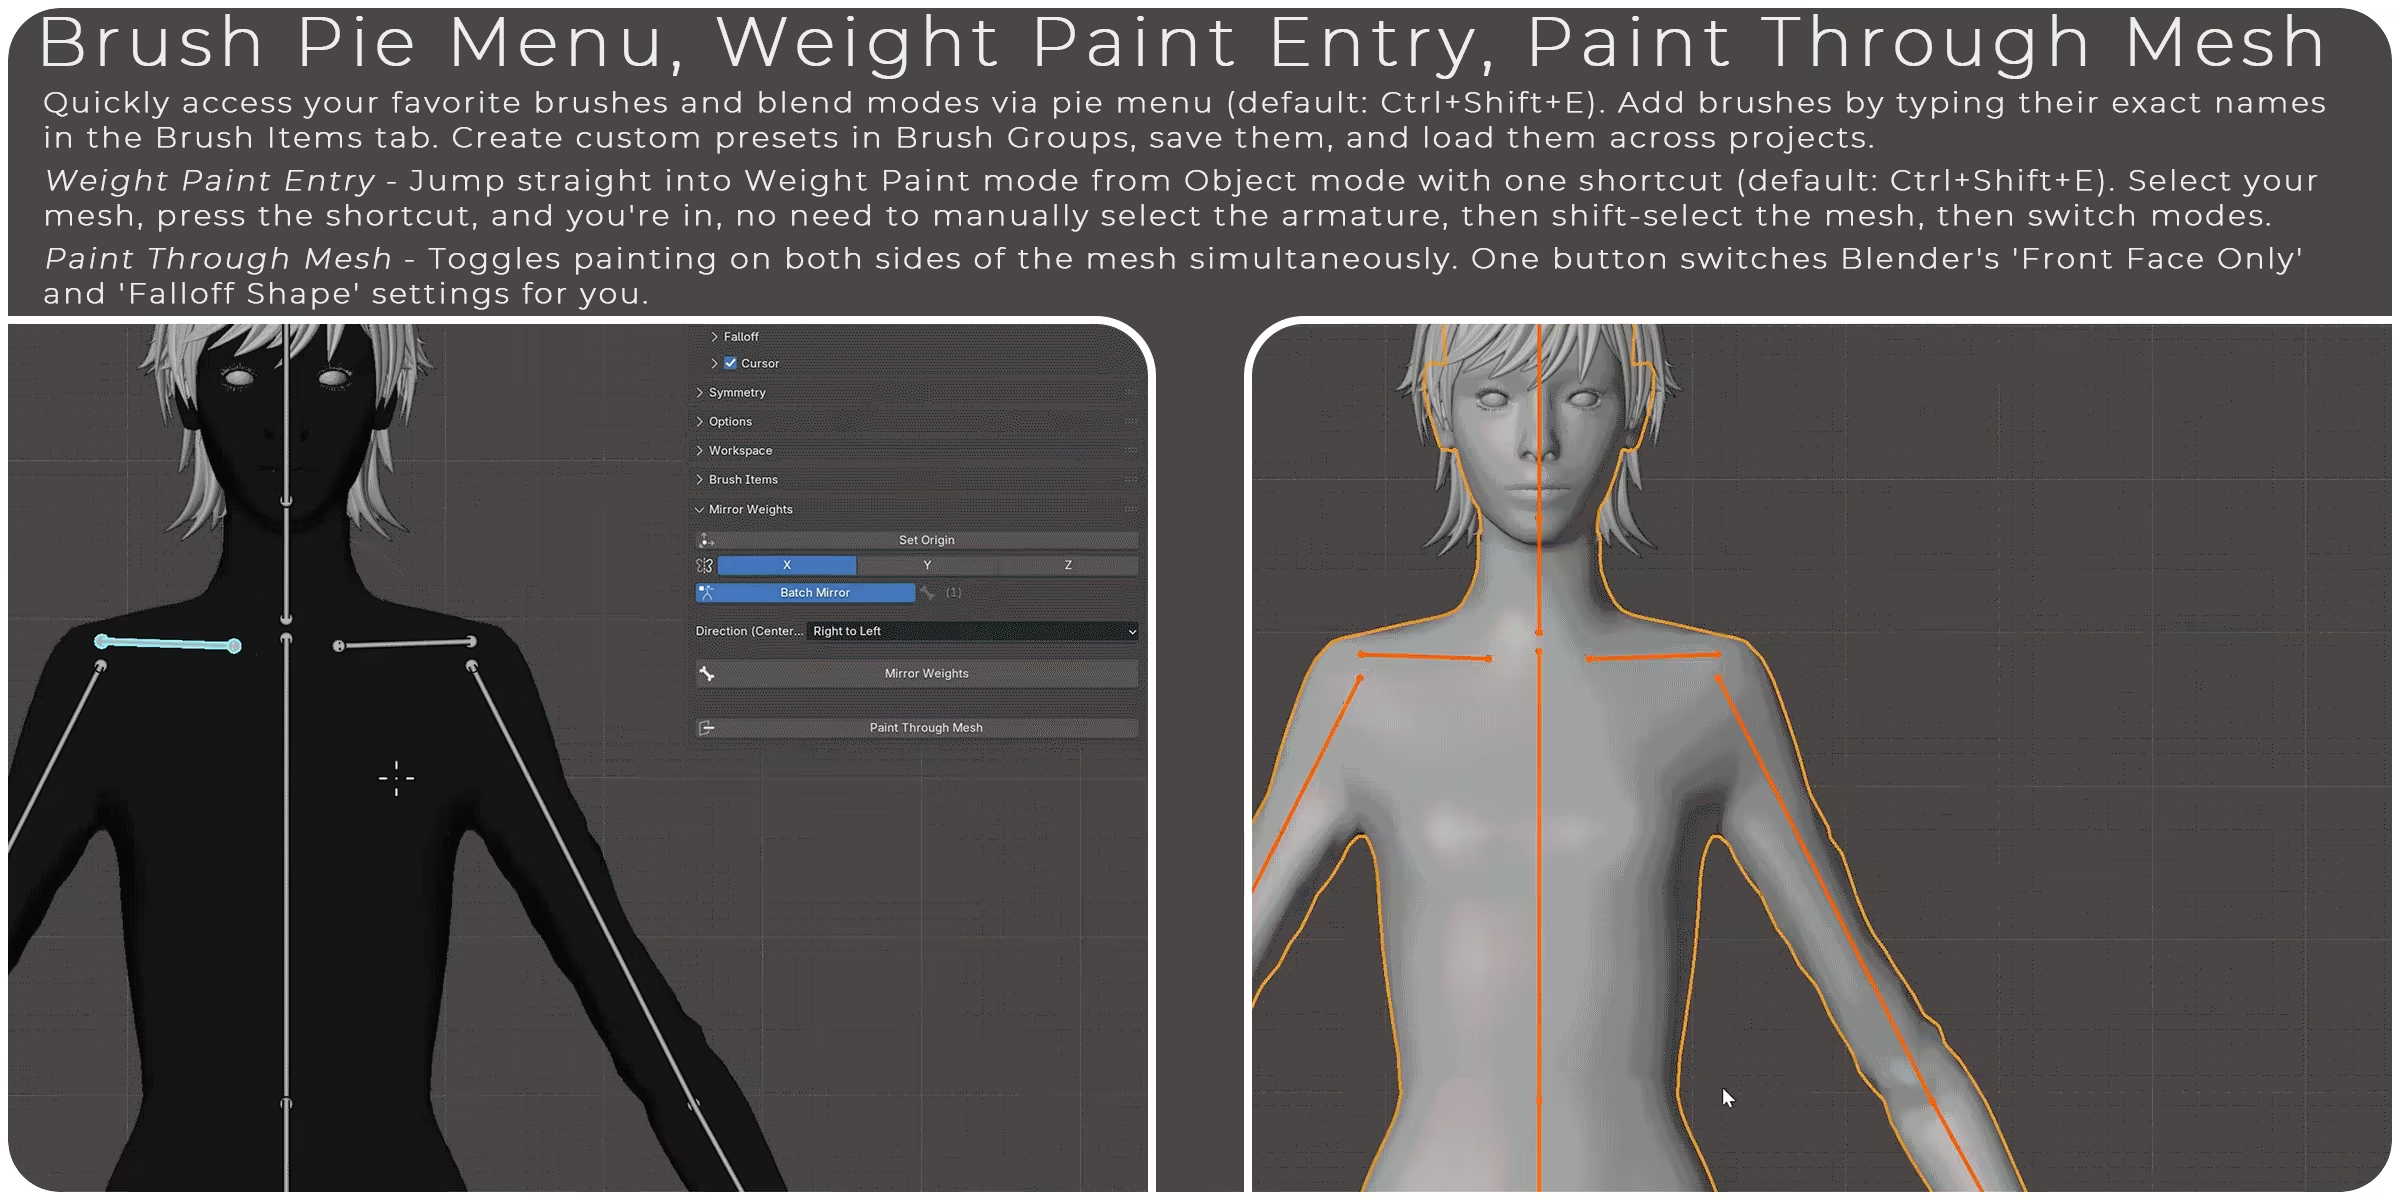
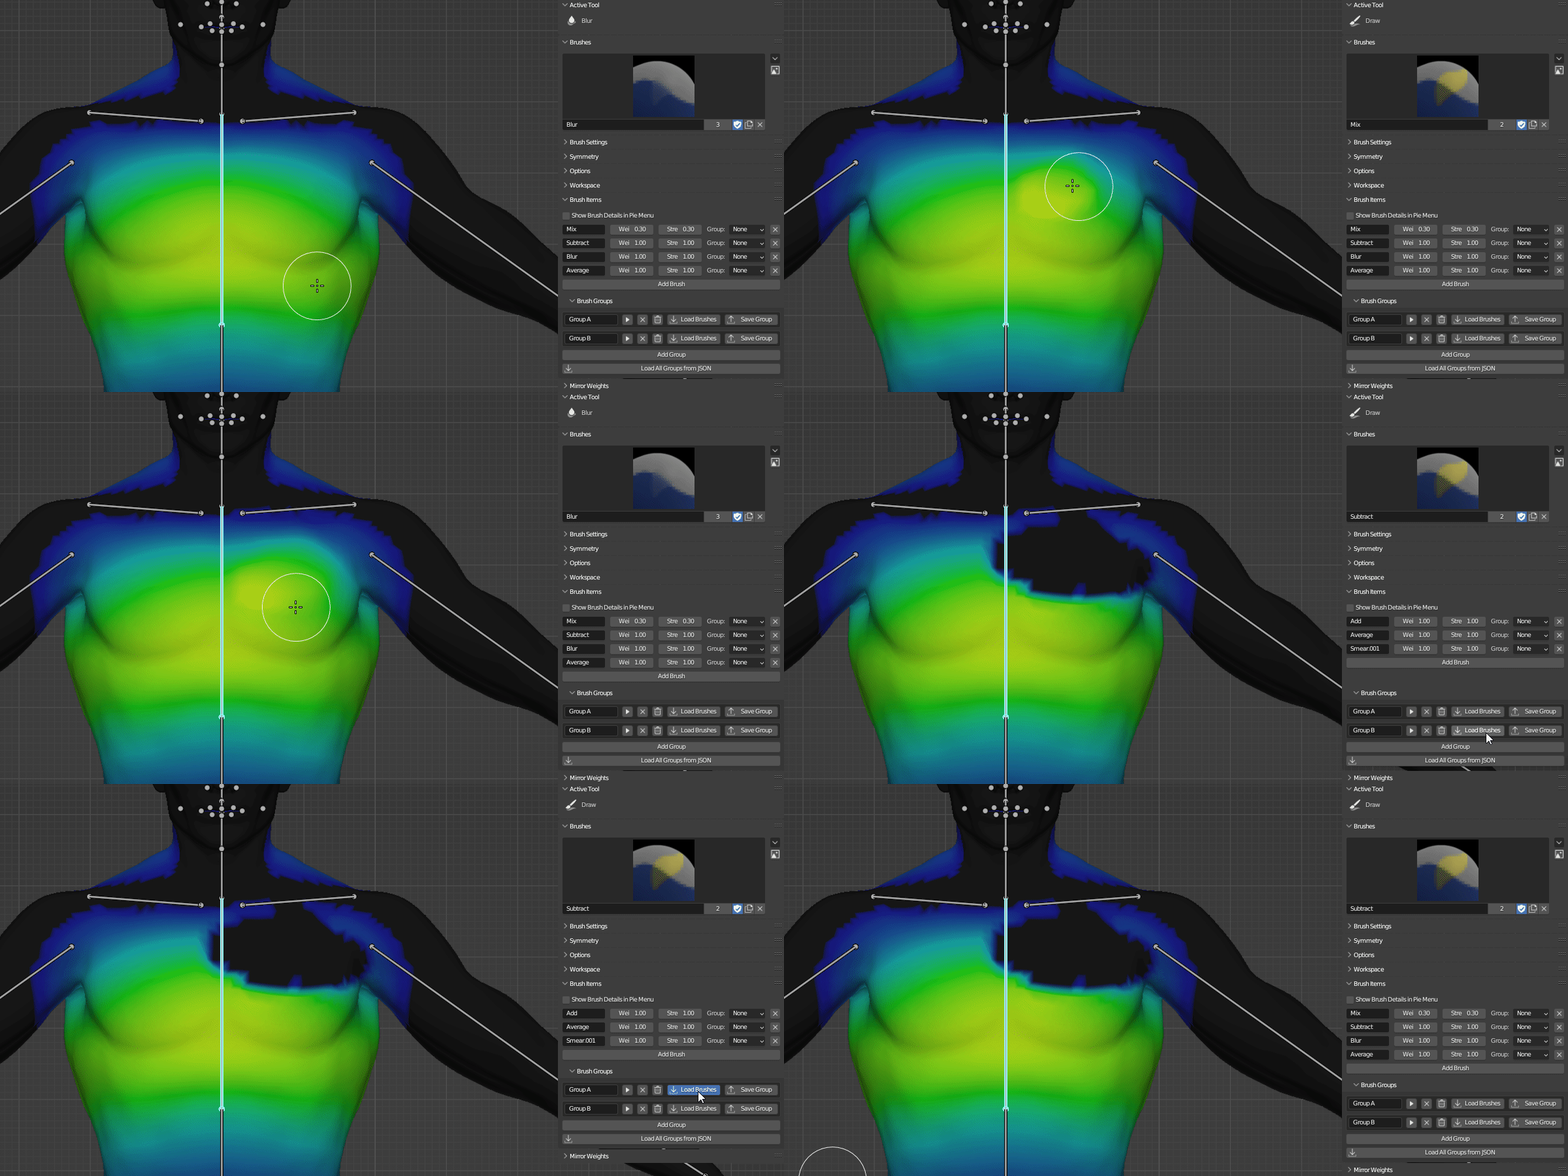
Brush Pie Menu and Brush Group Presets: Offers a user-friendly pie menu for quick brush switching and the ability to create custom brush groups.
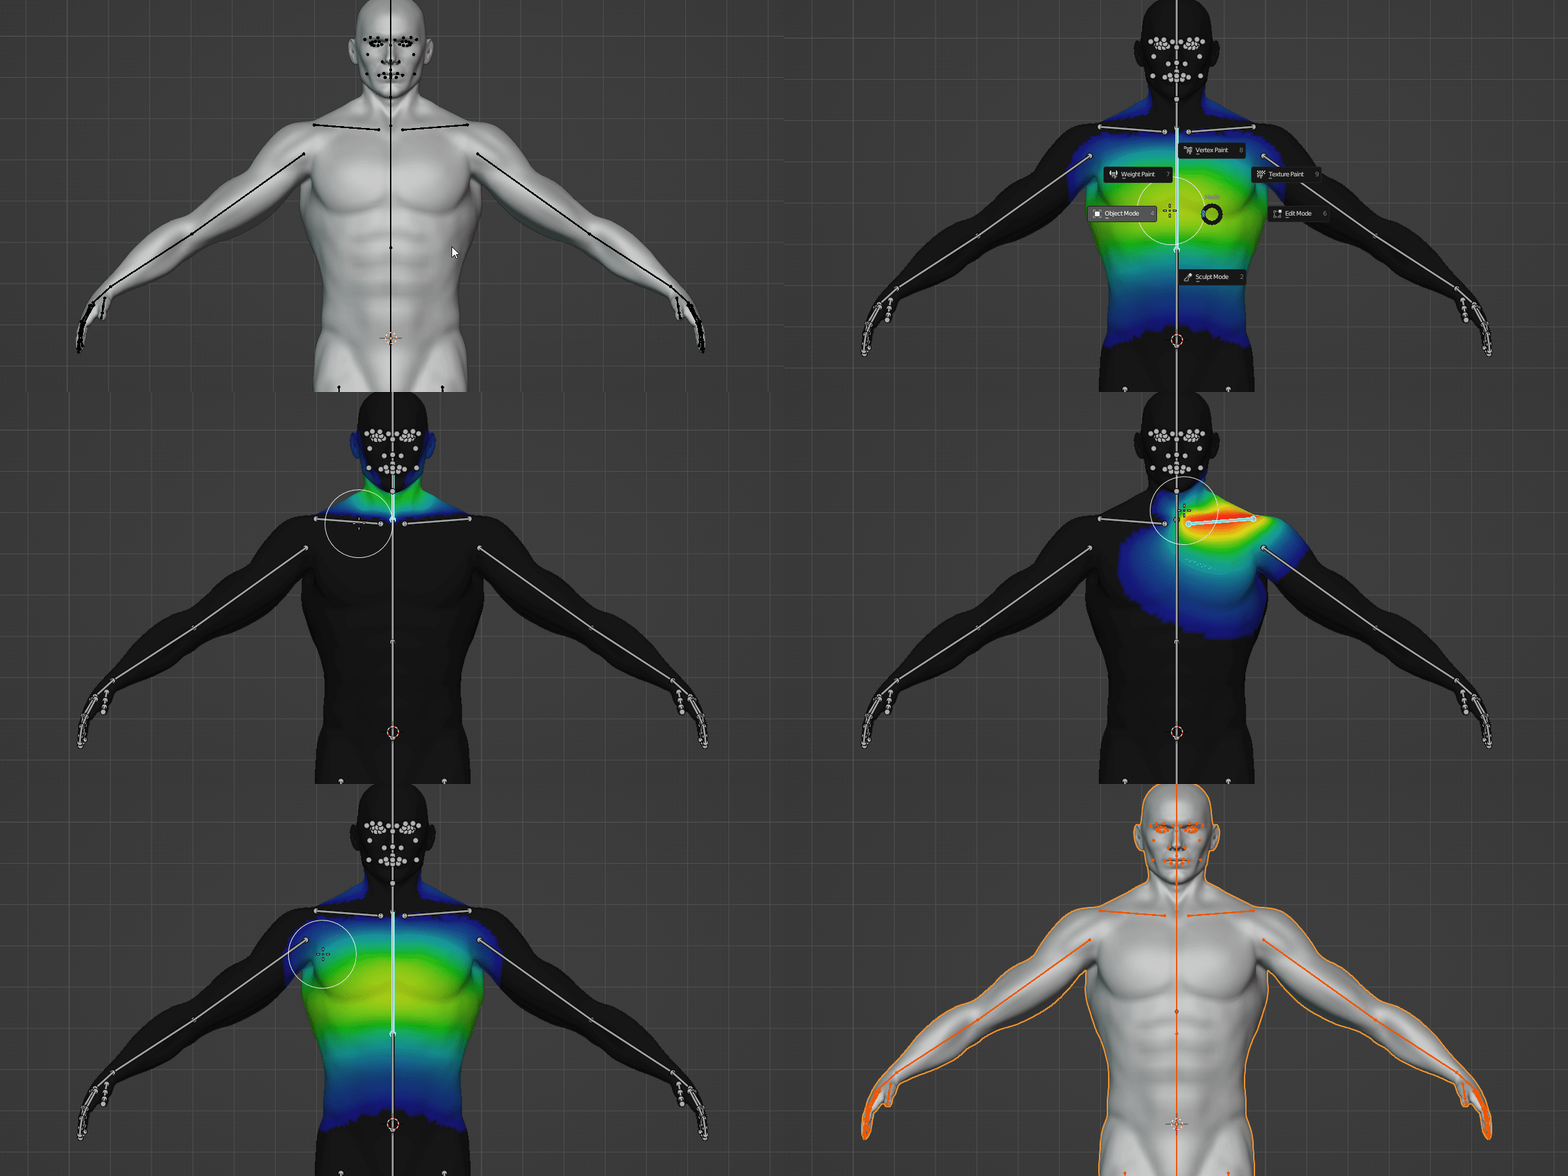
Efficient Weight Paint Mode Entry: This feature allows swift entry to weight paint mode from an object selection.
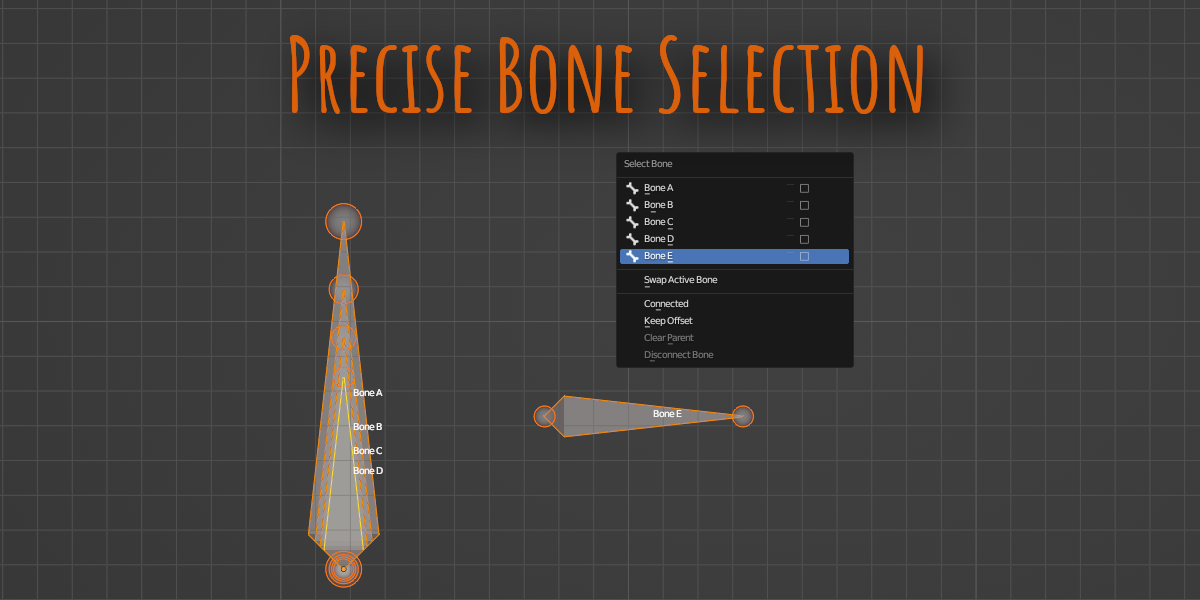
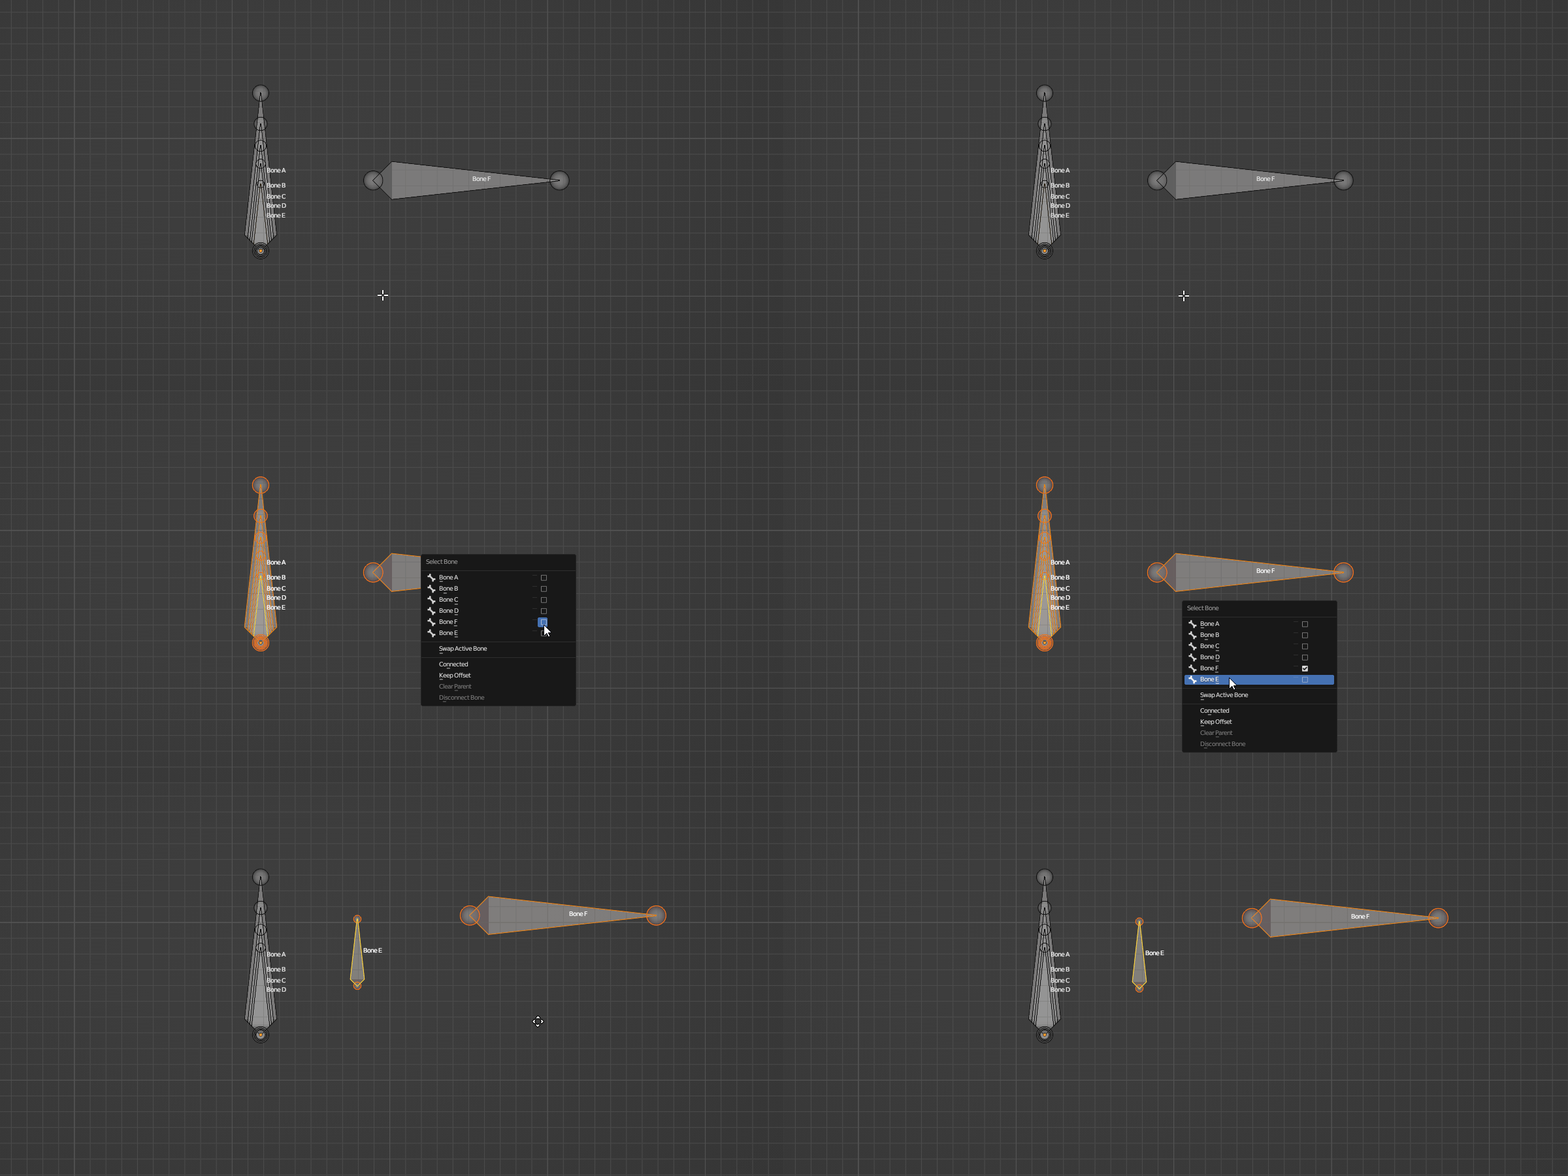
Precise Bone Selection: This feature ensures accurate and effortless selection even in complex bone assemblies.
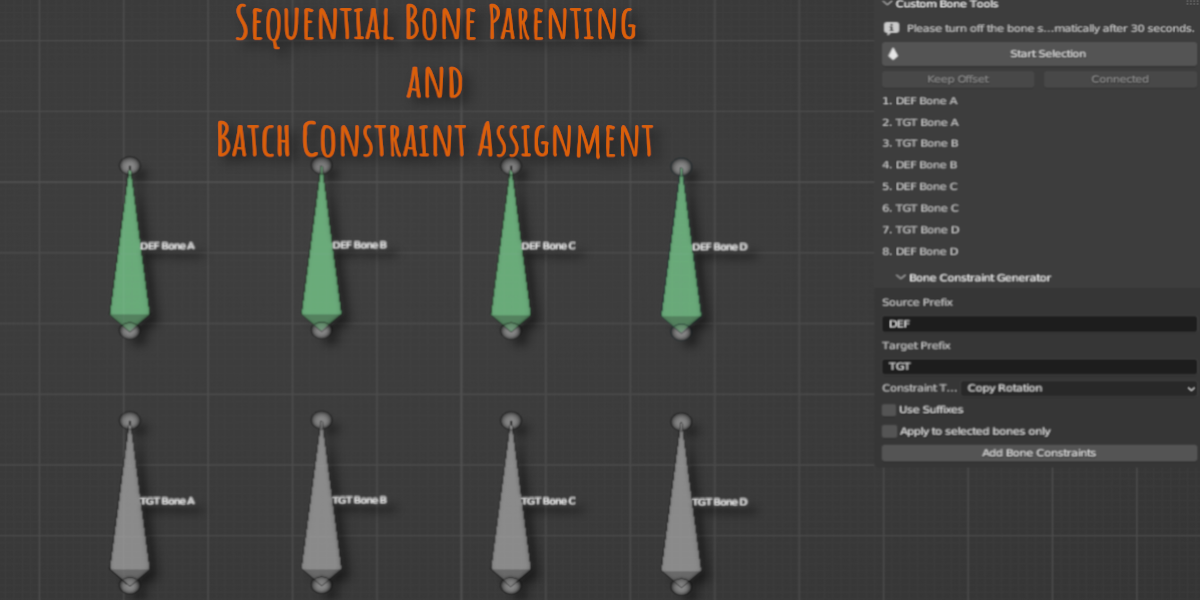
Sequential Bone Parenting: This feature accelerates the process of parenting multiple bones in a sequential order.
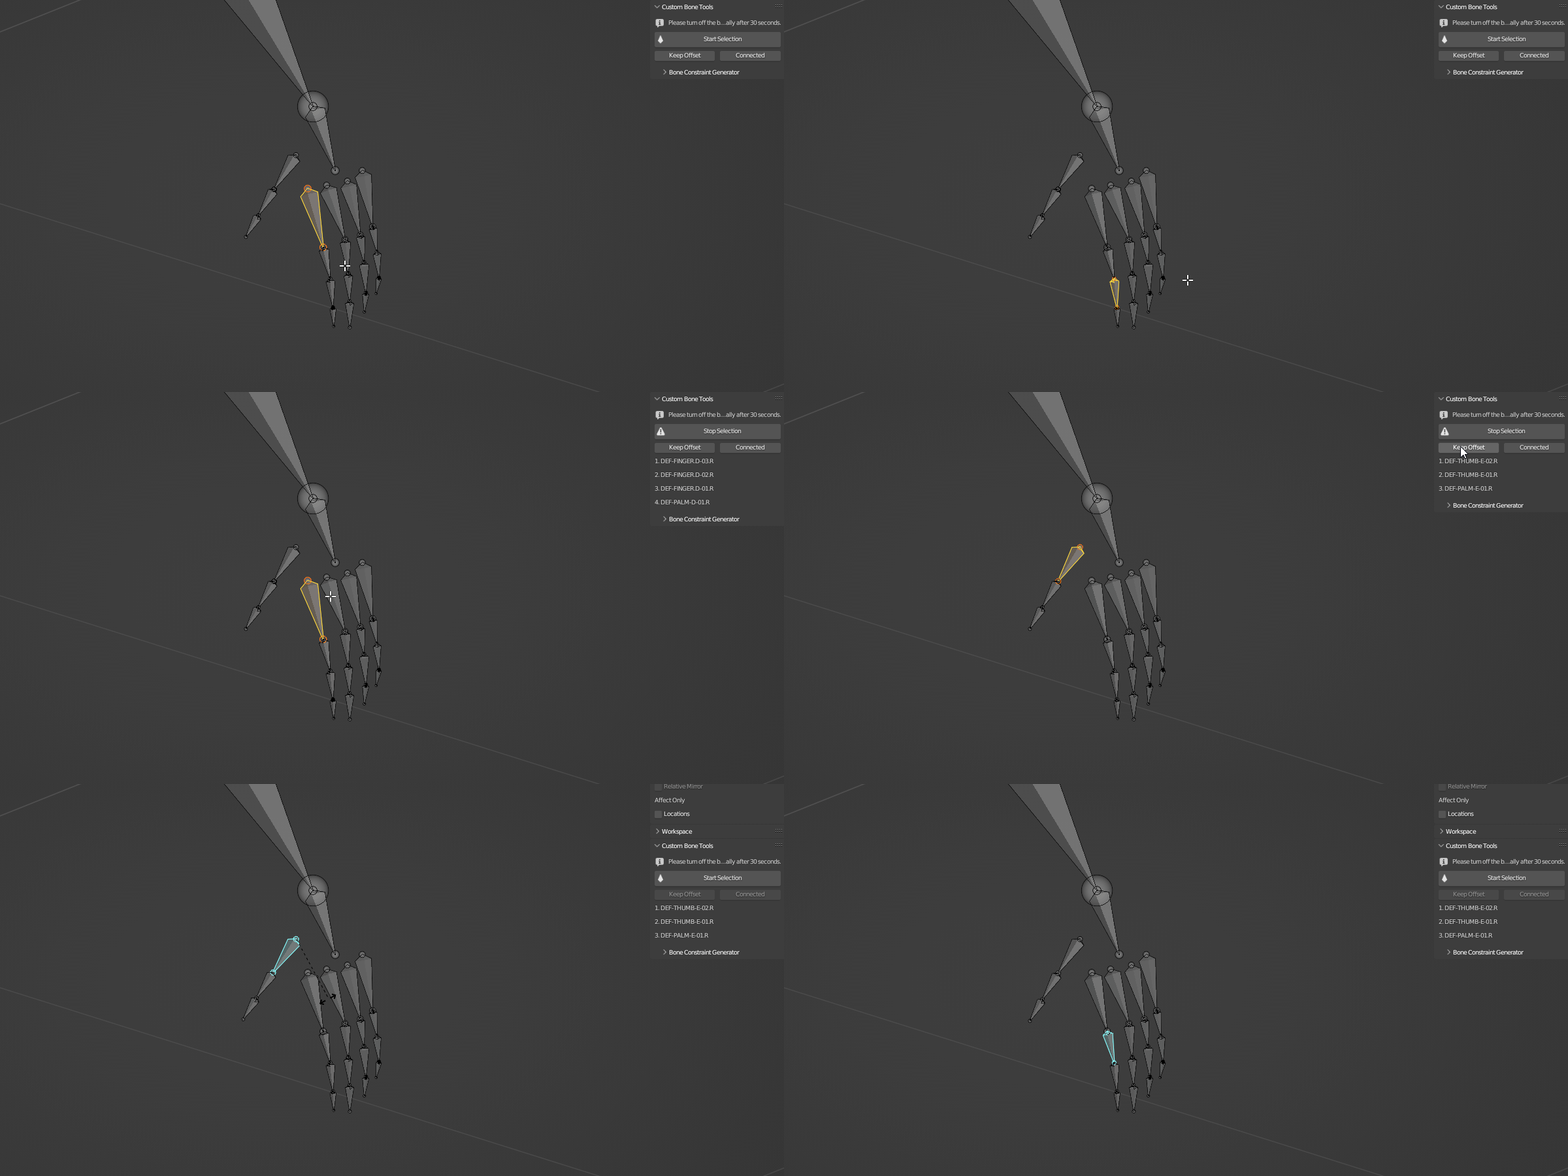
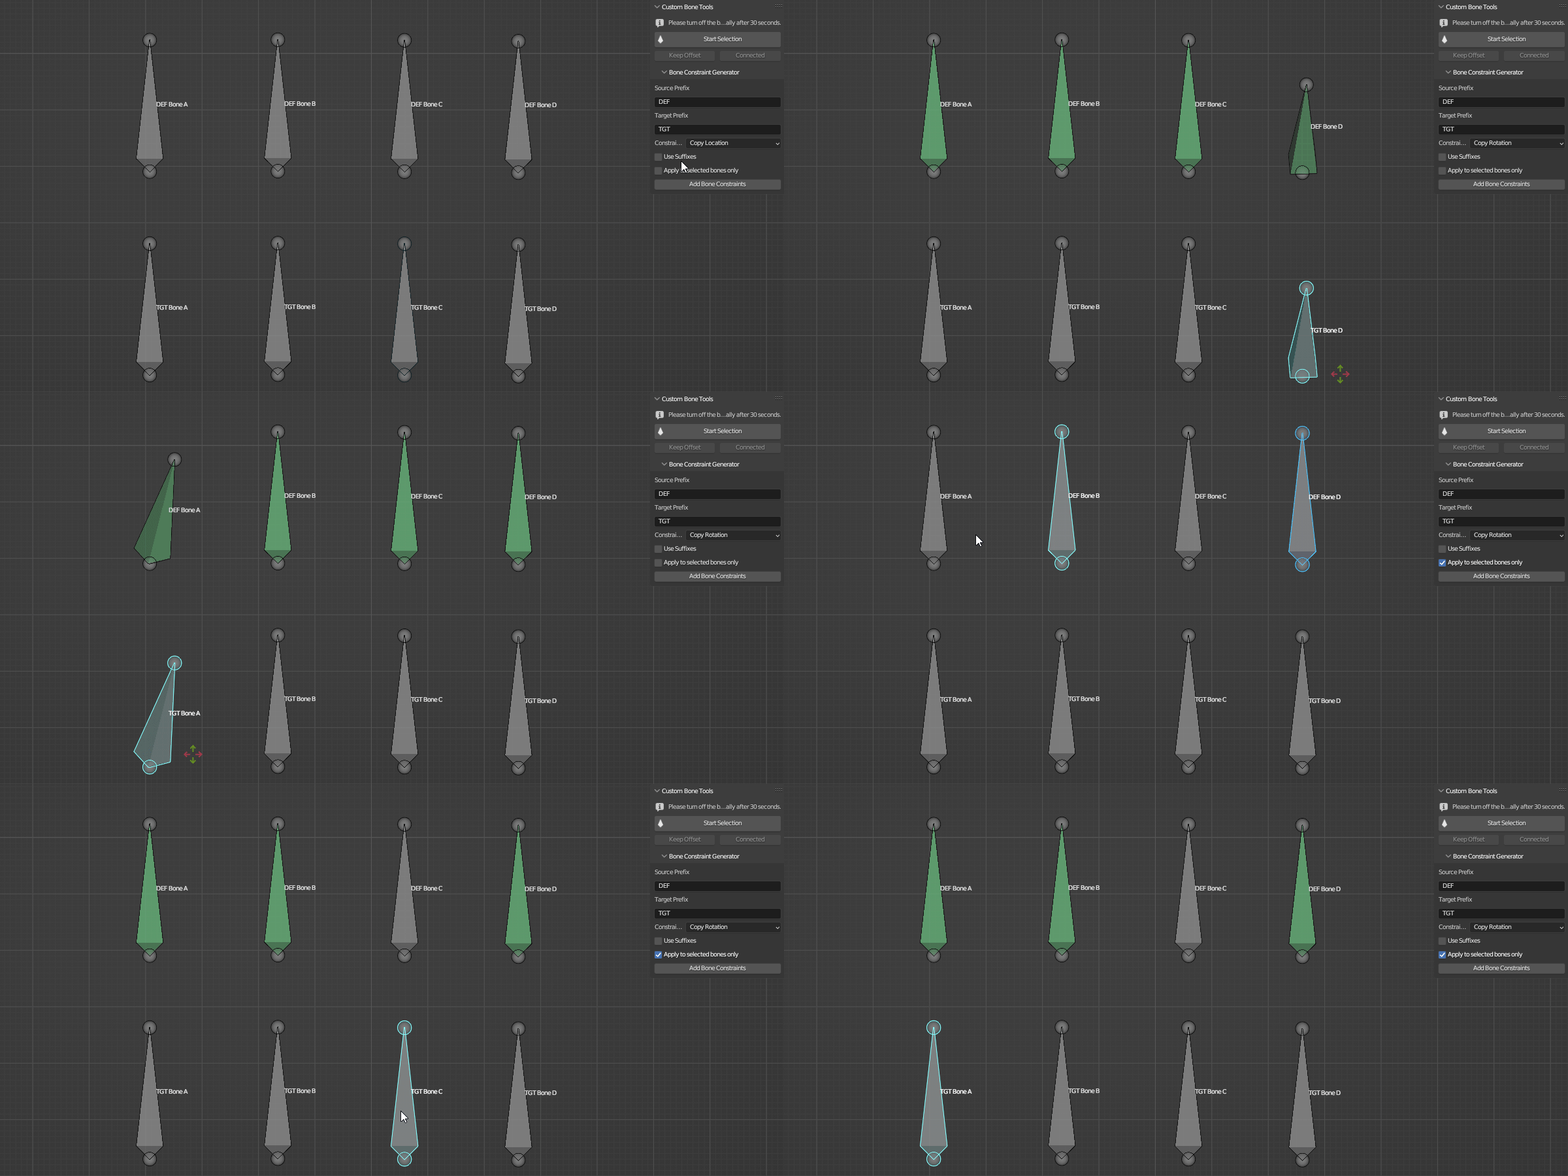
Batch Constraint Assignment: This feature streamlines the workflow when applying the same constraint to multiple bones.
Keyboard Shortcuts:
Here are the default shortcuts associated with various features:
Brush Pie Menu: CTRL+SHIFT+E
Located in Keymap > 3D View > 3D View (Global) > Select Brush

Precise Bone Selection Pop-Up Menu: CTRL+SHIFT+Q
Located in Keymap > 3D View > 3D View (Global) > Select Bone

Efficient Weight Paint Mode Entry: CTRL+SHIFT+E (This is the same as the Brush Pie Menu, but it doesn't interfere as it's used in a different interaction mode.)
Located in Keymap > 3D View > Object Mode > Object Mode (Global) > SwitchToWeightPaintMode

Additional Information
To help you get the most out of 'Weight Paint and Bones: A Blender Toolkit', here are some additional insights about certain features:
-
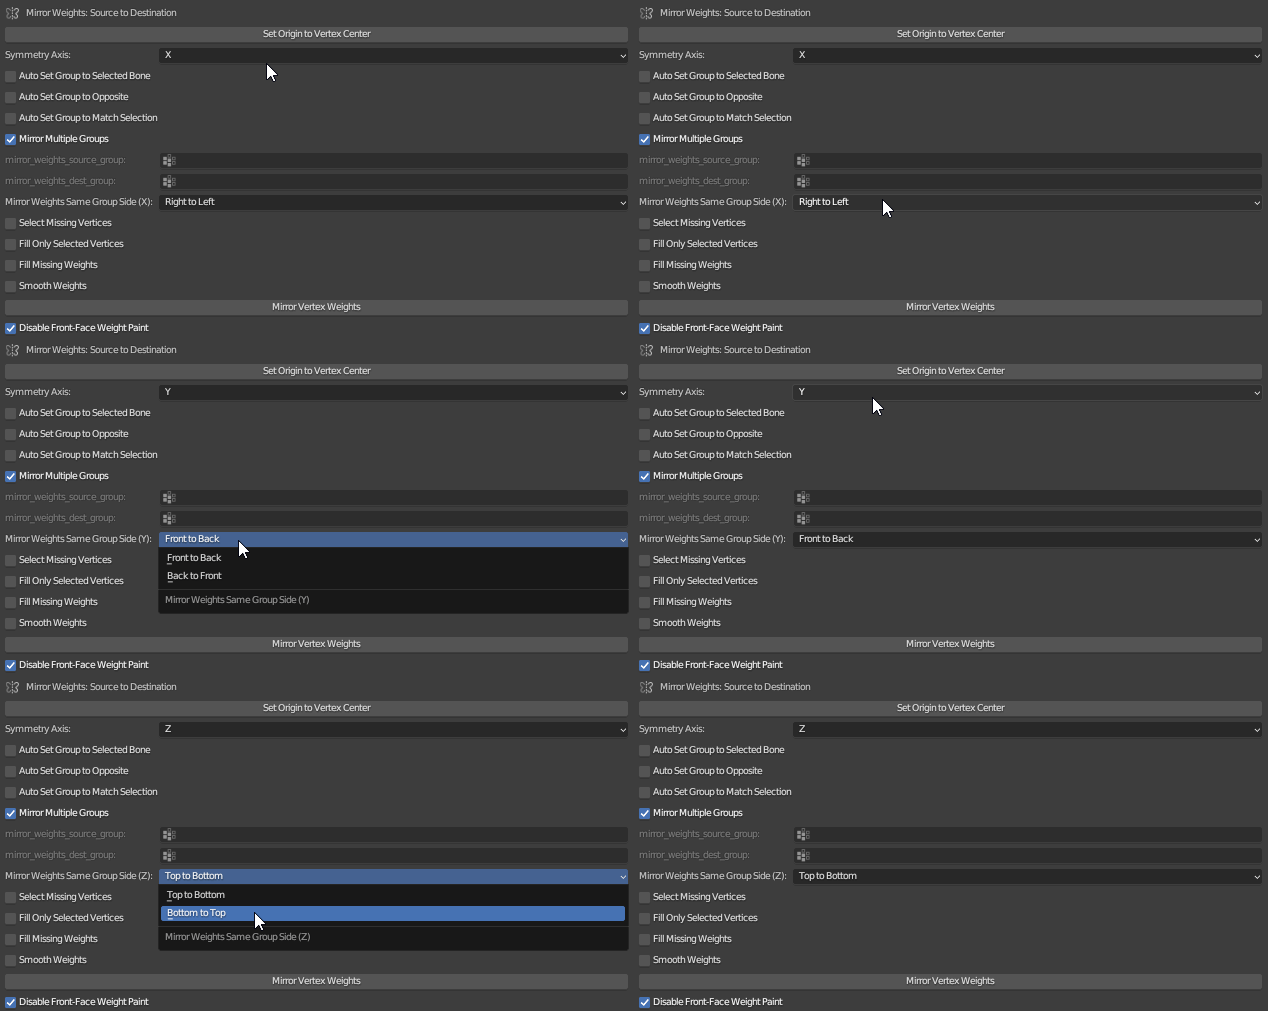
Direction of Weight Mirroring: When mirroring weights within the same group, the direction in which weights are mirrored depends on the symmetry axis you have selected. For example, for the x-axis, the options are Right to Left or Left to Right; for the y-axis, the options are Front to Back or Back to Front; and for the z-axis, the options are Top to Bottom or Bottom to Top.
- Mirror Multiple Groups Naming Convention: The "Mirror Multiple Groups" feature requires a specific naming convention for bones. The bone names must end with a ".L" or ".R" suffix, which denotes the left or right side of the model respectively. If a bone doesn't follow this naming convention, the weights will be mirrored within the same group, based on the chosen direction. This feature eliminates the need to manually select source and destination fields, streamlining the weight mirroring process across multiple groups.
-
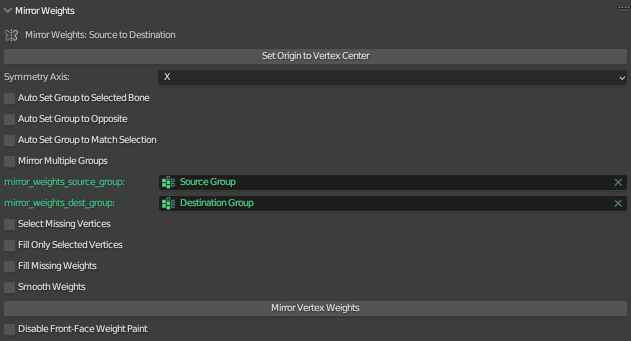
Field Selection for Various Features: For the "Fill Missing Weights" and "Select Missing Verticies" features, both the source and destination fields must be selected. For the "Fill Only Selected Vertices" and "Smooth Weights" features, only the destination field must be selected.
-
Additional Checkbox Features: This addon also includes three checkboxes designed to speed up the selection of source and destination fields:
-Auto Set Group to Selected Bone: This feature automatically populates the destination field with the corresponding group for the selected bone.
-Auto Set Group to Opposite: This feature automatically selects the opposite group name (if it exists) in the opposing field. For instance, if you select "BoneA.L" for the destination field, it will automatically select "BoneA.R" for the source field, and vice versa.
-Auto Set Group to Match Selection: This feature sets the opposing field to match the selected one. So, if you select "BoneA.L" for the destination field, it will also select "BoneA.L" for the source field, and vice versa.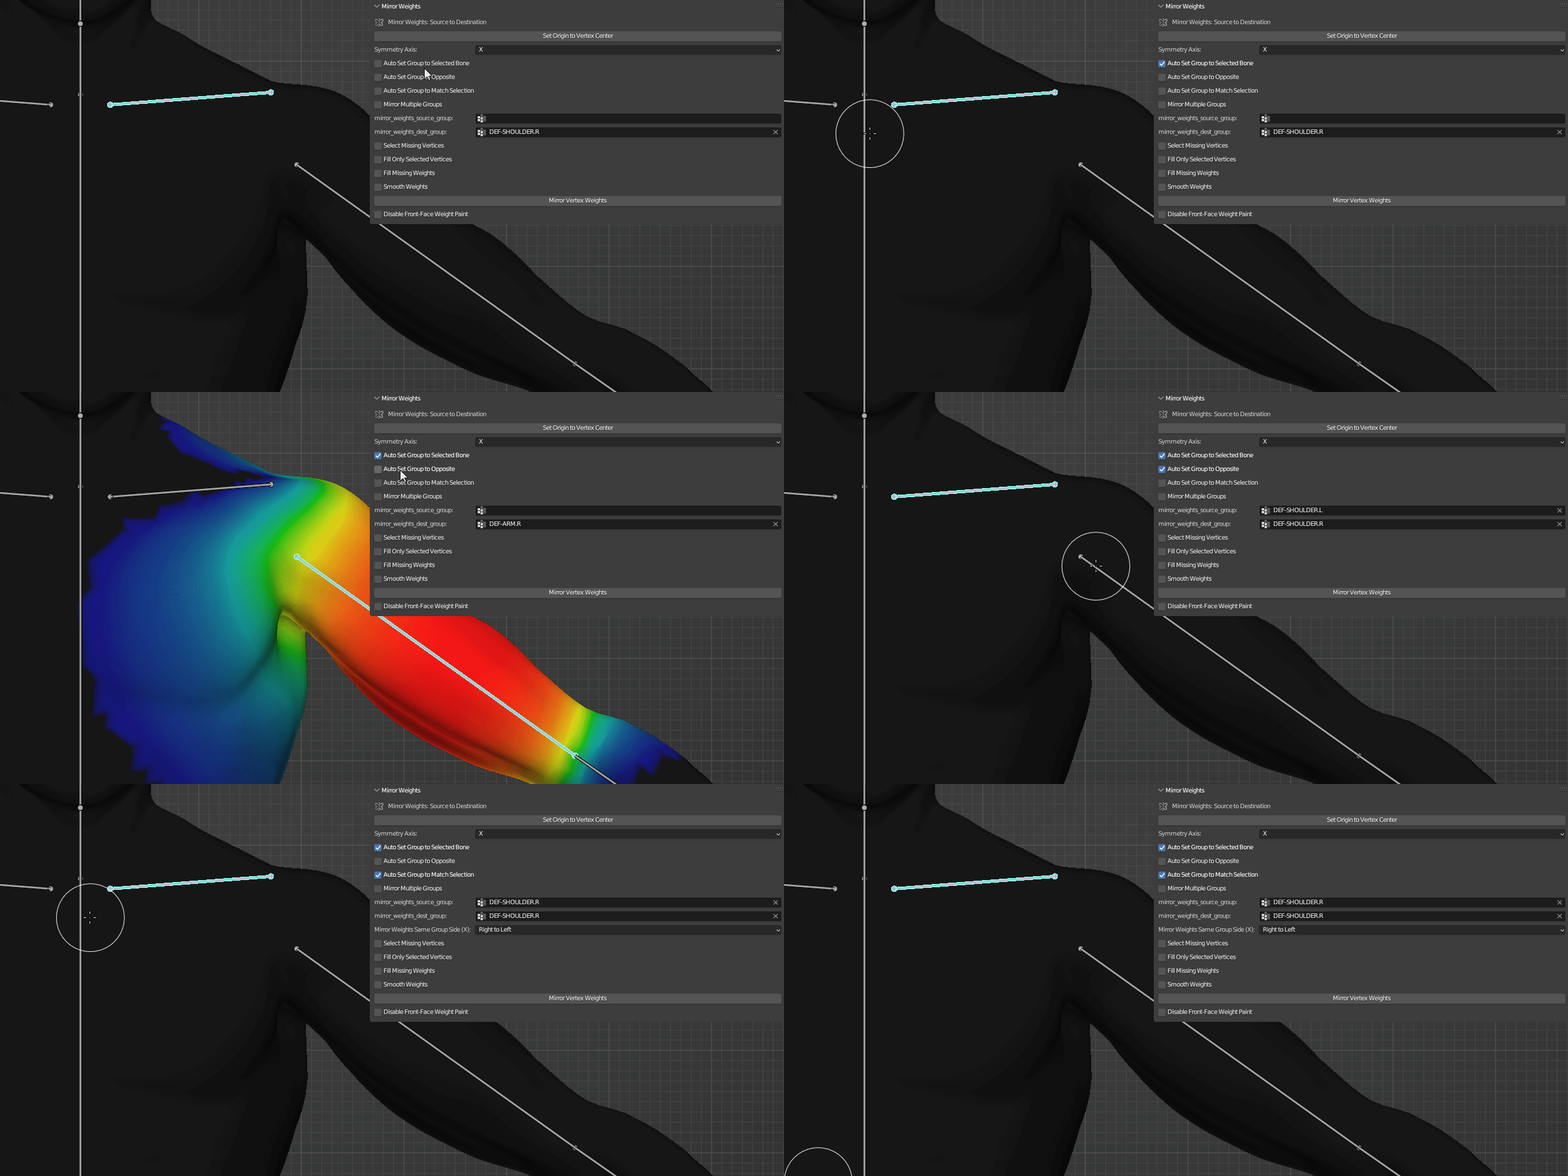
-
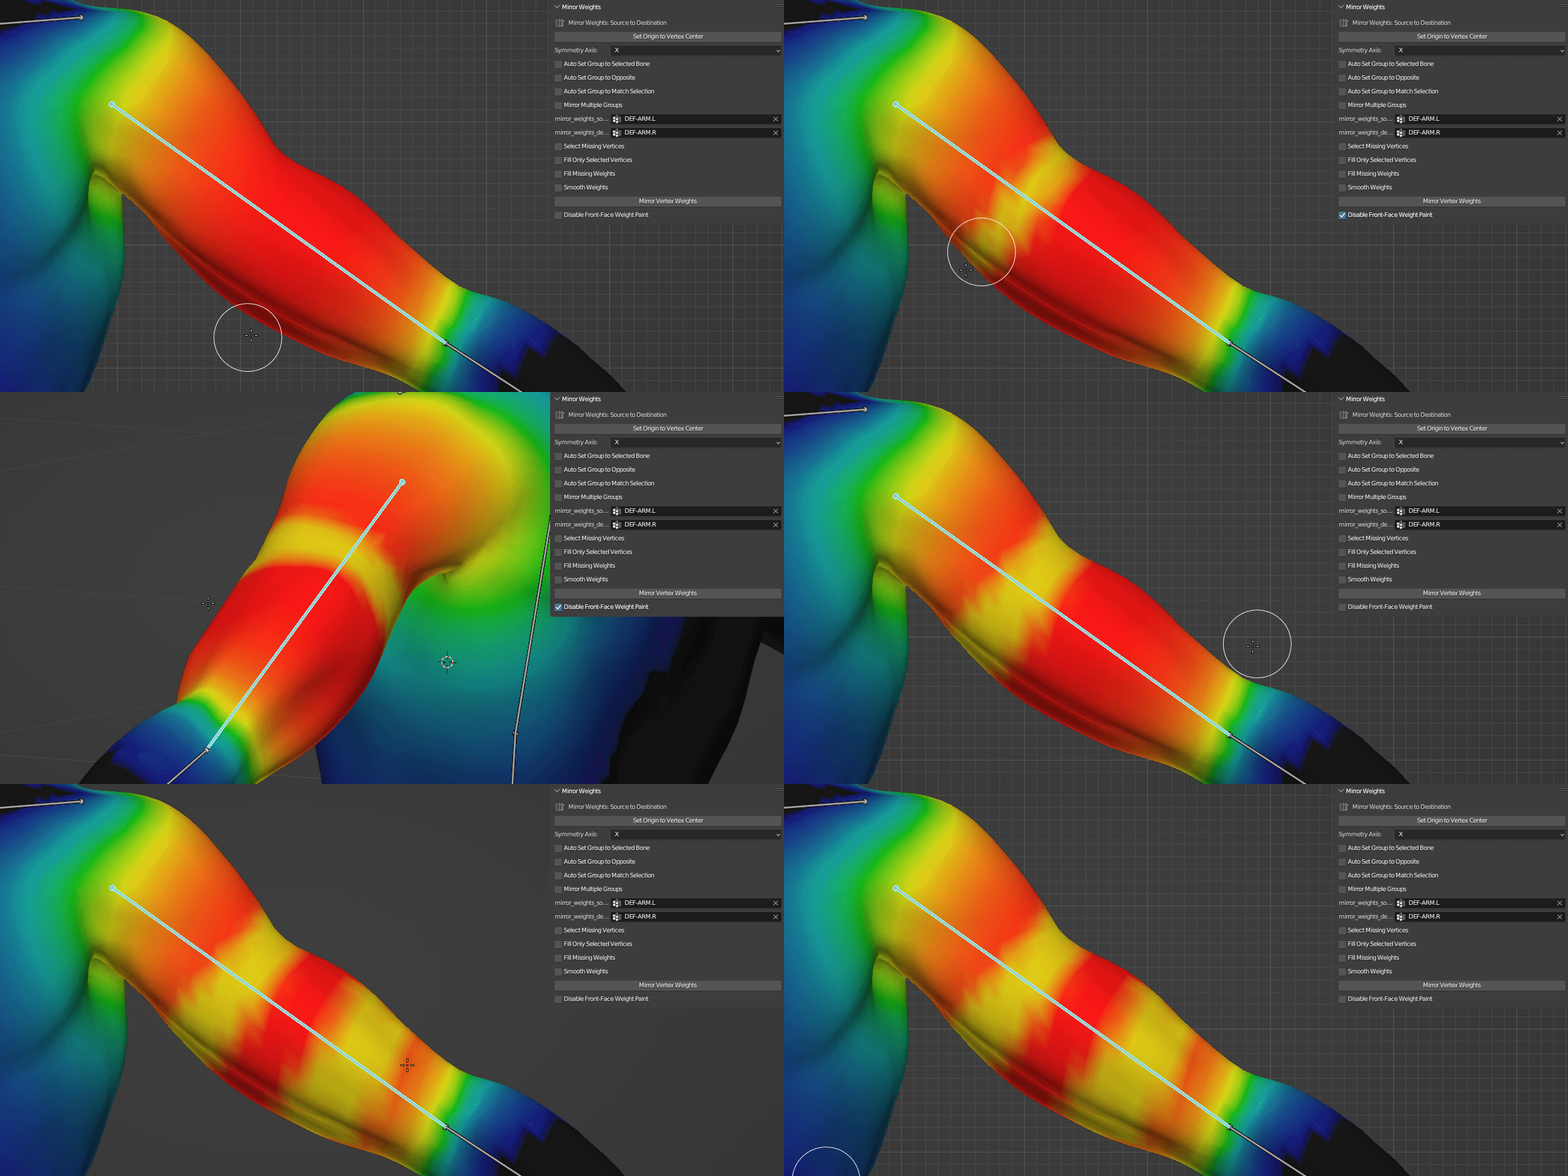
Disable Front-Face Weight Paint: This checkbox allows you to paint weights on both sides of your model simultaneously. By enabling this option, the addon automatically switches the 'Falloff Shape' from 'Sphere' to 'Projected' and disables the 'Front Face Only' option in Blender's settings. This provides a more efficient way to adjust these settings, saving you time and enhancing your weight painting workflow.
-
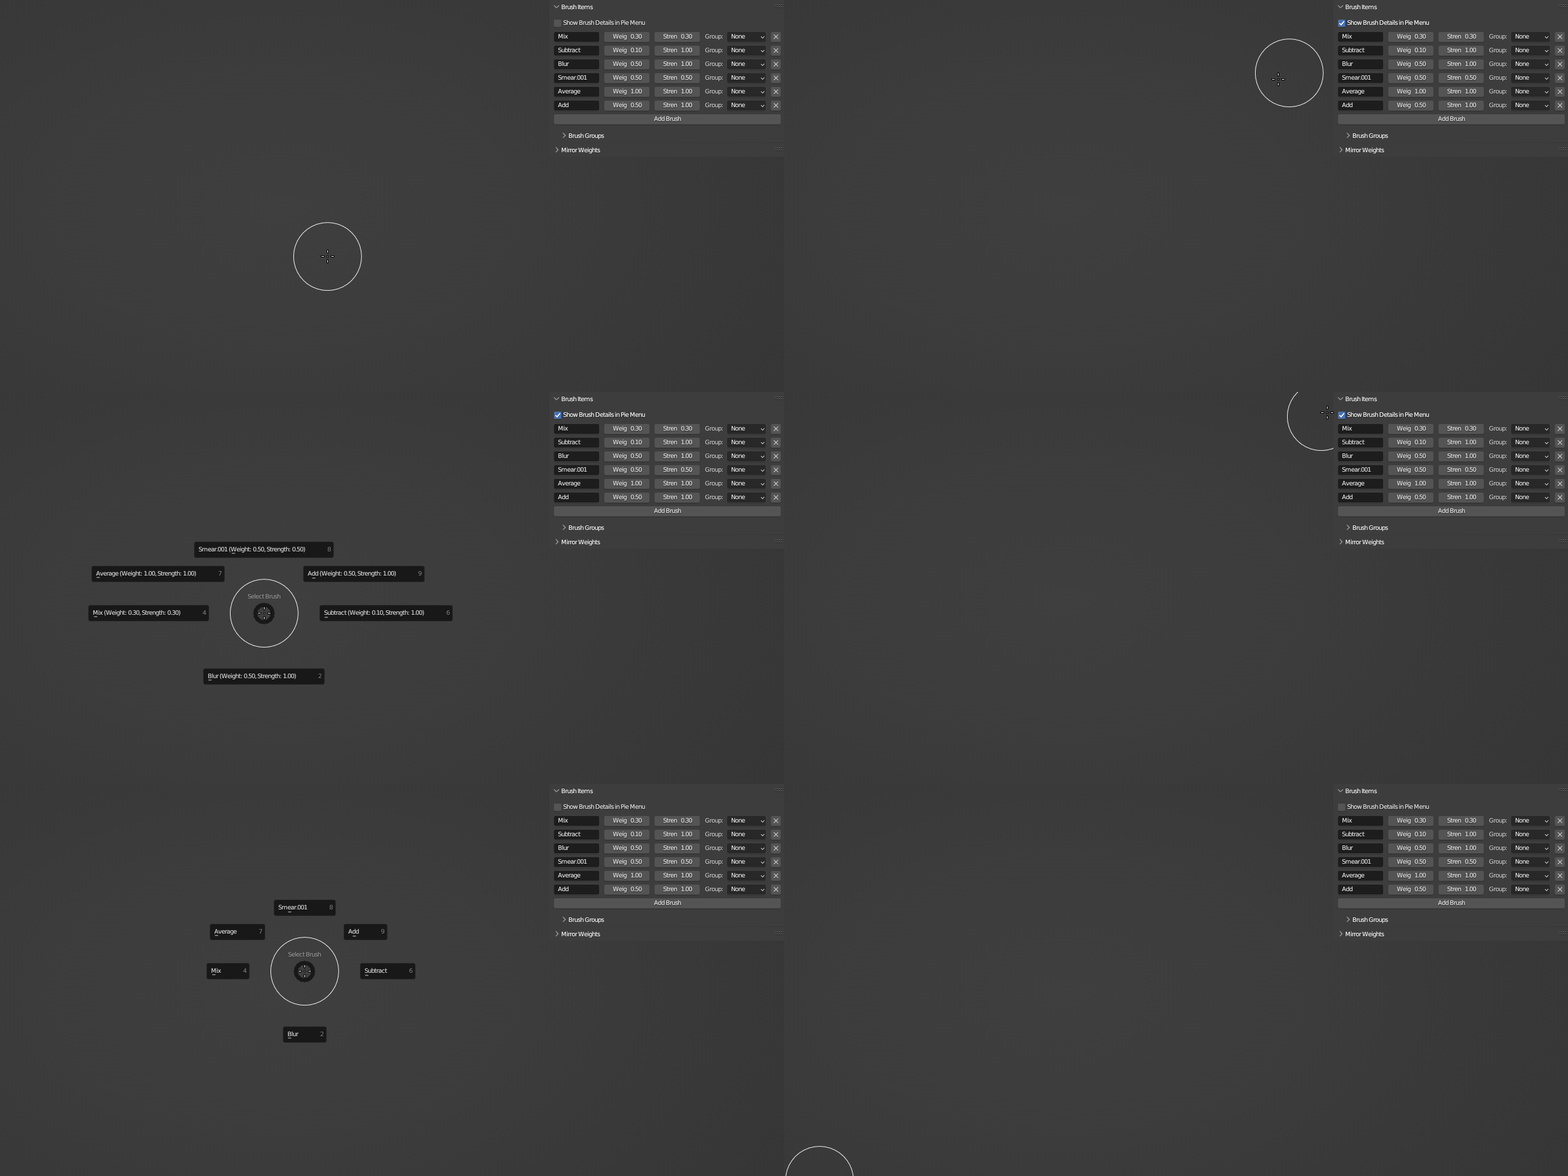
Show Brush Details in Pie Menu: This checkbox, when enabled, displays the weight and strength values of each brush directly in the pie menu.
Installation Guide:
- Open Blender and navigate to Edit > Preferences.
- In the Preferences window, switch to the "Add-ons" tab.
- Click on the "Install..." button at the top of the window.
- Navigate to the location where you downloaded the addon zip file, select it, and click "Install Add-on".
- The addon should now appear in the list of addons. It will be disabled by default. To enable it, tick the checkbox on the left side of the addon entry.
- The addon is now installed and enabled.
Please note: To update the addon, make sure to uninstall the previous version before installing the new one. To do this, find the addon in the list, click on it to expand it, and click the "Remove" button. After removing the old version, restart Blender and then install the new version as described above.