WoodCut
 Tugi Ireri
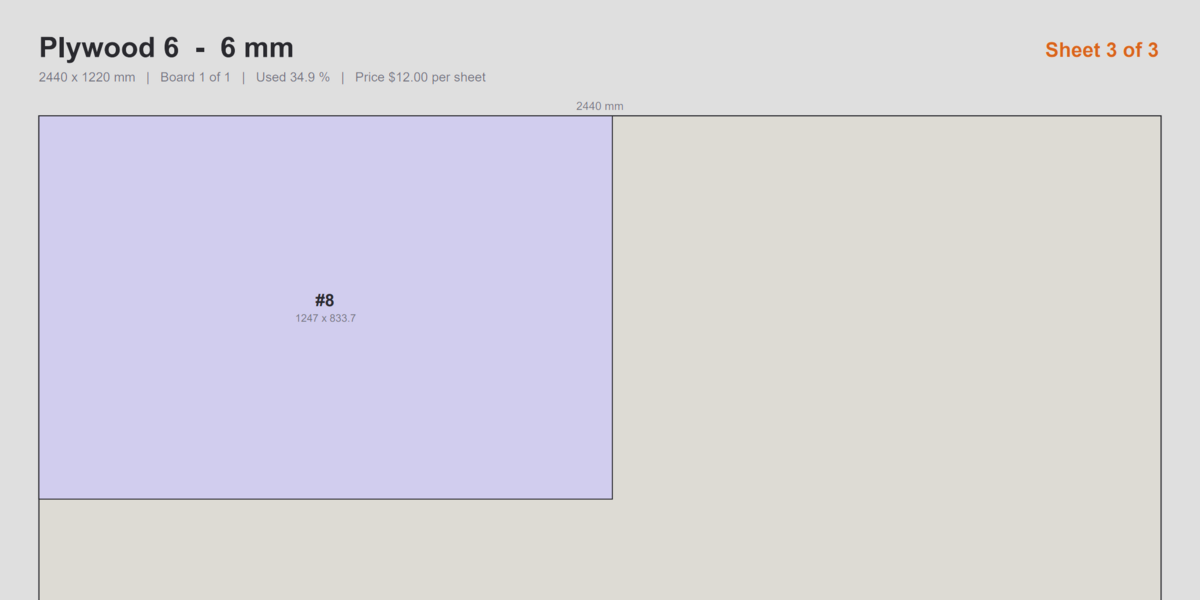
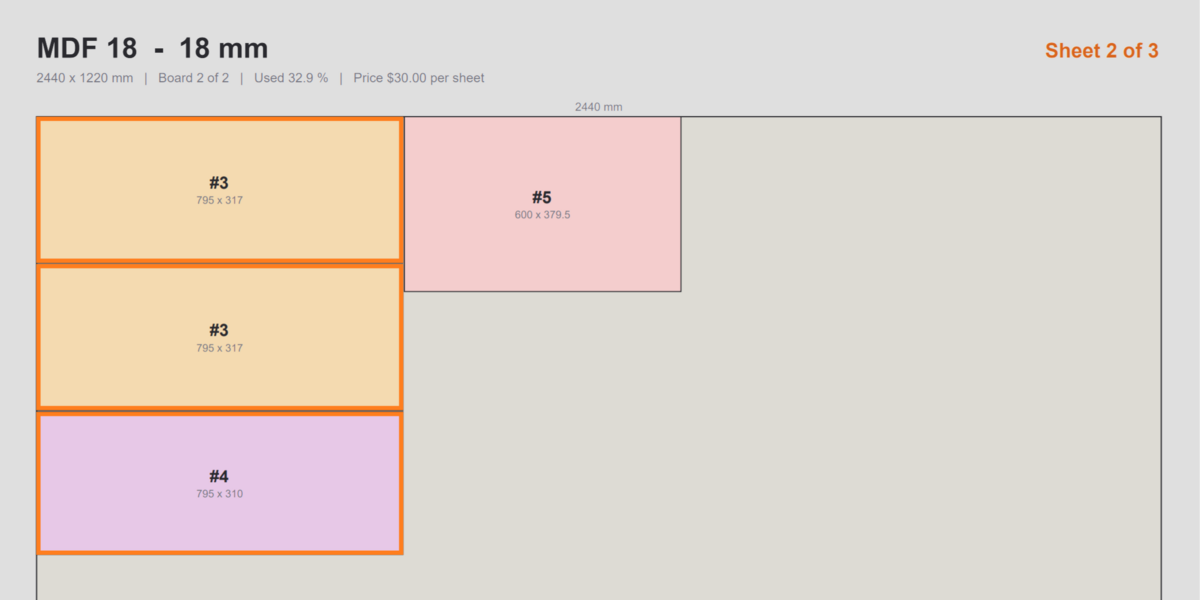
Installation
WoodCut is packaged as a Blender Extension for Blender 5.2 LTS.
- Download the
.zipfile you received after purchase. Do not unzip it. - In Blender, open Edit > Preferences > Get Extensions.
- Open the drop-down arrow at the top right and choose Install from Disk...
- Select the WoodCut
.zipfile and confirm. - Make sure the WoodCut extension is enabled (tick box on).
- In the 3D Viewport press N to open the sidebar and click the WoodCut tab.
You can also drag and drop the .zip file onto the Blender window.
When Blender asks about permissions, WoodCut lists one: it writes the exported PDF and PNG files to a folder you choose. It does not use the network.
Updating: install the new version the same way. Blender replaces the old one. Your boards, prices and lipping types are stored in your .blend files, so they are kept.
Uninstalling: Preferences > Get Extensions > Installed > WoodCut > Remove. Before removing it, switch Live Cutlist off so WoodCut can restore any object colours it changed (see Viewport colours).
Quick start
A complete first run takes about two minutes.
- Open the panel. 3D Viewport > N > WoodCut tab.
- Add boards. Click Add Starter Catalogue. This adds Plywood 18, Plywood 12, MDF 18, Plywood 6 (all 2440 x 1220 mm) and a 2 mm lipping type. Prices start at 0, so open Board Types & Prices and type in your real prices.
- Model your project. Put the parts in one collection. Each part is a simple box-shaped mesh. See How parts are measured.
- Choose the collection. Pick it in the Collection field, or select it in the Outliner and click the small collection button next to the field.
- Switch on Live Cutlist. The totals appear straight away: parts, sheets, board cost, lipping cost, total.
- Add lipping (optional). Enter Edit Mode on a part, select the edge faces that will be edged, open the Lipping sub-panel and click Lip Selected Faces.
- Check the layout. Open Cutlist to see each board type and every part row, or switch on Show sheet preview in viewport under Export & Preview.
- Export. Under Export & Preview click PDF, PNG or Both.
Check your units before you trust the numbers: that is the most common cause of a wrong cutlist.
Units and scale
WoodCut works internally in millimetres. Sheet sizes, thicknesses, kerf and trim are all entered in millimetres.
How big one Blender unit is depends on your scene's unit settings. The Settings sub-panel always shows the current conversion, for example 1 Blender unit = 1000 mm.
| Scene setup | 1 Blender unit equals |
|---|---|
| Metric, Unit Scale 1.0 (Blender default) | 1000 mm (1 m) |
| Metric, Unit Scale 0.001, Length set to Millimeters | 1 mm |
| Unit System set to None | 1000 mm (treated as a scale of 1.0) |
Either model in metres with the default scene, or set Unit Scale to 0.001 and model in millimetres. Both work. Just make sure the line in Settings matches how you actually modelled.
If every part looks 1000 times too big or too small, this is the setting to check.
How parts are measured
Every mesh object in the watched collection is treated as one part.
- Size comes from the object's oriented bounding box, with the object's scale applied and any modifiers included. Rotation does not matter: a board lying flat or standing on edge gives the same result.
- Length, width, thickness. The three box dimensions are sorted. Largest is length, middle is width, smallest is thickness.
- Non-box shapes are measured by their bounding box. An L-shaped or curved part is nested as the full rectangle around it.
- Zero-thickness meshes (flat planes) are skipped, with a note.
- Hidden objects are skipped by default. Switch this off with Skip hidden objects in Settings.
- Child collections are included by default. Switch this off with Include child collections.
- Non-mesh objects (curves, empties, lights, cameras) are ignored.
- Registered board models are never counted as parts. See Registering a model as a board.
Identical parts (same cut size, thickness, board and lipping) are grouped into one cutlist row with a quantity and a part number such as #3.
Per-part settings
Select a mesh and open the Active Part sub-panel:
| Setting | What it does |
|---|---|
| Board | Force this part onto a specific board type. Empty means automatic, by thickness. |
| Grain | Follow board uses the board's grain setting. Lock never rotates this part. Free allows a 90 degree turn. |
| Exclude from cutlist | Leaves the object out of the cutlist and the cost (handy for hardware mockups, reference models and so on). |
Boards and prices
Open the Board Types & Prices sub-panel.
Use + and - to add or remove board types. For the highlighted board you can set:
| Field | Meaning |
|---|---|
| Name | Shown in the cutlist and on the exported pages. |
| Thickness | In mm. Used to match parts to this board. |
| Length / Width | Sheet size in mm (default 2440 x 1220). |
| Price / sheet | Cost of one full sheet. |
| Grain along length | When on, parts keep their length along the sheet length and are not rotated. Turn it off for boards without a grain direction, such as MDF, to allow tighter nesting. |
How a part finds its board
- If the part has a Board set in Active Part, that board is used. WoodCut warns you if the thickness differs noticeably.
- Otherwise every board whose thickness is within Thickness tolerance (default 0.6 mm) of the part is a candidate.
- If several boards qualify, WoodCut nests the parts on each and keeps the one that leaves nothing unplaced, then costs the least, then uses the fewest sheets, then wastes the least.
- If no board matches, the part goes on the Fallback board (set at the bottom of the Board Types panel, or the first board in the list) and a note is added.
Assign Board to Selected applies the highlighted board type to all selected mesh objects in one go.
Registering a model as a board
If you like to model your actual sheets (for example a plywood sheet laid out in the scene):
- Select the sheet's mesh object.
- Click Register Selected Object as Board.
- Set its price.
The object's dimensions become the sheet length, width and thickness. With Follow model size on, the board updates if you resize the model. Registered objects are not counted as parts, and they are tinted with the Plywood colour (default #656D4A) when viewport colouring is on.
Lipping (edge banding)
Lipping is the solid-wood or tape edging applied to the exposed edges of a panel.
Lipping types
Open the Lipping sub-panel. Use + and - to manage lipping types. For each one set Strip thickness (mm), Price / metre, and a colour (used in the viewport and in the exports).
Two options apply to all lipping:
- Lipping waste (%) (default 10). Extra length added when costing, to cover offcuts and trimming. Billed length = lipped length x (1 + waste).
- Deduct lipping from cut size (off by default). Turn it on if your model shows the finished size of the part. WoodCut then subtracts the strip thickness on each lipped edge from the size cut from the sheet. Leave it off if you modelled the bare panel.
Marking lipped edges
- Enter Edit Mode on the part.
- Select the edge faces that get lipping (the thin side faces of the panel, not the large faces).
- Pick a lipping type in the list and click Lip Selected Faces.
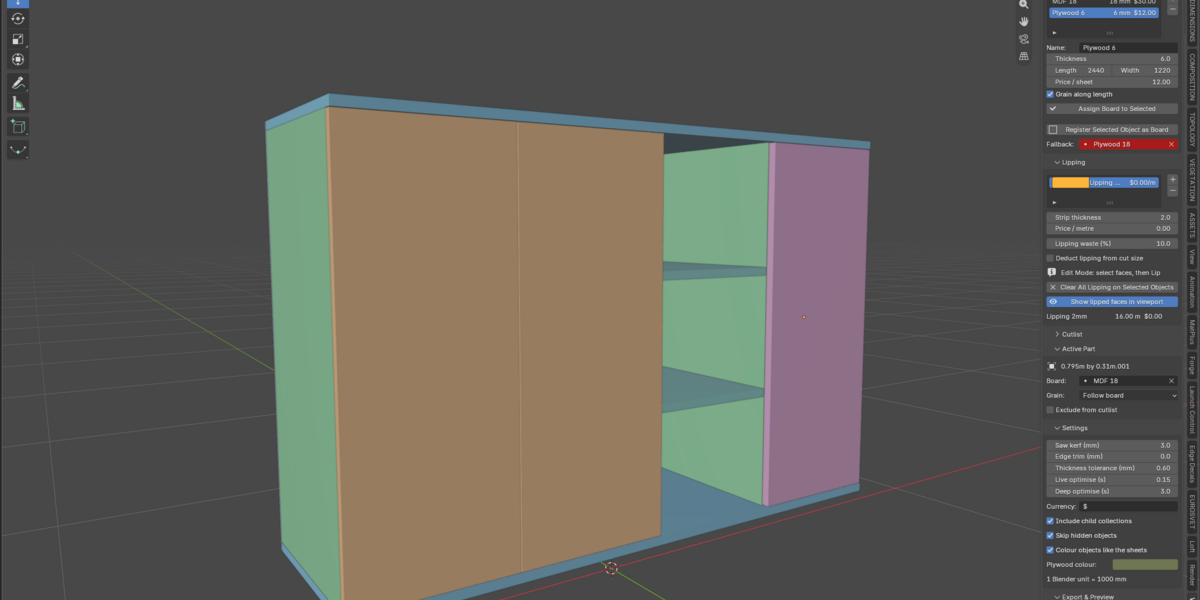
While Live Cutlist is on, marked faces are tinted in the viewport in the lipping colour (toggle with Show lipped faces in viewport). The cutlist then shows which edges are lipped, and the lipping length and cost are included in the total.
Other Edit Mode buttons:
- Clear Lipping on Selected Faces removes lipping from the selected faces.
- Select Lipped Faces selects every face already marked.
In Object Mode, Clear All Lipping on Selected Objects removes lipping from the selected objects.
Good to know:
- You can mark faces on several objects at once by editing them together in multi-object Edit Mode.
- Only the thin edge faces count. Faces marked on the large top or bottom surface are ignored, and WoodCut tells you so in the notes.
- The lipped length of an edge never exceeds the length of that edge of the part.
- If you delete a lipping type that is still in use, those edges are ignored and a note is added.
- Lipping data is stored on the mesh as a face attribute named
woodcut_lip, so it saves with your.blendfile.
Sheet nesting
WoodCut arranges the parts on sheets using a guillotine layout. Every cut runs fully across the piece it divides, so the plan can be cut on a panel saw, table saw or track saw without awkward partial cuts.
The packer respects:
| Setting (in Settings) | Default | Meaning |
|---|---|---|
| Saw kerf (mm) | 3.0 | Material lost to the saw blade between parts. |
| Edge trim (mm) | 0.0 | Waste removed from every edge of each sheet before cutting. |
| Thickness tolerance (mm) | 0.6 | How close a part's thickness must be to a board's thickness to match it. |
| Live optimise (s) | 0.15 | Time spent searching for a good layout per board type while you edit. |
| Deep optimise (s) | 3.0 | Time spent when you click Optimise Harder. |
It tries to use the fewest sheets first, and among equal results prefers the layout that leaves the single largest reusable offcut. Sheets are listed fullest first, with the offcut-heavy sheet last.
While you edit, WoodCut uses a short time budget so the viewport stays responsive. When the cutlist settles, click Optimise Harder at the bottom of the main panel to search longer for a tighter layout. The status line then shows deep.
If a part is larger than the usable sheet, it cannot be placed. WoodCut reports it in the notes, for example Side_L (2500 x 600) does not fit a 2440 x 1220 sheet.
Reading the results
The top of the WoodCut panel shows:
- TOTAL: boards plus lipping
- Boards (n sheets): board cost
- Lipping: lipping cost
- Part count and calculation time
- Up to six warnings. The rest appear in the export.
The Cutlist sub-panel
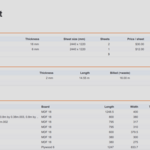
- One box per board type used: thickness, sheets needed, sheet cost, sheet size, and waste percentage.
- One row per distinct part:
#number, cut length x width x thickness, and quantity. A small icon marks parts with lipping. - Click a part number to select all the objects in that row in the viewport. Handy for finding what the cutlist is talking about.
- The panel shows the first 40 rows. The export lists everything.
Notes and warnings
WoodCut tells you when something needs attention, for example:
- A part has no board of matching thickness and went on the fallback board.
- A board or lipping type has no price set.
- A part does not fit on the sheet.
- A part's thickness differs from the board you assigned.
- A lipped face is on a large face rather than an edge.
Viewport colours
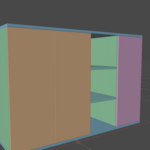
With Colour objects like the sheets on (default), WoodCut tints each part in the viewport using Blender's Object Color, so that same-size parts share a colour that matches the exported sheets. The first time it does this, it switches Solid shading in your 3D viewports to show Object colour.
Your original object colours are saved and restored when you turn Live Cutlist off, turn this option off, or an object leaves the watched collection.
Sheet preview in the viewport
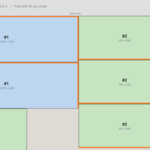
Under Export & Preview, switch on Show sheet preview in viewport, then use Sheet to step through the cutting layouts. Parts show their number and size, and lipped edges are drawn in the lipping colour.
Exporting PDF and PNG
Under Export & Preview:
| Field | Meaning |
|---|---|
| Folder | Where files are written. // (the default) means the same folder as your .blend file. If the file has not been saved yet, the system temp folder is used. |
| File name | Base name without extension (default woodcut_cutlist). |
| PNG px per mm | Image resolution, 3 to 14 (default 7). |
Click PDF, PNG or Both. The saved path is shown in the status bar. Open Export Folder opens it in your file browser.
The PDF is A4 landscape and contains:
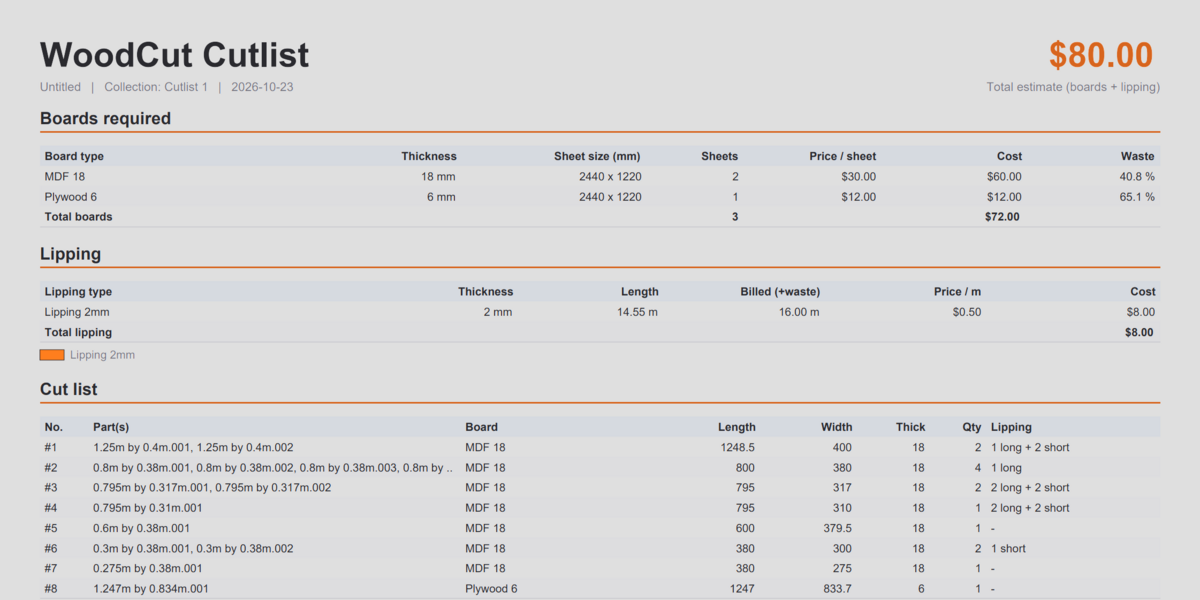
- A title block with the project name, collection, date and total estimate.
- Boards required: board, thickness, sheet size, number of sheets, price, cost and waste.
- Lipping: length, billed length (including waste), price and cost, with a colour key.
- Cut list: part number, part names, board, length, width, thickness, quantity and lipped edges.
- Notes: any warnings.
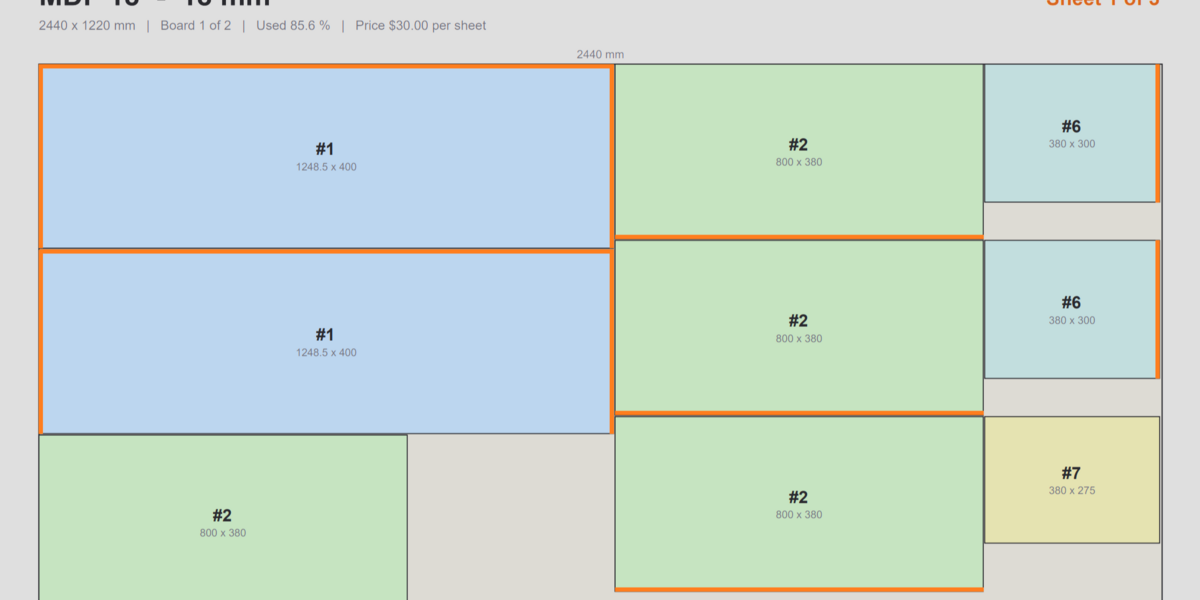
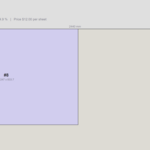
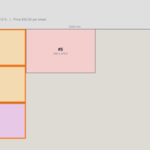
- One page per sheet showing the nested layout with part numbers, sizes and lipped edges.
The PNG contains the same pages stacked vertically in one image. For projects with many sheets, lower PNG px per mm to keep the image size manageable, or use the PDF.
You need an active Live Cutlist with at least one board in the result to export.
Panel reference
Main panel
| Control | What it does |
|---|---|
| Live Cutlist | Turns real-time calculation on and off. |
| Collection | The collection to watch. The button beside it picks the active Outliner collection. |
| Add Starter Catalogue | Shown when there are no boards yet. Adds example boards and a lipping type. |
| Optimise Harder | Recalculates now with the longer search time. |
Board Types & Prices: board list, name, thickness, sheet size, price, grain, Assign Board to Selected, Register Selected Object as Board, Fallback board.
Lipping: lipping list, strip thickness, price per metre, lipping waste, deduct-lipping option, Edit Mode buttons, overlay toggle, and a running total per lipping type.
Cutlist: board summaries and part rows.
Active Part (when a mesh is active): board, grain, exclude.
Settings: kerf, edge trim, thickness tolerance, live and deep optimise times, currency symbol, include child collections, skip hidden objects, object colouring, plywood colour, and the current unit conversion.
Export & Preview: folder, file name, PNG resolution, export buttons, open folder, and the sheet preview.
The Currency field is just a symbol shown in front of prices (default $). It does not convert anything.
Tips and best practice
- Model parts at their real size with the actual material thickness. WoodCut reads the geometry, so the model is the cutlist.
- Keep one collection per project. Use child collections to organise sub-assemblies, and leave Include child collections on.
- Put non-parts elsewhere (reference images, hardware, rooms), or use Exclude from cutlist.
- Apply scale if you can. Scale is taken into account, but clean geometry is easier to check.
- Use Grain: Free or Lock per part for the few parts where it matters, instead of changing the whole board.
- Turn grain off for MDF and other boards without a visible grain to allow tighter nesting.
- Set a realistic kerf (3 mm is typical for a table saw blade; thinner for a track saw).
- Use Edge trim if your supplier's sheets have rough factory edges.
- Click Optimise Harder before you export or order.
- Set a Fallback board so that odd thicknesses do not silently disappear into the wrong board.
- Check the Notes before you buy anything.
Limitations
WoodCut v1 is an estimating and planning tool. Please read these before relying on it for ordering.
- Parts are cut as rectangles from their bounding box. Shaped, curved or L-shaped parts are not nested by their true outline.
- The layout is a fast heuristic search. It gives good, practical results and respects guillotine cuts, but it is not guaranteed to be the mathematically optimal layout.
- Lipping is recorded on edge faces only, and its length is calculated from the faces you mark.
- Only mesh objects count as parts.
- The cutlist reads the active scene and one collection at a time.
- Prices are estimates: single price per sheet and per metre. There are no volume discounts, sales tax, offcut credit or labour costs.
- The PNG export is a single stacked image. Very large projects at high resolution create a very large file.
- Always check dimensions and add a margin before cutting expensive material.
Troubleshooting
The cutlist is empty or says "Pick a collection to watch". Choose a collection in the Collection field and make sure Live Cutlist is on.
It says "Add a board type first". Click Add Starter Catalogue or add a board with + in Board Types & Prices.
Sizes are wrong by a factor of 10, 100 or 1000. Check the unit line in Settings and read Units and scale.
A part is missing. It may be hidden (see Skip hidden objects), set to Exclude from cutlist, a non-mesh object, flat with no thickness, or registered as a board. Check the Notes.
A part went onto the wrong board. No board matched its thickness within the tolerance, so it used the fallback. Add a board of that thickness, raise Thickness tolerance, or set the Board on the part directly.
"does not fit" warning. The part is bigger than the usable sheet area (sheet size minus edge trim). Check the part size, the sheet size, or use a larger board.
The price shows 0. The board or lipping has no price yet. Enter it in the sub-panel. The Notes list anything still at zero.
Lipping is not counted. Make sure you marked the thin edge faces, not the large faces, and that a lipping type exists. In Edit Mode, Select Lipped Faces shows what is marked.
The calculation feels slow in a big scene. Reduce Live optimise (s) in Settings, put only the project's parts in the watched collection, and use Optimise Harder only when you are ready.
Object colours look wrong after turning WoodCut off. WoodCut restores them automatically. If you changed Solid shading colour to Object yourself, switch it back in the viewport shading menu.
Export did not appear where I expected.
If the .blend file has not been saved, exports go to the system temp folder. Save the file or set an absolute Folder path, then use Open Export Folder.
Changelog
1.0.0
- First release.
- Live cutlist from a watched collection, with automatic updates.
- Guillotine sheet nesting with kerf, edge trim and grain control.
- Board catalogue with thickness matching and cheapest-board selection.
- Register a model as a board.
- Lipping marked on faces, with viewport overlay, length and cost.
- Per-part board, grain and exclude settings.
- Viewport colouring and in-viewport sheet preview.
- PDF and PNG export.
Support
Questions, bug reports and feature requests are welcome. When reporting a problem, please include:
- your Blender version and operating system,
- the WoodCut version (shown in the panel header and Extensions list),
- a short description of what you did and what you expected,
- a small
.blendfile that reproduces it, if possible.
Have questions about this product?
Login to message
| Blender Extension Compatible | Yes |
| Published | about 2 hours ago |
| Blender Version | 5.0 - 5.2 |
| Extension Type | Add-on |
| Render Engine Used | Cycles, Eevee |
| License | GPL |
Discover more products like this
cabinet woodwork CutList Optimizer Export Interior 3d archviz