Blender X-Particles Importer
 blenderVfxMaster
X-Particles Importer for Blender - Detailed Documentation
Introduction
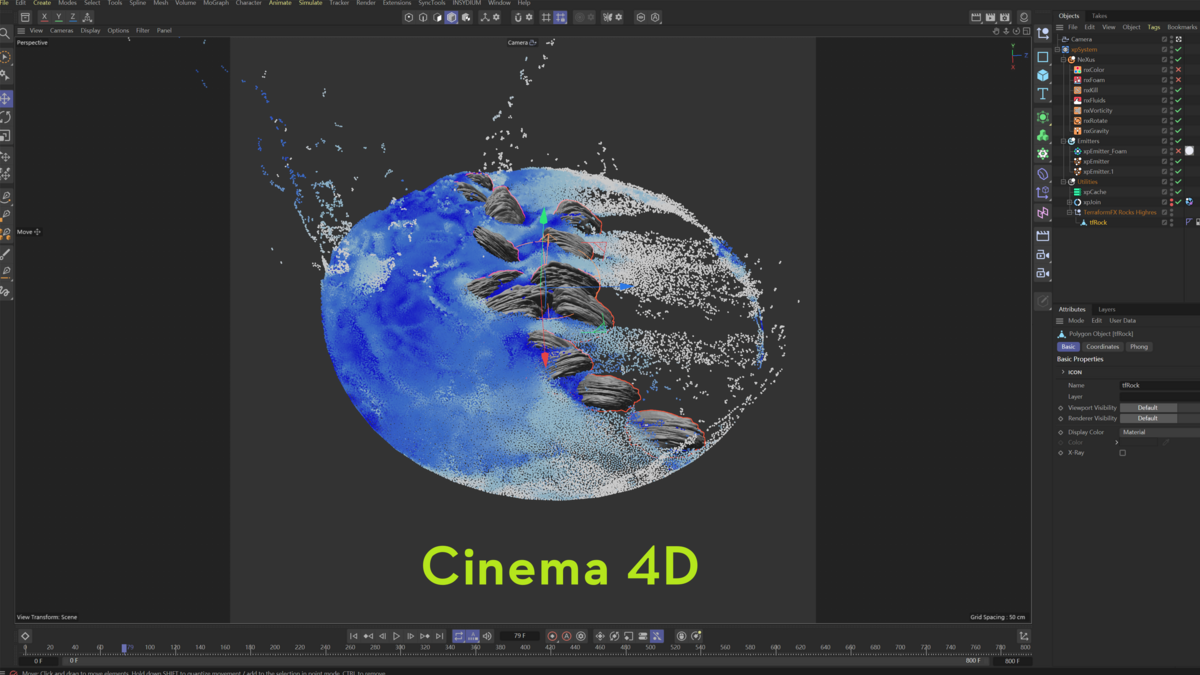
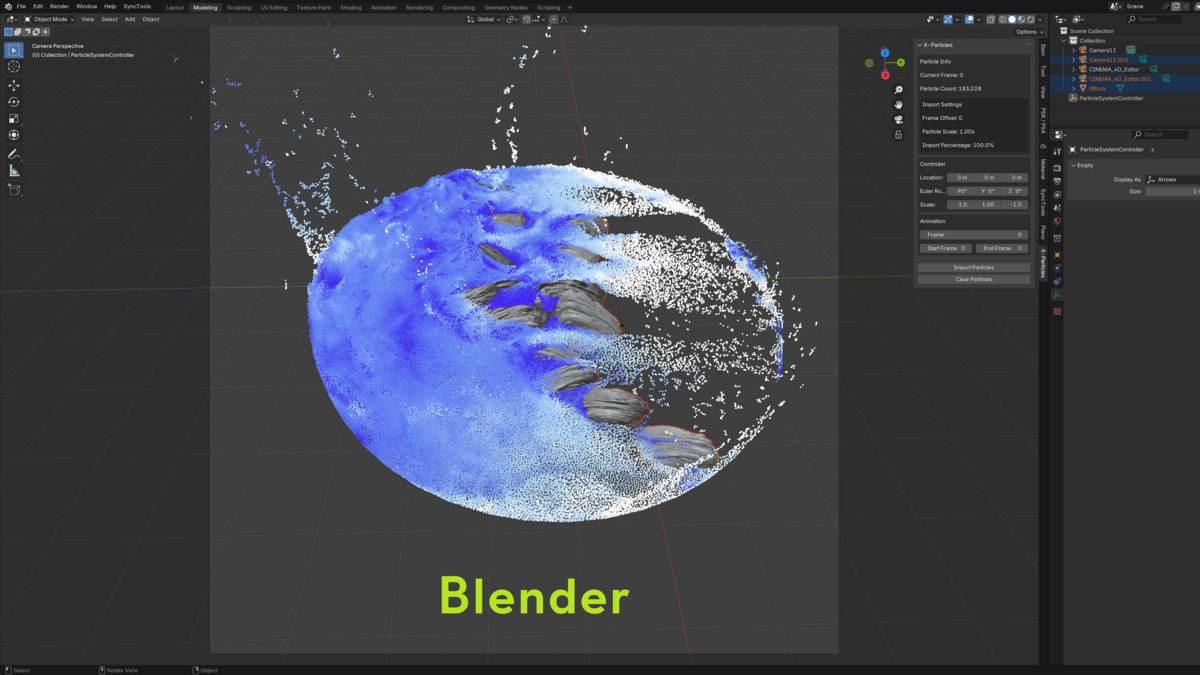
The X-Particles Importer is a powerful plugin that enables seamless import of X-Particles simulations from Cinema 4D into Blender. This document provides a detailed explanation of all parameters, settings, and controls available in the plugin, helping you make the most out of this tool.
Installation
-
Download the Plugin: Download the X-Particles Importer
.zipfile. -
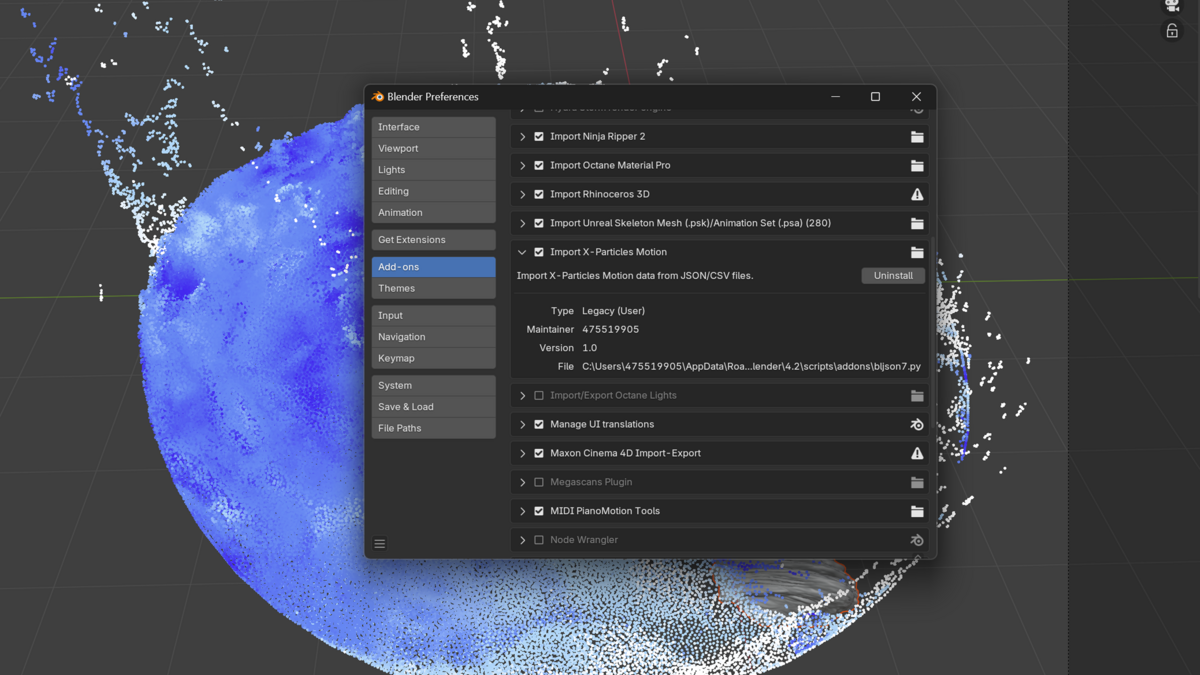
Install in Blender:
- Open Blender and go to
Edit > Preferences > Add-ons. - Click Install, select the
.zipfile, and enable the plugin.
- Open Blender and go to
-
Access the Plugin: In the 3D Viewport, press
Nto open the sidebar, then navigate to the X-Particles tab.
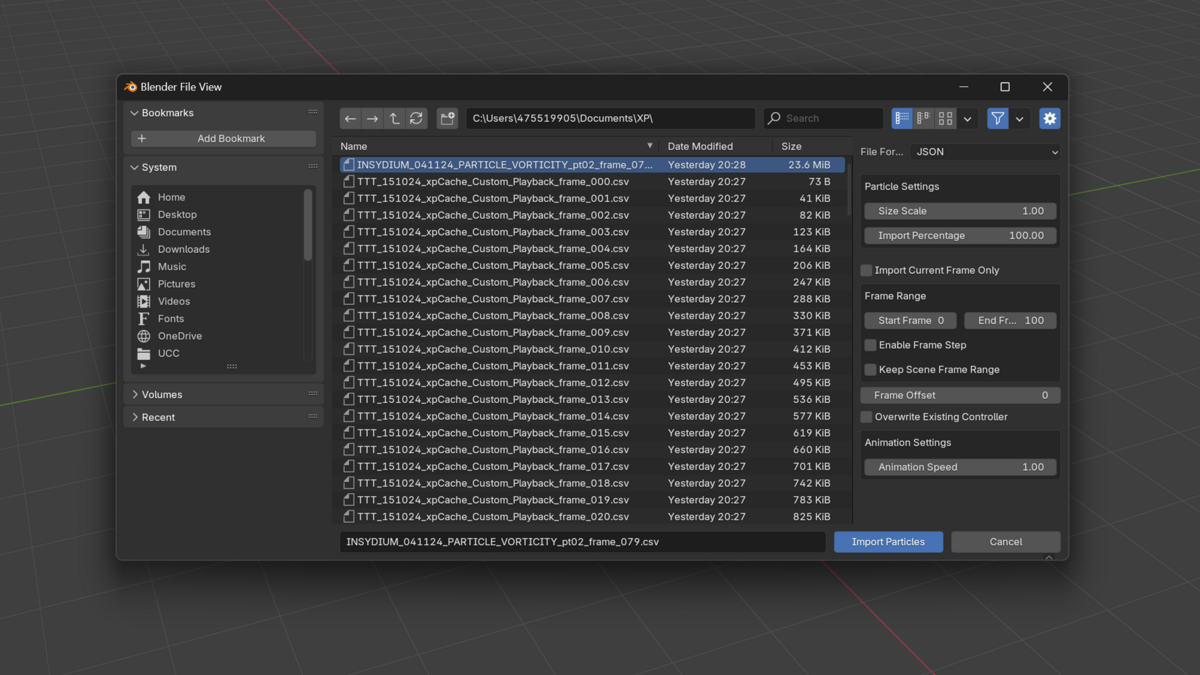
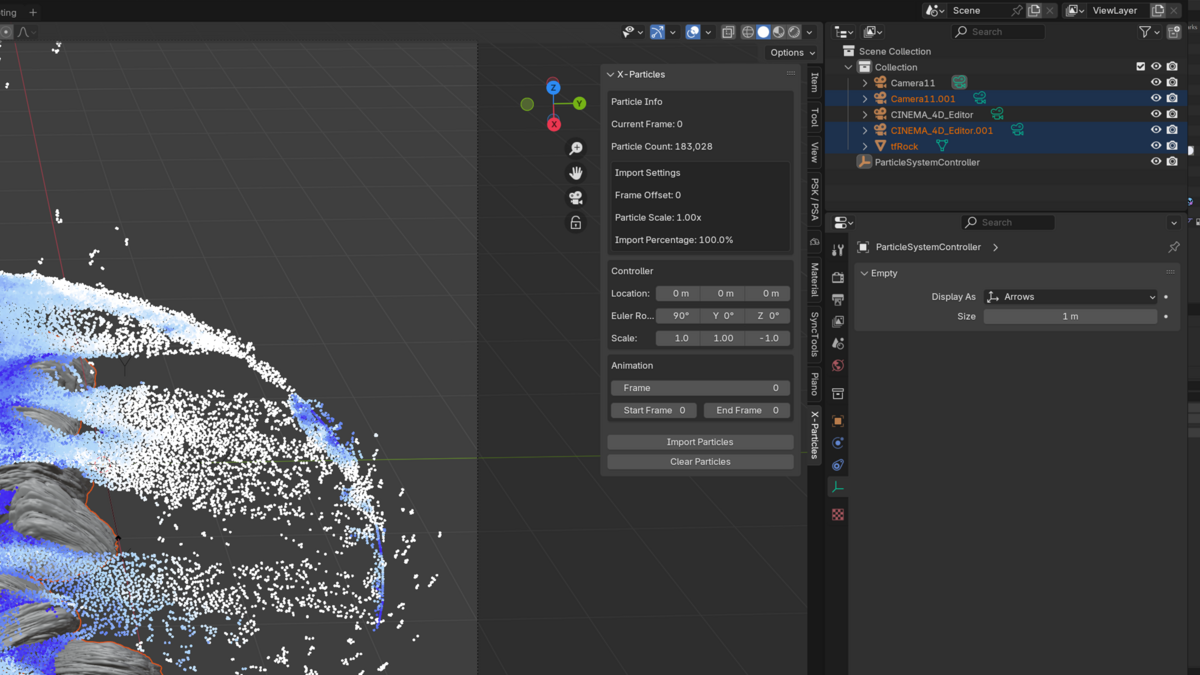
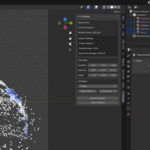
Import Panel
1. File Format
- JSON: Use this option if your X-Particles simulation is exported in JSON format.
- CSV: Select this for CSV format simulations.
Both formats must contain valid particle data, such as position, velocity, and frame information.
2. Particle Size
Adjust the visual size of imported particles in Blender:
- Default Range: 0.1 to 10.0.
- Larger sizes are helpful for previewing particles in the viewport.
3. Import Percentage
Control how many particles are imported from the source file:
- Range: 1% to 100%.
- Reducing the percentage helps optimize performance for large particle systems.
4. Frame Range
Define which frames of the simulation are imported:
- Start Frame: The first frame to be imported.
- End Frame: The last frame to be imported.
5. Frame Step
Specify the interval between frames to import:
- Default: 1 (imports all frames).
- Higher values skip frames, reducing the total imported data for better performance.
6. Frame Offset
Shift the imported animation along the timeline:
- Default: 0 (no offset).
- Use positive or negative values to move the sequence forward or backward.
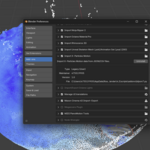
7. Override Scene Frame Range
- Enable: Adjusts the Blender scene’s frame range to match the imported particle animation.
- Disable: Retains the current scene frame range.
8. Replace Existing Particles
- Enable: Clears any previously imported particle systems before importing new ones.
- Disable: Appends the new particle system without removing existing ones.
Particle Controls Panel
1. Position Controls
- X, Y, Z: Adjust the global position of the entire particle system.
2. Rotation Controls
- X, Y, Z: Rotate the particle system around the respective axes.
3. Scale Controls
- X, Y, Z: Scale the particle system along individual axes for custom adjustments.
Animation Controls
1. Current Frame
Manually set the frame to view in the timeline.
2. Playback Range
Adjust the playback range for the particle animation:
- Start Frame: Set the starting frame for playback.
- End Frame: Set the ending frame for playback.
3. Play Animation
Start or pause the animation of the particle system in the Blender timeline.
Performance Optimization Settings
1. Lower Import Percentage
Reduce the number of particles imported to improve performance:
- Ideal for large simulations.
- Allows for faster previews without affecting original data integrity.
2. Increase Frame Step
Skip frames during import to reduce the total number of frames processed:
- Useful for reducing computational load on heavy simulations.
3. Use Smaller Particle Sizes
Minimize particle size to reduce viewport rendering load.
How to Import Particle Sequences
1. Sequence Naming Convention
Ensure files are named in the format:
basename_frame_###.json/csv
Where ### represents the frame number (e.g., particles_frame_001.json).
2. Importing the Sequence
- Select any frame from the sequence, and the plugin will automatically detect and load the entire sequence.
3. Adjust Frame Settings
Use Frame Range, Frame Step, and Frame Offset to customize the animation timing.
Common Issues and Solutions
Particles Are Not Visible
- Check Scale: Ensure particle size is set appropriately.
- Check Position: Verify the system is within the viewport.
- Enable Overlays: Make sure the “Overlays” option is active in Blender’s viewport settings.
Animation Looks Choppy
- Verify the Frame Step setting isn’t too high.
- Confirm all frames in the sequence were correctly exported from X-Particles.
Import Takes Too Long
- Reduce Import Percentage to limit particle count.
- Increase Frame Step to skip unnecessary frames.
Advanced Tips
1. Working with Geometry Nodes
Imported particle systems can be used with Blender’s Geometry Nodes for advanced effects:
- Create trails, meshes, or other visual elements based on particle data.
- Apply shaders or dynamic properties to the particles for enhanced visuals.
2. Exporting to Game Engines
- Use Blender’s native tools to export imported particle systems as FBX or other compatible formats.
- Apply animations and effects in engines like Unreal or Unity for game-ready assets.
3. Combining Multiple Systems
- Import multiple particle simulations into the same scene.
- Use the Particle Controls panel to adjust their positions, rotations, and scales for combined effects.
Troubleshooting
Supported Formats
- Ensure Files Are Valid: Only JSON and CSV formats exported from X-Particles are supported.
- Check File Structure: Files must contain positional and frame data to work correctly.
Performance Tips for Large Projects
- Use lower Import Percentage and higher Frame Step values for previews.
- Finalize settings before rendering with full particle counts.
Contact Support
If you encounter issues, consult the documentation or reach out to the plugin developer with your problem description and example files.
Conclusion
The X-Particles Importer is a versatile and powerful tool for bringing Cinema 4D’s X-Particles simulations into Blender. By understanding its settings and parameters, you can optimize your workflow, create stunning effects, and integrate advanced particle systems into your projects with ease.
Have questions about this product?
Login to message
| Published | 3 months ago |
| Software Version | 4.3, 4.2, 4.1, 4.0, 3.6 |
| Extension Type | N/A |
| License | GPL |
Discover more products like this
cinema 4d Unreal Engine unreal shader-control blender xparticles-importer dynamic effects unity film vfx Smoke Effects 3d animation houdini-integration particle simulation geometry nodes vfx tools game vfx Particles Import data-pipeline x-particles Cross-platform cinema4d-to-blender c4d Particle Effects VFX workflow-integration motion graphics alembic-io C4D to Blender Batch processing Real-time rendering fire animation unity3d simulation Fluid-simulation fx-tools technical-art blender particles