 Rana Abdullah


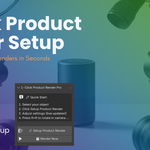
1-Click Product Render Pro
Blender Addon — v1.2.0
Author: Rana Abdullah
Compatibility: Blender 4.0 – 5.0+ · Cycles & EEVEE · Windows, macOS, Linux
What Is It?
1-Click Product Render Pro is a Blender addon that instantly sets up a complete, professional product photography scene — camera, lighting, background, render settings, animation, watermark, and export — from a single button click.
No manual scene assembly. No lighting guesswork. Just select your object and press ⚡ Setup Product Render. The addon handles everything else, and every parameter updates live in the viewport as you adjust it.
It is designed for 3D artists, freelancers, and product designers who need polished renders fast — for e-commerce listings, client deliverables, portfolio pieces, and social media content.
Feature Overview
| Category | Feature |
|---|---|
| Camera | Auto-framing, 85mm lens default, Depth of Field |
| Lighting | 4 professional presets, live energy & colour control, Light Mixer |
| Background | Solid, Gradient, HDRI — all with real-time preview |
| Ground Plane | Optional with Shadow Catcher (Cycles) |
| Animation | Turntable, Camera Orbit, Bounce/Float |
| Batch Render | Front, Side, 3/4, Top — auto-named and organised |
| Resolution | 1080p, 4K, 1:1, 4:5, 9:16, and fully Custom |
| Watermark | Text overlay via Compositor, position and opacity control |
| Export | Auto-export path, smart folder creation |
| Utilities | Scene Cleanup, Reset to Defaults, What's New popup |
Installation
- Open Blender 4.0 or later
- Go to Edit → Preferences → Add-ons
- Click Install… (top right)
- Select the downloaded
one_click_product_render_pro_v1_2.zip— do not extract it first - Enable the addon by ticking the checkbox next to 1-Click Product Render Pro
- Close Preferences
The panel appears at:
View3D → Sidebar (N key) → ProductRender tab
Updating from v1.1: Go to Preferences → Add-ons, disable and remove the old version, then install the new zip using the same steps above.
Quick Start
- Open a .blend file and select your product object
- Press N to open the Sidebar and click the ProductRender tab
- Click ⚡ Setup Product Render
- Your scene is ready — camera, lights, and background are placed automatically
- Adjust any settings in the panel; the scene updates live
- Click 🎬 Render Now when you are happy with the setup
Panel Reference
Main Controls
⚡ Setup Product Render
The primary action. Analyses your selected object's dimensions, places a camera at the optimal distance and angle, creates a three-point lighting rig matching your chosen preset, sets up the background world shader, configures render settings, and optionally adds a ground plane and animation. All existing PRS objects are cleaned up first so the setup is always fresh.
🎬 Render Now
Runs Setup and immediately starts a render. If an animation type is selected, it renders the full frame range; otherwise it renders a single still.
Camera
| Setting | Default | Description |
|---|---|---|
| Focal Length | 85 mm | Higher values compress the scene (telephoto). Lower values add drama. 85 mm is the industry standard for product photography. |
| Depth of Field | On | Focuses on the target object and blurs the background using Blender's native DoF system. |
| Aperture (f-stop) | f/2.8 | Only visible when DoF is enabled. Lower values = shallower depth of field and stronger blur. |
The camera is named PRS_Camera and is set as the active scene camera. A Track To constraint keeps it pointed at the object at all times, so you can freely reposition it.
Lighting
Presets
| Preset | Character | Best For |
|---|---|---|
| Studio | Clean, even three-point rig | General product, white background shots |
| Soft Box | Large area lights, soft gradients and gentle shadows | Cosmetics, jewellery, clothing |
| Dramatic | Narrow spot key light, minimal fill | Electronics, watches, premium goods |
| Outdoor | Sun + sky fill | Lifestyle, sporting goods, outdoor gear |
Switching presets instantly rebuilds the lights without touching any other scene settings.
Light Mixer
Below the preset selector, the Light Mixer sub-panel gives you independent control over the three lights in the rig:
| Control | Description |
|---|---|
| Key Light Power | Absolute energy of the key (main) light in Watts |
| Light Tint | Colour applied to all three lights simultaneously |
| Fill Ratio | Fill light energy as a fraction of Key (0.4 = 40%) |
| Back Ratio | Back/rim light energy as a fraction of Key (0.6 = 60%) |
All four sliders update the lights live. This replaces the previous hardcoded ratios and gives you precise control over the balance of your lighting rig without rebuilding the scene.
Lights are named PRS_Key, PRS_Fill, and PRS_Back.
Background
| Setting | Options | Notes |
|---|---|---|
| Background Type | Solid / Gradient / HDRI | Completely rebuilds the World shader when changed |
| BG Color | Colour picker | Primary colour — used for Solid and as Color 1 in Gradient |
| BG Color 2 | Colour picker | Only shown when Gradient is selected |
| BG Strength | 0 – 10 | Controls the world shader emission strength |
| Add Ground Plane | Toggle | Adds a large plane below the object |
| Shadow Catcher | Toggle | Makes ground plane invisible except for shadows (Cycles only) |
Shadow Catcher
When both Add Ground Plane and Shadow Catcher are enabled and the engine is set to Cycles, the ground plane is set as a shadow catcher object (is_shadow_catcher = True). This means the plane does not appear in the render — only the shadow the product casts onto it is visible. The result is a product that appears to float on a perfectly clean background with a realistic contact shadow underneath it.
Shadow Catcher requires Cycles. The toggle is greyed out automatically when EEVEE is selected, and a warning label is shown.
Render
| Setting | Options | Notes |
|---|---|---|
| Engine | Cycles / EEVEE Next | Cycles uses GPU automatically if available |
| Samples | 4 – 4096 | 128 is a fast preview; 512–1024 for final output |
| Resolution | 1080p / 4K / 1:1 / 4:5 / 9:16 / Custom | See below |
| Format | PNG / JPEG | PNG includes alpha channel for compositing |
| Color Look | None / Low / Medium / High / Very High Contrast | Applied via Filmic colour management |
Resolution Presets
| Preset | Pixels | Use Case |
|---|---|---|
| 1080p (16:9) | 1920 × 1080 | Standard widescreen, presentations |
| 4K (16:9) | 3840 × 2160 | High-res delivery, print |
| Square (1:1) | 1080 × 1080 | Instagram grid, marketplace thumbnails |
| Portrait (4:5) | 1080 × 1350 | Instagram portrait feed |
| Story (9:16) | 1080 × 1920 | Instagram/TikTok Stories and Reels |
| Custom | User-defined | Any exact pixel dimension |
When Custom is selected, Width (px) and Height (px) fields appear directly below the dropdown. Changes update the render resolution in real time. Supports up to 7680 px on either axis.
Animation
| Type | Description |
|---|---|
| None | Static render — no keyframes are created |
| Turntable | The product object rotates 360° around its Z axis over the chosen frame range, with linear interpolation for constant speed |
| Camera Orbit | An Empty pivot is created at the object's origin. The camera is parented to it and orbits 360° smoothly while always facing the product |
| Bounce / Float | The object gently rises and falls in a smooth Bezier loop — amplitude is proportional to the object's size |
Start Frame and End Frame control the duration for all animation types. At 24 fps, 120 frames = 5 seconds.
For turntable and orbit exports, use 🎬 Render Now which automatically triggers animation rendering when an animation type is active.
Batch & Export
Multi-Angle Batch Render
Select which angles to render:
| Angle | Camera Position |
|---|---|
| Front View | Directly in front at mid height |
| Side (90°) | 90° left at mid height |
| 3/4 View | 45° front-right at elevated angle |
| Top-Down | Directly above |
Click 🎯 Render All Angles to render each selected angle sequentially and save them as individual files. Files are automatically named ObjectName_front.png, ObjectName_side.png, etc.
Files are saved to the Export Folder path if set, or to a renders/ folder next to your .blend file.
Auto-Export
When Auto-Export After Render is enabled, the render filepath is set to your chosen Export Folder before each render, so images are saved automatically without a save dialog. If no .blend file is saved and no path is set, a warning is shown.
Watermark
Enable the Watermark toggle in the panel header to activate.
| Setting | Description |
|---|---|
| Text | The watermark string (e.g. © Studio Name) |
| Opacity | 0 = invisible, 1 = fully opaque |
| Color | RGB colour of the watermark overlay |
| X Offset | Horizontal position in pixels from centre |
| Y Offset | Vertical position in pixels from centre |
The watermark is applied through Blender's Compositor using Alpha Over nodes. It is rendered into the final image rather than appearing in the 3D viewport.
Utilities
Reset to Defaults
Resets all addon properties to their original values and clears any animation keyframes set by the addon on the target object. PRS scene objects are not removed.
🗑 Remove PRS Objects
Removes all scene objects created by the addon (PRS_Camera, PRS_Key, PRS_Fill, PRS_Back, PRS_Ground, PRS_TurntableEmpty, PRS_CamOrbitEmpty) without changing any of your settings. A confirmation dialog prevents accidental deletion. Your product object and all its materials are untouched.
Use this when you want to hand off a clean file, rebuild the scene from scratch, or start fresh with a different lighting preset.
What's New in v1.2.0
Re-opens the update popup at any time.
What's New in v1.2.0
Shadow Catcher Ground Plane
The ground plane now supports a Shadow Catcher mode (Cycles only). When enabled, the plane disappears from the final render and only the shadows it receives are visible. This is the standard technique used in professional product photography to produce the floating-product-with-contact-shadow look without any post-processing.
Custom Resolution
A new Custom option in the Resolution preset dropdown reveals pixel Width and Height input fields. Any dimension from 1 px to 7680 px is supported. The resolution updates live in Blender's render settings as you type.
Light Mixer
The Fill and Back lights previously operated at hardcoded ratios (40% and 60% of Key respectively). These are now exposed as interactive Fill Ratio and Back Ratio sliders. Both update all three lights live and work across all four lighting presets. Default values are identical to the previous behaviour.
Scene Cleanup Operator
A dedicated 🗑 Remove PRS Objects button in Utilities removes all addon-created scene objects in one step, with a confirmation dialog. Settings are preserved. Previously, the only way to clear PRS objects was to delete them manually or run Setup again.
Version History
| Version | Date | Summary |
|---|---|---|
| v1.2.0 | 2026-05-07 | Shadow Catcher, Custom Resolution, Light Mixer, Scene Cleanup, What's New popup |
| v1.1.0 | 2026-02-18 | Watermark system, Bounce/Float animation, smart export paths, UNDO support on all operators |
Troubleshooting
The panel does not appear
Make sure you installed the .zip file directly — do not extract its contents first. Restart Blender after installing. Check that the addon is enabled (checkbox ticked) in Edit → Preferences → Add-ons.
Shadow Catcher has no effect
Shadow Catcher requires the Cycles render engine. Switch to Cycles in the Render section of the panel. The toggle is greyed out automatically when EEVEE is selected.
Batch render saves to the wrong folder
Set an explicit Export Folder path in Batch & Export, or save your .blend file first so the addon can create a renders/ folder next to it.
The camera does not frame my object correctly
Make sure your object's scale is applied (Ctrl+A → Apply Scale in the 3D viewport) before running Setup. Un-applied scale causes incorrect dimension calculations.
Turntable animation has no movement
Confirm that Animation Type is set to Turntable before clicking Setup. If you change the animation type after setup, run Setup again — it rebuilds the keyframes each time.
HDRI background appears black
Set the HDRI Image path in the Background section to a valid .hdr or .exr file, then run Setup again. The file path must be accessible on disk at render time.
What's New popup does not appear
This popup fires once per version on Blender startup. If it has already been dismissed, click What's New in v1.2.0 in the Utilities panel to reopen it. Version state is stored in prs_version_seen.json inside the addon folder.
Technical Notes
- All managed scene objects use the
PRS_prefix so they are easy to identify and do not conflict with user-created objects of the same name - Camera uses a Track To constraint targeting the product object — it is safe to reposition the camera manually after setup
- Light energies are in Watts (Blender's physical units). Values are relative to the object's bounding sphere radius, so the same settings work across objects of any scale
- The addon uses only
bpyandmathutils— no external Python packages or pip installs are required - Compatible with Blender's Undo system (
bl_options = {'REGISTER', 'UNDO'}on all operators) - The What's New popup state is stored in
prs_version_seen.jsonin the addon's installation folder and persists across Blender sessions
1-Click Product Render Pro — One-time purchase, lifetime updates
