2Dfactory
 Tamara


2DFactory
Documentation
Refer to this .pdf file for a full documentation:
https://drive.google.com/file/d/19TgMfQLxBtxRZ8nAS0gEnZV491SWhs1_/view?usp=sharing
Camera Setup Panel

Fig. 1 Camera panel of 2DFactory, located in Blender side panel.
The add-on generates its own camera as soon as you set the Target to your model. The Target can be armature, mesh, or empty object. The generated camera is automatically constrained to your chosen Target, keeping it aimed at your model origin. For even more accuracy, you can assign a Subtarget (such as a bone if the Target is an armature or a vertex group if the Target is a mesh) to fine-tune the aim point.
The camera position is controlled from the panel using spherical coordinates defined by three variables: Radial Distance, Polar Angle, and Azimuthal Angle. For finer adjustments, you can use the Camera Offset values to pan the view with precision. With this kind of control, you can freely set the view of your model based on your need. For example, if your game is a side scroller, you can set the Polar Angle at near 90° and set the appropriate value of Azimuthal Angle. If instead you prefer top-down isometric sprite sheet, you can input Polar Angle as 54.74°.

Fig. 2 Using 2D Ruler under the 2DFactory Camera Panel, you can measure the pixel size of your sprites directly in Blender.

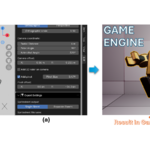
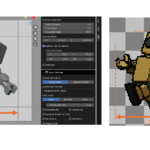
Fig. 3 You can set the pivot of your sprite sheet directly in Blender, by moving the Pivot Marker from the 2DFactory camera panel (a). The pivot values will be stored in sprite sheet metadata (e.g. JSON file). You can then put the custom pivot value in game engine (b).
Two helper tools are also provided inside this Camera Panel to make the sprite sheet preparation even easier (see Fig. 2):
- 2D Ruler – measure the pixel height or width of your rendered sprite directly in Blender.
- Pivot – define pivot coordinate from camera view that will be stored in the generated JSON metadata for accurate alignment in your game engine.
Rendering Settings

Fig. 4 Full view of Rendering Panel when (a) Render Custom Keyframe is unchecked, and (b) when Render Custom Keyframe is checked.
This panel defines how your animations will be rendered into the sprite sheets.
-
Save
Path (folder path)
Choose the folder where your sprite sheet will be saved. You can specify new folder name at the end of the path, the new folder will be automatically created. - Actions Queue

Fig. 5 (a) Action box, Mark Looping, and Direction Playback contained in entry of Action Queue. (b) Three menus from the drop-down list button (Extra Menu).
Use this Actions Queue box to manage which animations will be included in the render.
- Add (+) / Remove (–) –> add new entry or remove existing ones.
-
Extra
Menu
A drop-down for quick management of the entries (see Fig. 5b): - Refresh the Listed Actions– verify that the current actions in the list are still valid.
- List All Actions – search and populate the box with all actions that belong to the Target. Action that belongs to other model would not be added.
- Clear All Actions – remove everything from the list.
Each entry contains (see Fig. 5a):
- Action box – a pointer to the action. Only actions belonging to the selected Target (those with keyframes) are accepted.
- Mark Looping – a toggle to mark whether the action is looping or not.
- Direction Playback – mark the action animation play back either Forward, Reverse, or Ping-pong.
-
Directions
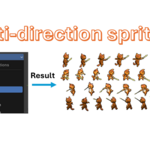
This drop-down menu lets you choose how many directions your model will be rendered from. For example, selecting 4-direction will render views every 90° starting from your current azimuthal angle. If your initial azimuthal angle is 30°, the add-on will render at 30°, 120°, 210°, and 300°. To the left of this menu, there is a toggle called Mirror Directions. When enabled, the add-on will only render half of the directions (from the initial azimuthal angle up to 180° ahead). For instance, using the same example above, it would render at 30°, 120°, and 210°, while the 300° direction is skipped—on the assumption that you will mirror the 120° result to obtain it. - Frame Render Preference

Fig. 6 Comparison of the resulting sprite sheet when no option is checked (default render), Sweep keyframe is checked, Skip last keyframe is checked, and both are checked. The Skip las keyframe here will only work if the action in the Action Queue is Marked Looping.
Under this section, there are two options:
- Sweep keyframe – Render every single frame between the first and last keyframe, instead of only the frames where keyframes are set.
- Skip last keyframe (looping) – Exclude the final keyframe when rendering looping actions (from Mark Looping) to avoid duplicate frames.
By default, this add-on renders only the keyframe set in the action animation (in Fig. 6, it is the frame 1, 3, 5, and 7). This will be useful if your intended sprite sheet animation follows "limited animation". But, if your usual workflow is a smooth-high-fps animation, then just check the Sweep keyframe, it will render every single frame the the first to the last keyframe. To prevent duplicate frame due to looping animation, the add-on provides Skip last keyframe which exclude the final frame.
-
Include
Bake
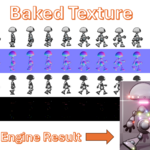
This is where you generate baked textures of your sprite sheet. There are five type of textures you can bake: Ambient Occlusion, Emmisive, Normal, Roughness, and Diffuse. Just toggle the check button of the corresponding bake texture to include it during rendering. Beside each check button, there is Preview Button which you can click to preview the bake result directly inside the Blender Image Editor.

Fig. 7 Under Include Bake, you can preview the bake texture by clicking the Preview Button. The result will be shown in the Blender Image Editor.

Fig. 8 Example of bake result for Normal and Ambient Occlusion. Note that, these sheets will be exported in separate .png files.

Fig. 9 Baking work for both Orthographic (a) and Perspective (b) camera view.
The baking work both work on Orthographic and Perspective camera view (see Fig. 9). When you check the Diffuse, you will see extra option called Use Diffuse as Main Sheet. If you check such option, it will replace the standard render sheet with the diffuse sheet. The transparent area from the standard render sheet will be applied to the diffuse sheet. Finally, at the very bottom of this Include Bake section, there is Use Recommended Settings option (see Fig. 7). Checking it will enforce the efficient and optimized cycles settings for the baking:
- Render Device: CPU
- Samples: 2 for non-AO bakes (AO bake samples use the user-specified value)
- Denoise: Disabled for non-AO bakes (AO denoise uses user-specified value)
- Use Tiling: Off (applies if the rendered resolution has width or height lower than 4096 px)
- Max Ray Distance: 0
- Cage extrusion: 0
-
Execute
Render
This button will execute the creation of the sprite sheet based on the Camera Setup and the Rendering Settings that you have set. The rendering follows the current render settings you have set in the Render Properties. You can press hold Ctrl + Backspace to abort the rendering process. -
Custom
Render Keyframe
If you prefer to create sprite sheet without action, you render user-inputted frames by enabling this option. and the Actions Queue box will be replaced by two new fields: - Action/tag Name – This set the action/tag of your custom render and used as the resulting sheet name.
- User-input Frames – This is where you input your custom frames to render:
- Use comma-separated values (e.g., 1,2,4:7,10).
- Colon (:) denotes ranges — e.g., 4:7 means 4,5,6,7.
- A single colon ':' renders all frames between start and end of scene timeline.
- Typing :4 will render frames from start (active timeline) to frame 4, while typing 4: will render frames from 4 to the last (active timeline).
Export Settings

Fig. 10 Full view of Export Settings panel if (a) Single Sheet option is selected, (b) Separate Sheets option is selected.
This panel defines the export settings after the rendering is finished. The first option in this panel is Sprite Sheet Output, where you can choose whether your sprites are exported as a Single Sheet or as Separate Sheets.
-
Single
Sheet
If your workflow involves producing low-resolution sprites (e.g., pixel art) along with a JSON file, the Single Sheet option is recommended. You can set the sheet filename in Sprite Sheet Filename. The JSON file is generated in Aseprite format. When rendering multiple actions, the add-on will place each action in a new row of the sheet (Fig. 11a and 11b). If you re-render an action that already exists in the sheet, it won’t create a duplicate row; instead, the add-on updates the existing row for that action (Fig. 9c). The resulting JSON file will be updated automatically to reflect the change. Obviously, every run will overwrite the older sheet. But older sheet is will always be copied in the "reserved" folder, in case you want to recover it.

Fig. 11 File explorer view of the resulting output for the Single Sheet option. (a) First run with 3 actions: their sprites are stitched together into one sheet. (b) Second run adds a new action not yet in the sheet—it is appended as a new row. (c) Third run re-renders an action already present in the sheet (row 2), which updates/overwrites the existing row instead of creating a duplicate.
-
Separate
Sheets
In this separate sheets mode, instead of combining all actions into a single massive sprite sheet (which may exceed engine texture limits like 16k×16k), each action is saved in its own folder with its corresponding baked textures (see Figure 17a).
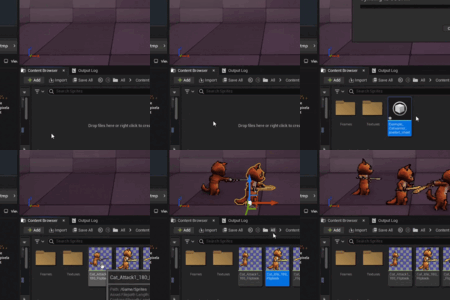
Starting from 2DFactory version 1.2.0, Separate Sheets Mode now includes a JSON file alongside the sprite sheet image in each action folder (Figure 17b). This change allows each sprite sheet animation to retain its full metadata through the JSON file. Keeping action folders limited to only the JSON file and corresponding sprite sheet(s) enables a faster workflow, allowing users to drag and drop multiple folders directly into the Unreal Engine Content Browser, instead of importing JSON files individually from each folder.
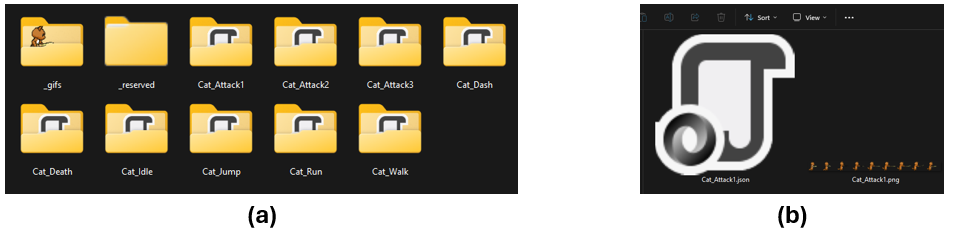
Fig. 12 Result of Separate Sheets Mode. (a) The exported sprite sheets are created in their respective folders based on the action. (b) Each action folder contains JSON file and the sprite sheet.
The Separate Sheets option is very useful if your rendered image has a big resolution. Because if you stitch them all into one single sprite sheet, the resolution can quickly become very large — and many game engines limit texture sizes to 16k. You can also control the maximum column the sprite sheet under Sprite Sheet Width Limit, just below the Separate Sheets option.
Other options in Export Settings panel:
-
Crop
Mode
This option lets you choose how to crop the rendered sprites: - Auto – Automatically detect and crop the sprite based on the transparent background.
- Expand Auto Crop – Add clearance outward to the Auto crop.
- 2D Ruler – Use the defined 2D ruler area on camera.
- None – No cropping.
-
Horizontal
Flip and Vertical Flip
Flip the rendered sprites horizontally or vertically. -
Export
as Power-of-Two
Makes the sprite sheet resolution conform to the nearest power of two. -
Produce
GIF
This field lets you generate .GIF file from your rendered sprites animation. - GIF fps – Frames per second of the GIF.
- GIF Background Mode
- Scene – Uses the scene’s background (transparent or not).
- Flat Color – Replaces transparency with a solid color.
- Create GIF Baked Textures – Also generates GIFs from baked textures.
Misc
The add-on automatically organizes its workflow by creating a dedicated collection called “Tdf_collection”, which stores the camera and other helper objects. Within it, you’ll find sub-collections that give you fine control over texture baking:
· Tdf_bake_include à Place any mesh here to ensure it’s included in the baking process (if it appears in the camera view).
· Tdf_normal_exclusionà Objects placed here will be excluded from the Normal Map bake.
· Tdf_AO_exclusion à Exclude objects from the Ambient Occlusion bake
· Tdf_roughness_exclusion à Exclude objects from the Roughness bake
· Tdf_emmisive_exclusion à Exclude objects from the Emmisive bake
Compatibility
Compatible with Blender 3.3 LTS through Blender 5.2.
Compatible with Windows, MacOS, and Linux (For MacOS and Linux, please install the add-on with 2DFactory Online Install .zip file)
-
2DFactory Unreal Engine Plugin: Ready for Unreal Engine Version: 4.27 through 5.7.
Check it out in Fab: www.fab.com/listings/0eaac510-c35b-4bbc-96f7-3fb9d1d43684 - 2DFactory Godot Plugin: Ready for Godot Engine Version: 4.4 through 4.7
- 2DFactory Unity Plugin: Ready for Unity 6.0 through Unity 6.6.
Have questions about this product?
Login to message
| Blender Extension Compatible | Yes |
| Sales | 40+ |
| Published | about 1 year ago |
| Blender Version | 3.3 - 5.2 |
| Extension Type | Add-on |
| Render Engine Used | Cycles, Eevee, Freestyle |
| License | GPL |
