Adc Relight
 ADC - Automotive Design Community


DOCUMENTATION
Getting Started with ADC Relight
The addon's panel is split into 5 numbered sections, top to bottom. This guide walks through them in the same order you'll see them in Blender — find the number, you'll always know exactly where you are.
INSTALLATION
|
THE PANEL, SECTION BY SECTION
Every numbered section, in order
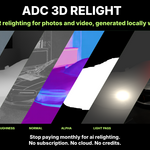
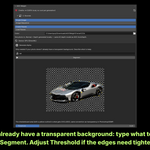
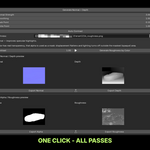
| 1 SourcesStart here with two toggles at the top: Single Image or Image Sequence. Single Image — set Color to your photo (under Create Passes) and click Generate Normal + Depth. The local AI reconstructs the surface geometry from your photo — this is what lets lights react to real direction and falloff instead of a flat 2D image. Already have Normal/Depth/Roughness maps from somewhere else? Switch to the Load Passes tab instead. Image Sequence — point Input Folder at a folder of numbered frames (export your video as frames first, with any editor or Blender's own VSE). Range Start/End auto-fills to match the files actually in that folder — use the refresh icon next to it (Sync Range) if you add more frames later, or to snap back to the Blender timeline's own range before picking a folder. Click Preview First Frame to load one representative frame into the settings above and dial everything in before running the full batch in 4. From then on, the timeline follows along automatically — scrub or play, and whichever frame you land on regenerates and shows up in the settings above (and in Open Live Preview, see 3) on its own. 🔬 HIGH-DETAIL NORMAL (AI) By default, the Normal map is derived from the Depth map's own gradient — fast, but limited to whatever detail Depth itself contains (which, for any depth model, is smooth surface shape, not fine texture). Tick High-Detail Normal (AI) to predict Normal directly from the photo instead, using a second AI model — panel seams, fabric folds, brick texture, and other fine surface detail come through that the gradient method never could. Trade-off: a second full AI pass, so generation takes longer. Normal Strength doesn't apply in this mode (it reads the photo directly, not the Depth map). Worth it for hero shots and close-ups; the default gradient method is still the faster choice for quick iteration or wide/distant shots where fine surface detail won't read anyway. ✂️ GENERATE ALPHA If your photo doesn't already have a transparent background: type what to keep (e.g. "the car") and click Segment. Adjust Threshold if the edges need tightening. The mask is always available to export once generated (Export Alpha, or as a pass in Export Frame Range). Tick Use for Depth/Normal Generation only if you also want it to constrain Generate Normal + Depth — leave it off if you just want the mask itself, e.g. for compositing elsewhere. ⚠ Beta on video: works great on single photos. Re-segmenting fresh on every frame of a sequence (AI-Segment Alpha per Frame, in 4) is still rough — edges can be inconsistent frame to frame. Being actively improved. |
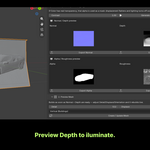
| 2 Preview MeshBuilds as soon as Normal + Depth are ready — this gives your lights real geometry to interact with, so shading and falloff look correct from any camera angle, not just straight-on. Detail and Displace rebuild it live as you adjust them. |
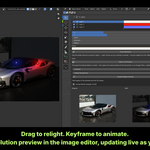
| 3 LightsClick Add Light and adjust position, color, and intensity — add as many as your scene needs. The relit result updates live as you drag the sliders, no re-generating. Want the lighting to change over time? Use Insert Keyframe here to animate any light property. 💡 TIP — WORK IN THE IMAGE EDITOR The thumbnail in the sidebar is small. Click Open Live Preview to open the same result at full resolution in a real Image Editor — it keeps updating live as you drag the light sliders, and you get normal zoom/pan, so it's a much easier way to actually judge your lighting than the small panel thumbnail. |
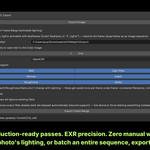
| 4 ExportMatches whichever mode you picked in 1: Single Image mode — Export Relit Image saves the current still. If you keyframed your lights in 3, use Export Frame Range instead: set Start/End, choose which passes you need (Relit, Light Pass, Normal, Depth, Roughness, Alpha), and export the whole lighting animation as an image sequence. Normal/Depth/Roughness/Alpha don't change frame to frame (same photo) — they're just re-saved under frame-numbered filenames, not recomputed, so this is fast. Image Sequence mode — choose your passes and output format (PNG, JPEG, TIFF, or OpenEXR), then click Process Sequence. It runs every frame in the range set in 1, reading your lights' current (or keyframed) values at each one. Both modes skip frames whose output already exists (tick Reprocess All to force redoing everything) — so if a batch gets interrupted, just run it again to pick up where it left off. |
GOOD TO KNOW
FAQ
| Do I need an internet connection? No — everything ships bundled with the addon and runs fully offline from the very first launch. | Do I need a GPU? No. It runs fine on CPU. Any DirectX 12 GPU (NVIDIA, AMD, or Intel) speeds things up automatically — no extra setup needed. |
| Does my photo need to already be cut out? No — use Generate Alpha (in Section 1) to describe what to keep in plain text and the AI masks it for you. | Which section do I use for a single photo vs. a video? Both live in the same two sections now — just switch the toggle at the top of 1. Sources between Single Image and Image Sequence. 5. Export automatically matches whichever you picked. |
| Can I use the results commercially? Yes — everything you generate is entirely yours, no royalties or attribution required. | A batch export got interrupted — do I have to start over? No — just run it again. Frames that already have output files are skipped automatically, so it picks up where it left off. |
Still stuck on something? Reach out through Superhive's messaging and we'll help you sort it out.
 Included
Includes 12 months of
- Support from ADC - Automotive Design Community
- Product updates
Extend this product’s Support Period +12 months: 50% of product price
Have questions before purchasing?
Login to message
| Blender Extension Compatible | Yes |
| Sales | 10+ |
| Published | about 2 months ago |
| Blender Version | 4.5 - 5.2 |
| Extension Type | Add-on |
| Render Engine Used | Cycles, Eevee |
| License | Mit |
Discover more products like this
product-visualization segmentation local ai Lighting Photo to 3D Relight normal map VFX relighting PBR ai depth map