Addon Controller - Enable/Disable, Sort & Search Addon Manager
 peterz



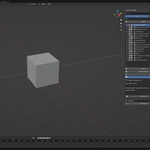
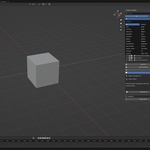
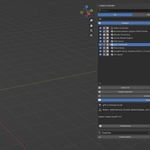
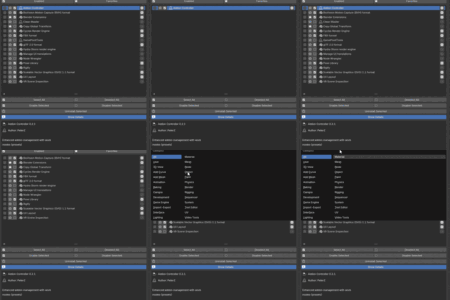
1. INSTALLATION & ACTIVATION
================================================================================
Step 1: Download the Addon
--------------------------
Download addon_controller.zip from Blender Market.
Step 2: Install the Addon
-------------------------
1. Open Blender
2. Go to Edit → Preferences → Add-ons
3. Click Install...
4. Select the downloaded addon_controller.zip file
5. Click Install Add-on
Step 3: Enable the Addon
-------------------------
1. Search for "Addon Controller" in the addon list
2. Check the box next to the addon name
3. The addon is now enabled
Step 4: Access the Interface
----------------------------
1. Press N in the 3D Viewport to open the sidebar
2. Find the Addon Ctrl tab
3. Click to enter the addon interface
================================================================================
2. INTERFACE OVERVIEW
================================================================================
Main Panel Layout
-----------------
The addon interface is divided into the following areas:
1. Top Toolbar
[Search Box] [Refresh Button]
- Search Box: Enter addon name for real-time search
- Refresh Button: Rescan installed addons
2. Filter Bar
[All] [Official] [Community] ← Support type filter
[Category Dropdown] ← Category filter
[✓ Enabled] [★ Favorites] ← Status filter
3. Addon List
Each addon item displays:
[☐] [★] [✓] [Icon] Addon Name [⏱ 0.123s] [⚙️]
- ☐: Selection checkbox (for batch operations)
- ★: Favorite button (click to toggle)
- ✓: Enable/Disable button (click to toggle)
- Icon: USER (user addon) or BLENDER (official addon)
- Addon Name: Full name display
- ⏱ 0.123s: Load time (if measured)
- ⚙️: Open preferences (only when addon is enabled)
4. Batch Operation Buttons
[Select All] [Deselect All]
[Enable Selected] [Disable Selected]
[Uninstall Selected]
5. Details Panel
After clicking an addon in the list, the following is displayed below:
- Addon name and version
- Author information
- Description
- Keymap list
- Keymap conflict warnings
- Quick action buttons
6. Global Actions
[Snapshots Menu ▼] [Safe Mode]
[Install Addon] [Batch Install]
================================================================================
3. BASIC OPERATIONS
================================================================================
Enable/Disable a Single Addon
------------------------------
Method 1: Click the ✓ button in the addon row
Method 2: Select the addon, then click the Preferences button in the details
panel (if enabled)
Search for Addons
-----------------
1. Enter the name in the top search box (supports partial matching)
2. The list filters in real-time to show matching items
Filter Addons
-------------
Filter by Type:
- All: Show all addons
- Official: Show only Blender official addons
- Community: Show only user-installed addons
Filter by Category:
- Select a category from the dropdown (e.g., "3D View", "Animation",
"Render", etc.)
- Select "All" to show all categories
Filter by Status:
- Enabled: Show only enabled addons
- Favorites: Show only favorited addons
Note: The two status filters cannot be enabled simultaneously.
Favorite Addons
---------------
1. Click the ★ button in the addon row
2. The star lights up when favorited
3. Click again to unfavorite
Use Cases:
- Quick access to frequently used addons
- Use with "Favorites Only" filter
View Addon Details
------------------
1. Click an addon in the list
2. Ensure "Show Details" is checked
3. View:
- Name, version, author
- Description
- Keymap list
- Keymap conflict warnings (if any)
Open Addon Preferences
-----------------------
1. Ensure the addon is enabled
2. Click the ⚙️ button in the addon row, or
3. Click the Preferences button in the details panel
Open Addon Folder
-----------------
Click the Folder button in the details panel to open the addon directory
in the file browser.
Access Addon Documentation
---------------------------
Click the Docs button in the details panel to open the documentation link
in a browser (requires the addon to provide wiki_url).
================================================================================
4. ADVANCED FEATURES
================================================================================
Batch Operations
----------------
Batch Selection:
1. Use search/filters to narrow down the list
2. Check the boxes for addons you want to operate on
3. Use "Select All" or "Deselect All" for quick selection
Batch Enable/Disable:
1. Check the target addons
2. Click Enable Selected or Disable Selected
3. Confirm in the dialog to execute
Note: Core addons cannot be disabled.
Batch Uninstall:
1. Check the addons to uninstall (only user addons can be uninstalled)
2. Click Uninstall Selected
3. Confirm in the popup dialog
4. Click Confirm Uninstall to complete
Safety Tips:
- Only user-installed addons can be uninstalled
- System/core addons are protected
- It's recommended to create a snapshot before uninstalling
Snapshot System
---------------
Create a Snapshot:
1. Configure the desired addon state
2. Click the Snapshots menu
3. Select Create New Snapshot
4. Enter a name (optional, defaults to timestamp)
5. Click OK
What's Saved:
- List of all currently enabled addons
- Timestamp
- Custom name
Restore a Snapshot:
1. Click the Snapshots menu
2. Select the snapshot to restore
3. Confirm to execute
Restore Process:
- Disables addons not in the snapshot
- Enables addons in the snapshot
- Shows the number of changes
Manage Snapshots:
- Rename: Click the Rename button next to the snapshot, enter a new name
- Delete: Click the X button next to the snapshot, confirm deletion
Snapshot Storage Location:
- Windows: %APPDATA%\Blender Foundation\Blender\3.6\config\addon_controller\snapshots\
- macOS: ~/Library/Application Support/Blender/3.6/config/addon_controller/snapshots/
- Linux: ~/.config/blender/3.6/config/addon_controller/snapshots/
Safe Mode
---------
Enter Safe Mode:
1. Click the Safe Mode button
2. Confirm, and all non-core addons will be disabled
Use Cases:
- Troubleshoot addon conflicts
- Resolve startup issues
- Test if problems are addon-related
Exit Safe Mode:
1. Click the Exit Safe Mode button
2. Automatically restores the addon state before entering safe mode
Note: Safe mode saves the state before entry and automatically restores it
when exiting.
Performance Monitoring
----------------------
Measure Addon Load Time:
1. Click the ⏱ button (refresh icon) in the addon list
2. The addon will be disabled and re-enabled
3. Load time is measured and displayed
Display Format: 0.123s (seconds, 3 decimal places)
View Load Times:
- Addons that have been measured will show load time in the list
- Click the refresh button to re-measure
Use Cases:
- Identify addons slowing down startup
- Optimize startup performance
- Compare load speeds of different addons
Keymap Management
-----------------
View Addon Keymaps:
1. Enable the addon
2. Check the "Keymaps" section in the details panel
3. Display format: Ctrl+Shift+T [3D View]
Detect Keymap Conflicts:
1. Enable relevant addons
2. Check the "Keymap Conflicts" section in the details panel
3. If conflicts exist, warning messages will be displayed
Conflict Message Format:
Key 'Ctrl+Shift+T' also used by 'Another Addon' in 3D View
Resolving Conflicts:
- Modify keymaps in Blender preferences
- Disable one of the conflicting addons
- Contact addon developers
Installing Addons
-----------------
Install a Single Addon:
1. Click the Install Addon button
2. Select a .zip or .py file
3. The addon list will refresh automatically after installation
Batch Install:
1. Click the Batch Install button
2. Select multiple files or an entire folder in the file picker
3. Supported file types: .zip, .py
4. Shows the number of installed addons after completion
================================================================================
5. USE CASES
================================================================================
Use Case 1: Project Switching
------------------------------
Problem: Different projects require different addon combinations.
Solution:
1. Create snapshots for each project
2. Restore the corresponding snapshot when switching projects
Example:
- Create "Modeling Project" snapshot (enable modeling-related addons)
- Create "Rendering Project" snapshot (enable rendering-related addons)
- Switch with one click when needed
Use Case 2: Performance Optimization
-------------------------------------
Problem: Blender starts slowly.
Solution:
1. Use performance monitoring to measure each addon's load time
2. Identify time-consuming addons
3. Temporarily disable unused addons
4. Create a "Fast Startup" snapshot
Use Case 3: Troubleshooting
----------------------------
Problem: Blender crashes or functions abnormally.
Solution:
1. Enter safe mode
2. Test if the problem disappears
3. Gradually enable addons to locate the issue
4. Update or disable the problematic addon after finding it
Use Case 4: Team Collaboration
------------------------------
Problem: Team members need unified addon configurations.
Solution:
1. Configure a standard addon combination
2. Create a "Team Standard Config" snapshot
3. Export the snapshot file and share it with team members
4. Team members import and restore the snapshot
$10
 Included
Includes 12 months of
- Support from peterz
- Product updates
Extend this product’s Support Period +12 months: 50% of product price
Have questions before purchasing?
Login to message
Discover more products like this
productivity batch operations Workflow Optimization system-tools Addon manager performance tools plugin Addon Management