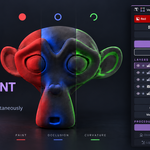
Vertex color for real work. Fill, set alpha and remove color across many meshes in one click, and paint every selected mesh at once with Blender's own Vertex Paint brushes. Pro adds Photoshop-style layers and procedural color from occlusion, curvature, textures and a light that follows your mouse.
It appears in Blender's add-on list as Advanced Vertex Color (Basic) or Advanced Vertex Color Pro.
Two editions, one listing. Basic is fill, alpha, remove, multi-object Paint, Gradient and Spline. Pro is everything in Basic plus layers and the procedural tools. Sections marked (Pro) below are Pro only. Install one edition at a time: if both are enabled, the second one declines to load and says so.
Version: 1.0.0
Blender: 3.3 – 5.2, one package for all of them — a modern extension on 4.2+, a classic add-on on 3.3 – 4.1
Platform: Windows, macOS or Linux. No native code, nothing platform-specific
Network use: None
Licence: GPL-3.0-or-later
Getting started
1. Install it
Edit ▸ Preferences ▸ Get Extensions ▸ Install from Disk (Blender 4.2+) or Edit ▸ Preferences ▸ Add-ons ▸ Install (3.3 – 4.1), pick the zip, and enable Advanced Vertex Color or Advanced Vertex Color Pro.
2. Open the card

In the 3D Viewport press Ctrl + Shift + C. A floating card appears with every control on it. The same controls are in the sidebar (N) under the Vertex Color tab.
3. Color something

Select faces in Edit Mode — across as many meshes as you are editing — or whole meshes in Object Mode, and press Red, Green or Blue. Each click is a single undo step, however many meshes it reached.
The card
The card is the add-on's interface: a floating panel drawn in the viewport, in the same navy and blue as the rest of the Tachyon Studio tools.
| Control |
What it does |
| Ctrl + Shift + C |
Summon or dismiss the card. Rebindable in the preferences, with any mix of Shift, Ctrl, Alt and Cmd (macOS) |
| Drag the header |
Move the card anywhere in the viewport |
| Drag the left or right edge |
Make it wider or narrower (240 – 720 px) |
| Dock button |
Dock the card into the sidebar's Vertex Color tab, and back out |
| × |
Close it |
Buttons that cannot act right now are greyed out, so the card always shows what is possible from where you are.
Fill, alpha and remove
| Button |
Edit Mode |
Object Mode |
| Red / Green / Blue |
Fills the selected faces, on every mesh you are editing |
Fills every selected mesh |
| Alpha 1 / Alpha 0 |
Sets the alpha of the selected faces and keeps the color |
Sets the alpha of every selected mesh |
| Remove |
Takes the color off the selected faces |
Removes the color attribute from every selected mesh |
A mesh with no color attribute gets one the first time you color it. Faces are filled per corner, so neighbouring faces can hold different colors without bleeding into each other.
Paint every selected mesh at once

Paint opens one Vertex Paint session across all the selected meshes. They are merged into a single temporary paint mesh in a Paint tab, so a stroke can cross from one mesh onto the next, and every Vertex Paint brush Blender has works on all of them together.
-
Red / Green / Blue set the brush color while you paint. Remove paints white.
- Started from Edit Mode with only some faces selected, the session paints only those faces (face masking on), and only on the meshes you were editing.
-
Apply writes the paint back into each mesh, in each mesh's own color format. Cancel throws it away and puts every mesh back exactly as it was.
- Leaving Vertex Paint any other way — switching mode, changing workspace — applies the paint too. Only Cancel discards it.
- Editing the paint mesh's geometry during a session is refused: it could no longer be split back into the originals. Undo the edit, or cancel.
Gradient

In a Paint session, Gradient lets you drag a line across the meshes. The colors blend along it and stay live until you apply.
| Control |
What it does |
| Color chips |
Red, Green and Blue toggle which colors the gradient runs through; Reverse runs them the other way |
| Transition |
From a hard edge (0) to a smooth blend (1) |
| Midpoint |
Where the halfway point sits along the line |
| Strength |
How much of the gradient goes over what was already there |
| Handles |
Drag either end of the line to move it |
| Redraw |
Draw the line again |
| Apply / Cancel |
Keep it as one undo step, or put the colors back exactly |
Spline

Spline is a freehand gradient. Draw a stroke over the meshes; when you let go it is fitted to a smooth curve with a few points, and the colors follow the curve. Drag any point to reshape it. It has the same chips and sliders as Gradient, and stays editable until Apply.
Layers (Pro)

Open Advanced at the bottom of the card. Every mesh gets a layer stack, like Photoshop, and nothing is destroyed until you flatten.
| Control |
What it does |
| + Paint Layer |
A new empty layer to paint on |
| Blend mode |
Normal, Multiply, Screen, Overlay, Soft Light, Hard Light, Add, Subtract, Difference, Darken, Lighten, Color Dodge, Color Burn |
| Opacity |
Per layer: drag the slider in its row (one undo step when you let go) |
| Eye |
Hide or show a layer |
| Solo (star) |
See only the starred layers, over black. Several can be soloed at once |
| Drag the grip |
Reorder the stack |
| Double-click the name |
Rename a layer |

| Blur / Sharpen |
Soften or crisp the active layer |
| Merge Down |
Merge the active layer into the one below |
| Flatten |
Bake the whole stack into your usual color attribute and remove the layers |
| Trash |
Delete a layer |
Layers carry through multi-object Paint sessions. While you paint a layer, the add-on draws the finished composite over the meshes, so you see the result, not just the layer.
Flatten before exporting. Layers are stored as color attributes named AVC <id>. Game engines and exporters read one color attribute, so press Flatten first: it bakes everything into your usual color attribute and removes the layer attributes.
Procedural layers (Pro)
In a Paint session, the Procedural layers row adds a layer that is computed rather than painted. Each one stays editable later: select it and press Edit.
Every procedural layer shares these:
| Control |
What it does |
| Red / Green / Blue / Invert |
Which channels it writes, and whether to invert the mask |
| Threshold |
Where the mask switches on |
| Contrast |
How hard the transition is |
| Strength |
How much of it goes over the layers below |
| Apply / Cancel |
Keep it (Enter) or throw it away |

Occlusion
Raycast ambient occlusion: creases and contact points get the color.
-
Distance — how far each ray looks.
-
Rays — more is smoother, fewer is faster.
-
Occluded by — All (every painted mesh), Own (each mesh on its own), or Scene (everything visible, painted or not).

Curvature
Colors the sharp edges, the crevices, or both.
-
Convex / Concave / Both — edges, cavities, or both.
-
Sensitivity — how sharp counts as an edge.
-
Smooth — soften the result.

Texture
Any image, read as grayscale: the light parts get the color.
-
The image — load one from disk, or step through the images already in the file with ‹ ›.
-
View — projected from where you are looking. From View projects again from the current view, and Front faces only keeps it off the back of the mesh.
-
Triplanar — projected from all three axes and blended, so every side is covered.
-
Scale — how often it repeats. Blend — how sharply the three projections meet (Triplanar).

Light
A directional light around the meshes: lit surfaces get the color, shadowed ones do not.
-
Click and drag anywhere in the viewport — the light follows the mouse.
-
+X … Down — snap it to an axis.
-
Azimuth / Elevation — set it exactly.
-
Softness and Rays — crisp or soft shadows.
-
Shade by angle — fade with the angle to the light, not just lit or shadowed.
-
Shadows from — All, Own, Scene or None.
-
Light From View — put the light where you are looking from.
Gradient and Spline layers
The Gradient and Spline tools also come as procedural layers, so a gradient can sit in the stack with its own blend mode and opacity and be edited later.
Preferences
Edit ▸ Preferences ▸ Add-ons ▸ Advanced Vertex Color:
| Setting |
What it does |
| Summon shortcut |
The key that shows and hides the card, with any modifiers. Restore Default puts back Ctrl + Shift + C |
| Card Interface |
Off shows the classic sidebar panels instead of the card |
| Card Width |
The card's width; dragging its edges changes it too |
| Card |
Floating in the viewport, or docked in the sidebar |
| Show on Startup |
Show the card as soon as Blender starts |
| Card Opacity |
How opaque the card is |
| Accent Hue / Saturation |
The card's colour theme |
| Drawn Icons |
Use the add-on's own icon set in the panels |
Limits worth knowing
-
One edition at a time. Basic and Pro cannot be enabled together; the second one declines and says why.
-
Layers need Flatten before export — see the tip above.
-
Geometry edits end a Paint session's ability to split. Adding or deleting vertices in the paint mesh is refused on Apply; undo the edit or Cancel.
-
Very dense meshes make Occlusion and Light slower, as they cast rays per vertex. Lower Rays while you look, raise it for the final.
Troubleshooting
Ctrl + Shift + C does nothing
Another add-on may use the same shortcut. Set your own in the preferences — any key, with any modifiers.
The colors don't show in the viewport
Set Viewport Shading ▸ Color to Attribute, or look in Vertex Paint mode.
Pro says the other edition is enabled
Disable Advanced Vertex Color (Basic) and restart Blender, then enable Pro.
The card is gone
Press Ctrl + Shift + C, or check whether it is docked in the sidebar's Vertex Color tab.
Network use and files written
None. The add-on opens no sockets, sends no telemetry and checks no licence. It writes nothing but its own preferences. Pro's Texture layer reads the image file you pick.
Support
Questions, bug reports and feature requests — join the Tachyon Studio Discord: https://discord.gg/sksWuJRsqS
 Tachyon Studio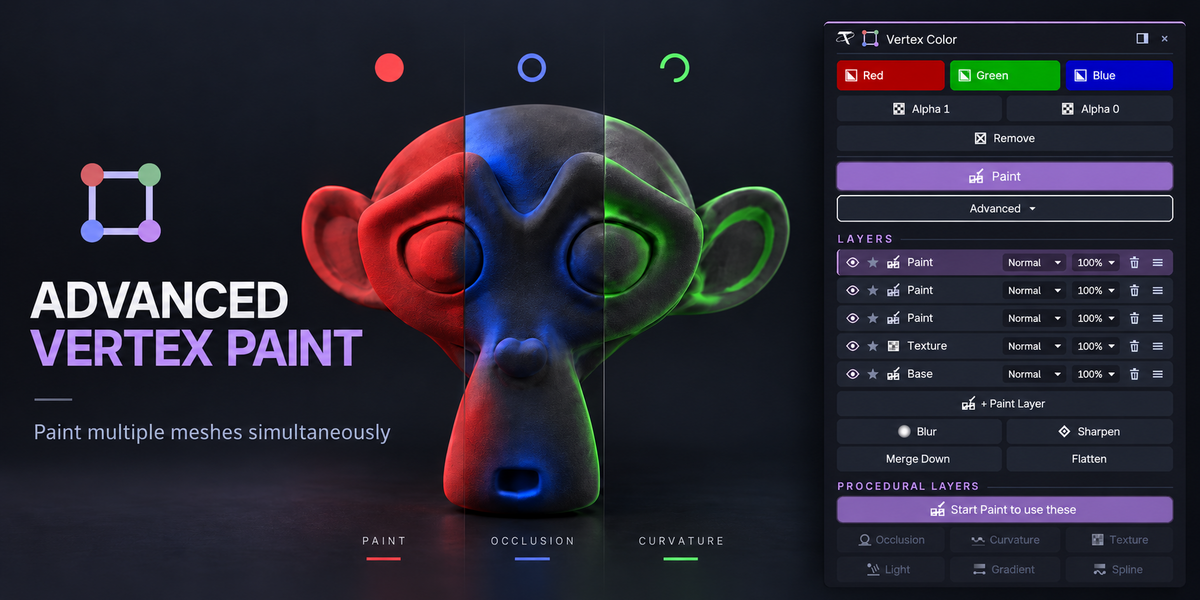
 Included