Advanced Weight Slider
 Fried Chickencat Store


Advanced Weight Slider - User Guide
繁體中文版本: https://github.com/Yuru778/Advanced-Weight-Slider-User-Guide-zh/blob/main/README.mdA Maya Component Editor-inspired vertex weight management tool for Blender
📖 Table of Contents
- Introduction
- System Requirements
- Installation Guide
- Interface Overview
- Core Features
- Weight Assignment
- Lock & Unlock Vertex Groups
- Weight Visualization Table
- Auto Normalization
- Quick Start Tutorial
- FAQ
- Support & Contact
Introduction
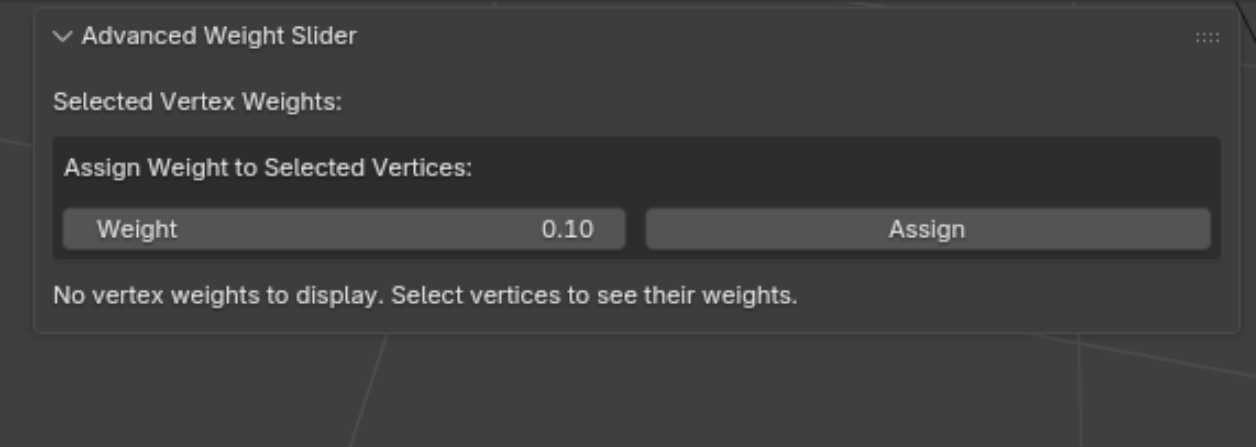
Advanced Weight Slider is a vertex weight management addon designed specifically for Blender, inspired by Maya's Component Editor. Whether you're an indie game developer, character rigger, or 3D animator, this addon enables you to manage vertex weights in a more intuitive and efficient way.
Key Features
- ✨ Precision Weight Adjustment - Easily set exact weight values for selected vertices
- 🔄 Auto Normalization - Automatically ensures weights sum to 1.0 for smooth deformations
- 🔒 Lock/Unlock Feature - Full control over your vertex groups to prevent accidental modifications
- 📊 Visual Table - Clearly displays weight distribution for each vertex
- 🎯 Seamless Integration - Naturally fits into Blender's existing workflow
System Requirements
| Requirement | Minimum Version |
|---|---|
| Blender | 4.2.0 or higher (tested and working on 5.0) |
| Operating System | Windows / macOS / Linux |
Installation Guide
Method 1: Install via Blender Extensions
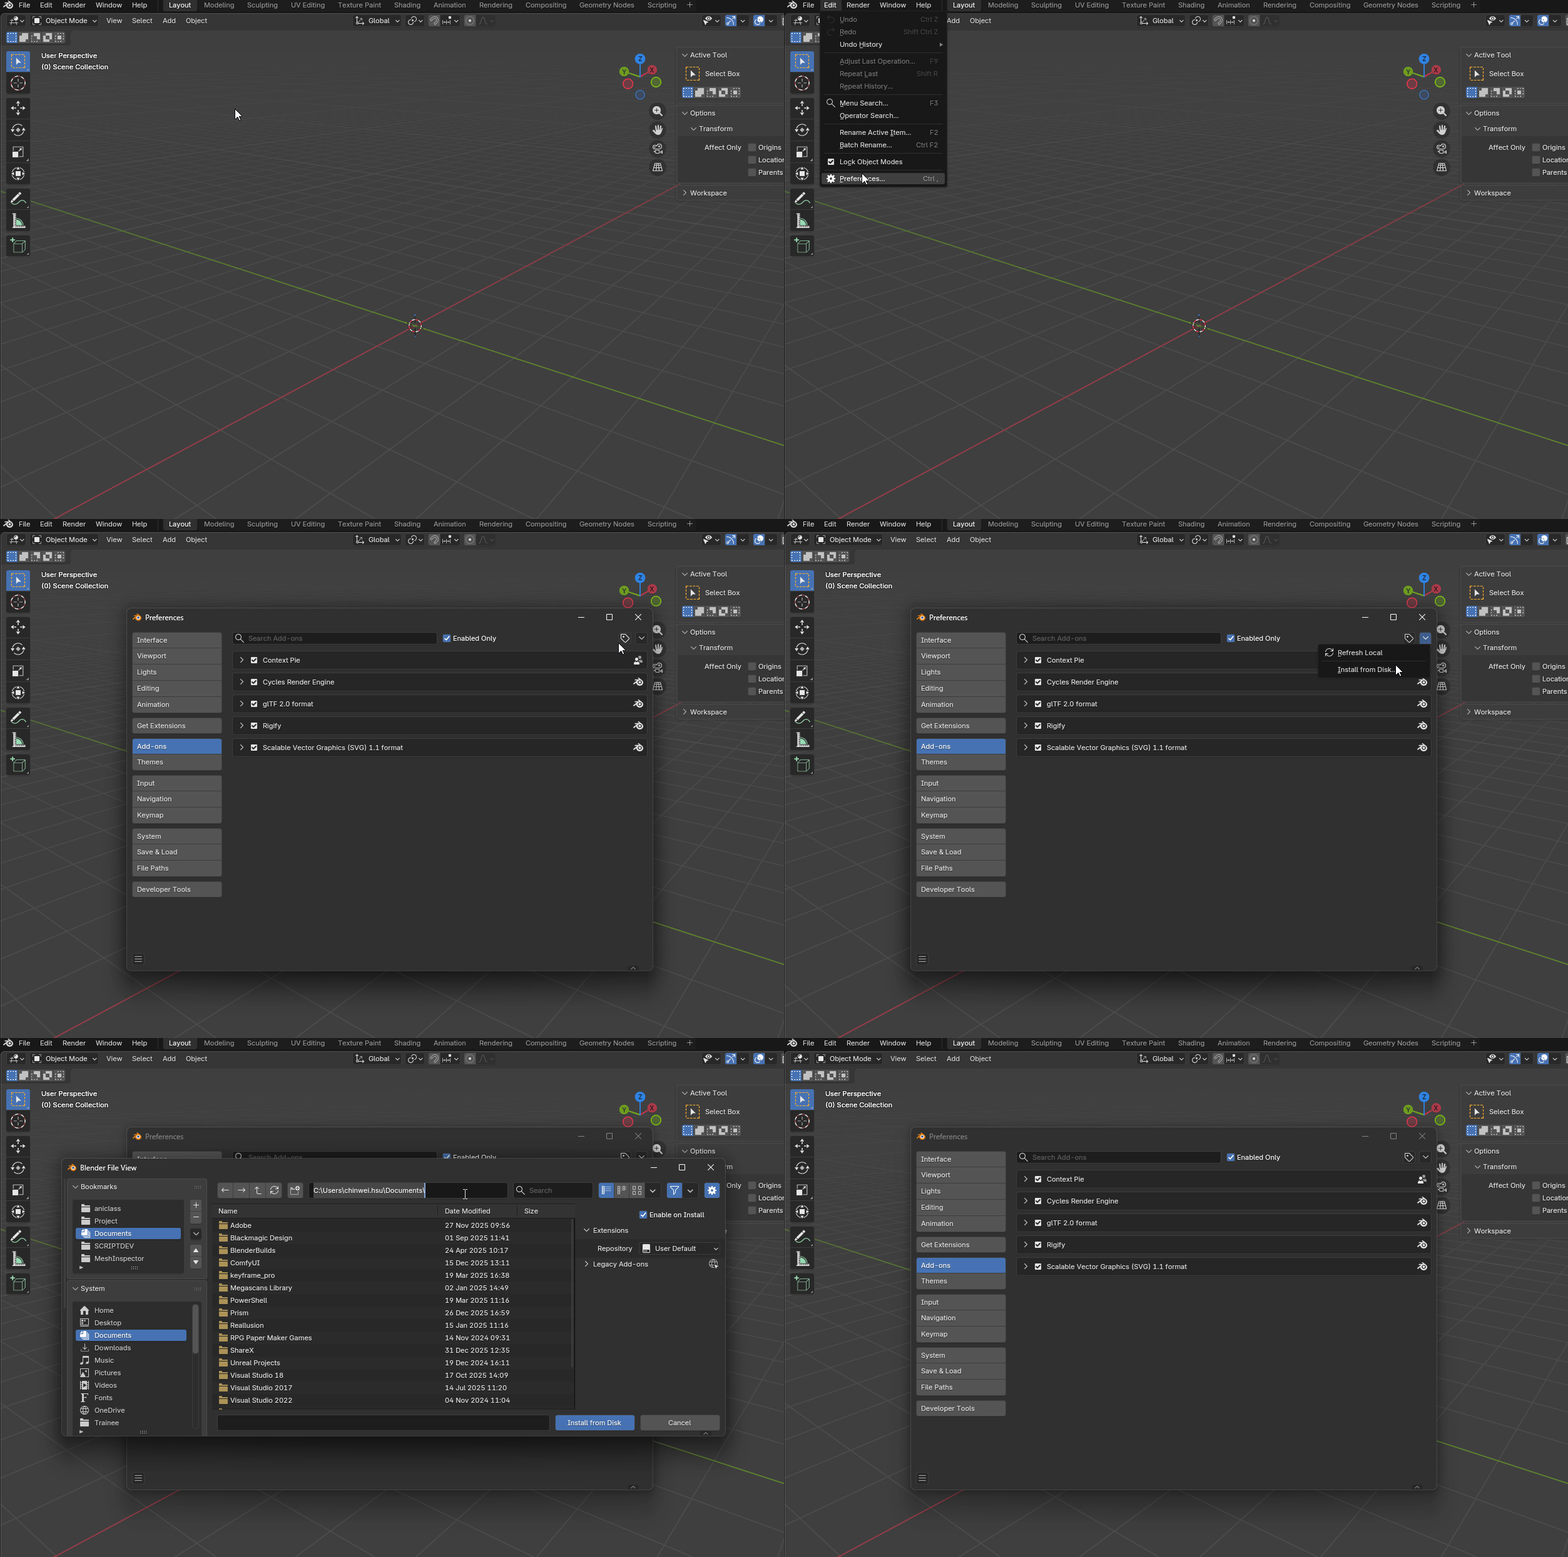
- Open Blender
- Go to Edit → Preferences
- Select the Add-ons tab
- Click the Install button in the top-right corner
- Select the downloaded .zip file
- Check the checkbox to enable the addon
Method 2: Manual Installation
- Extract the downloaded file
- Copy the blender_component_editor folder to Blender's addons directory:
- Windows: %APPDATA%\Blender Foundation\Blender\4.2\scripts\addons\
- macOS: /Users/[username]/Library/Application Support/Blender/4.2/scripts/addons/
- Linux: ~/.config/blender/4.2/scripts/addons/
- Restart Blender and enable the addon in Preferences
Interface Overview
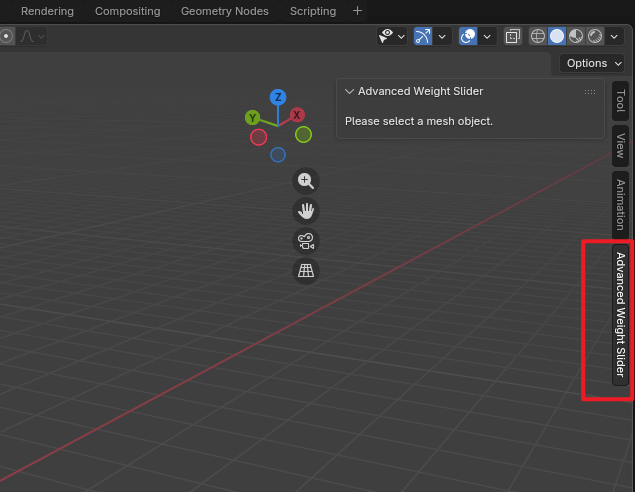
After installation, you can find the Advanced Weight Slider tab in the right sidebar of the 3D Viewport.
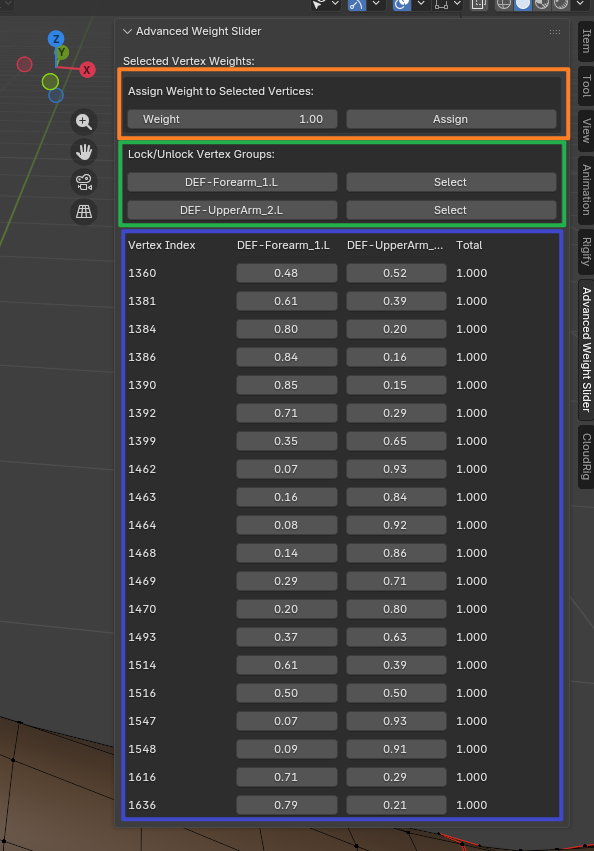
Interface Elements
| Area | Description |
|---|---|
| Weight Assignment Area | Set the weight value to assign and apply to selected vertices |
| Vertex Group Lock Area | Displays affected vertex groups with lock/unlock controls |
| Weight Table Area | Shows weight distribution for selected vertices in table format |
Core Features
Weight Assignment
Quickly assign precise weight values to selected vertices.
Steps:
- Select a mesh object with an Armature modifier
- Enter Edit Mode
- Select the vertices you want to adjust weights for
- Set the target weight value (0.0 - 1.0) in the Advanced Weight Slider panel
- Click the Assign button
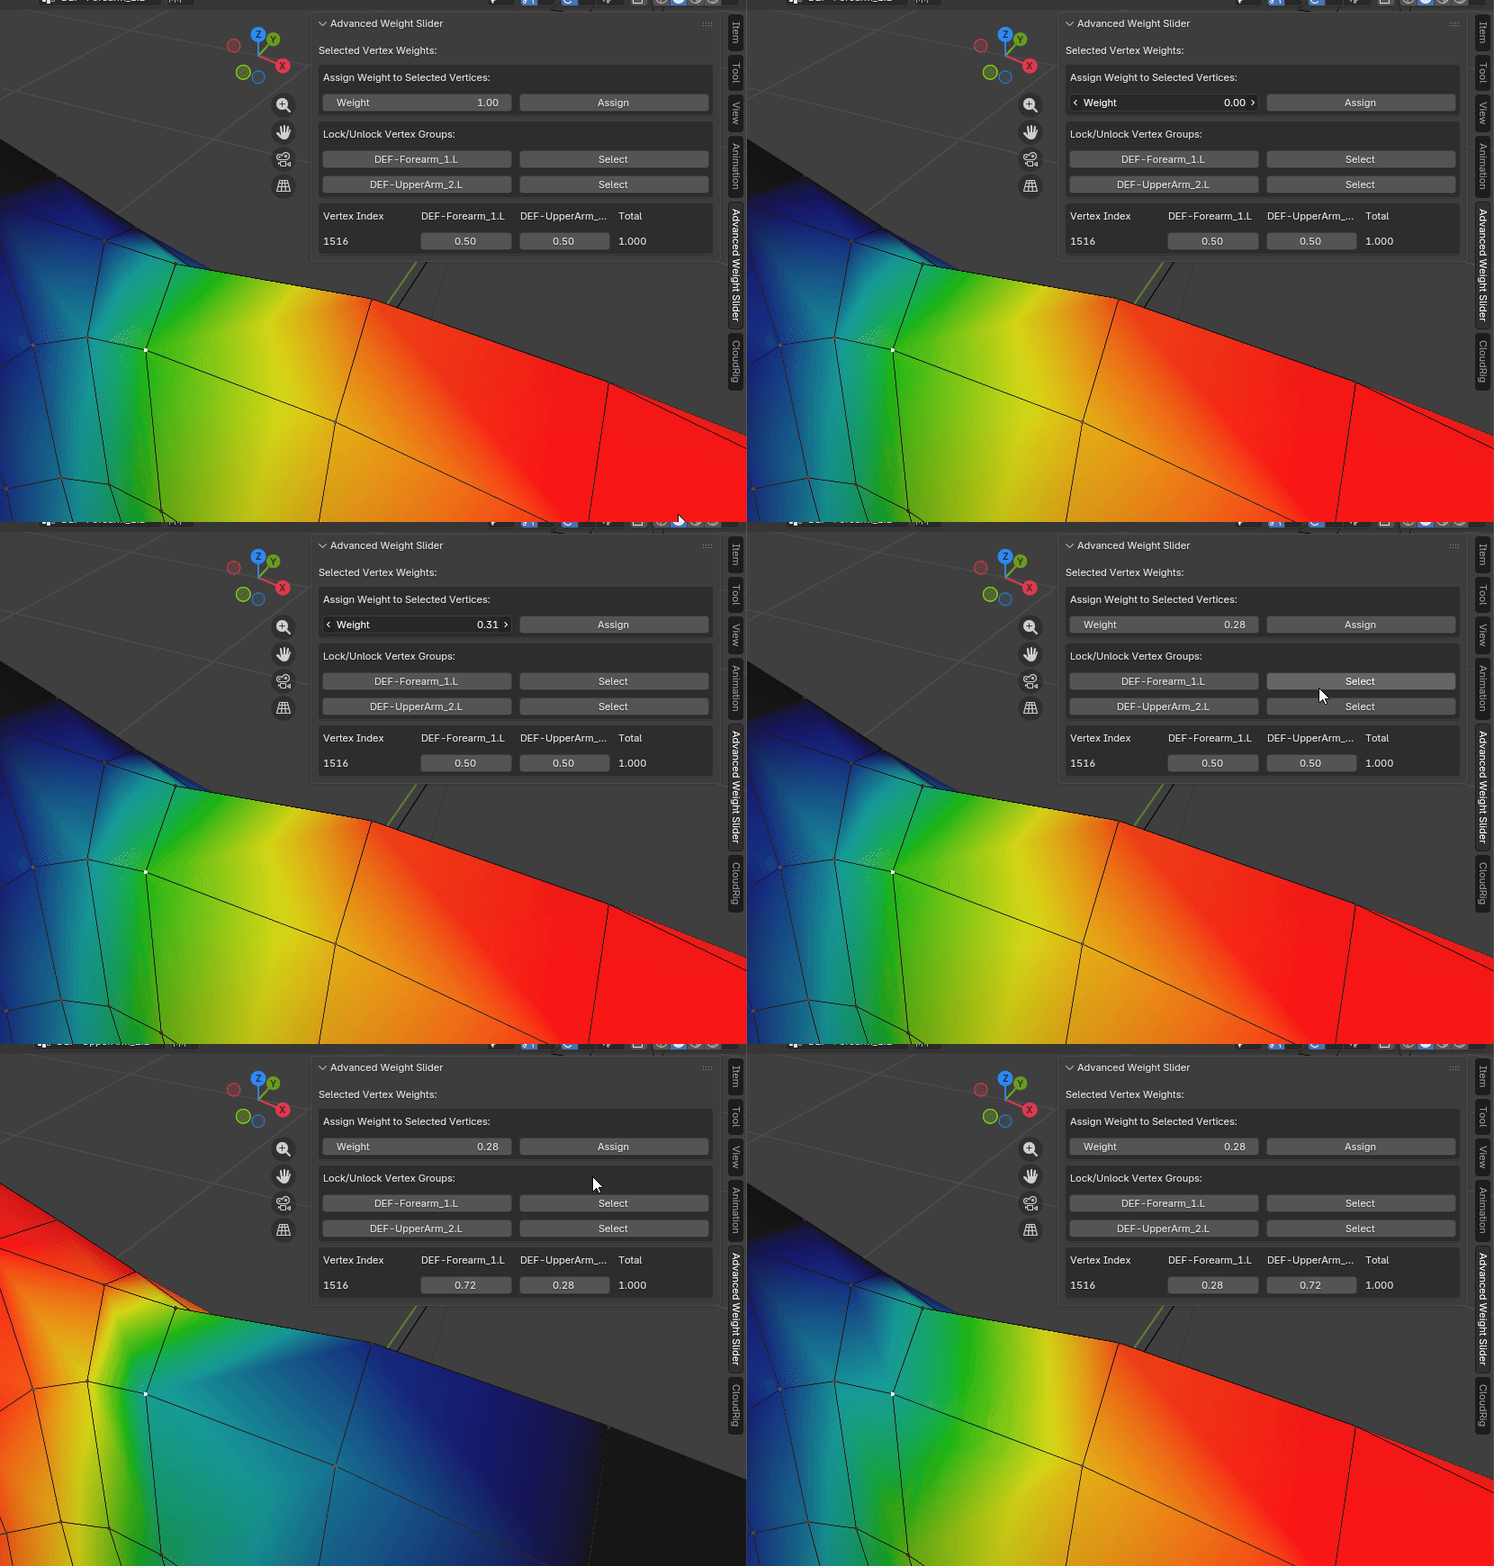
💡 Tip: Make sure you have set an Active Vertex Group—weights will be assigned to that group.
Lock & Unlock Vertex Groups
Protect important vertex group weights from accidental modifications during adjustments.
Features:
- Locked State - The vertex group's weights will not be modified and won't participate in normalization
- Unlocked State - Can be edited normally and participates in auto normalization
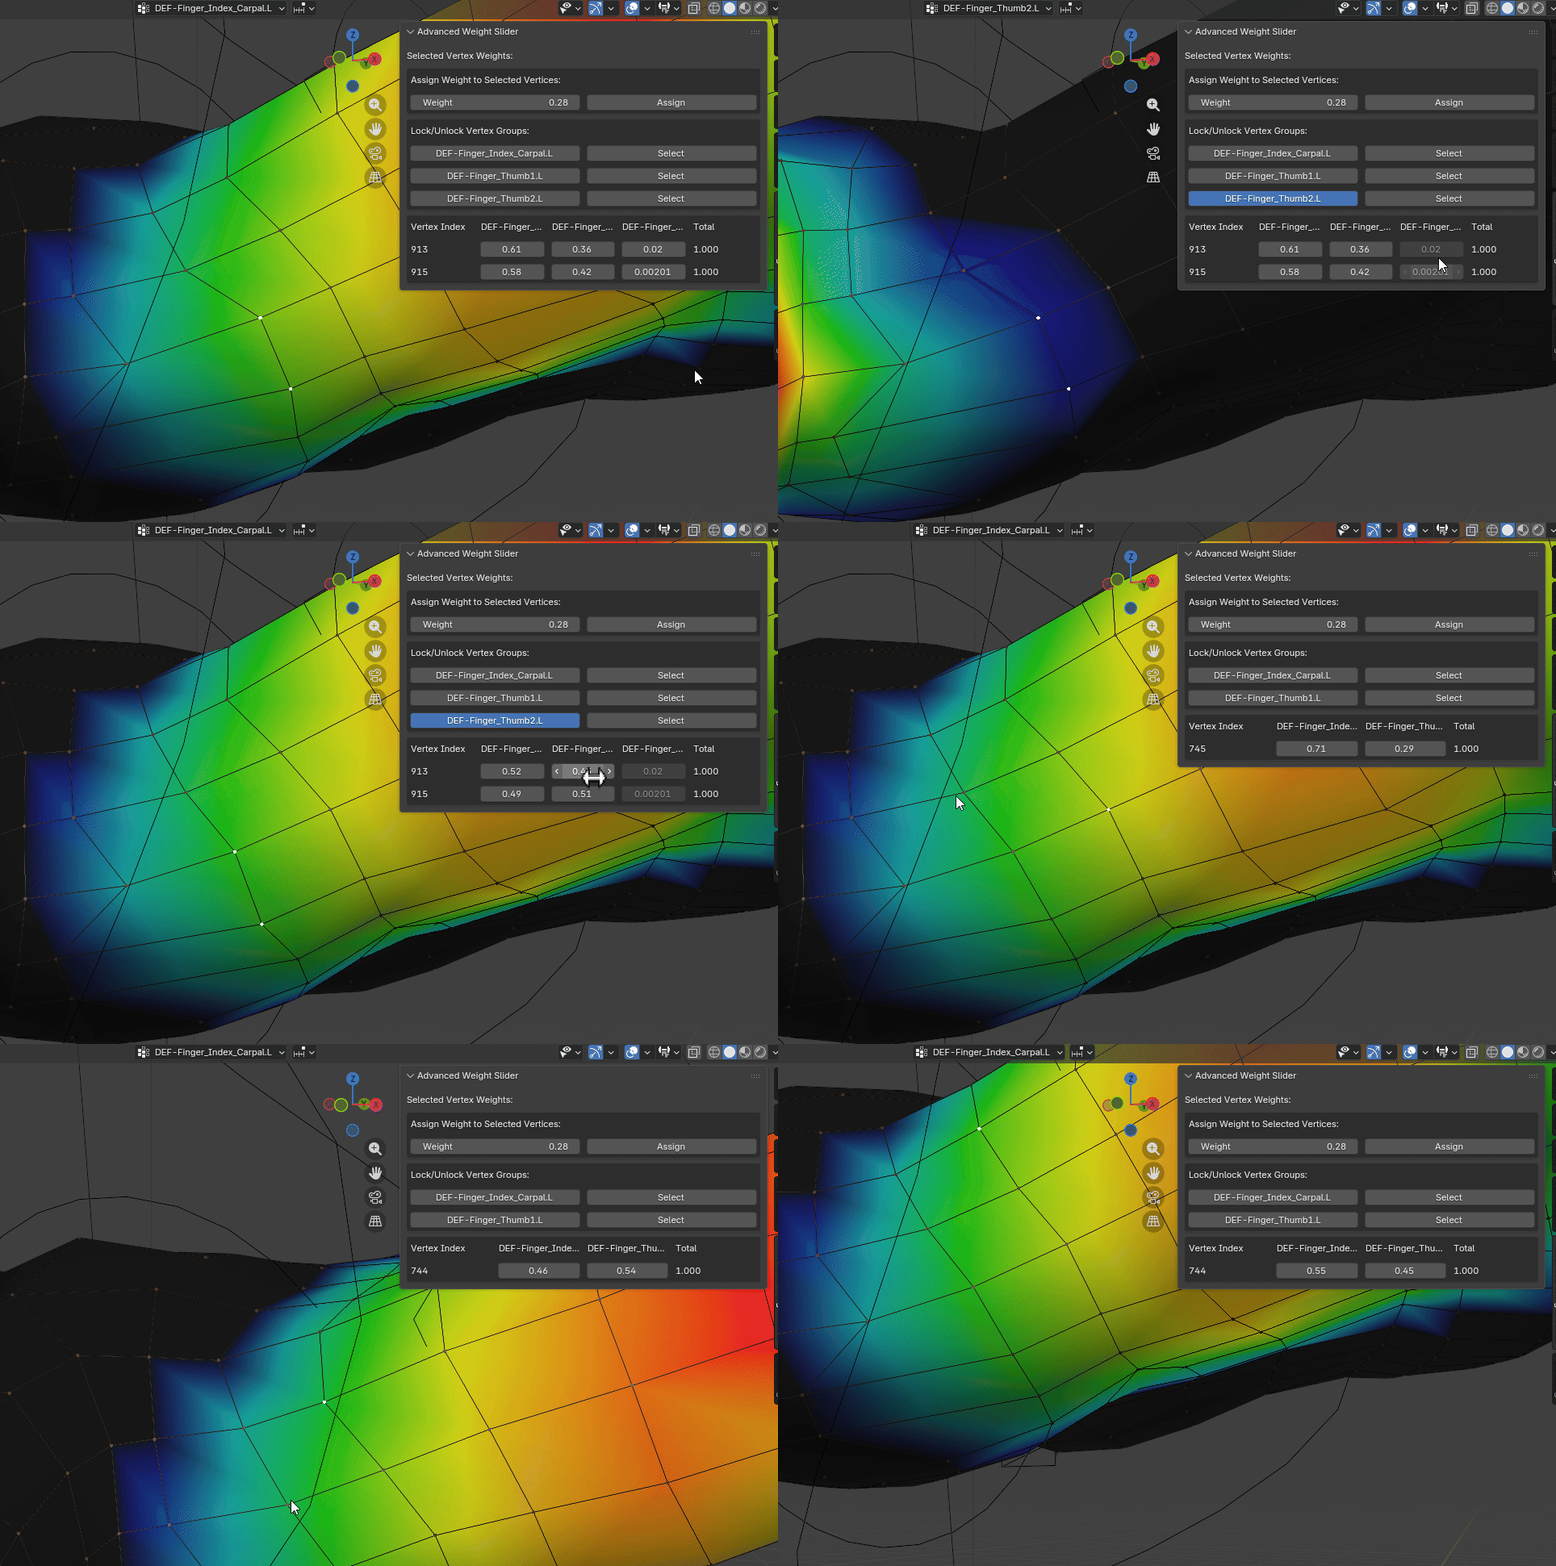
How to Use:
- Find the Lock/Unlock Vertex Groups area in the panel
- Click the toggle button next to the vertex group name to lock/unlock
- Click Select to quickly set that vertex group as active
Weight Visualization Table
Get a clear view of weight distribution for each selected vertex.
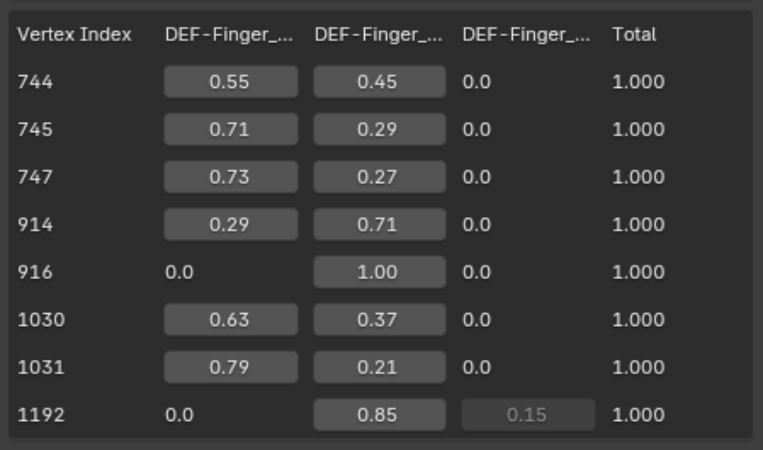
Table Columns:
| Column | Description |
|---|---|
| Vertex Index | The index number of the vertex |
| Vertex Group Names | Weight values for each bone (directly editable) |
| Total | Sum of all weights for that vertex |
💡 Tip: You can directly drag the value sliders in the table to adjust weights—normalization triggers automatically after adjustment.
💡 Tip: Use Shift + LMB for precise control over weight values.
💡 Experimental Feature: Hold LMB and drag down to select and adjust multiple weight values simultaneously. This method can easily corrupt multiple vertices, so use this feature with extra caution (recommended for 10 vertices or fewer, and always use Shift + LMB for precise control).
Auto Normalization
The addon automatically ensures each vertex's weights sum to 1.0—critical for skeletal animation.
Normalization Rules:
- 🔒 Locked Vertex Groups - Weights remain unchanged
- 🎯 Currently Edited Vertex Group - Preserves the weight value you set
- 🔄 Other Unlocked Vertex Groups - Automatically adjusted proportionally to ensure sum equals 1.0

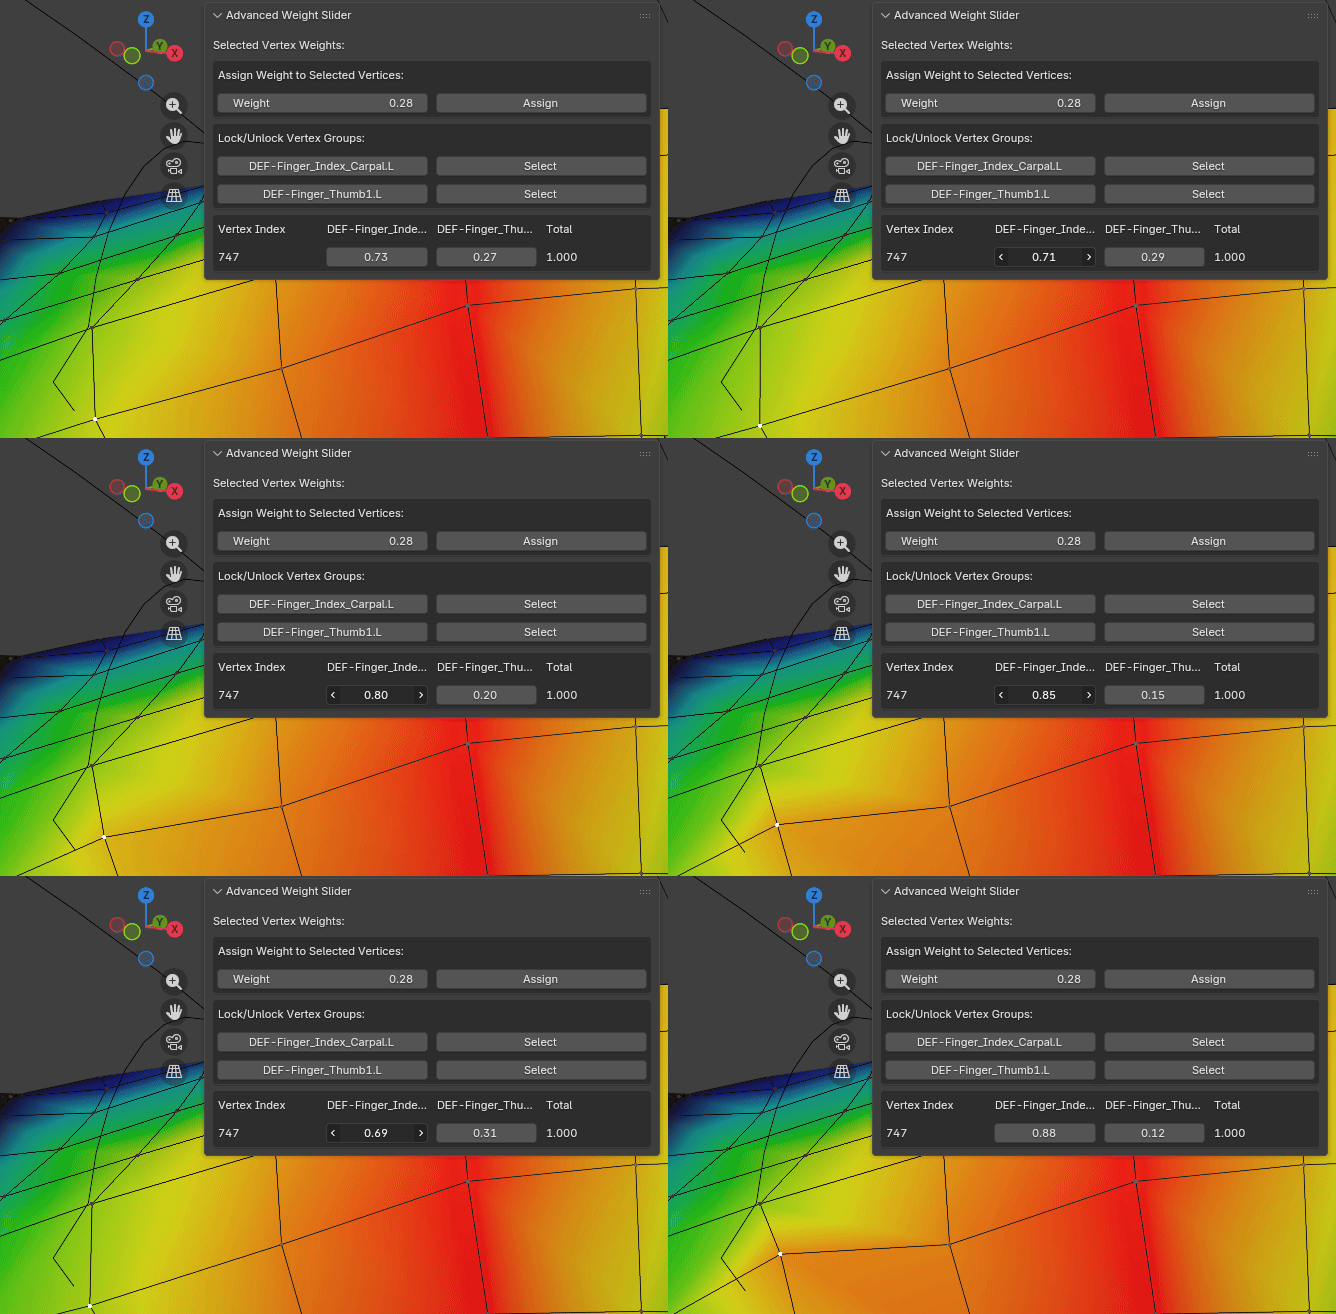
Example Scenario:
Suppose a vertex has the following weights:
- Bone_A: 0.5 (locked)
- Bone_B: 0.3
- Bone_C: 0.2
When you adjust Bone_B to 0.4, Bone_C will automatically adjust to 0.1, maintaining a total sum of 1.0.
Quick Start Tutorial
Step 1: Prepare Your Model
Ensure your mesh object has:
- ✅ An Armature modifier added
- ✅ A valid armature object assigned
- ✅ Vertex groups created
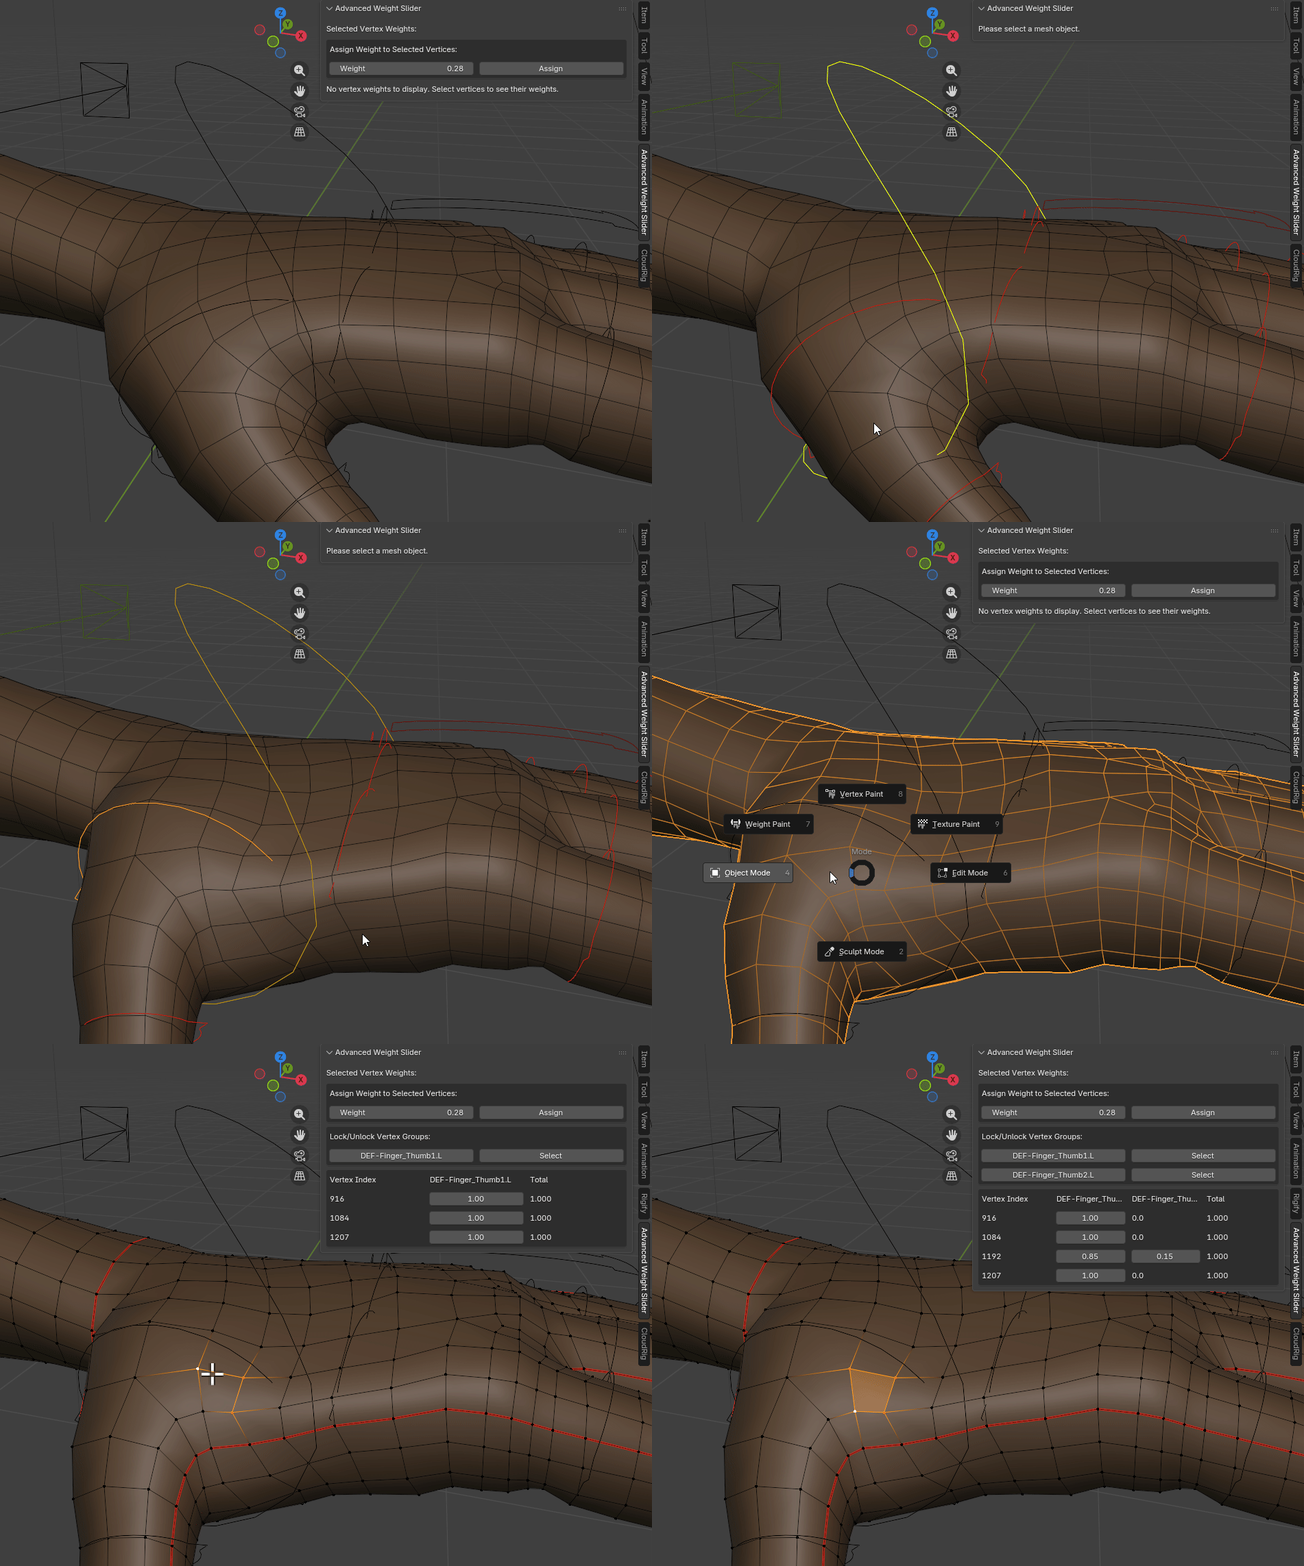
Step 2: Select Vertices
- Enter Pose Mode ( press Tab)
- Use controllers or bones to pose the mesh you want to adjust weights for
- Select the mesh object
- Enter Edit Mode ( press Tab)
- Select the vertices you want to edit weights for
Step 3: View Weight Information
After selecting vertices, the Advanced Weight Slider panel will automatically display:
- All vertex groups the vertex belongs to
- Weight values for each vertex group
- Total weight sum
Step 4: Adjust Weights
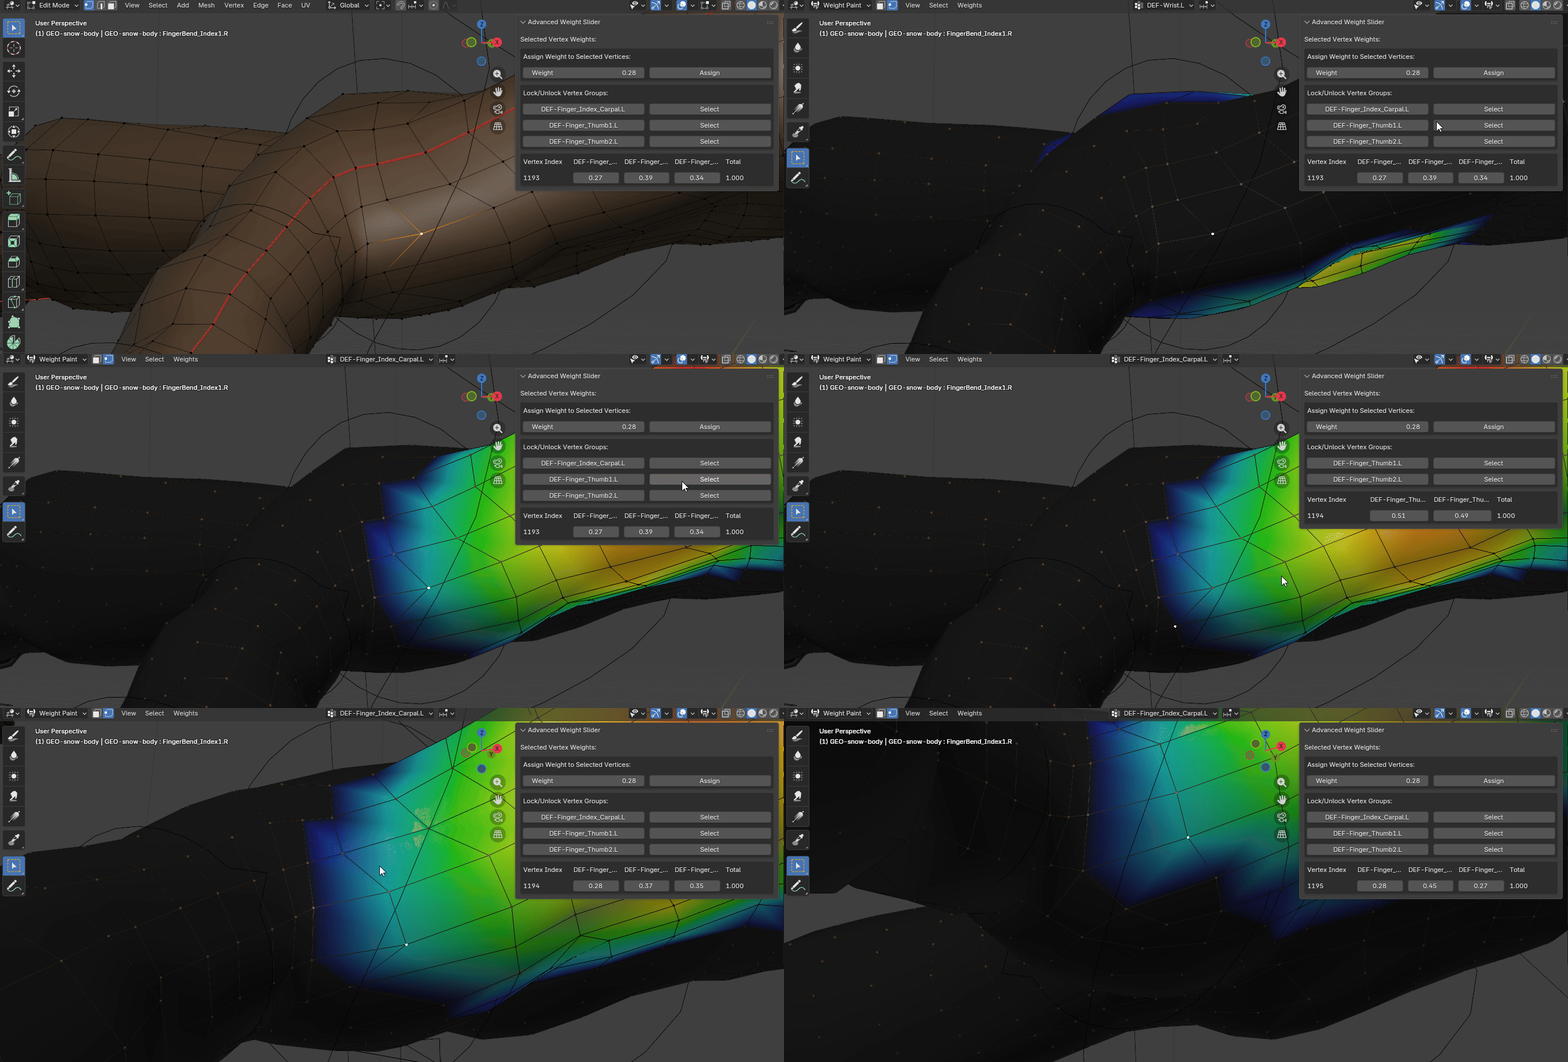
To see vertex weight colors: Enter Weight Paint Mode ( press Tab) Click Vertex Selection in the top-left corner—your previously selected vertices will be marked as a Mask.
You can adjust weights in two ways:
Method A - Using the Assign Function:
- Select the active vertex group
- Enter the target weight value
- Click Assign
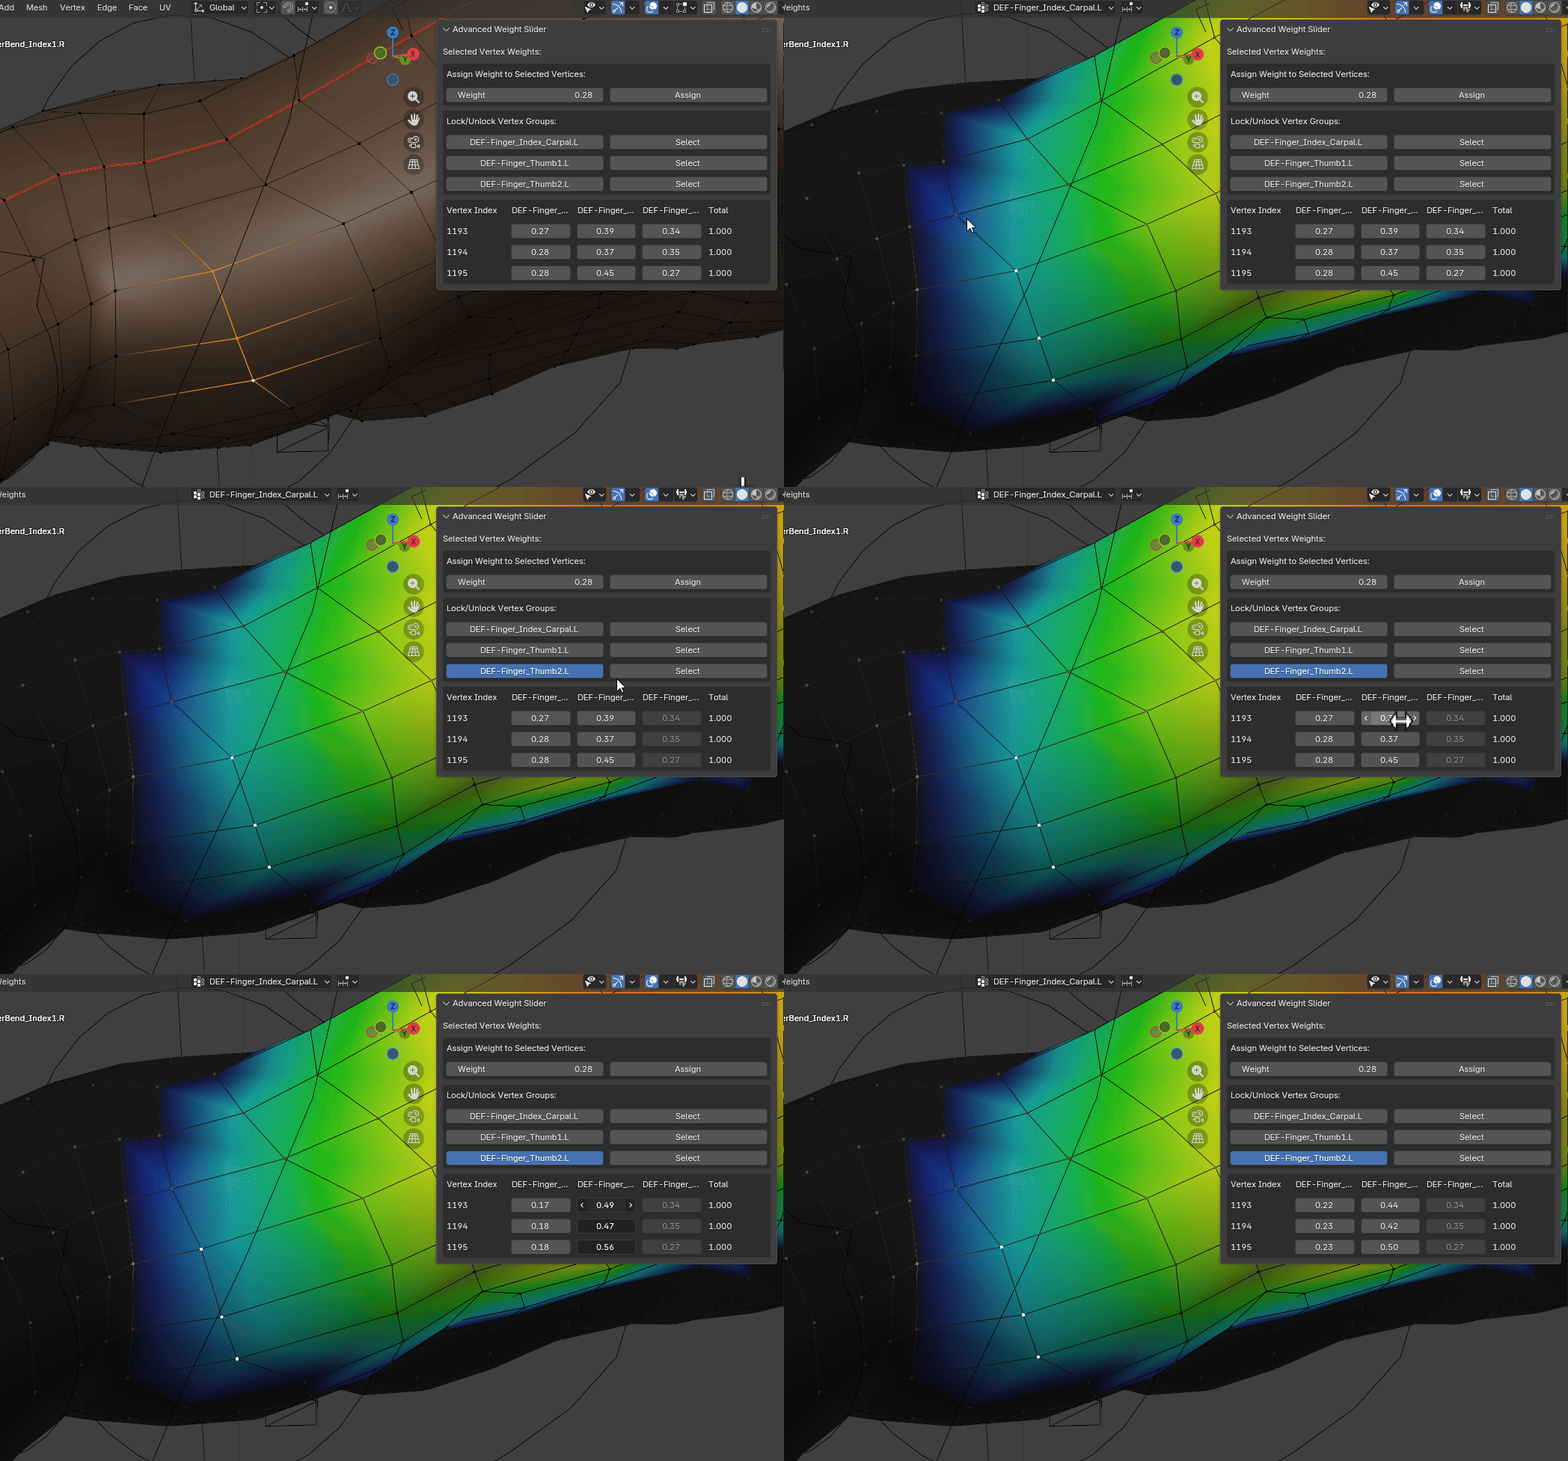
Method B - Direct Table Editing:
- Find the corresponding field in the weight table
- Drag the slider or enter a value
FAQ
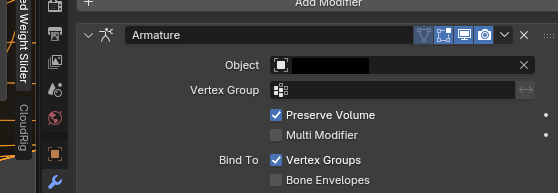
Q1: The panel shows "Please assign an Armature object in the Armature modifier to edit weights."
Solution: Make sure your mesh object has an Armature modifier added, and a valid armature object is assigned in the modifier.
Q2: Why can't I edit some vertex group weights?
Possible Reasons:
- The vertex group may be in a locked state
- The vertex group's weight value is 0
Solutions:
- Unlock the vertex group in the Lock/Unlock Vertex Groups area.
- Add weight values from other vertex groups to that vertex before adjusting.
Q3: Why is the weight table empty?
Possible Reasons:
- No vertices selected - Please select vertices in Edit Mode
- Selected vertices have no weights - Use Blender's weight paint tools to assign basic weights first
- Vertex group names don't match bone names - Only vertex groups matching bone names will be displayed
Q4: How do I modify only specific bone weights without affecting others?
Solution: Before adjusting weights, lock the vertex groups you don't want modified. During normalization, these vertex groups' weights will remain unchanged.
Best Practice: When adjusting weights, try to work with three or fewer vertex groups at a time to avoid weight instability during normalization.
Support & Contact
If you encounter any issues or have suggestions, feel free to contact us:
- 📧 Email: [email protected]
- 💬 Discord: friedchickencat
Version Information
| Version | Release Date | Notes |
|---|---|---|
| 1.0.8 | - | Current Version |
Thank you for choosing Advanced Weight Slider! We hope this tool helps boost your creative efficiency. 🎨