 blidART
Archviz Synchronizer – Beginner’s Guide
Table of Contents
What is Archviz Synchronizer?
Installation and Startup
Where to Find the Tools and How to Configure Options
-
Add-on Modules – Explained in Plain Language
Module 1: Asset Browser
Module 2: FBX Converter
Module 3: FBX Synchronizer
Module 4: Textures Transforms
Module 5: Materials Sets
Module 6: Selection Tools
Module 7: Quick Dirt
Module 8: Auto Bevel
Usage Examples
Common Issues and Tips
Where to Find Help
1. What is Archviz Synchronizer?
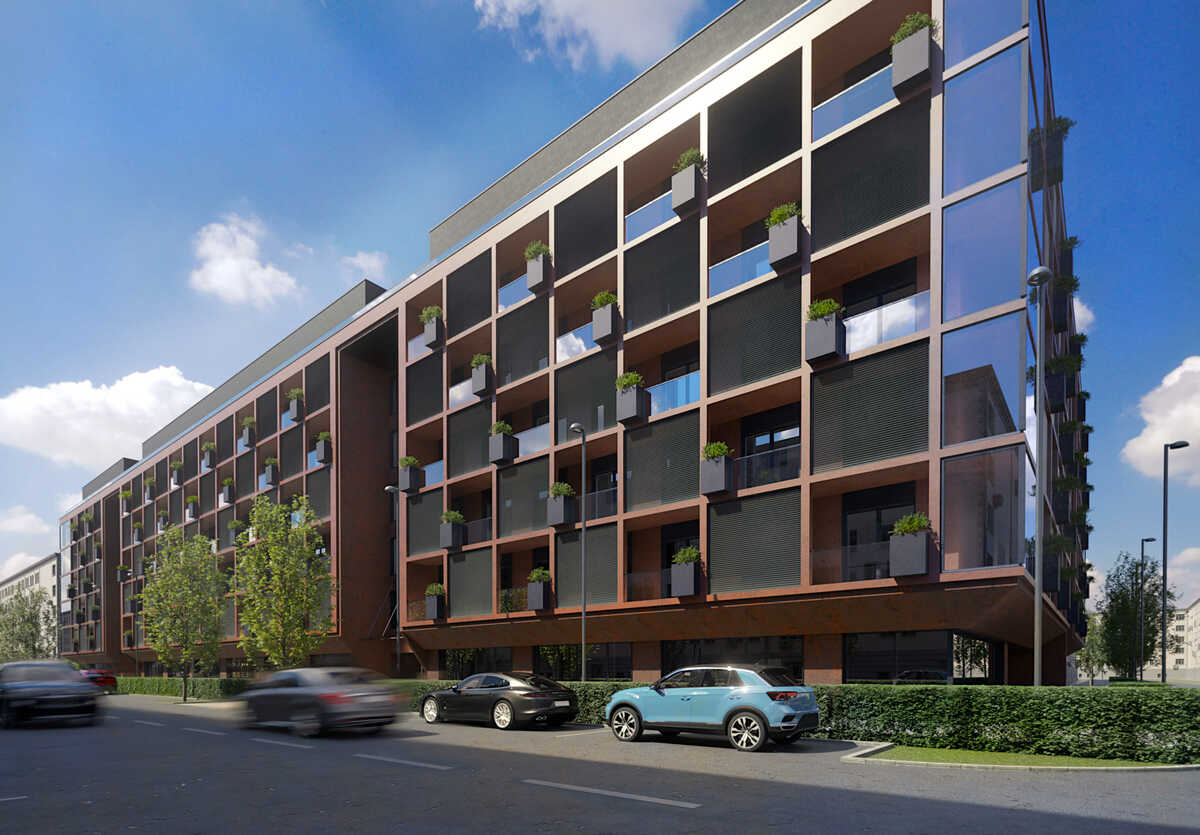
Archviz Synchronizer is a Blender extension designed to streamline your workflow on large architectural scenes. It works similarly to D5 Render or Twinmotion by syncing your CAD models (exported as FBX) directly into Blender.
How it works
You export your model from CAD as an FBX.
Important: for best performance, combine all CAD materials into single objects—each CAD material should become one Blender object. In your CAD export settings, enable Merge Surfaces by Materials (or equivalent). If your CAD tool doesn’t offer this, use the FBX Converter module in Archviz Synchronizer—it will do it automatically. This ensures your sync takes only seconds instead of minutes.
Whenever you make changes, overwrite your FBX from CAD and re-sync in Blender.
All subsequent material edits—textures, scaling, rotation, offsets—will persist through future syncs.
2. Installation and Startup
Download the Archviz Synchronizer ZIP.
In Blender, go to Edit → Preferences → Add-ons → Install, select the ZIP, then enable Archviz Synchronizer.
The add-on’s panels appear in the 3D View Sidebar → ArchViz Synchronizer.
3. Where to Find the Tools and How to Configure Options
All modules live under the ArchViz Synchronizer tab in the 3D View Sidebar. Click the module’s name to expand its controls. Many options are simple checkboxes or sliders—just click or drag to enable/adjust.
4. Add-on Modules – Explained in Plain Language
Module 1: Asset Browser
Description
Opens and closes the Asset
Browser, letting you quickly browse and drag your custom models or
materials into the scene.
How to use
Click the Asset Browser icon (or hit its hotkey) to open/close.
Search or filter for a model or material.
Drag it into the 3D View to add it to your scene.
Module 2: FBX Converter
When to use
Use when your CAD tool either
can’t export FBX at all or lacks a Merge Surfaces by
Materials option:
Export as DAE, OBJ, 3DS—or FBX without merge support.
Run this module in Blender to convert and optimize into a new
*_converted.fbx.
Quick how-to
Prepare: Export from CAD as DAE, OBJ, 3DS, or FBX.
Launch: Open FBX Converter → Open Archviz Converter.
Convert: Choose your source format, pick the file, and let it output
*_converted.fbxnext to the original.Return: Click Return to Main Scene, go to FBX Synchronization → Add, select your
*_converted.fbx, then Synchronize FBX.Update: After CAD changes, overwrite the original and click Reimport from converter (or use Auto Sync) to refresh.
Manual Sync: If Auto Sync is off, hit Synchronize FBX again.
Module 3: FBX Synchronizer
Description
Core module that keeps your FBX
files in Blender synchronized with your CAD exports—manually or
automatically.
Key steps
Export from CAD with Merge Surfaces by Materials.
Add your FBX to the sync list.
Click Synchronize FBX to import/update.
After making CAD edits, overwrite the FBX and click Synchronize FBX again.
Enable Auto Sync to have Blender watch and refresh whenever the file changes.
Import Settings
Clean Geometry: merge duplicate vertices for faster performance.
Merge Distance (visible with Clean Geometry): max distance to consider vertices identical.
Limited Dissolve: remove insignificant edges under a set angle.
Dissolve Angle (visible with Limited Dissolve): angle threshold in degrees.
Align Axes: auto-align object axes to major faces without changing appearance.
Restore Particles: bring back particle systems and Geometry Nodes from previous sync.
Module 4: Textures Transforms
Description
Ensures your textures keep
correct scale, rotation, and offset after every FBX sync—without
manual UV unwraps.
Features
Global Controls: one set of sliders (Scale, Rotation, Offset X/Y) for all texture maps in a material.
Built-in UVs: the add-on generates its own UVs—no extra UV maps needed.
Randomize UV Islands: shuffle UV islands automatically to break repeating patterns (e.g., wooden planks).
How to use
Select your object.
In Textures Transforms, tweak Scale, Rotation, Offset X/Y.
Click Randomize UV Islands if you need to vary tiling patterns.
Module 5: Materials Sets
Description
Manage multiple color/material
variants and switch between them instantly.
How to use
Apply materials for Variant 1, click Save New Material Set.
Change materials for Variant 2, click Save New Material Set again.
Pick any saved set from the list to apply it.
To tweak a set without overwriting the original, click Override, adjust, then Save Override.
Module 6: Selection Tools
Description
Quickly select objects by
criteria (e.g., by material, by tag) to speed up scene
organization.
(Detailed usage would follow based on your
add-on’s specific tools.)
Module 7: Quick Dirt
Description
Automatically adds a procedural
dirt layer to materials for realistic wear.
Controls
Custom Texture Folder: optionally point to your own dirt maps (defaults to
textures/dirt).Sliders: Scale, Offset X/Y, Strength, Intensity, Dirt Color.
Apply Dirt: injects the dirt node into every material on selected objects.
Restore Original Material: removes the dirt node and returns to the prior state.
Module 8: Auto Bevel
Description
One-click bevel creation or
removal in your material shader.
Controls
Add Bevel: inserts a Bevel node to round edges in all selected mesh materials.
Bevel Radius: slider to set the bevel’s width.
Bevel Samples: slider to control bevel smoothness.
Remove Bevel: strips out the Bevel node and reconnects the original shader.
Summary and Final Tips
Archviz Synchronizer is an advanced Blender add-on developed by BlidART Architektura that streamlines and automates architectural visualization workflows. This tool provides a wide range of features, from FBX file synchronization and material management to advanced UV mapping and realistic dirt effect application.
With a simple, intuitive interface, Archviz Synchronizer allows users to save time and reduce errors when working on large, complex projects. Each module is designed with efficiency, automation, and ease of use in mind, so architects and 3D artists can focus on the creative aspects of their work rather than technical details.
The add-on offers:
Automation: Handles FBX files, materials, and UV mapping without the need for manual intervention.
Versatility: Optimized tools for geometry, texture, and scene organization, making them ideal for large architectural projects.
Advanced UV Mapping: Quick and precise texture assignment for architectural models, including texture rotation and random tiling.
Realistic Dirt Effects: Easy-to-use tools for adding dirt and aging effects to materials, significantly enhancing the quality of visualizations.
Automatic Beveling: Automatically smooths object edges using the Bevel node, making models appear more natural and realistic.
Archviz Synchronizer is not just a time-saver but also improves precision and efficiency in the architectural visualization process. With this add-on, working on large scenes becomes simpler and less error-prone, allowing users to focus on design and aesthetics.
Have questions about this product?
Login to message