AutoLipSync Pro
 Wee Learn From Mobile


🔹 System Requirements 🔹
Installation Guide
Installing AutoLipSync Pro is similar to installing any standard Blender addon.
Step 1 — Choose the Correct Addon Version
Before installing, make sure you select the correct addon ZIP file based on:
Your Operating System
Your Blender Version
Example Files
Windows:
AutoLipSyncPro_v1.3_Blender3.6x_Windows.zip
AutoLipSyncPro_v1.3_Blender4.1x_Windows.zip
AutoLipSyncPro_v1.3_Blender5.0x_Windows.zip
AutoLipSyncPro_v1.3_Blender5.1x_Windows.zip
Linux:
AutoLipSyncPro_v1.3_Blender3.6x_Linux.zip
Linux versions follow the same naming format.
Example:
If you are using Blender 4.2, install the Blender 4.1x version of the addon.
Step 2 — Install the Addon
Open Blender
Go to Edit → Preferences
Open the Add-ons tab
Click Install
Select the correct ZIP file for your Blender version
Click Install Add-on
Enable AutoLipSync Pro from the addon list
Step 3 — Ready to Use
After enabling the addon, AutoLipSync Pro will appear in the Blender UI Sidebar (N-Panel) under the “AutoLipSync Pro” tab and is ready to use.
AutoLipSync Pro Quick Documentation
Using AutoLipSync Pro
After enabling AutoLipSync Pro, the addon appears in the Blender 3D View Sidebar (N-Panel) under the AutoLipSync Pro tab.
Step 1 — Select Audio File
Under Step 1: Select Audio File, click the folder icon to choose your audio file.
Supported audio formats:
MP3
WAV
OGG
The file browser automatically filters supported formats for convenience.
Step 2 — Convert Audio
Click Convert Audio to prepare the audio for processing.
What happens:
The audio is converted into the required format for the addon
The converted file is stored in Blender’s temporary directory
This file is used for all further lip sync processing
Timing Settings
These settings control when the character speaks during the timeline.
Start Frame
Defines the frame where lip sync begins.
End Frame
Defines the frame where lip sync stops.
Auto
Automatically calculates the End Frame based on the audio length.
These settings ensure the audio and animation are perfectly synced in the timeline.
Timeline Controls
Start Frame
Controls when the lip sync animation begins.
Example:
Start Frame = 100
Audio and animation begin at frame 100
End Frame
Controls where the audio playback and lip sync stop.
Example:
Start Frame = 100
End Frame = 200
The addon trims any remaining audio after frame 200.
Auto Option
When enabled, AutoLipSync Pro automatically calculates the correct End Frame based on the full audio length.
Example:
Audio length = 200 frames
Start Frame = 100
Result:
Audio starts at frame 100
Animation automatically ends at frame 300
When disabled, the addon uses the manually specified End Frame.
Push to VSE
Click Push to VSE to automatically add the audio into Blender’s Video Sequence Editor (VSE).
The addon automatically uses the current Start Frame and End Frame settings when placing the audio strip.
Process Audio
Process Audio Button
Click Process Audio to start generating lip sync data.
The addon automatically:
Converts speech into text
Breaks words into phonemes
Maps phonemes into visemes
Displays live processing results inside the UI
Processing runs in the background to avoid freezing Blender.
Cancel Process
You can safely stop processing at any time using the Cancel button.
Word Editing System
After processing:
All detected words appear in a list
Words can be manually edited
Incorrect detections can be fixed directly
Regenerate Options
Regenerate Word
Updates only the selected word.
Regenerate All Phonemes
Rebuilds the full phoneme and viseme mapping.
Character Lip Sync Setup — Pose Action Mode
In this mode, lip sync animation is driven using Pose Actions on a character rig.
Select Character Rig
Use the Eyedropper tool to select your armature from the Blender scene.
Auto Assign Actions
Click Auto Assign Actions to automatically search and assign matching viseme actions.
Required viseme actions:
V_None
V_Open
V_Explosive
V_Dental_Lip
V_Tight_O
V_Tight
V_Wide
V_Affricate
V_Lip_Open
V_Tongue_Raise
V_Tongue_Out
V_Tongue_Narrow
V_SZ
If names do not match, actions can be assigned manually.
Generate Lip Sync Animation
Click Generate Lip Sync Animation to open the animation settings popup.
Available controls include:
Blending Factor: Controls how smoothly one viseme transitions into the next.
Hold Factor: Controls how long each mouth shape stays visible before changing.
Transition Frames: Sets how many frames are used to blend between visemes.
Dynamic Timing: Automatically adjusts timing based on speech speed.
Interpolation Mode: Defines how keyframes are blended (smooth, linear, or stepped).
Coarticulation: Makes neighboring sounds influence each other for more natural speech.
Phoneme Strength: Controls the intensity of mouth movement from phonemes.
Exaggeration Factor: Increases or decreases overall facial expression strength.
Idle Movement: Adds subtle motion when the character is not speaking.
Anticipation Factor: Makes the mouth prepare slightly before the next sound.
When you click OK:
Lip sync animation is generated automatically
Keyframes are created
Visemes are applied to the rig
Shape Key Mode
AutoLipSync Pro also supports Shape Key-based lip sync animation.
Add Character Mesh
Select your character mesh and click the + button to add it to the setup list.
Auto Shape Key Check
The addon automatically checks for all required viseme Shape Keys.
Required Shape Keys:
V_None
V_Open
V_Explosive
V_Dental_Lip
V_Tight_O
V_Tight
V_Wide
V_Affricate
V_Lip_Open
V_Tongue_Raise
V_Tongue_Out
V_Tongue_Narrow
V_SZ
Create Missing Shape Keys
Automatically creates placeholder Shape Keys if any are missing.
These placeholders must still be manually sculpted.
Generate Lip Sync — Shape Key Mode
Click Generate Lip Sync to create Shape Key-based animation.
Shape Key Animation Settings
Influence Scale
Controls the overall strength of the Shape Key animation.
Higher values = stronger mouth movement
Lower values = softer and more subtle animation
Transition Frames
Controls how many frames are used to blend between visemes.
Higher values = smoother transitions
Lower values = faster mouth changes
Hold Factor
Controls how long each viseme stays active before transitioning.
Higher values = longer mouth holds
Lower values = quicker speech movement
Mouth Open Bias
Controls how open the mouth remains during speech.
Higher values = more open mouth
Lower values = more closed and subtle speech
Coarticulation
Controls how neighboring visemes influence each other.
Creates smoother speech flow
Reduces robotic transitions
Random Variation
Adds slight random variation to the animation.
Helps make speech feel more natural
Reduces repetitive motion
Transition Smoothness
Controls the softness of transitions between visemes.
Higher values = softer blending
Lower values = sharper transitions
Anticipation Factor
Makes the mouth begin preparing for the next sound earlier.
Improves natural speech timing
Creates more believable lip sync motion
The addon automatically creates Shape Key keyframes for the full audio sequence.
Keep Existing Lip Sync
This option controls how multiple lip sync generations behave.
Enabled
Previous lip sync animation is preserved
New animation is added without deleting old animation
Disabled
Previous generated lip sync is replaced
A new animation set is created
Useful for creating multiple dialogue sections inside one scene.
AutoBlink Shape Keys
AutoLipSync Pro includes automatic eye blink generation.
Blink Setup
Assign:
Left Blink Shape Key
Right Blink Shape Key
Combine Mode
When enabled:
Both eyes use the same Shape Key
When disabled:
Separate left/right blink Shape Keys can be used
Generate Eye Blink
Automatically creates natural blinking animation and keyframes.
Shape Keys / Actions Reference
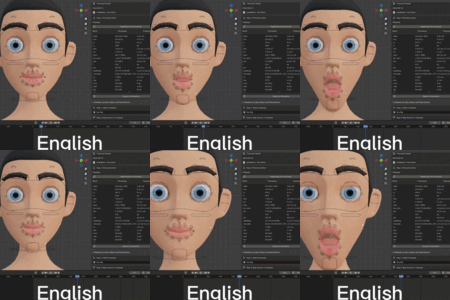
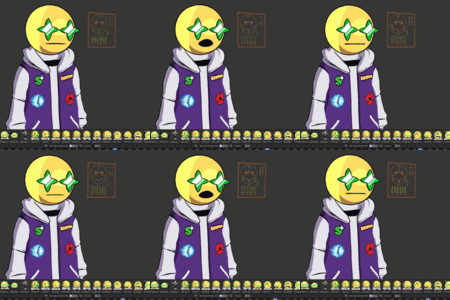
The addon includes a visual reference panel showing how each viseme should look.
Examples:
V_Open → open mouth
V_Explosive → lips closed for P/B/M sounds
V_Wide → wide smiling mouth
V_Tight_O → rounded mouth for “oo” sounds
V_SZ → teeth close for S/Z sounds
This helps with creating both Shape Keys and Pose Actions correctly.
Included Test Character
AutoLipSync Pro includes a ready-to-use test character containing:
Required Shape Keys
Pose Actions
Example setup
This allows quick testing and learning without creating everything manually from scratch.
If you have questions or problems with AutoLipSync Pro,Please join my Discord for assistance.Discord
The Addon Include pdf documentary on how to use it from the beginning.
Discover more products like this
charcter auto lip sync 3danimation blender realmotion pro Automatic Lip Sync easy dialogue