Batch Camera Renderer
 active clay
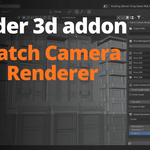
How to install & use
-
1Install it like any other addon. In Blender go to
Edit → Preferences → Add-ons → Install, select the downloaded.pyfile, and check the box to enable it. -
2Open the panel. In the 3D Viewport, press
Nto open the sidebar. You'll find a new tab called Active Clay. Click it. -
3Set your output folder. At the top of the panel there's an Output Path field — point it to wherever you want your renders saved before doing anything else.
-
4Add your shots. Frame your viewport however you like — then click Create New Shot. The addon captures that exact view and adds it to your shot list. Repeat as many times as you need.
-
5Adjust anything you need. Click a shot in the list to jump to its view. Use the Active Camera Details section to dial in focal length, depth of field, clipping, or composition guides per camera.
-
6Render them all. Hit Render All Shots and confirm. Blender will cycle through every camera in your list and save each render as its own file. A live status counter shows your progress.
-
7Or just preview first. Use Viewport Preview for fast OpenGL screenshots of every angle — great for quick client reviews or layout checks before burning render time.
-
$6
-
$15
Have questions about this product?
Login to message
| Blender Extension Compatible | Yes |
| Published | 3 months ago |
| Blender Version | 4.2 - 5.2 |
| Extension Type | Add-on |
| Render Engine Used | Cycles, Eevee |
| License | GPL |
Discover more products like this
rendering Workflow eevee still render layout batch render Scene Optimization Camera Management Add-on viewport-preview blender Cycles