Beatmotion
 Programmable Factory


BeatMotion User Guide
Introduction
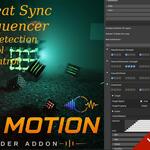
BeatMotion is a music-driven animation sequencer for Blender. It allows you to create synchronized animations using a step-sequencer workflow inspired by music production tools.
BeatMotion is available in two editions:
BeatMotion Lite
Create one sequence per project.
One target per track.
Ideal for simple music-reactive animations.
BeatMotion Studio
Create and chain multiple sequences.
Multiple targets per track.
Pattern presets.
Advanced sequencing workflows.
Note: BeatMotion Studio includes all features available in Lite and extends them with additional capabilities.
If you encounter a bug, have a question, or need help setting up a project, feel free to get in touch. User feedback is always welcome, and support requests are answered personally.
Installing BeatMotion
BeatMotion is a Blender addon installable with the standard process.
Just go to Edit/Preferences/Add-ons panel, and click "Install from disk...". Then select the addon .zip. (for instance 'beatmotion-1.1.0-Studio.zip')
Accessing BeatMotion
BeatMotion appears as a dedicated panel in Object Mode.
The workflow is organized around three main concepts:
Audio synchronization
Sequences
Tracks and Targets
Audio Setup
Before creating animations, you should configure the audio settings, as in the screenshot
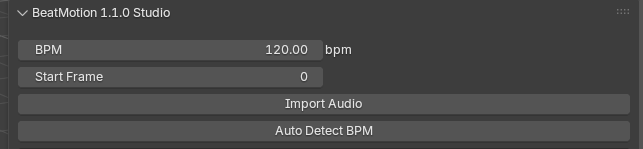
BPM (Beats Per Minute)
BeatMotion can operate with either:
Manual BPM entry
Automatic BPM detection
Manual BPM : Simply enter the desired BPM value in the BPM field.
Automatic BPM Detection:
- Click: Import Audio. This imports an audio track into the Video Sequencer of the current Blender scene.
- Click: Auto Detect BPM. BeatMotion analyzes the imported audio and automatically calculates the BPM.
Once the BPM has been determined, you can define where the animation begins using:
Start Frame
This specifies the frame where BeatMotion starts evaluating the sequence timeline.
Understanding Sequences
A sequence is a section of animation.
Think of a sequence as a musical phrase or animation block that contains one or more tracks.
A sequence contains:
Timing and Loop Settings
Tracks
Tracks define what happens during the sequence.
Creating Your First Sequence
Click: Create Sequence
This creates the first sequence in your project.
Sequence Properties
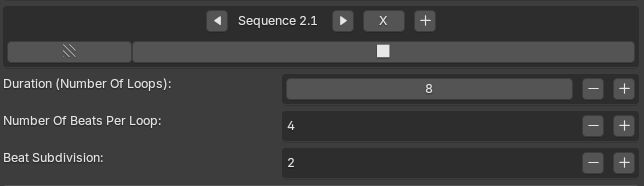
Duration (Number of Loops)
Determines how many times the sequence repeats before moving to the next sequence.
Examples:
Duration = 1
The sequence plays once.Duration = 4
The sequence repeats four times.Duration = 16
The sequence repeats sixteen times before advancing.
Number Of Beats Per Loop
Defines how many beats exist in one loop.
Common examples:
4 Beats
The most common setting.
Typical count:
1 - 2 - 3 - 4
Used for:
House music
EDM
Pop music
Most rhythm-based animations
8 Beats
Count:
1 - 2 - 3 - 4 - 5 - 6 - 7 - 8
Useful for longer animation patterns.
Beat Subdivision
Defines the resolution of the step sequencer.
Examples:
Subdivision = 1
One step per beat.
4 beats → 4 steps
Pattern:
X - X - X - X
Subdivision = 2
Two steps per beat.
4 beats → 8 steps
Pattern:
X - - X - - X - -
Useful for creating off-beat events.
Subdivision = 4
Four steps per beat.
4 beats → 16 steps
Pattern:
X - - - X - - - X - - - X - - -
Ideal for detailed rhythmic effects.
Current Beat Highlight
BeatMotion highlights the currently playing step in real time.
This makes it easy to understand:
Current beat position
Current subdivision
Current playback location
Multiple Sequences (Studio Edition)
Only available in BeatMotion Studio.
Studio allows multiple sequences to be chained together.
This makes it possible to create complete songs or animation performances consisting of different sections.
Examples:
Intro
Build-up
Drop
Outro
Each section can have its own tracks and patterns.
Add a Sequence
Click: +
A new sequence is inserted immediately after the current sequence.
Delete a Sequence
Click: X
The current sequence is removed.
Navigate Between Sequences
Use:
- < Previous Sequence
- > Next Sequence
Timeline Synchronization Tip
You can freely move the Blender timeline cursor.
BeatMotion automatically detects the current frame and updates:
Current sequence
Current loop
Current beat
This makes navigation extremely convenient when working on long animations.
Understanding Tracks
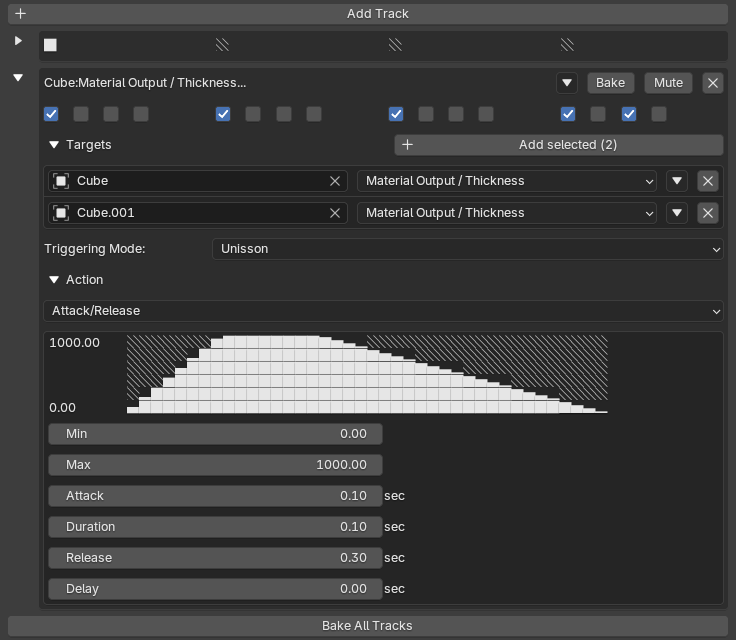
Tracks are the core of BeatMotion.
A track contains:
A step pattern
One or more targets
An action description
Each track operates independently.
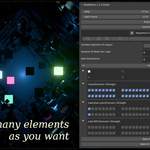
You can create as many tracks as needed inside a sequence.
Once a track is configured, click the 'Bake' button. This creates the keyframes.
Click 'Mute' to remove these keyframes.
Step Patterns
The step sequencer is displayed as a row of checkboxes.

Each checkbox represents one step.
Active Step
Checked checkbox: ✓ The action will be triggered.
Inactive Step
Unchecked checkbox: □ Nothing happens.
Example Pattern
4 beats, subdivision 4:

The action triggers on beats 1,2,3,4, and also on last half beat
Pattern Presets (Studio Edition)
BeatMotion Studio includes ready-made pattern presets.
These provide a fast way to create rhythmic animations without manually programming every step.
Actions
Each track contains a single action.
Whenever an active step is reached, BeatMotion launches the action defined by that track.
The action is applied to every target assigned to the track.
Targets
Targets define what BeatMotion controls.
A target consists of:
(Object + Property)
Examples:
Light → Power
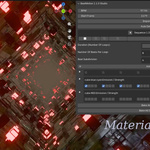
Mesh → Any Material Property (float only). "Emission Strength" is probably the most useful.
Lite Edition
One target per track.
Studio Edition
Multiple targets per track.
This allows a single rhythmic pattern to drive multiple objects simultaneously.
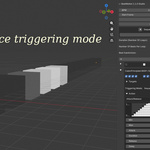
The Triggering Mode lets use choose how the targets are triggered:
- 'Unisson': all targets are triggered on enabled steps
- 'Sequence': targets are triggered one after the other, in the declaration order
- 'Random Sequence': beat motion creates a random triggering sequence
Adding Targets
Targets can be added in two ways.
Add Multiple Targets At Once
Select several objects in Blender.
Add them to the track.
All selected objects become targets.
Add Targets One By One
Add objects individually.
This is recommended when target order matters.
The order is particularly useful when using:
Triggering Mode: Sequence
where targets are activated sequentially according to their position in the target list.
Available Properties
Lights
Currently supported:
Power
Mesh Objects
All float parameters from the active material are available.
This makes it possible to animate:
Emission strength
Material intensities
Custom shader parameters
Action Parameters
The shape and behavior of each trigger can be customized.
Min: Minimum value applied by the action.
Max: Maximum value applied by the action.
Attack: Time (in seconds) required to reach the maximum value. A longer attack creates smoother transitions.
Release: Time (in seconds) required to return from the maximum value. A longer release creates smoother fades.
Duration: How long the triggered state remains active.
Delay: Adds a delay before the action begins.Useful for creating echoes, offsets, and layered rhythmic effects.
Typical Workflow
Import an audio file.
Run Auto Detect BPM.
Set the Start Frame.
Create a sequence.
Configure beats and subdivisions.
Add a track.
Assign targets.
Enable desired steps in the pattern.
Adjust Min, Max, Attack, Release, Duration, and Delay.
Play the timeline and watch your animation synchronize with the music.
Need Help?
If you encounter a bug, unexpected behavior, or simply have questions about BeatMotion, don't hesitate to get in touch.
User feedback is actively welcomed, and support requests are answered personally whenever possible.
-
$49
Studio version for complete song production and multi-sequence workflows. Features: Includes all Lite Edition features + Multiple sequences with Song Mode + Auto Sequence and Random Sequence effects + Pattern presets for faster workflows
-
$19.99
Lite version for syncing lights and material properties to music beats. Features: * Audio import and automatic BPM detection * Built-in multi-track step sequencer * Easy beat-driven animation editing * Advanced curve shaping controls
 Included
Includes 12 months of
- Support from Programmable Factory
- Product updates
Extend this product’s Support Period +12 months: 50% of product price
Have questions before purchasing?
Login to message
Discover more products like this
light-sync Animation Workflow loop rhythm-animation vj audio-reactive auto-light-sync material animation Music Sync addon sequencer Procedural Animation