Blendcap Performance Capture
 Arcomade


Installation
Step 1: Install the add-on
- In Blender, open Edit ▸ Preferences ▸ Get Extensions (or Add-ons).
- Use Install from Disk and select the BlendCap
.zipfile you downloaded. - Enable BlendCap in the list if it isn't enabled automatically.
Once enabled, you'll find BlendCap in the 3D Viewport sidebar (press N) under the BlendCap tab, as well as in the "Output" tab in the Properties editor.
Step 2: Install the dependencies
The first time, BlendCap needs to download the models and the libraries that run them (around 11 GB). This is a one-time setup.
If the Preferences window isn't already open, go to Edit ▸ Preferences ▸ Add-ons, find BlendCap, and expand it. (You can also reach this faster with the Open Preferences button in the Setup section of BlendCap's sidebar panel.)
Click Install Dependencies.
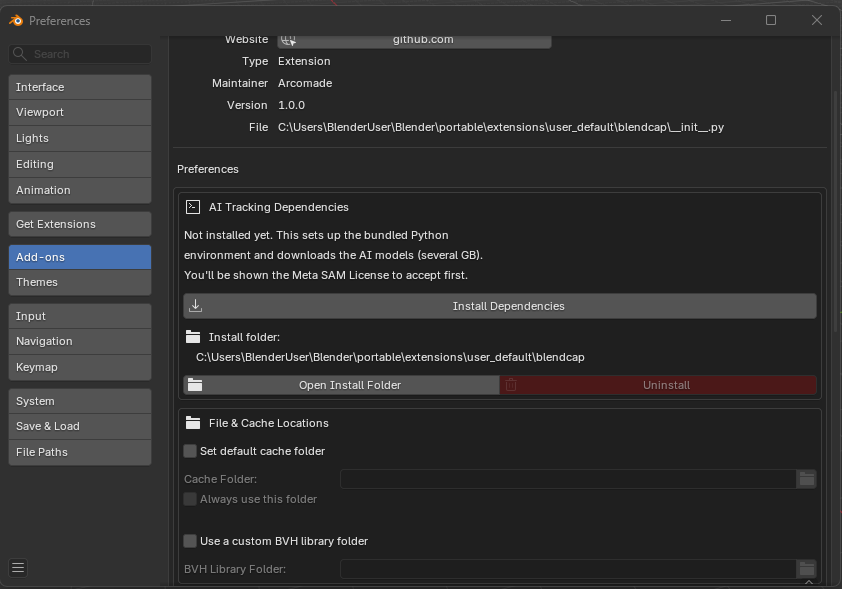
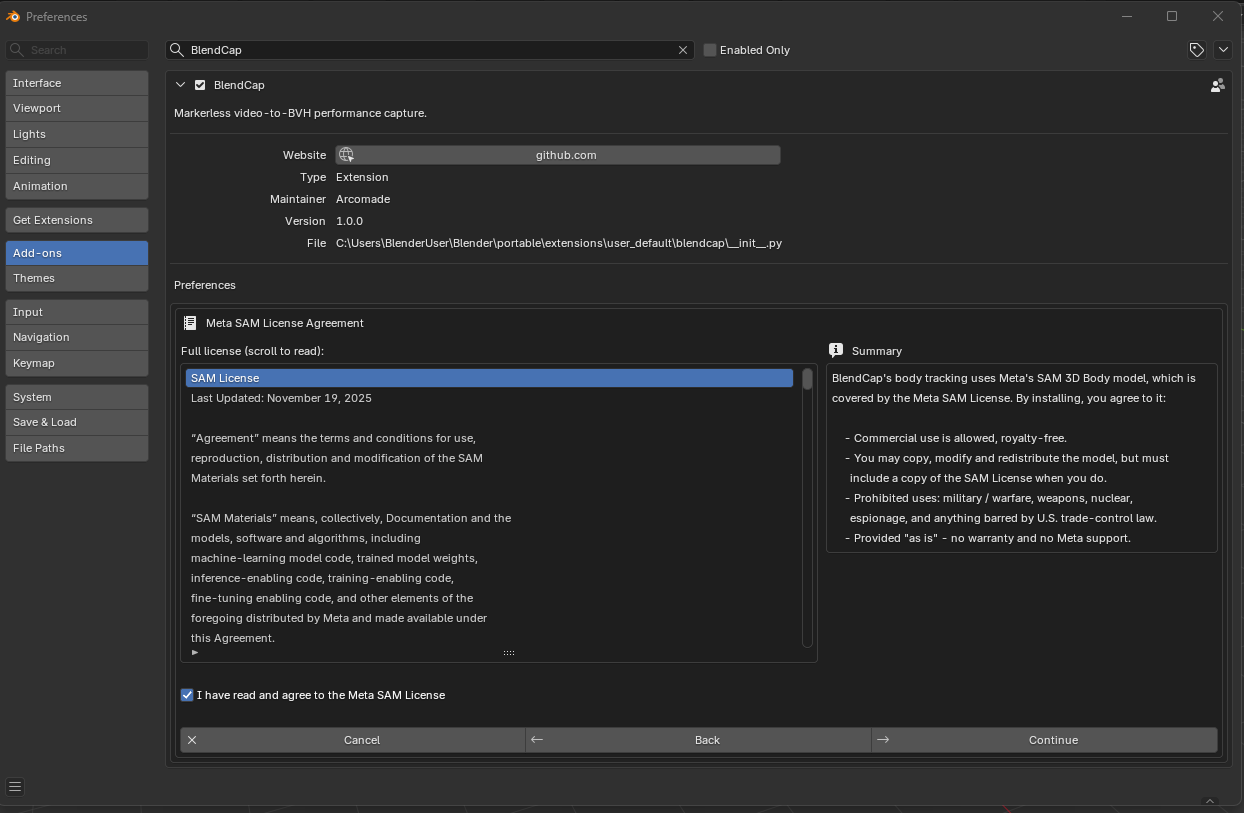
An install guide appears, right inside the preferences panel. Read the intro, then review and accept the model license (Meta's SAM License), you need to scroll through it and tick the agreement box to continue.
The next page lists the small system tools BlendCap may install for you if they're missing (a package manager helper, Git, and on Windows the Microsoft Visual C++ runtime). Click Install to begin. If any of them need to be installed, your system may ask for permissions in order to install them.
The installer opens a terminal window where you can watch its progress. It will alert you to any errors or extra instructions if needed.
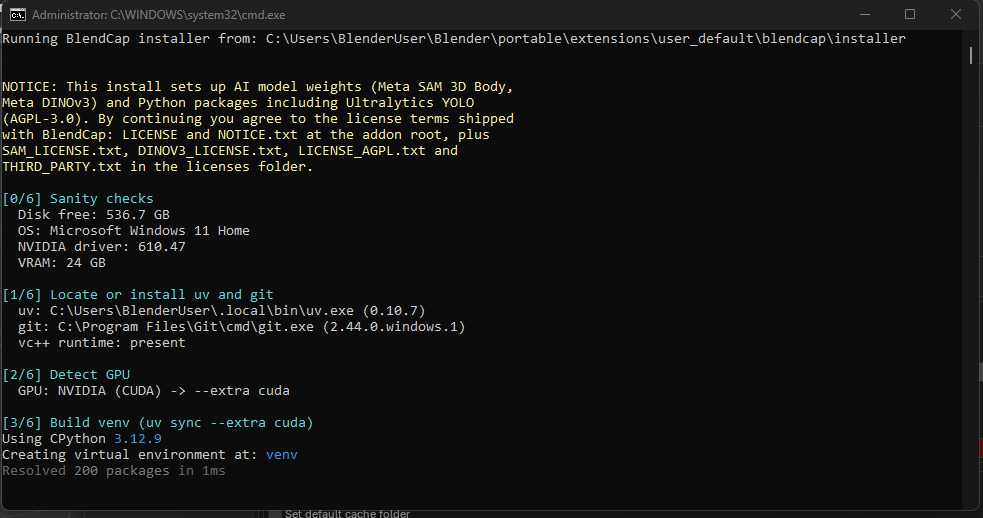
When it finishes, the terminal window will say "INSTALL COMPLETE" and BlendCap will be ready to capture.
How long does it take?
Mostly it depends on your internet speed, you're downloading about 11 GB. On a fast connection it's typically several minutes; on a slow one, longer. If the download is interrupted, just run it again, it resumes where it left off rather than starting over.
Platform notes
Windows
The installer can set up everything a clean machine needs, it will fetch the few system tools it depends on automatically. You don't need Python or any developer tools installed beforehand. If a standard Microsoft component is missing, Windows asks for permissions once in order to install it.
If a tool can't be fetched on your system, the installer tells you exactly which component to install and where to get it.
Linux
On Linux the installer opens a visible terminal so you can follow along. Installing some system tools may ask for your password (via sudo). Both standard and Flatpak Blender are supported.
Flatpak Blender, one-time permission. Because Flatpak runs Blender in a sandbox, BlendCap needs permission to run its installer on the host system. If this permission is missing, the install guide shows the exact command to run, with a Copy button. Run it once, restart Blender, and you're set.
Reinstalling and uninstalling
Both live in the BlendCap section of Add-on Preferences:
- Reinstall Dependencies: re-runs the dependency setup. Useful after a GPU change or if an install was interrupted.
- Uninstall: removes the downloaded models and libraries to free up disk space. It asks you to confirm first. (This removes the dependencies, not the add-on itself, disable or remove the add-on through Blender's Add-ons list.)
There's also an Open Install Folder button if you ever want to see where things live on disk.
Quick Start
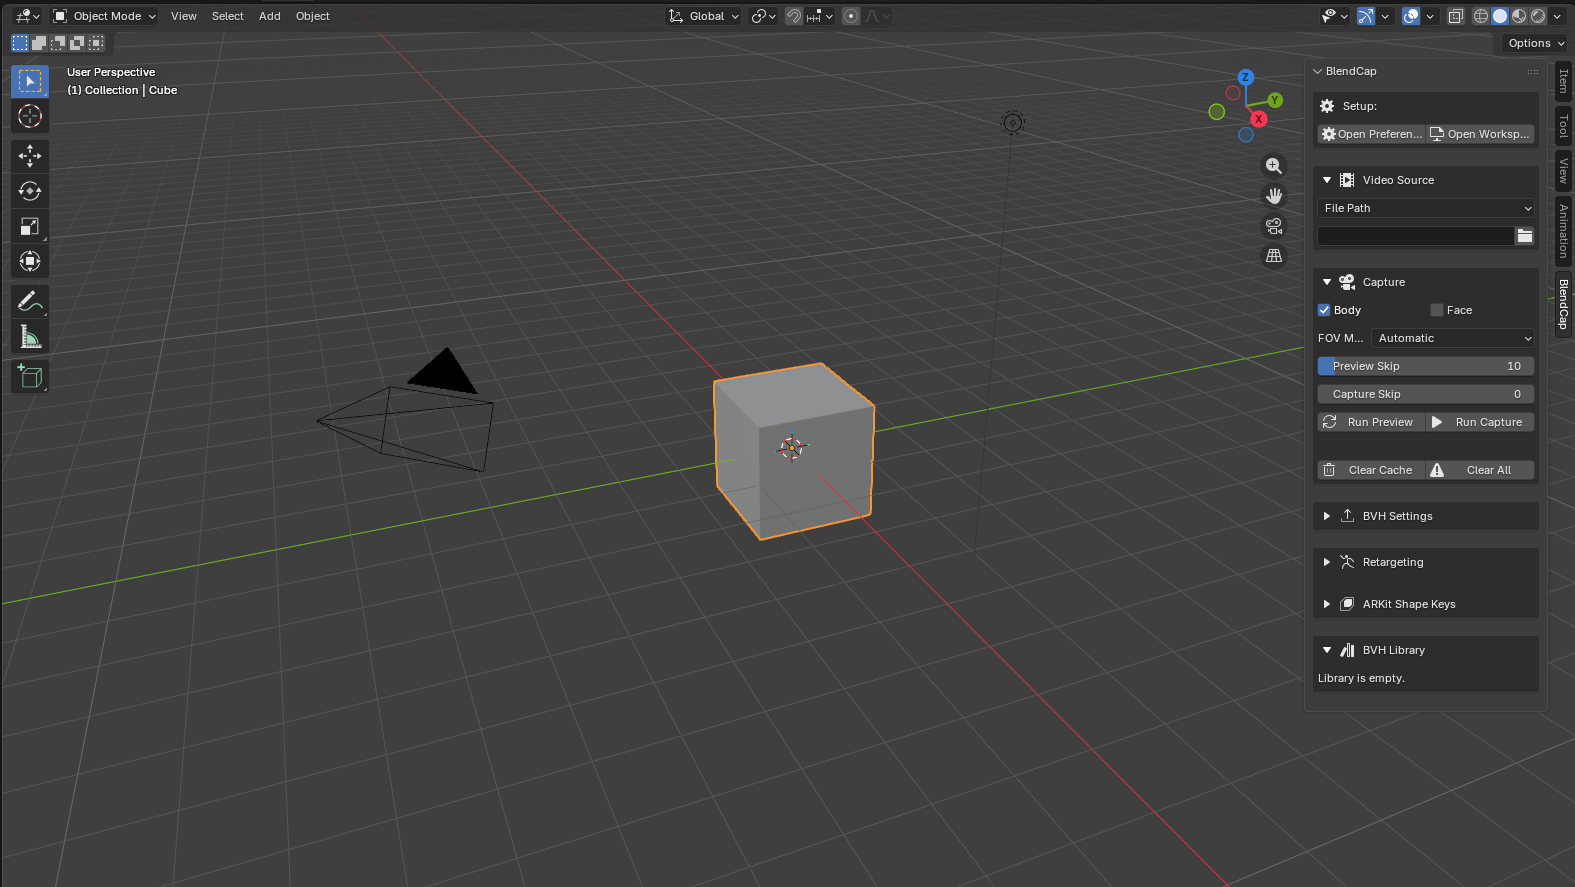
1. Open BlendCap
In the 3D Viewport, press N to open the sidebar and click the BlendCap tab.
2. Choose your video
In the Video Source section, leave it on File Path and point BlendCap at a video file on disk.
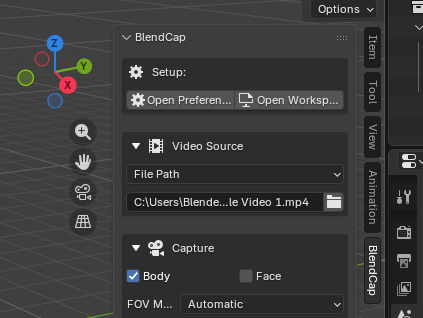
Tips for a good first clip: The video should only show one person, fully in frame, with reasonably good lighting, and a steady camera.
BlendCap can also pull footage from Blender's Video Sequencer for editing and multi-clip work.
3. (Optional) Run a Preview
Before committing to a full capture, you can optionally click Run Preview. Instead of processing every frame, BlendCap will check a sample of frames across the clip and draw a box on each where it finds a person, so you can confirm your subject is detected from start to finish. Because it only samples frames and just detects the person rather than solving the full pose, it is far quicker than a full capture. How densely it samples is set by Preview Skip.
Preview confirms the person is detected across the clip. It doesn't show the final pose quality, that comes from the full capture in the next step.
4. Capture
In the Capture section, choose what to track:
- Body: full body and hands.
- Face: facial performance (can be combined with Body, or done on its own).
Click Run Capture. BlendCap processes the clip and loads a plane in the viewport showing the tracked 2D skeleton over your footage, so you can check the result before going further.
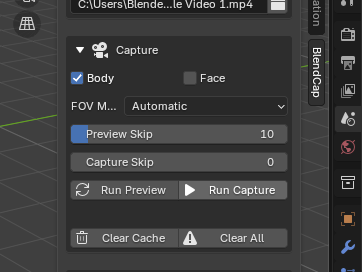
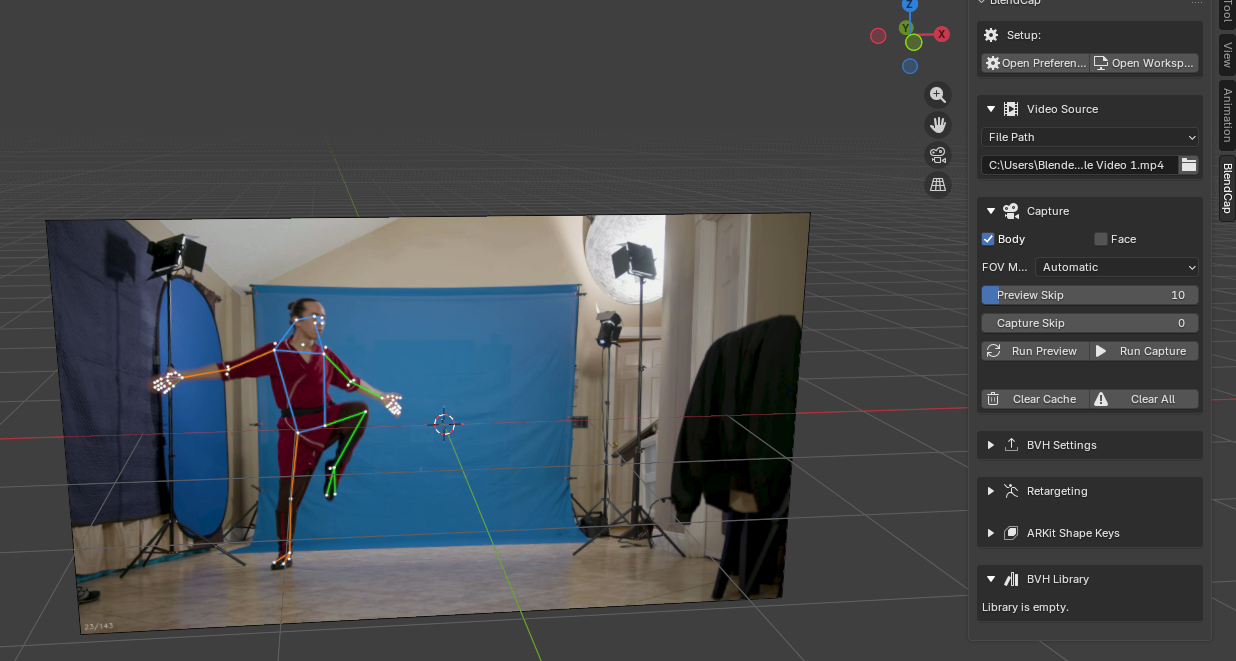
Once you're done examining the capture results, you can safely hide or delete the preview plane to clear up your viewport.
5. Generate the armature
Expand the BVH Settings section and click Generate/Reload BVH. BlendCap converts the capture into an animated armature and imports it into your scene, ready to retarget.
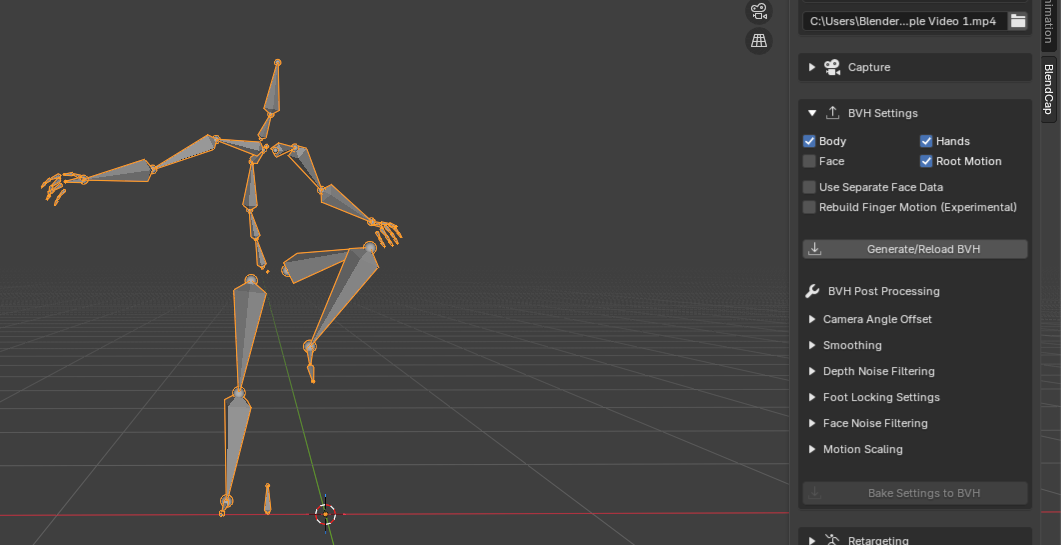
Your captured motion is now ready to use. If anything looks off, you can refine it with the BVH Post Processing controls.
From here you have two options:
- Export it to use in another program.
- Retarget it onto a rigged character in Blender, covered in the steps below. First make sure your rigged character is in the scene, either by importing it or by opening the project file that already has it.
Heads up: an unsaved project keeps its capture in a temporary cache that does not carry over to another project and is wiped when Blender closes. So before you exit, save this project if you plan to move the capture into another project file, or export the result. Otherwise the capture is lost when you leave. Even if you're staying in this project, it's worth saving anyway, so a crash doesn't force you to run the capture process again.
6. Point BlendCap at your rig
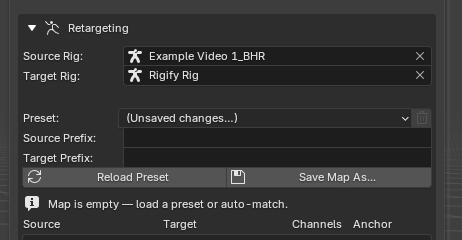
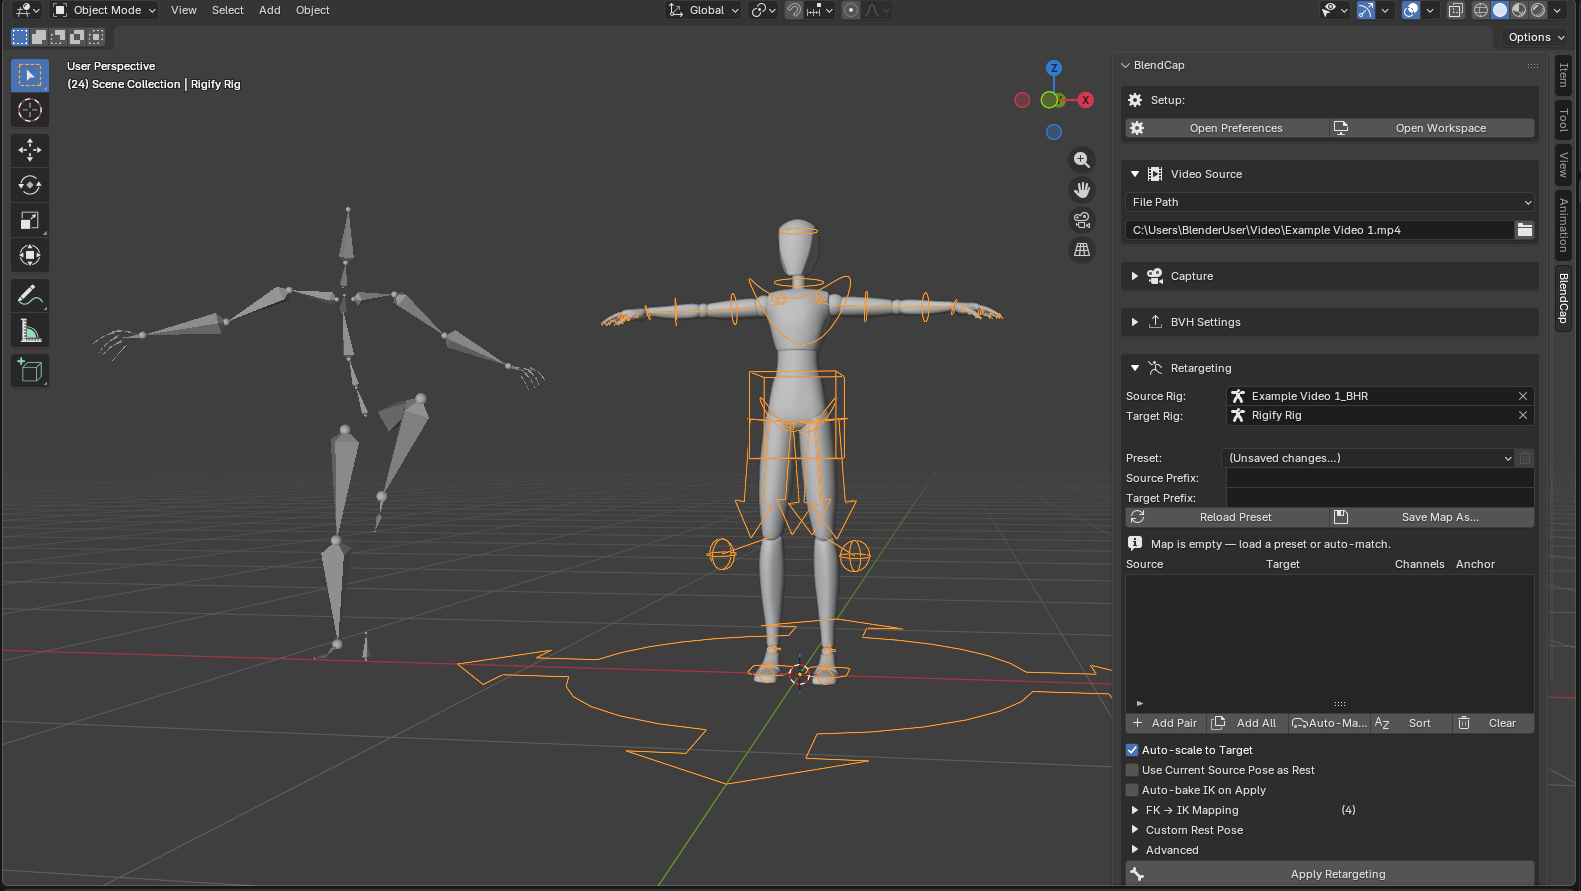
Now transfer the captured motion onto your character. In the Retargeting section:
- Set Source to the armature you just generated.
- Set Target to your character's rig (Rigify, Auto-Rig Pro, CloudRig, a Mixamo-style rig, or your own).
7. Load a bone map
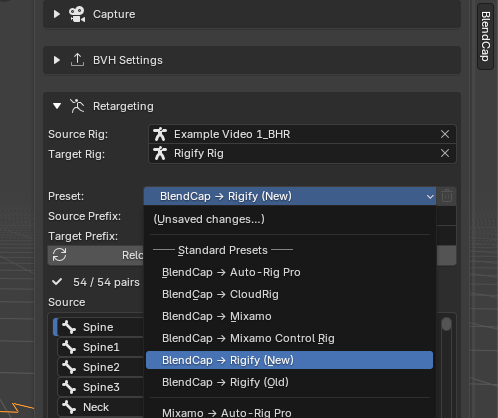
BlendCap needs to know which captured bone drives which bone on your rig. The easiest path:
- Choose a preset that matches your rig type from the preset list, or
- Click Auto-Match to let BlendCap attempt to pair the bones automatically based on naming, or Add All to fill the map, and pair the bones manually.
- You can fine-tune any pairing by hand.
8. Match the rest pose
Retargeting is cleanest when the source armature and your character start from the same rest pose, so line them up before baking.
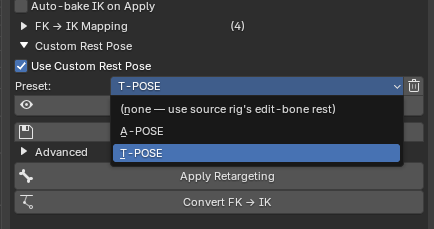
- If your character is in a simple T-pose (like the example), open the Custom Rest Pose section, enable it, and pick the T-POSE preset. No manual posing needed.
- For any other pose, match it by hand. In Pose Mode on the source armature, clear its transforms, pose it to match your character's rest pose, then enable Use Current Source Pose as Rest. You can also save any manual pose as your own Custom Rest Pose preset for future use.
This only sets what BlendCap treats as the source's rest pose; it doesn't change your captured animation.
9. Retarget
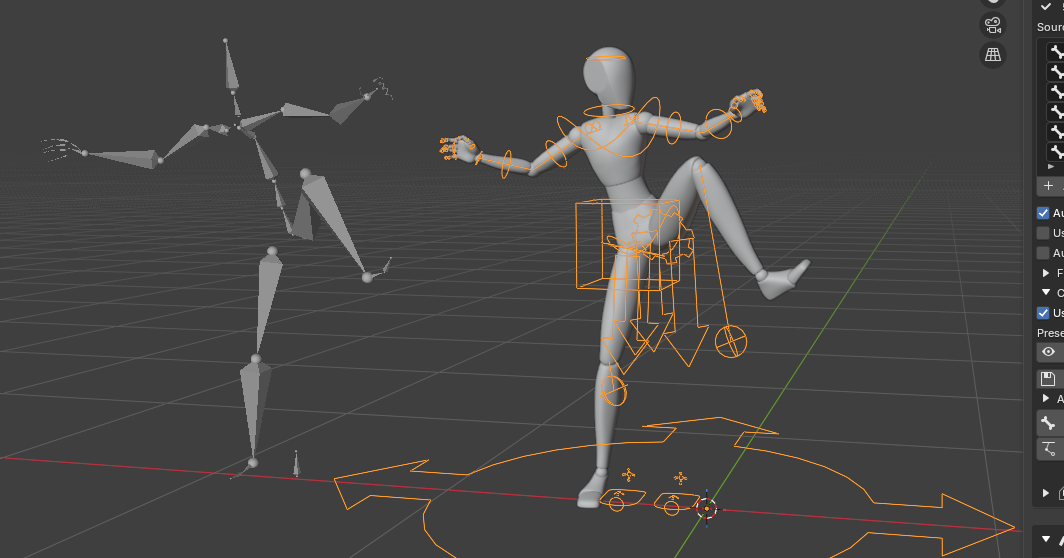
Click the "Apply Retargeting" button. BlendCap will transfer the motion onto your rig's FK controls. Once it's finished, scrub across the timeline and you should see your character performing the clip.
10. (Optional) Convert to IK
If your rig includes IK arms and legs, BlendCap can convert the FK motion to IK so you get clean foot and hand control for editing. If you used one of BlendCap's bundled preset maps, just click Convert FK → IK and BlendCap handles the conversion for you; otherwise you will need to set up the IK targets manually before converting.
11. Polish to taste
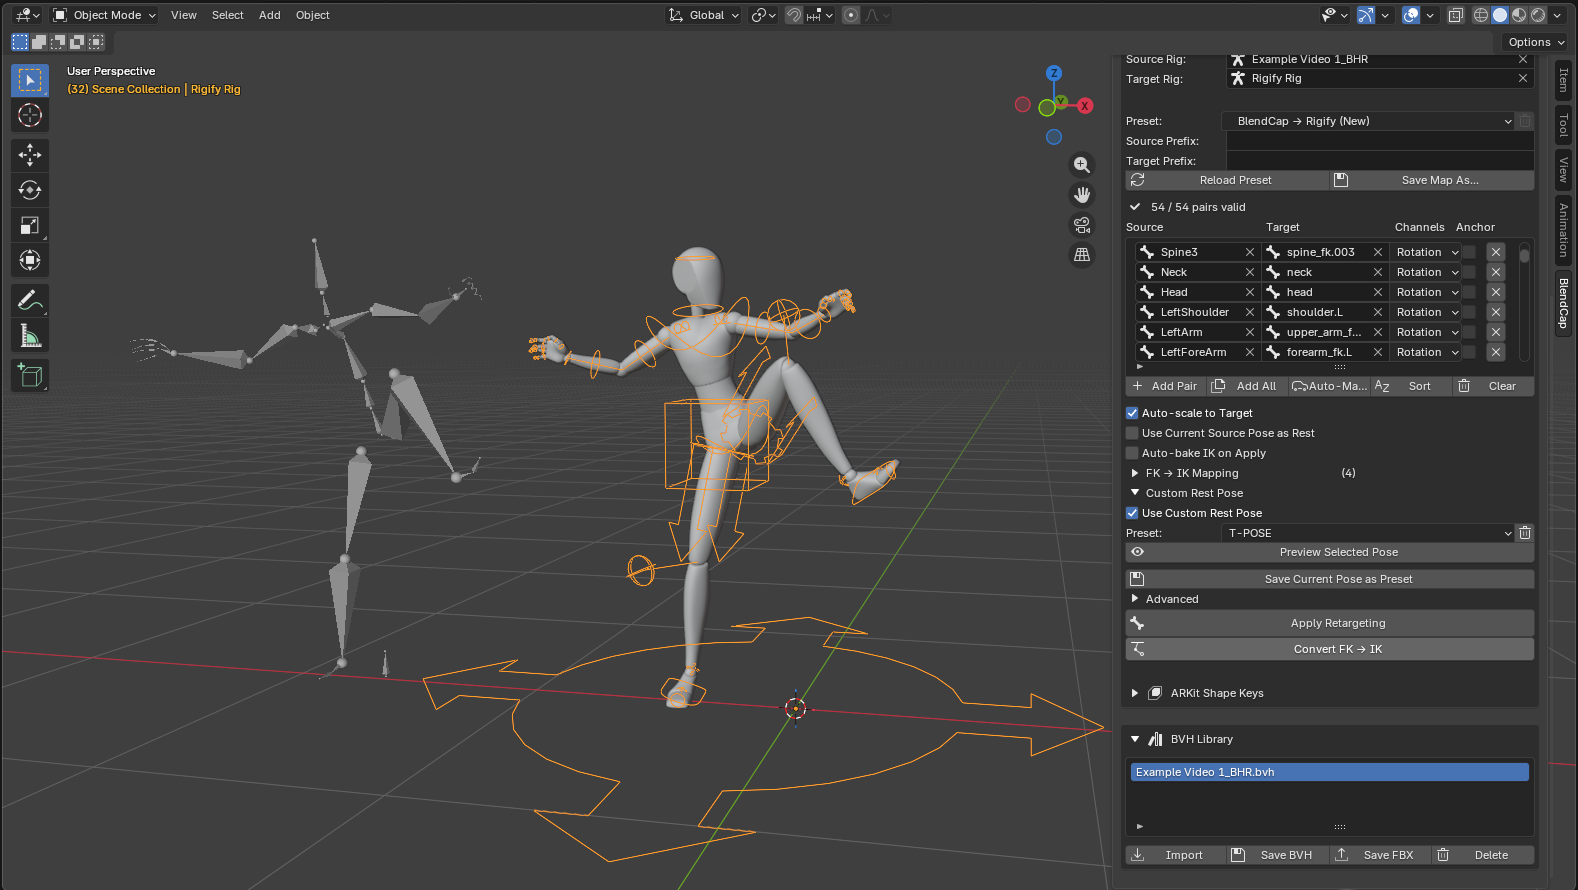
Your character is now animated with the captured motion, on its own FK (and, if you converted them, IK) controls. From here it is a normal Blender animation, so you can refine it by hand like any other: clean up keyframes, smooth rough moments, or adjust individual poses until it is the final result you want. The IK controls from the previous step make foot and hand fixes much easier.
If it already works for your shot, leave it as is. (Capture-level problems like footskate or overall jitter are often best fixed back in BVH Post Processing rather than by hand.
That's a capture!
This page covers installation and your first capture. For everything else (capture settings, face and finger tracking, retargeting, post-processing, the capture library, filming tips, and troubleshooting) see the documentation PDF included in your download. It covers everything shown here in more detail as well.
-
$60
Full BlendCap Addon - For 1 user
-
$250
Full BlendCap Addon - For up to 5 users
-
$450
Full BlendCap Addon - For up to 10 users
Have questions about this product?
Login to message
| Blender Extension Compatible | Yes |
| Sales | 500+ |
| Rating | 17 ratings |
| Published | 2 months ago |
| Blender Version | 4.2 - 5.2 |
| Render Engine Used | Cycles, Eevee |
| License | GPL |
Discover more products like this
retargeting character animation video to animation hand tracking body tracking face-tracking mixamo motion capture markerless mocap rigify performance capture mocap