 3D Tudor


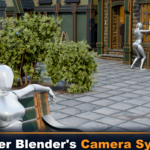
Blender Essentials: Camera Basics
A focused 10-lesson course on Blender's camera system — composition, focal length, depth of field and cinematic presentation, taught inside a fully built Victorian street scene.
Turn settings into images: Your model can be detailed, your materials strong and your lighting polished — but if the camera is weak, the final image still feels flat. This course fixes that.
A Camera Course Built Around a Finished Scene
A camera does far more than record a scene. It controls scale, mood, depth, distortion, visual hierarchy and the path the viewer's eye takes through the frame. Learning to use it deliberately is what turns a good render into a strong image.
In Blender Essentials: Camera Basics you will take full control of Blender's camera system and use it to present your work with clearer composition, stronger perspective and more deliberate visual storytelling. Across 10 focused lessons you work directly inside a supplied, fully built Victorian street environment — architecture, streets, props, foliage, lighting and posed mannequin characters, all ready from the start — so instead of testing settings in an empty file you have real subjects and real composition problems to solve.
You will not simply learn where the camera settings are. You will learn what they change, why they matter, and how to combine them into a practical workflow you can reuse for portfolio renders, thumbnails, course videos, architectural shots, isometric scenes and cinematic environment presentation.
Quick Answer
What is this?
A focused 10-lesson Blender course on the camera system, taught inside a supplied, fully built Victorian street scene.
What will you create?
Wide establishing shots, close-ups, top-down and architectural frames, orthographic and isometric views, character-led compositions and depth-of-field renders — all from one finished environment.
What makes it different?
Every camera setting is tied to a visible result on a finished scene. Focal length and composition are taught as visual decisions you can see, not lists of numbers to memorise.
Who is it for?
Blender users who can already model and light, but want to present their work with stronger, more deliberate camera work.
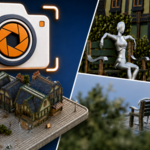
Focal length made visual: Wide lenses exaggerate depth and stretch nearby forms; longer lenses compress space and flatten distance. Compare the same frame side by side and choose a lens with purpose.
What You Will Learn
- Camera creation and management. Create, select, rename, organise, lock and switch between multiple cameras with confidence.
- Camera navigation. Position cameras through viewport controls, transforms, local axes, split views, walk mode and fly mode.
- Output formats. Set square, 16:9 and vertical-safe framing for thumbnails, videos, social posts and presentations.
- Focal length and perspective. Control field of view, distortion, depth exaggeration and telephoto compression.
- Projection types. Build perspective, orthographic, isometric and architectural camera views.
- Lens shift and clipping. Reframe architecture while keeping the camera level, and control visible scene depth.
- Composition tools. Use rule of thirds, diagonals, golden ratio, triangle guides, centre framing and safe areas.
- Depth of field. Use focus distance, focus objects, f-stop, aperture blades, rotation and bokeh ratio.
- Reference matching. Load camera background images, match the 3D scene to a reference and export transparent PNGs.
- Camera constraints. Aim cameras with Track To constraints and understand track and up axes.
- Rendering. Prepare and preview outputs in Cycles and Eevee using practical GPU and sample settings.
- Troubleshooting. Fix blank renders, missing geometry, clipping, focus, active-camera and visibility problems.
Compose with intent: Split viewports, safe areas, overlays and composition guides let you adjust a camera while keeping a live preview — so the frame feels deliberate before you spend time on a final render.
Six Reasons This Course Is Useful
- Learn on a finished scene. A fully built Victorian street — architecture, props, foliage, lighting and posed characters — gives you real subjects from lesson one.
- Every setting has a visible result. Technical controls are connected to what you actually see on screen, not explained in the abstract.
- Focal length taught visually. Compare matching frames at different lens lengths and distances so lens choice becomes an obvious creative decision.
- Composition tools you will actually use. Thirds, diagonals, golden ratio, triangles, centre framing and safe areas applied to a real environment.
- Professional workflows. Split viewports, local cameras, lens shift, Track To, orthographic and isometric views, walk and fly navigation.
- A dependable render workflow. Troubleshoot the problems that waste time and prepare clean outputs in Cycles and Eevee.
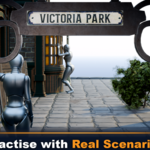
Real composition problems: Frame a mannequin looking into a shop window, balance seated and standing figures, and use foliage as foreground — real subjects that make every technical setting easier to understand.
Included files and resources
- 10 structured video lessons covering Blender's full camera workflow.
- A fully built Victorian street environment scene to practise in.
- Architecture, streets and building facades for real composition problems.
- Props and foliage for clean foreground, midground and background layering.
- Scene lighting already set up, so you can focus on the camera.
- Posed mannequin characters for character-led framing and storytelling shots.
- Immediate subjects for wide, close-up, top-down, architectural, isometric and depth-of-field shots.
- The complete lesson workflow, from first camera placement to a saved final image.
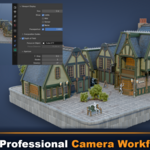
Professional camera workflows: Orthographic and isometric projection, lens shift, Track To constraints, clipping controls, background references, transparent PNG output and focus-object depth of field.
Course roadmap at a glance
1. Master Blender's camera system
Create cameras, enter and leave camera view, set the active scene camera, lock, protect transforms, rename, organise and switch between shots.
2. Focal length and perspective
Compare lens length and camera distance to control distortion, compression, scale and the emotional feeling of a shot.
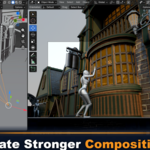
3. Create stronger compositions
Work with thirds, centre framing, diagonals, golden ratio, triangle guides, passepartout and title- and action-safe margins.
4. Practise with real scene scenarios
Shoot wide establishing frames, close-ups, top-down, architectural, character-led, isometric and depth-of-field studies on the Victorian street.
5. Professional camera workflows
Use split viewports, local cameras, lens shift, Track To aiming, walk and fly navigation, orthographic scale, isometric positioning and background references.
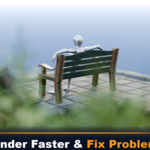
6. Render faster and fix problems
Troubleshoot blank renders, clipping, focus and active-camera issues, and dial in Cycles and Eevee, GPU, samples, denoising and colour management.
Render faster, fix problems: The final lesson tackles the issues that interrupt production — missing objects, broken depth of field, clipping, the wrong active camera and blank renders — so your workflow stays dependable.
Who this is for
Artists whose renders feel flat
Your models, materials and lighting are solid, but the final image lacks depth, mood or focus — and you suspect the camera is the missing piece.
Portfolio and thumbnail creators
You want repeatable framing for portfolio renders, thumbnails and social posts in square, widescreen and vertical formats.
Environment and architectural artists
You need orthographic, isometric and level architectural shots, plus lens shift and clipping control for clean presentation.
Course and content creators
You present 3D work on video and want deliberate, consistent camera framing for lessons, demos and cinematic shots.
Anyone new to Blender's camera
You want the foundations explained properly, on a finished scene, instead of piecing them together from scattered tutorials.
First placement to final image: A complete, connected workflow — position the camera, compose the frame, control depth of field, then preview, render, save and troubleshoot with confidence.
Why this course stands out
Camera work is usually taught as a list of buttons and numbers. This course teaches it as a series of visual decisions, on a scene that is already finished and waiting to be shot.
Because the Victorian street already has foreground, midground and background layers, architectural lines, props, lighting and character interactions, every technical setting is connected to a visible result. You see immediately how a lens change alters proportion, how a composition guide reshapes the frame, and how depth of field guides the eye — which makes the course useful both while you watch it and later, as a reference for your own projects.
In other words, the settings matter — but learning to turn them into deliberate images is the real skill you keep.
Requirements and compatibility
- You will need access to Blender; a reasonably recent version is recommended so all camera features are available.
- The course is best suited to confident beginners and intermediate artists. Core steps are demonstrated, but you get the most from it by following along in the scene.
- A computer capable of running Blender and rendering in Cycles or Eevee is recommended; a supported GPU helps.
- The Victorian street environment is supplied as a Blender file — you do not need to model it.
- Extract the zip before opening the project file so linked resources stay stable.
Before you buy
- This is a camera, composition and presentation course — not a modelling, materials or full-environment build course.
- You do not model the Victorian street. It is supplied so you can concentrate entirely on the camera.
- The resource file is included to support the learning workflow shown in the course.
- The camera principles transfer to any scene, so you can apply them to your own projects afterwards.
- For best results, extract the full zip before opening the project file.
Common questions
Is this beginner-friendly?
Yes. It is best for confident beginners and intermediate artists. The camera system is explained step by step, on a finished scene, so the concepts are easy to follow.
Do I have to model the Victorian street?
No. The full scene is supplied — architecture, props, foliage, lighting and posed characters are ready from the start, so you can focus entirely on the camera.
Which render engines are covered?
Both Cycles and Eevee, including GPU Compute, OptiX and CUDA options, denoising, preview and final sample counts, render regions, exposure and colour management.
Do I need a powerful PC?
Any machine that can run Blender and render the supplied scene will work. A supported GPU makes previews and final renders faster, and the course shows practical settings to keep things responsive.
Can I use these techniques on my own scenes?
Yes. The Victorian street is the practice ground, but the camera, composition, focal length, projection, depth-of-field and rendering principles transfer to any Blender project.
Is this only about camera settings?
No. It is about turning those settings into deliberate images — controlling scale, mood, depth, hierarchy and the viewer's eye, so your renders feel intentional rather than default.
Orthographic and isometric presentation: Parallel lines and controlled projection give clean architectural and isometric shots — a look that is hard to fake without understanding Blender's camera properly.
License note
This product includes course resources to support your learning inside the Blender Essentials: Camera Basics course. Unless the final store license states otherwise, the supplied Victorian street scene and resources are for course learning and personal non-commercial projects only.
The source files may not be resold, redistributed, repackaged, uploaded publicly, or included as raw downloadable resources inside another marketplace product, asset pack, template, course resource pack, or tool.
Take Control of Your Camera.
Learn to take a finished Blender scene and turn it into a stronger image — with deliberate composition, the right focal length, controlled depth of field, and clean orthographic, isometric and cinematic presentation.
Follow all 10 lessons on the supplied Victorian street scene and leave able to frame, compose and present any Blender project with intent — from portfolio renders and thumbnails to architectural, isometric and cinematic shots.
Until next time, happy modelling everyone!
Luke - 3D Tudor