 3D Tudor


Blender Essentials: Camera Basics
Camera control, composition, lenses and professional render workflows — taught inside a complete Victorian street environment.
Your model can be detailed, your materials strong and your lighting polished — but if the camera is weak, the final image still feels flat. This course fixes that. Across 10 focused lessons (1 hour 44 minutes, beginner friendly) you will take full control of Blender's camera system and learn to present your work with clearer composition, stronger perspective and more deliberate visual storytelling.
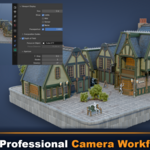
Instead of testing settings in an empty file, you work directly inside a supplied, fully built Victorian street scene. Architecture, streets, props, foliage, lighting and posed mannequin characters are ready from the start, giving you real subjects and real composition problems to solve. You will not just learn where the camera settings are — you will learn what they change, why they matter, and how to combine them into a repeatable workflow for portfolio renders, thumbnails, course videos, architectural shots, isometric scenes and cinematic presentation.
What's included
- 10 video lessons — 1 hour 44 minutes of focused, practical instruction, each tool demonstrated on a finished scene and followed by a visible result.
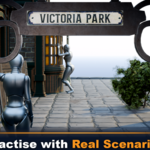
- Prebuilt Victorian-style Blender scene (.blend) — a complete environment with buildings, streets, windows, benches, signs, lamps, foliage, props, existing materials and lighting, plus posed mannequin characters. It is arranged to support wide establishing shots, close-ups, architectural and isometric views, focal-length comparisons, character compositions and depth-of-field studies.
- Prepared background PNG reference — used to practise matching a 3D composition to a camera reference and exporting a transparent (RGBA) render for external compositing.
Getting started
- Download and unzip the resource pack, then open the supplied .blend file in Blender.
- Begin with Lesson 1, which introduces the scene, explains the difference between the working viewport and the rendered camera view (F12), and sets up Cycles with GPU Compute for previews.
- Work through the lessons in order. Every setting is demonstrated inside the complete scene and immediately paired with the framing or render it produces, so each control is tied to an outcome you can see.
Software & requirements
- Blender: built in Blender 4.x. The camera panels, tools and shortcuts also apply to current Blender releases.
- Render engines: both Cycles and Eevee are covered, including GPU Compute, OptiX and CUDA setup, GPU denoising, and preview versus final sample counts.
- Experience: a basic understanding of Blender viewport navigation is recommended. No previous camera, photography or composition experience is required.
- Laptop friendly: the course covers Blender's Emulate Numpad option and menu alternatives to every essential camera shortcut.
Course curriculum
10 focused lessons | Total runtime: 1 hour 44 minutes
| Lesson | Runtime |
|---|---|
|
1. Camera Foundations & Project Setup Understand the rendered camera view, create a camera, open the supplied Victorian project and organise cameras in the Outliner. |
05:08 |
|
2. Controlling & Managing Multiple Cameras Enter camera view, use Lock Camera to View, protect transforms, name cameras and switch the active scene camera. |
10:19 |
|
3. Framing, Resolution & Precise Camera Movement Set square and widescreen output, move in global and local space, use split viewports and save a test render. |
10:07 |
|
4. Focal Length, Camera Distance & Perspective Compare wide, natural and telephoto lenses while matching similar framing to reveal distortion and compression. |
09:42 |
|
5. Orthographic Cameras, Clipping & Lens Shift Create orthographic and isometric views, control clipping ranges and use lens shift for clean architectural framing. |
13:30 |
|
6. Composition Guides & Camera Visualisers Use passepartout, thirds, diagonals, golden ratio, triangles, safe areas, limits and depth-of-field markers. |
13:52 |
|
7. Depth of Field & Focus Control Focus on a subject, blur foreground foliage, shape bokeh and create a miniature / tilt-shift-style presentation. |
07:34 |
|
8. Camera Background References & Transparent Renders Match a 3D composition to a background reference and export RGBA PNG renders with a transparent world. |
09:59 |
|
9. Camera Constraints, Local Views & Walk Navigation Assign local cameras to viewports, build a Track To setup and position shots using walk and fly navigation. |
09:51 |
|
10. Troubleshooting & Faster Rendering Solve common camera and render issues, configure GPU workflows, use render regions and improve preview efficiency. |
14:08 |
What you will learn
- Camera creation & management: create, select, rename, organise, lock and switch between multiple cameras.
- Camera navigation: position cameras with viewport controls, transforms, local axes, split views, and walk / fly mode.
- Output formats: set square, 16:9 and vertical-safe framing for thumbnails, videos, social posts and presentations.
- Focal length & perspective: control field of view, distortion, depth exaggeration and telephoto compression.
- Projection types: build perspective, orthographic, isometric and architectural camera views.
- Lens shift & clipping: reframe architecture while keeping the camera level, and control visible scene depth.
- Composition tools: rule of thirds, diagonals, golden ratio, triangle guides, centre framing and safe areas.
- Depth of field: focus distance, focus objects, f-stop, aperture blades, rotation and bokeh ratio.
- Reference matching: load camera background images, match the 3D scene and export transparent PNGs.
- Camera constraints: aim cameras with Track To constraints and understand track and up axes.
- Rendering & troubleshooting: Cycles / Eevee, GPU and sample settings, and fixes for blank renders, missing geometry, clipping, focus, active-camera and visibility problems.
Who this course is for
- Blender users who understand basic viewport navigation but are new to cameras.
- Environment artists who want stronger portfolio renders and presentation images.
- Course creators and YouTubers producing thumbnails, demonstrations or camera-based videos.
- Artists creating architectural, isometric, cinematic or character-led scenes.
- Anyone who struggles with framing, focal length, camera switching, depth of field or inconsistent render output.
A note on the resource pack
The Victorian environment used in this course was developed from the scene created for Blender 4: The Ultimate Environment Artist's Guide. For this camera course, parts of the environment were revised specifically for camera practice — selected compositions were remodelled, and buildings were repurposed or repositioned to better support framing, focal-length, perspective, depth-of-field, orthographic and character-composition exercises. It is a revised teaching scene derived from that project, not an unchanged copy.
Explore the full environment course here: Blender 4: The Ultimate Environment Artist's Guide.
Your work deserves more than a default camera angle. Learn to present every scene with clearer composition, stronger perspective and professional control.
Happy modelling, everyone.
Neil — 3D Tudor
Have questions about this product?
Login to message
| Sales | 30+ |
| Dev Fund Contributor | |
| Published | about 2 months ago |
| Blender Version | 5.0 - 5.1 |
| Render Engine Used | Cycles |
| License | Royalty Free |
Discover more products like this
Blender Essentials camera angles blender eevee blender lighting blender tutorial 3d tudor blender camera Blender course 3D rendering Blender cycles blender blender presentation