 za studio
BModeller v1.0 - Complete User Guide
Note : There is a pdf document in Add-on zip file. You can follow all of these on Pdf Document.
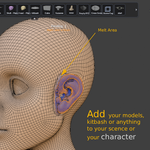
BModeller places Mesh, Text, and Metaball assets with brushes and editable paths in Blender's 3D Viewport. It can keep inserts separate, fit them to a base surface, merge them for sculpting, and record supported changes in an Action Stack.
1. Requirements and installation
BModeller supports Blender 5.0 and later releases before Blender 6.0. The downloadable BModeller.v1.0.zip is a Blender extension package. Do not unpack it before installation.
- In Blender, open Edit > Preferences > Get Extensions.
- Open the extension menu and choose Install from Disk.
- Select
BModeller.v1.0.zipand enable BModeller if needed. - In a 3D Viewport, press N and open the BModeller sidebar tab.
- If you are replacing a version that is already loaded, restart Blender before testing the updated controls.
2. The workflow in one minute
Think of BModeller as two stages: placement and finishing. Accept ends the current placement stage and makes its insert set available for a finishing method. It does not permanently fuse the geometry. Finish exits Insert Mode while keeping the placed objects independent.
- Select the mesh that should be the base, if the operation needs one.
- Choose a source in Select Asset.
- Choose Placement: Surface, View, or Cursor.
- Draw, paint, annotate, or distribute the source along a Curve.
- Adjust Scale, Count/Distance, orientation, and optional Chain settings while the result is pending.
- Press Accept to continue to Surface Fit or Sculpt Merge. Alternatively, press Finish to keep the separate objects.
- Preview the selected finishing method. Use that section's Apply to commit or Cancel to restore the editable inputs.
- Select a new base or Curve and begin the next operation.
Recommended order: choose the base and asset first; place and adjust the inserts second; Accept third; choose Surface Fit or Sculpt Merge fourth; Apply only after inspecting the preview. This avoids confusing a placement decision with a geometry commit.
3. Where the controls are
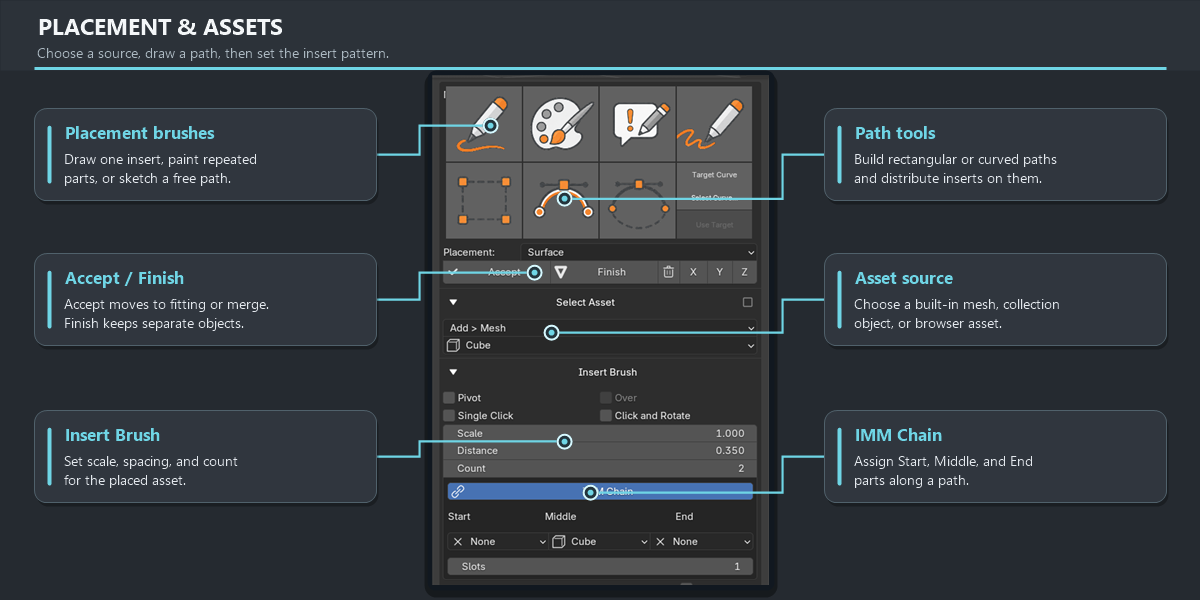
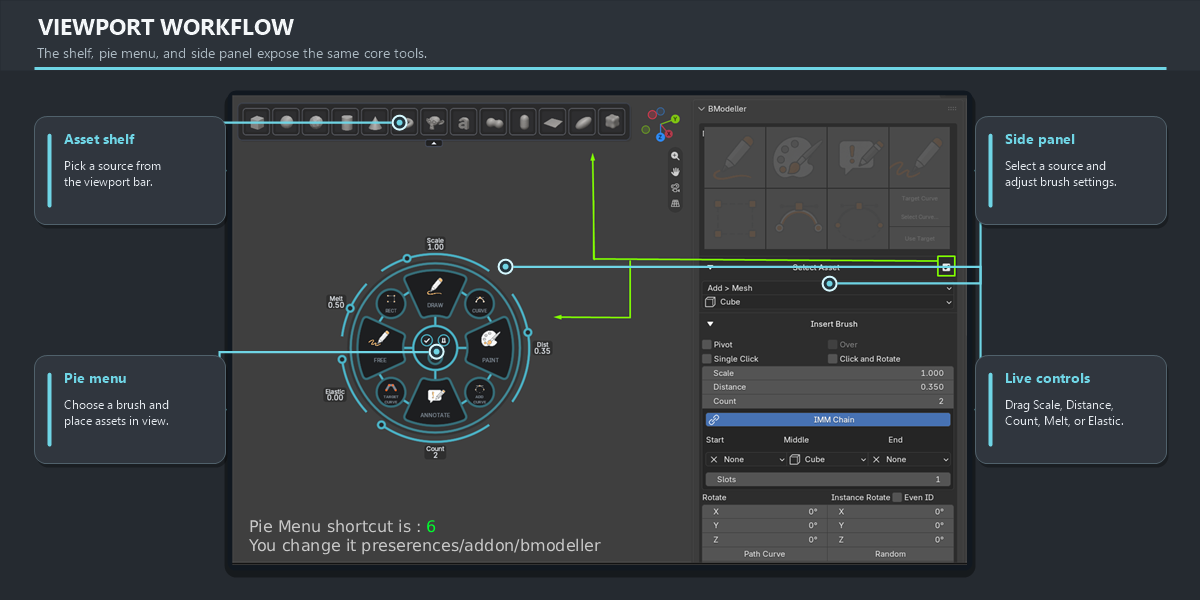
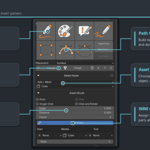
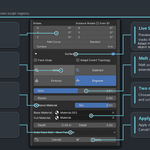
Main Tools contains the placement brushes and Curve actions. Placement chooses where new paths are created. Select Asset chooses the source. Insert Brush controls distribution and transforms. Surface Fit, Sculpt Merge, Local Remesh, and Action Stack contain the finishing operations.
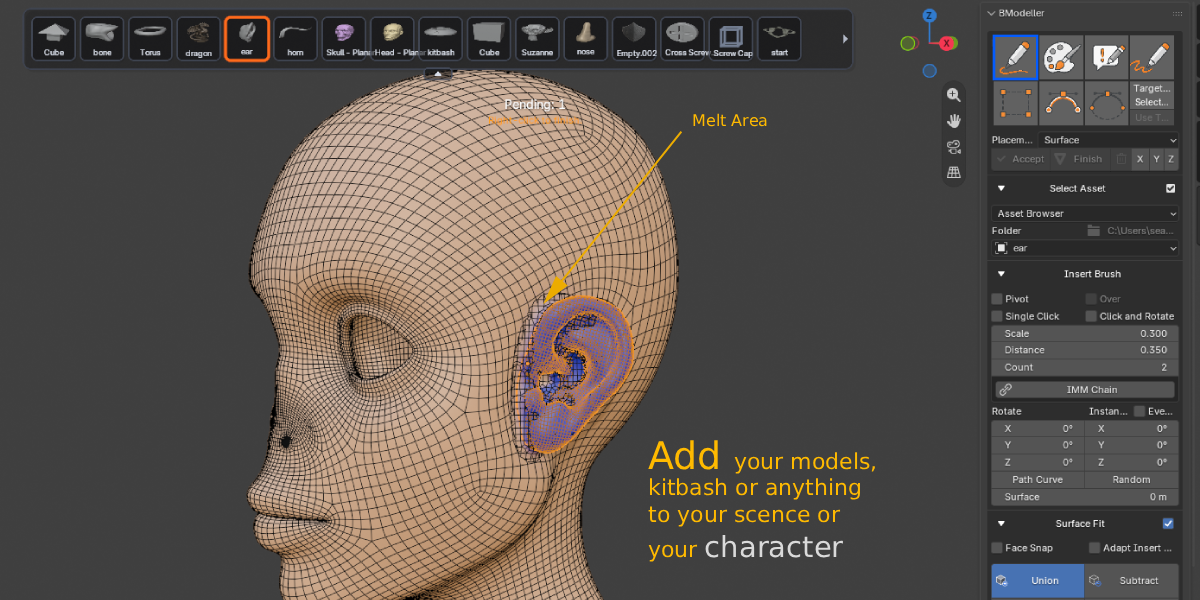
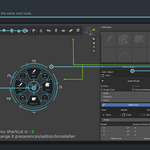
The optional Viewport GPU shelf sits along the top edge of the 3D Viewport. It shows cards for the current asset source and two workflow actions at the right. Hovering a card shows its name. Its small tab collapses and reopens the shelf; mouse-wheel scrolling reaches cards beyond the visible width.
The radial or pie menu uses the same core placement tools. Its default shortcut is 6 in the 3D Viewport; change it in BModeller's add-on preferences using Press Any Key. While the menu is open, MMB orbits, Shift+MMB pans, and the wheel or Ctrl+MMB zooms. The menu remains open while you inspect the object until you select a control or dismiss it.
The pie arcs expose Scale, Distance, Count, Melt, and Elastic. Melt drag covers 0-1 to keep live updates responsive; hover and type a number to reach the full maximum of 5. The central FIT control toggles live Surface Fit when available. Workflow icons change with the current stage: before Accept they represent Accept/Finish; an active finishing preview supplies its own Apply/Cancel behavior.
4. Choosing an asset
Add > Mesh supplies built-in primitive sources, including Mesh, Text, and Metaball choices. Collection lets you choose an object from a scene collection, including nested child collections. Asset Browser reads Object Assets from .blend files in the folder selected in the add-on preferences or sidebar.
Select a simple placeholder to block out a stroke if you wish. Before Accept, changing the selected asset can replace the pending ordinary Draw, Paint, or Annotate stroke while keeping recorded positions and distribution settings. A change to one IMM Chain slot affects that role, not every other slot. With several target Curves, select the intended Curve before replacing its assigned asset so another path is not changed by accident.
The source object is evaluated for placement and fusion. Text and Metaball sources can stay editable while a live preview is being adjusted. A source with many polygons or a costly modifier stack can make every Count edit and preview refresh slower. For a first test, use a simple primitive and a low Count.
5. Placement and the base mesh
Surface places new inserts using a mesh surface. View and Cursor let Annotate or Add Curve work freely in space without forcing the new path onto a base. The chosen placement is stored with a stroke; changing it later affects new strokes rather than moving already placed objects.
The Surface value in Insert Brush controls an explicit distance from the recorded placement or surface. Pivot changes whether new geometry rests on the contacted surface or is positioned by its origin. Pivot is captured when each insert is made; changing it later does not silently rewrite earlier inserts.
For an existing mesh, select the base before starting the brush. For an external Surface Fit session, select the insert object or objects first, then make the desired base mesh active last, and enable Surface Fit. Once that session is active, changing the Blender selection alone does not switch its sources: Cancel the current preview, then select the next pair.
If the first object was created in View space and no independent base exists, Finish that first asset as a scene object, select it as the base, then Accept the next insert set. The viewport may tell you: "No independent mesh base. Select [object], press Finish, then Accept and merge the next BModeller asset." This is a workflow guard, not a reason to delete the object.
6. The placement tools
Draw places one source at a time. Single Click changes placement into a staged click workflow. With Click and Rotate, a later click locks the position and begins rotation; X, Y, or Z selects or resets the local axis, numeric input sets an exact angle, Ctrl snaps to 5-degree steps, and Shift makes fine adjustments.
Paint repeats the chosen source while the pointer moves. Each mouse press/release is a separate stroke. Annotate builds a line of objects from a drawn gesture and is useful for freely shaped paths away from a base. Free, Rectangle, and Curve draw guide paths; press Enter to place a completed path, then draw another if required.
Add Curve creates a real, editable Blender Bezier Curve with linked inserts. Target Curve / Use Target assigns the asset to an existing Curve selected in the scene. Moving Curve points and handles, changing the Curve transform, or changing Count/Distance updates the linked distribution. A Curve with several splines has independent paths; each spline restarts the placement pattern.
7. Count, Distance, orientation, and random variation
Count requests a number of inserts on a completed path. Distance requests world-space spacing. The control edited most recently takes priority: changing Distance can update the resulting Count; changing Count redistributes the instances and updates their spacing.
Path Curve changes orientation, not path positions. Off: inserts stay at their path locations with their own orientation. On: they rotate to follow the Curve tangent. Instance Rotate adds rotation per instance; Even ID alternates the relevant sequence. Random reveals Seed, Scale, and Rotate on one row. Changes are previewed while the inserts are pending, and the same Seed restores the same random arrangement.
Symmetry X/Y/Z mirrors placement around the selected Cursor or Object center. Check the center before creating a long stroke: mirroring can multiply the displayed objects and the amount of work in later fusion.
The large-path confirmation
A path update estimated to create more than 250 objects is paused before rebuilding. The panel shows an action such as Apply Count 251 (251 objects) or Apply Distance ... (N objects). Clicking it opens a Large path update detected confirmation. The dialog explains that BModeller paused the update to keep Blender responsive. Confirm only if the scene and asset complexity are manageable; cancelling keeps the previous safe distribution.
A path request estimated above 1000 objects is refused; reduce Count or increase Distance. On a multi-spline Curve, the estimate covers the generated instances across splines, so a modest per-spline Count can still cross a total threshold. 200 objects by itself does not trigger the large-path confirmation in v1.0; the threshold is above 250.
The 250/1000 controls guard path distribution, not all later geometry operations. A 200-object batch of dense, textured, or heavily modified meshes can still be expensive to preview or merge.
8. IMM Chain
Enable IMM Chain in Insert Brush when a path needs different Start, Middle, and End pieces. Each of up to five slots can contain its own Start, Middle, and End source. Sequential cycles the enabled Middle choices; Random uses a Seed for repeatable choices. Closed paths use Middle pieces instead of artificial endpoints.
The chain works with Paint, Annotate, Draw guide paths, and Curve distributions. Count/Distance changes keep the role arrangement. You can edit an already placed chain by selecting its stroke collection, changing the relevant slot, and allowing the linked instances to refresh. Manually scaled objects in another slot should keep their own stored transforms when a different slot or Random settings change.
Use a low Count to test Start and End orientation first. Then increase Count or reduce Distance after the path shape is final. For a long or multi-spline chain, check the large-path estimate before confirming the rebuild.
9. Accept, Finish, Apply, and Cancel are different
Accept completes the placement stage while preserving a set that can be finished by Surface Fit or Sculpt Merge. It is not the same as applying a Boolean, remesh, or material blend. You may select another brush or source for a later operation after a completed action.
Finish ends Insert Mode and keeps the current inserted objects as regular scene objects, without forcing them into the base. Finish Insert Mode is also the recovery control if an interrupted session leaves the brushes greyed out.
Surface Fit Apply commits the visible live Surface Fit result. Surface Fit Cancel ends that live session and keeps the source objects. Sculpt Merge first creates its own preview; its Apply confirms that merged result, while its Cancel restores the pre-merge objects. The pie and shelf workflow controls route to the currently active finishing operation.
For safety, save the .blend before a very dense merge. Blender Undo can return to a previous stage, but a saved file is the most reliable checkpoint before a costly operation.
10. Surface Fit: choose an operation
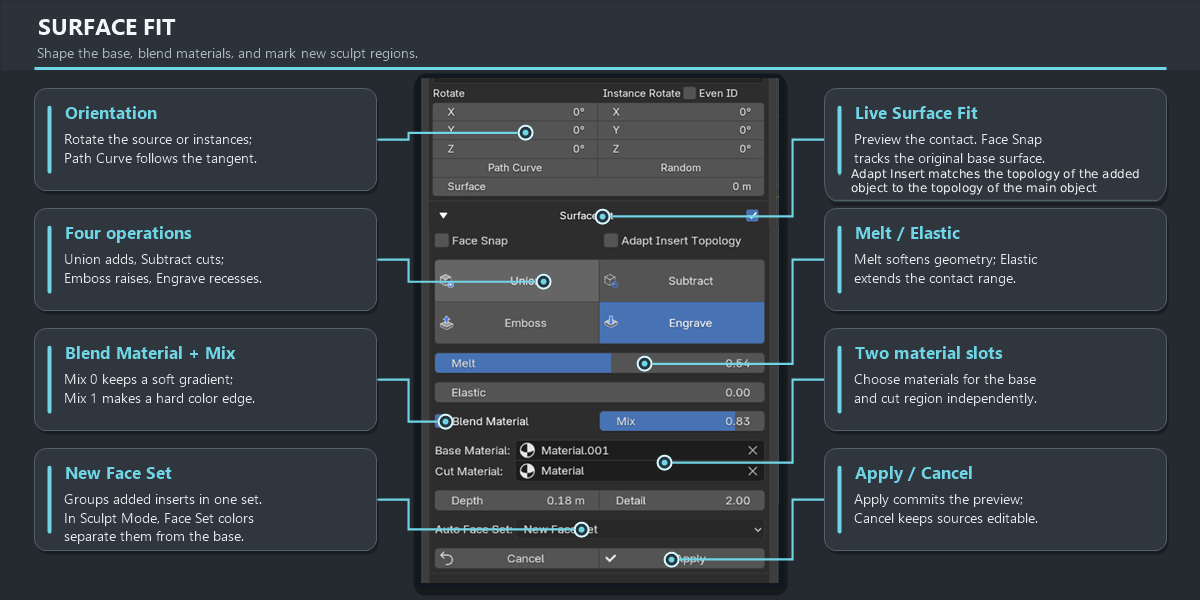
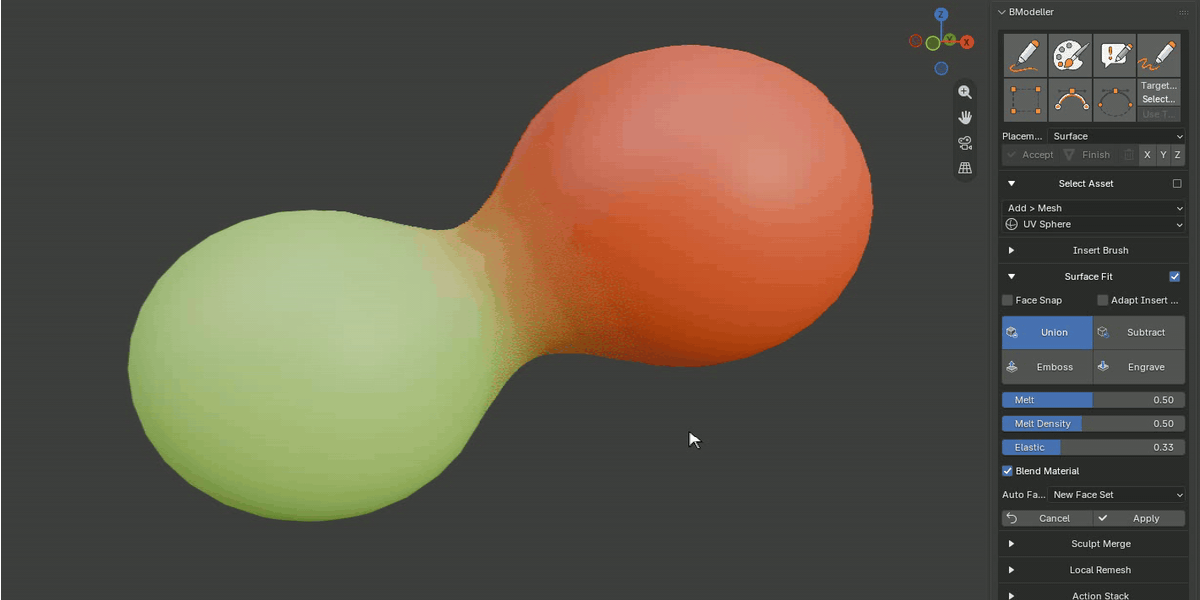
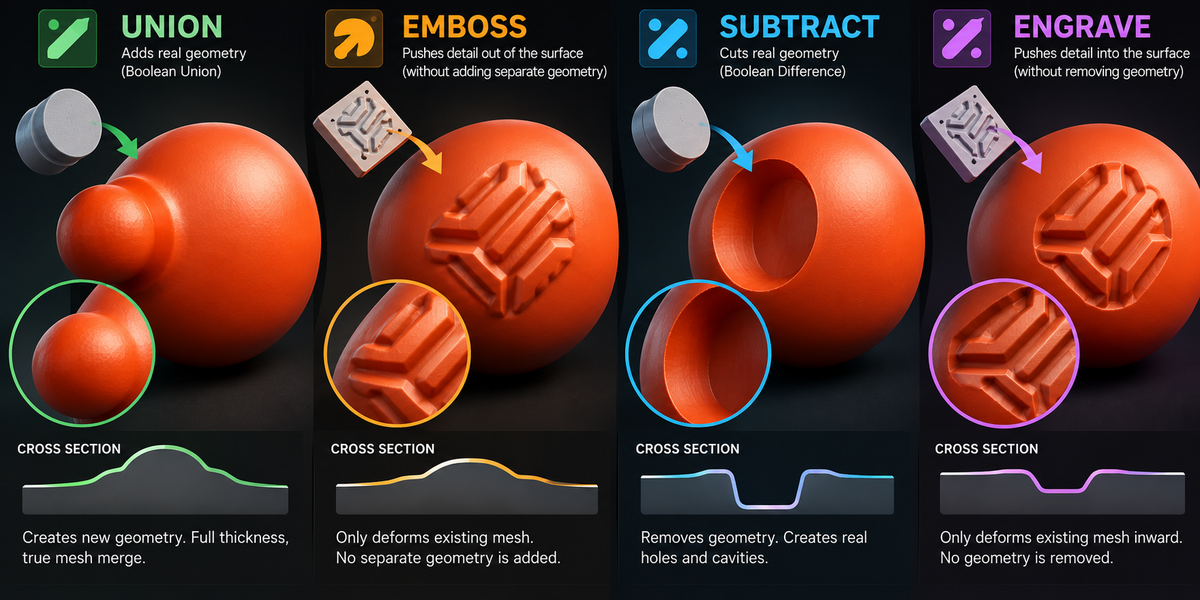
Enable the checkbox on the Surface Fit heading. It builds a live preview from the selected base and inserts. The four operations are:
- Union: add inserts to the base and optionally create a soft connecting neck.
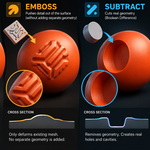
- Subtract: use inserts as cutters; a larger contact region can soften the subtraction.
- Emboss: raise a surface-following stamp by Height.
- Engrave: recess a surface-following stamp by Depth.
Move, rotate, or scale the original inserts while the preview is active. The original sources remain selectable as controls. Surface Fit can temporarily support many open boundaries and planar bases during calculation and remove the temporary support from the applied result. A source or base outside the supported safe geometry/budget may still be refused rather than producing a damaged mesh.
Face Snap follows the original base surface when moving an insert. It does not use the already generated preview as a new snap target. Adapt Insert Topology adjusts the insert's density toward the base locally; it does not globally remesh the authored base. Leave Adapt off if preserving the source insert's original topology matters more than matching densities.
11. Surface Fit controls in detail
Melt ranges from 0 to 5. Zero keeps a sharp operation contour. Increasing it widens and softens the connection or relief rim. A high Melt value can be slower and can erase small features. In the pie, drag only covers 0-1; type values above 1 explicitly.
Melt Density ranges from 0.1 to 1.0 for Union/Subtract. Its default, 0.5, retains the previous sampling level. At 1.0 the transition creates approximately twice as many faces as the default. This increases detail and memory use; raise it only where the smoother surface is visible and needed.
Elastic ranges from 0 to 1. In Union/Subtract it allows a longer, thinner neck across a gap; in Emboss/Engrave it extends contact reach. If the sources move beyond the capture range, the connection disappears. Melt governs softness; Elastic governs reach. They are separate controls.
Height/Depth specifies the relief displacement for Emboss/Engrave. Detail adjusts the local relief sampling density from 0.25 to 4. Higher detail follows curves more closely but updates more slowly. Auto Face Set can assign new Sculpt Face Sets per insert or per stroke, or keep base Face Set identifiers according to the selected mode.
For best feedback, begin at default Melt Density and moderate Melt/Elastic. Make one control change at a time and let the live preview update before increasing Count or Detail.
12. Blend Material: solid-color transition only
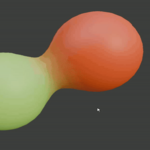
Blend Material is enabled for Surface Fit Union. It creates a gradual material transition across both sides of the join and the connector. The outer areas of the original objects retain their own material appearance; the generated blend is focused around the joining surfaces.
Mix Material is mixing 2 material that you assing to the objects. 0 is zero gradient. 1 is full gradient.
The blend material reads constant Principled BSDF Base Color, Metallic, and Roughness values from the participating materials. A Base Color linked directly from a constant RGB node can also supply that color. It constructs a new pair of Principled shaders and mixes them using a stored blend factor.
It does not merge Image Texture nodes, UV layouts, procedural shader networks, normal maps, or baked texture detail. A textured source can remain visually different outside the seam, but its image pattern will not flow across the new blend. For a predictable green-to-orange transition, start with two simple solid-color Principled materials. For textured production assets, plan a separate texturing/baking pass after geometry is committed.
13. Sculpt Merge
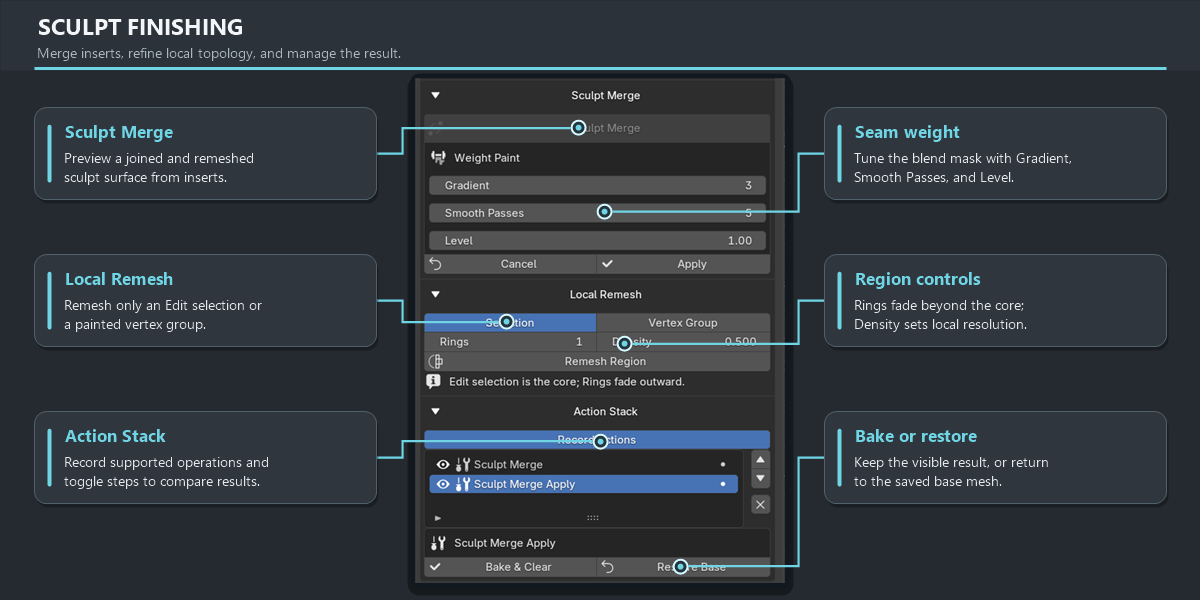
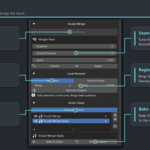
Turn Surface Fit off before using the dedicated Sculpt Merge section. Select or accept the relevant insert set, then click Sculpt Merge. It previews a joined and remeshed sculpt surface, including an option for touching objects built with Annotate in free space. This is a useful fallback when a safe Live Surface Fit preview cannot be made on an open or very large base.
The Weight Paint controls remain adjustable in the preview:
- Gradient (1-50): expands the seam mask outward from the contact area; it should not paint every remote surface at full strength.
- Smooth Passes (0-200): controls the working Smooth modifier's Repeat count.
- Level (0-10): scales the working mask; zero temporarily clears its effect.
Inspect the seam from more than one angle before applying. Apply bakes the working result and clears BModeller's temporary IMM seam groups. User-created vertex groups are preserved. Cancel returns to the source objects. If Record Actions was enabled, the committed step is part of the Action Stack, so its earlier state can be rebuilt.
Sculpt Merge is not a promise that any number of arbitrary dense meshes can be combined instantly. It uses guarded solver and remesh paths; a too-heavy case can be paused, skipped, or rejected to protect the scene. Reduce the batch or source polygon counts rather than repeatedly forcing the same failing operation.
14. Local Remesh
Open Local Remesh on a mesh and choose Selection or Vertex Group. Selection uses the Edit Mode selection as its core. Vertex Group uses the chosen painted group; for a Sculpt Merge seam, choose IMM_Added_Parts while that working group exists.
Rings (0-12) adds neighboring topology bands around the core and fades the change toward the untouched mesh. Density (0.001-1.0) is an edge-size factor: smaller values create a denser local result and can take much longer. Start at the default 0.5 and increase Rings only where the transition needs room.
Local Remesh changes topology. Confirm that your chosen selection or group is correct, save before large changes, and inspect materials, Face Sets, and other data after an operation on a complex production mesh.
15. Action Stack
Enable Record Actions before supported fitting, merging, and remesh operations when you want rebuildable history. The stack records the operation's sources/settings and can rebuild the visible mesh when a recorded step is changed. Its eye controls let you compare results by hiding or showing actions.
Bake & Clear commits the visible state and removes the recorded history. Restore Base discards the recorded changes and returns to the saved base. These are different decisions; do not use Bake & Clear until you no longer need the stack's reversibility.
An Action Stack rebuild can take time on a dense mesh because earlier steps may need to be evaluated again. Keep the base and source objects available until the stack is committed. Save the file before changing a long action chain.
16. Practical workflows
Example A: a soft solid-color insert
- Select the base mesh, choose a simple sphere or custom Mesh source, and use Draw with Surface placement.
- Place the insert so it touches or approaches the base. Adjust Scale and Surface offset.
- Press Accept. Enable Surface Fit, select Union, and begin with moderate Melt and default Melt Density.
- If both objects use simple solid Principled materials, enable Blend Material and inspect both sides of the join.
- Adjust Elastic only if a longer bridge is required. Apply when the silhouette, density, and colors look correct.
Example B: tread around an open tire
- Select the tire as the intended base. Choose one tread block or an IMM Chain source.
- Select an existing Curve and use Target Curve / Use Target, or create an editable Curve with Add Curve.
- Shape the Curve and tune Count/Distance with a small initial set. Check the 250-object confirmation before expanding a long distribution.
- Accept the placed set. Try Surface Fit only if a safe preview is available.
- If the open tire or dense distribution exceeds Live Surface Fit's safe preview budget, turn Surface Fit off and use Sculpt Merge or keep the tread as separate objects with Finish.
- Inspect the seam and resulting topology before Apply. A large tire with many detailed blocks may need several smaller batches.
Example C: free Annotate or Metaball forms
- Choose Placement: View or Cursor, then choose Annotate or Add Curve.
- Draw a path away from any base. Adjust Count, Distance, and source Scale while it is pending.
- Accept and choose Sculpt Merge for touching free forms, or Finish to retain independent editable parts.
- For Metaballs, Over can place a later stroke on an earlier BModeller stroke rather than only on the original base. Test the support path at low Count first.
17. Performance and safety limits
BModeller applies several different guards. They prevent obviously unsafe work; they do not guarantee that every scene under a numeric threshold will be fast.
| Situation | v1.0 behavior | What to do |
|---|---|---|
| 200 path instances | No large-path confirmation solely because of this count. | Still check asset polygon count and live preview speed. |
| More than 250 estimated path instances | Count or Distance update pauses and requires explicit confirmation. | Confirm once the path and asset are ready. |
| More than 1000 estimated path instances | Path request is rejected. | Reduce Count or increase Distance; account for every Curve spline. |
| Dense Sculpt Merge inputs | A dense handling path begins at 24 source objects; guarded Exact fallback has its own operand and face budgets. | Use simpler assets or merge in smaller logical batches. |
| Large base relative to small inserts | Surface Fit may show a safe-preview budget warning. | Finish or use Sculpt Merge, simplify the base, or work on a smaller region. |
| High Melt Density / relief Detail / low remesh Density | More geometry and longer updates. | Start at defaults and raise resolution only for a visible need. |
For advanced users, v1.0 can skip unsafe dense Exact retries above 8 operands or 100,000 operand faces. Exact Self has additional face guards. These are solver-specific conditions, not universal Sculpt Merge limits; topology, modifiers, scale, or memory can force earlier rejection.
Practical rule: save first, preview with few instances, inspect the base and sources, then increase Count or resolution in steps. If Blender slows sharply, cancel the pending update and split the work. Repeatedly retrying the same extremely dense Boolean in one scene is unlikely to help.
18. Viewport messages and what they mean
Pending: N shows the current insert count during Draw. The nearby viewport instruction tells you which gesture finishes the active tool. It disappears when that Draw session ends.
Large path update detected means a Count/Distance edit was paused before a heavy rebuild. Decide whether to confirm; cancelling keeps the previous safe arrangement.
N objects exceeds the 1000-object limit means the requested path distribution cannot be applied. Reduce Count or increase Distance.
No independent mesh base means BModeller cannot treat an object from the pending insert set as the separate base. Finish the first asset, select it, and then accept a later insert.
Choose a Base Mesh before Surface Fit or Apply Insert means a Curve distribution needs an explicit mesh target. Select the intended base in Base Mesh; the inserted objects are kept for another attempt.
The base is too large relative to these inserts for a safe Live Surface Fit preview is a preview resource guard, not proof that the source asset is invalid. Use a smaller base region, a larger/simpler insert, a lower-cost setup, or Sculpt Merge/Finish as appropriate.
No Live fusion preview is available means Apply was requested without a usable current live result. Check the Surface Fit checkbox, active base, selected inserts, and any error in the Surface Fit section. Cancel the stale session if necessary before selecting a new pair.
If a method reports that it stopped safely, the result was not committed. Read the reason, inspect source topology and overlap, adjust the inputs, and retry with a smaller set. Do not assume that a missing preview has been applied.
19. Troubleshooting
Brushes appear grey after an operation. Finish or cancel the active preview. If Insert Mode is stuck, use Finish Insert Mode to keep scene objects and return to placement.
My new Surface Fit targets an older object. Cancel the existing Surface Fit session, then select the new child object(s) and make the new base active last before enabling the preview.
The new objects snap to a mesh although I chose View. Check the placement stored on the stroke, Face Snap, and whether an existing Surface Fit session is still active. A newly selected Placement mode does not retroactively move an old stroke.
The Curve points move but the objects do not. Check that the intended Curve is the active Target Curve and that the asset was assigned to it. With multiple Curves, confirm the correct path before changing its asset.
A long chain or merge becomes slow. Lower Count, increase Distance, use a simpler source, switch off unnecessary Adapt/Detail, or split the operation. The path guard and Boolean budgets cover different costs.
The color seam does not carry my texture. Blend Material intentionally uses fixed Principled values and does not transfer Image Texture or UV-based detail. Re-texture or bake the committed geometry.
The remesh affects too much of the model. Check the selected Edit region or Vertex Group and reduce Rings; increase the Density factor for a coarser result. In Sculpt Merge, lower Gradient or Smooth Passes before Apply.
A preview remains wire-like or Apply is disabled. Inspect the message inside Surface Fit and ensure a valid mesh base and supported source are selected. For an open or oversized base, try Sculpt Merge or Finish rather than deleting the sources.
20. Compatibility, license, and support
BModeller v1.0 targets Blender 5.0 through the releases before Blender 6.0. Its source is licensed under GNU GPL version 3 or later; the release ZIP includes the complete LICENSE text. The supplied PNGs and GIF stills illustrate the controls in this version.
Keep a copy of the ZIP and of any custom asset .blend files. For a reproducible support report, include the Blender version, BModeller version, selected operation, Count/Distance, active base and insert types, the exact warning text, and a small .blend example when possible.
Have questions about this product?
Login to message
| Blender Extension Compatible | Yes |
| Published | 1 day ago |
| Blender Version | 5.0 - 5.2 |
| Extension Type | Add-on |
| Render Engine Used | Blender-Internal |
| License | GPL |
Discover more products like this
modeling sculpting imm-brush kitbash asset placement local remesh surface fit sculpt merge insert mesh Curve Tools IMM Chain emboss&engrave