Cadprep Pro — Batch Cad Processing For Blender
 Anvil Interactive Solutions

CADPrep Pro — Documentation
Version 1.3.0 · Blender 4.2–4.55 and Blender 5.2+ (two builds included) · Windows, Linux, macOS (Apple Silicon and Intel) Anvil Interactive Solutions — [email protected]
CADPrep Pro is a standalone Blender extension. It does not require Quadify CADPrep (the base product) — the complete import-and-prep pipeline is built in, alongside batch folder processing, mirrored-instance matching, Bill of Materials export, and STEP export.
1. Installation
CADPrep Pro ships as two separate builds, each with its own bundled CAD engine:
-
quadify_cadprep_pro-x.x.x-blender4x-<platform>.zip— for Blender 4.2 through 4.55 LTS -
quadify_cadprep_pro-x.x.x-blender5x-<platform>.zip— for Blender 5.2 and newer
<platform> is one of windows_x64, linux_x64, macos_arm64, macos_x64. Download the one file matching both your Blender version and your operating system.
Install steps:
- In Blender, open Edit → Preferences → Get Extensions.
- Click the dropdown arrow in the top-right corner and choose Install from Disk.
- Select the zip matching your Blender version and OS. Do not unzip it first.
- Blender installs the extension and its bundled CAD engine automatically — no Python setup, no pip, no internet connection required.
To verify: open the extension's preferences (Edit → Preferences → Add-ons → CADPrep Pro). It should read "CAD engine: bundled, ready."
Important: install through Get Extensions, not the legacy Add-ons → Install button — the legacy path does not deploy the bundled engine.
Upgrading
Remove the old version from Get Extensions before installing the new one. If you're upgrading across a Blender major version (e.g. 4.4 → 5.2), install the matching build for your new Blender version — the two builds are not interchangeable.
Wrong build installed
If Blender reports the extension is incompatible with the running Python version, you have the wrong build for your Blender version. Remove it and install the matching blender4x/blender5x zip instead.
2. Quick start
- Open the sidebar in the 3D viewport (press N) and select the CADPrep Pro tab.
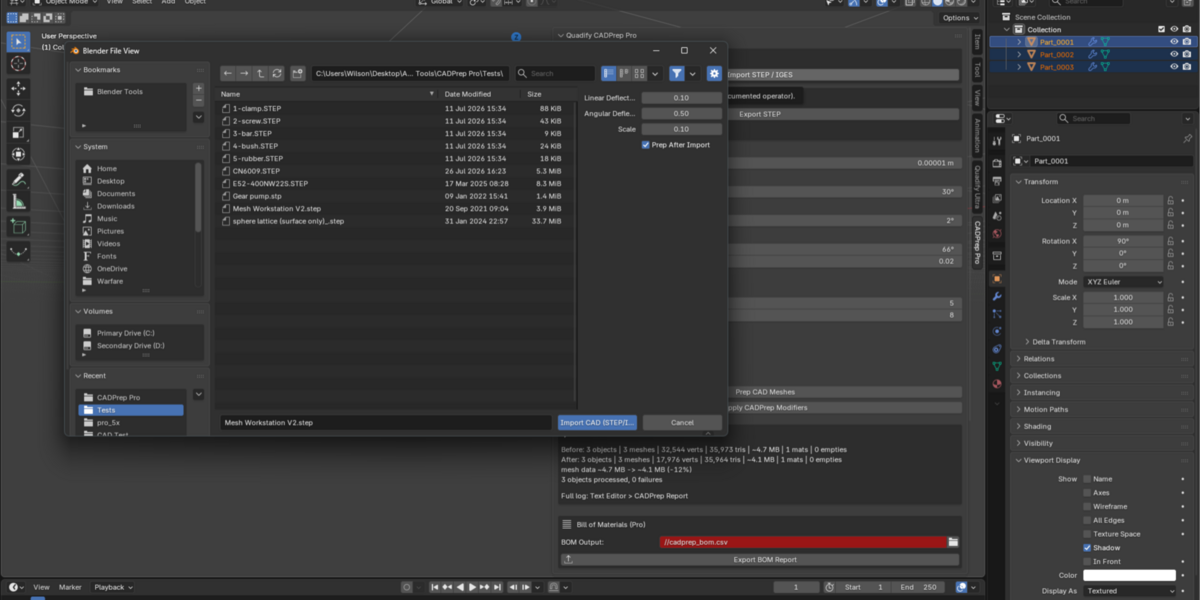
- Press Import STEP / IGES and pick your file.
- Leave Prep After Import enabled.
- Press Import.
Your assembly arrives merged (coincident seam vertices welded), shaded, decimated, UV-mapped, instanced (including mirrored parts), with consolidated materials, a clean hierarchy, and normalized names. The Last Run box shows what changed, and the full audit log is in the Text Editor under CADPrep Report.
For processing many files at once, see section 5, Batch Folder Processing.
3. CAD Import
Supported formats
- STEP (
.step,.stp) — recommended - IGES (
.iges,.igs) - BREP
Proprietary formats — SolidWorks, CATIA, Creo, NX, Fusion (.f3d) — cannot be read by any Blender addon. Export STEP from the native application first; every one of these packages can. For one-off SolidWorks conversions without a SolidWorks license, Onshape's free tier can import the file and export STEP.
Import options
Set in the file dialog's right-hand sidebar.
Linear Deflection (default 0.1) — maximum distance between the true CAD surface and the generated mesh. Smaller values produce denser, smoother meshes on curves. Use 0.02–0.05 for hero-render close-ups; 0.2–0.5 for background or game assets.
Angular Deflection (default 0.5) — maximum angle between adjacent mesh facets, in radians. Lower values add density on tight curvature.
Scale (default 0.001) — multiplier applied to coordinates. Most CAD files are authored in millimeters; the default converts to Blender's meters at true real-world size. Set to 1 if your file is already in meters.
Prep After Import (default on) — runs the full pipeline immediately after import.
4. The prep pipeline
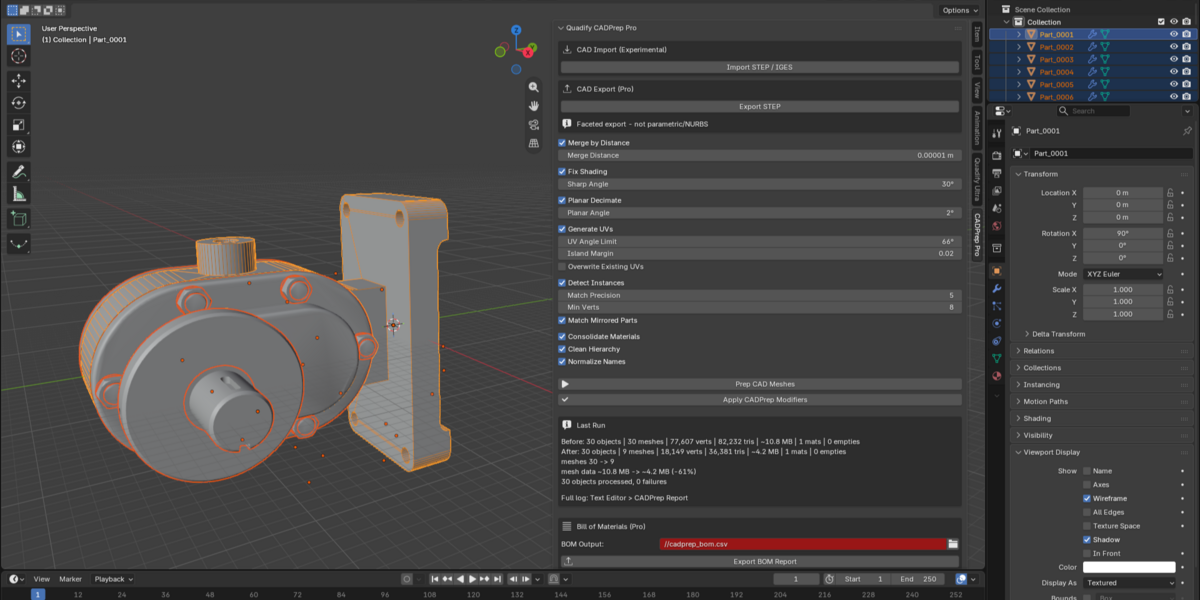
Press Prep CAD Meshes to run the pipeline on the current selection, or on the entire scene if nothing is selected. Every stage can be toggled off independently, and each writes an OK or FAIL line per object to the report.
Merge by Distance
Welds vertices closer than a threshold. CAD importers tessellate each face independently, which leaves exactly-coincident duplicate vertices at every shared edge between faces — this stage removes that seam duplication before anything else runs, which matters because sharp-edge detection needs correctly welded topology to work.
Merge Distance (default 0.00001m / 0.01mm) — tight enough to catch true floating-point-coincident seams without merging legitimately close but distinct geometry. Raise it only if you have a specific reason to believe genuinely separate features are closer together than this.
Fix Shading
Sets faces to smooth shading, detects sharp edges from face angle, and adds a Weighted Normal modifier with sharp preservation.
Sharp Angle (default 30°) — edges beyond this angle are marked sharp. Lower for soft chamfers being missed; raise if curved surfaces pick up unwanted creases.
Planar Decimate
Non-destructive Decimate modifier removing redundant coplanar tessellation while protecting sharp edges, material borders, and UV seams.
Planar Angle (default 2°) — faces within this angle of coplanar are merged.
Generate UVs
Smart-projects UVs onto meshes with none. Existing UVs are respected unless Overwrite Existing UVs is enabled.
Detect Instances (with Mirror Matching)
Finds repeated parts and links them to a single shared mesh. Works in three passes:
- Exact match — identical mesh data linked directly.
- Aligned match — parts related by rotation and translation are matched via rigid alignment, verified vertex-by-vertex, then linked with the recovered transform folded into the object — world-space geometry never moves.
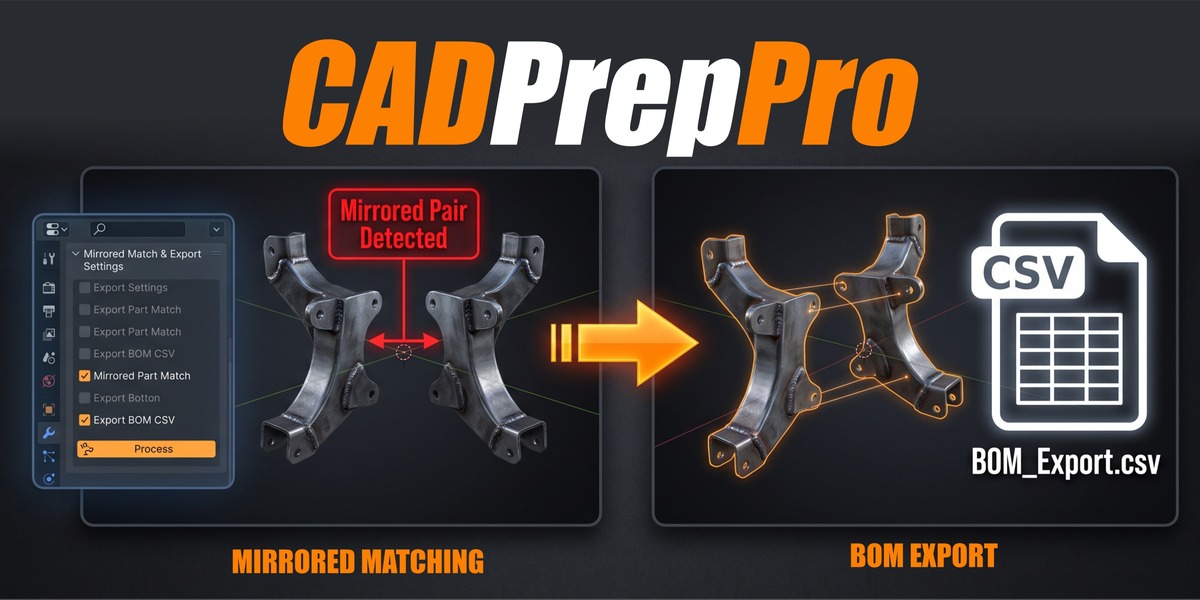
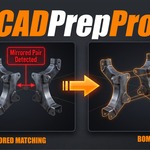
- Mirrored match (Pro only) — parts related by a reflection (left/right brackets, mirrored hardware) are matched the same way, using a negative-scale transform. Toggle with Match Mirrored Parts.
Every match — rotated or mirrored — is verified against real mesh surface geometry before linking, never guessed. Parts that can't be verified are skipped and named in the report, not falsely merged.
Match Precision, Min Verts — as in base CADPrep; see the report for what was skipped and why.
Consolidate Materials, Clean Hierarchy, Normalize Names
Identical to base CADPrep: duplicate materials merged, dead empty transforms removed while preserving real assembly structure, importer suffix noise cleaned into numbered names.
One bad mesh never aborts a batch. Every object is processed in isolation.
5. Batch Folder Processing
Point CADPrep Pro at a folder and it processes every STEP/IGES/BREP file inside — including subfolders — unattended.
How it works
Each file is handed to its own isolated background Blender process. This means:
- A crash or hang on one file cannot affect the rest of the batch, and cannot affect your interactive Blender session.
- Progress is tracked in a manifest file written to your output folder. If the run is interrupted (Esc, a crash, closing Blender), rerunning the same batch automatically skips every file already completed successfully and only processes what's left.
- Force Reprocess All ignores the manifest and reprocesses everything — use this if you've changed settings and want a clean run.
The resume manifest is keyed on file size and modification time: if you re-export a changed STEP file with the same name, CADPrep Pro detects the change and reprocesses it rather than skipping it based on stale results.
Setup
- Input Folder — where your CAD files live.
- Output Folder — where exports land.
- Include Subfolders — recurse into nested directories.
- Export Format — glTF Binary (.glb), FBX (.fbx), or Blender (.blend).
-
Export BOM Report — writes a
<filename>_bom.csvalongside each exported file.
Press Start Batch. A progress indicator shows the current file and position in the queue. Press Cancel at any time — files already completed keep their results.
Reading the batch report
Written to the Text Editor as CADPrep Batch Report:
Total: 200  |  Already done (resumed): 140  |  Processed OK: 57  |  FAIL: 3
[OK] bracket_04.step
[FAIL] housing_12.step :: conversion produced no importable geometry
Headless / command-line use
The same engine is exposed as a standalone script (cli.py) for CI pipelines or render-farm pre-processing, callable without opening the Blender UI:
blender --background --factory-startup --python cli.py -- --input part.step --output part.glb --format GLB
6. Bill of Materials Export
Generates a CSV listing every unique part in the current scene and its quantity — useful for procurement, part-count audits, or simply understanding what's actually in a supplied assembly.
Press Export BOM Report in the panel, or enable Export BOM Report in the Batch Folder panel to generate one automatically per file during a batch run.
Output columns: representative object name, mesh datablock, quantity, vertex count, triangle count, and the full list of instance object names for that part.
Quantities reflect the state after instance detection — a part appearing 6 times in the original assembly (before merging) will show quantity 6, listing all 6 instance names, even though they now share one mesh datablock.
7. STEP Export
Exports the selected mesh objects (or the whole scene, if nothing is selected) as a STEP file — openable in any CAD tool.
This is a faceted export, not a parametric one. Each triangle in your Blender mesh is written as an exact flat planar face in the STEP file. The shape is geometrically exact — surface area and volume match precisely on reimport — but the result is a tessellated solid, not a smooth NURBS surface. If your downstream tool specifically needs curved parametric geometry, this does not produce that.
Scale (default 1000) — multiplier applied before writing. Default converts Blender meters to millimeters, the convention most CAD packages expect on import. Use 1 if your target tool expects meters.
What happens on export
- Degenerate triangles (zero area, invalid) are skipped per-part rather than failing the whole export — the report shows how many were skipped.
- Multiple selected objects export as separate solids in one file.
- A per-object report is written to CADPrep Export Report in the Text Editor.
Reimporting an exported file
Reimporting through CADPrep (or any STEP importer) will show seam-duplicate vertices at every face boundary — this is inherent to how STEP tessellation works (each face is meshed independently), not something specific to this export. Run Merge by Distance (part of the standard pipeline, on by default) to weld these back down; the shape itself was never altered.
Shading/smoothing information does not survive a STEP round-trip — STEP is pure geometry with no concept of Blender's smooth-shading data. This is true of the file format itself, not a defect of the export. Running Prep CAD Meshes after reimport restores correct shading, exactly as with any fresh CAD import.
8. Reading the report
The Last Run panel
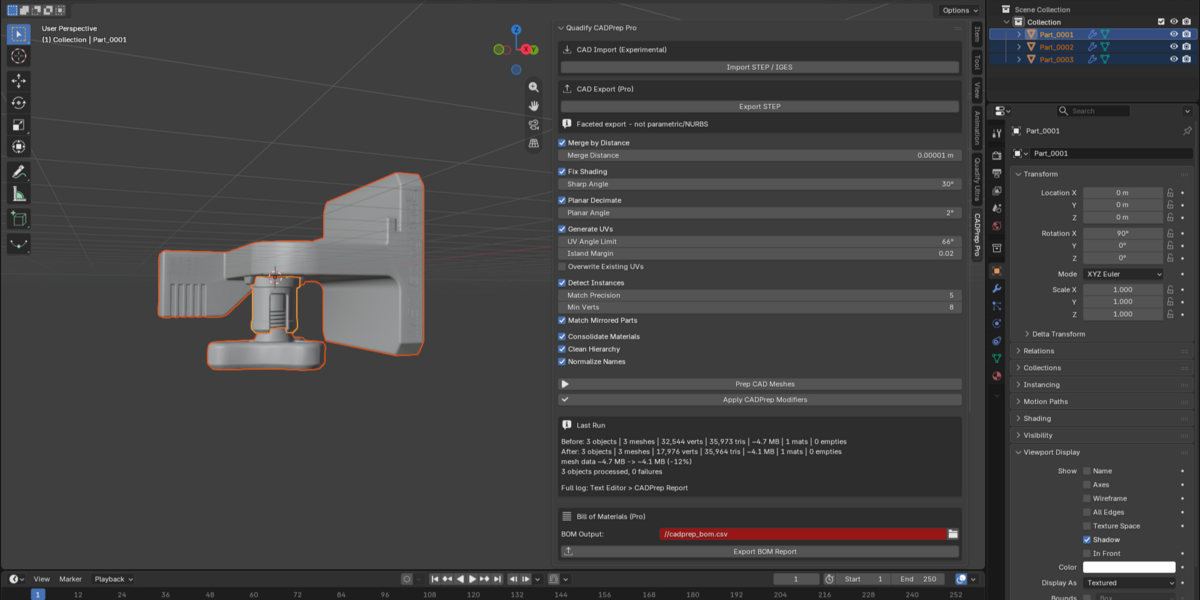
Shows before/after scene statistics (objects, unique meshes, vertices, triangles, estimated memory, materials, empties) and the delta between them — e.g. meshes 28 → 19, mesh data ~3.2 MB → ~0.5 MB (−85%).
The CADPrep Report
Full per-object, per-stage audit log in the Text Editor. Every line is [OK] or [FAIL], naming the object, the stage, and the outcome:
[OK] merge :: Part_0007 :: 18 vertices welded
[OK] instances :: scene :: 4 exact links, 2 aligned links, 1 mirrored links
[OK] instances :: Part_0012 :: geometry similar but alignment unverified, skipped
[FAIL] lines never abort the batch or the pipeline — the affected object or file is skipped for that stage, and everything else completes.
9. Limitations
Stated up front:
- Proprietary formats (SolidWorks, CATIA, Creo, NX, F3D) require a STEP export from their native application first.
- Perfectly symmetric parts may be correctly skipped by instance matching if there's no geometric feature to verify an alignment against — this is intentional caution, not a bug, and is named in the report.
- STEP export is faceted, not parametric. See section 7.
- Batch export formats are glTF, FBX, and .blend. Individual STEP export (section 7) is separate, for CAD-to-CAD workflows.
- Very large single bodies tessellate in one operation; extremely dense solids may take time during import. A 10-minute conversion ceiling prevents indefinite hangs.
- Memory figures in the Last Run panel are estimates from a per-element model, marked with
~— directionally reliable, not an exact accounting.
10. Troubleshooting
"Batch processing seems stuck on one file." Each file runs with its own timeout behavior inherited from the import engine (10 minutes). If a file is unusually large or complex, this is expected; check the per-file log referenced in the batch report once it completes or fails.
"I reran a batch and it skipped everything." That's the resume feature working as intended — every file was already completed successfully in a prior run. Use Force Reprocess All if you want a clean rerun regardless.
"I changed a STEP file and reran the batch, but it still skipped it." Resume detection is keyed on file size and modification time. If your CAD tool re-exported the file with an identical size and timestamp (rare, but possible with some export pipelines), the fingerprint may not have changed. Use Force Reprocess All in that case.
"Instancing found nothing on my assembly." Check the report — parts listed as "alignment unverified, skipped" are likely rotationally symmetric with no distinguishing feature. Lowering Match Precision tolerates more importer noise between exports from different tools.
"My STEP export looks faceted when I reopen it." Expected — see section 7. Run Prep CAD Meshes (specifically Fix Shading) after reimporting.
"Preferences say the CAD engine is not bundled."
You installed the wrong platform or Blender-version build, or used the legacy Add-ons install path. Remove the extension, download the correct blender4x/blender5x + platform zip, and install via Get Extensions → Install from Disk.
Anything else: email us the relevant report (CADPrep Report, CADPrep Batch Report, or CADPrep Export Report) plus your Blender version, OS, and which build you installed.
11. FAQ
Do I need Quadify CADPrep (the base product) as well? No. CADPrep Pro is complete on its own — the full import-and-prep pipeline is built in.
Do I need Python, pip, or an internet connection? No. The CAD engine ships inside the extension and installs automatically. Fully local: no network access, no accounts, no telemetry.
Is this a subscription? No. One-time purchase, updates included.
What happens if a file in my batch fails? It's logged with the specific reason and skipped. The rest of the folder keeps processing — one bad file never stops a run.
If a batch run is interrupted, do I have to start over? No. Rerun the same batch and already-completed files are automatically recognized and skipped.
Will mirrored-instance matching ever falsely merge two different parts? No. Every match — mirrored or rotated — is verified against real mesh geometry (point-to-surface distance) before linking. Unverifiable parts are skipped and named, never guessed.
Can I run Prep on meshes from other importers, not just CADPrep's own? Yes. The pipeline runs on any mesh objects in the scene regardless of origin.
Is it safe to run Prep, or a batch, twice? Yes. Both are idempotent — rerunning on already-processed data makes no further changes (or, for batches, is instant since everything is recognized as already done).
Does STEP export preserve shape keys, UVs, or materials? Shape is preserved exactly. UVs and materials are not part of the STEP geometry format and are not included in the export — STEP is pure BRep geometry.
Do instanced parts (including mirrored ones) survive export to glTF/FBX? Yes — both formats export shared mesh data as instances, and mirrored copies use a negative-scale transform that both formats support natively.
Which Blender versions are supported? Two builds are included with your purchase: one targeting Blender 4.2 through 4.55 LTS, one targeting Blender 5.2 and newer. Install the one matching your version.
What licenses cover the product?
The addon code is GPL-3.0-or-later. The bundled engine components are OpenCASCADE (LGPL-2.1 with exception), the OCP Python bindings (Apache 2.0), and VTK (BSD-3-Clause). Full texts are in THIRD_PARTY_LICENSES.md, included in the package.
What is your refund policy? Handled per Superhive's marketplace refund policy. If something misbehaves, send us the relevant report first — most issues are resolved in one reply.
CADPrep Pro is developed by Anvil Interactive Solutions. quadify3d.com · theanvilstore.com
 Included
Includes 12 months of
- Support from Anvil Interactive Solutions
- Product updates
Extend this product’s Support Period +12 months: 50% of product price
Have questions before purchasing?
Login to message
| Blender Extension Compatible | Yes |
| Published | about 2 months ago |
| Blender Version | 4.2 - 5.2 |
| Extension Type | Add-on |
| License | GPL |
Discover more products like this
iges instancing cad product-visualization pipeline bom step automation CAD export Batch processing bill of materials hard surface