 Moomnidee


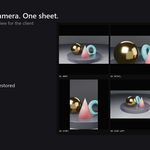
Tick the cameras. Press one button. Get every shot at its right size — plus one sheet you can send to the client.
You set up eight cameras for a client review. Now comes the boring part: pick camera, change resolution, render, save, rename, pick the next camera, change the resolution back, render again — and at the end you still have to open a photo editor to lay the shots out on one page so the client can see them together.
CamBatch does the whole run in one press.
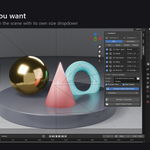
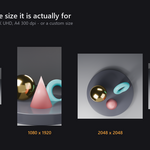
Every camera in your scene is listed with a checkbox. Give any camera its own output size from the dropdown — Scene, 1920x1080, 1080x1920 story, square, 4K UHD, A4 300 dpi in both orientations, or a custom size. One scene, one click, and the LED-wall shot, the Instagram story and the print handout all come out at the size they are actually for.
The contact sheet
When the batch finishes, CamBatch stitches every render into one labelled overview image, camera names under each frame, right next to the renders. No external software needed — it is built in. That is the file you send to the client.
Animation mode, per-camera frame ranges
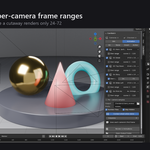
Switch the panel to Animation and each camera renders a frame range instead of a single frame. Cameras follow the scene range by default; tick "Own range" on any row to give that camera its own start and end. The 240-frame hero move and the 48-frame cutaway go out in the same batch, and the contact sheet uses each camera's first frame so you still get one overview to send.
A queue that does not freeze the interface
The batch runs through the normal render window, so the interface stays alive, you watch each frame come in, and progress shows in the panel. Esc — or the Cancel Queue button — stops it cleanly at any point.
Your scene comes back exactly as you left it. Camera, resolution, samples and output path are snapshotted before the first render and restored afterwards — whether the batch finishes, fails, or you cancel halfway.
Everything it does
- Two modes: Still and Animation
- Checkbox per camera, with All / None / Invert / Active buttons
- Per-camera resolution: 7 presets + custom
- Per-camera frame range in Animation mode (or follow the scene range)
- Optional per-camera samples — heavy hero shot at 512, quick previews at 32 (0 keeps the scene setting)
- Automatic contact sheet, 1-8 columns, with camera labels
- Numbered output files in queue order: 01_Front.png, 02_Stage Left.png
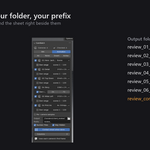
- Your own output folder and filename prefix
- "Skip Hide Render" leaves out cameras you disabled in the outliner — and tells you it did
- Open Output Folder button
- Works in background / command-line renders too — the same batch runs
Built for
Product and packaging renders, archviz walk-arounds, event and stage visualisation, character turntables — anything where one scene has to leave as many images, at many sizes, for a client who wants to see them side by side.
Documentation
Install
Version 4.2 and newer: Edit > Preferences > Add-ons > arrow at the top right > Install from Disk... > pick cambatch-1.1.0.zip > tick it on.
Panel: 3D Viewport > Sidebar (N) > CamBatch
How to use
- Open the CamBatch tab. Every camera in the scene is listed with a checkbox. All / None / Invert / Active buttons for quick selection.
- Give any camera its own size with the dropdown on its row: Scene (default), 1920x1080, 1080x1920 story, square, 4K UHD, A4 print at 300 dpi in both orientations, or Custom.
- Optional: turn on "Per-camera samples" to give heavy shots more samples and previews fewer (0 keeps the scene setting).
- Pick the mode at the top of the panel. Still — one image per camera, the current frame. Animation — a frame range per camera; each camera follows the scene range unless you tick "Own range" on its row and type a start and end frame of its own.
- Set the output folder and prefix. Files are numbered in order: 01_Front.png, 02_Stage Left.png, ... In Animation mode the frame number is appended: 01_Front_0001.png, 01_Front_0002.png, ...
- Press "Render N Cameras" (or "Render N Animations"). Watch the queue progress in the panel; cancel any time.
- When the batch finishes, {prefix}contact_sheet.png appears next to the renders: every shot in a grid with its camera name under it.
Notes
- Renders use your current render engine and settings; CamBatch only overrides what you ask it to (size, samples, frame range) and puts everything back — camera, resolution, frame range and output path.
- "Skip Hide Render" leaves out checked cameras whose camera icon is disabled, and tells you it did.
- The contact sheet needs no extra software.
- Works from the command line too: the same batch runs when the file is rendered in background mode.
Known limits — stated up front
- Animation mode renders image sequences. If your output format is a video file (FFmpeg), the contact sheet is skipped automatically, because it cannot be built from a video file.
- Render engine and file format are taken from the scene; they are not yet selectable per camera. Planned for a future update.
What you get
-
cambatch-1.1.0.zip— Extension for 4.2 and newer, install from disk - Panel in the 3D Viewport sidebar (N) > CamBatch
- README with the full workflow
- GPL-3.0-or-later, full license text included
Support
Questions and bug reports are answered within 72 hours — message us here on the market, or email [email protected]
