 Moomnidee


CamBatch 1.1.0 — full documentation
Install
Version 4.2 and newer: Edit > Preferences > Add-ons > the arrow at the top right > Install from Disk... > pick cambatch-1.1.0.zip > tick it on.
The panel appears at 3D Viewport > Sidebar (press N) > CamBatch.
Step by step
- Open the CamBatch tab. Every camera in the scene is listed with a checkbox. Use the All / None / Invert / Active buttons for quick selection.
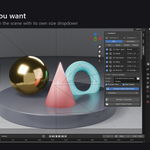
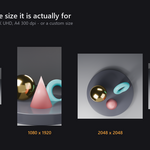
- Give any camera its own output size with the dropdown on its row: Scene (default), 1920x1080, 1080x1920 story, square, 4K UHD, A4 print at 300 dpi in portrait or landscape, or Custom for your own numbers.
- Optional per-camera samples. Turn on "Per-camera samples" to give heavy hero shots more samples and quick previews fewer. A value of 0 keeps the scene setting for that camera.
-
Pick the mode at the top of the panel.
Still renders one image per camera from the current frame.
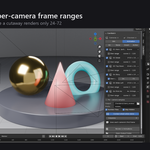
Animation renders a frame range per camera. Every camera follows the scene range unless you tick "Own range" on its row and type a start and end frame of its own. -
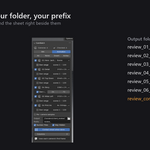
Set the output folder and filename prefix. Files are numbered in queue order:
01_Front.png,02_Stage Left.png, and so on. In Animation mode the frame number is appended automatically:01_Front_0001.png,01_Front_0002.png. - Press "Render N Cameras" (it reads "Render N Animations" in Animation mode). Progress shows in the panel while the queue runs. Press Esc or the Cancel Queue button to stop at any point.
-
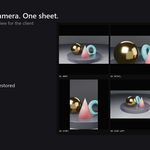
Collect the contact sheet. When the batch finishes,
{prefix}contact_sheet.pngis written next to the renders: every shot in a grid with its camera name underneath. Set the number of columns from 1 to 8 in the panel. Use the Open Output Folder button to jump straight to the files.
How it treats your scene
- Renders use your current render engine and settings. CamBatch overrides only what you asked it to — size, samples, frame range — and puts everything back afterwards: camera, resolution, frame range and output path.
- The restore runs whether the batch finishes normally, fails, or you cancel it halfway.
- The queue runs through the normal render window, so the interface stays responsive throughout.
Options explained
- Skip Hide Render — leaves out any checked camera whose camera icon is disabled in the outliner, and reports in the panel that it did so.
- Contact sheet columns — 1 to 8. In Animation mode the sheet is built from each camera's first frame.
- Open Output Folder — opens the render folder in your file browser.
- Command line — the same batch runs when the .blend file is rendered in background mode.
Limits, stated up front
- Animation mode renders image sequences. If your output format is set to a video file (FFmpeg), the contact sheet is skipped automatically, because a sheet cannot be built from a video file.
- Render engine and file format come from the scene. They are not selectable per camera in this version.
Compatibility
Built as an Extension for version 4.2 and newer. Tested on 4.2.3 LTS with 49 automated checks, both as a legacy add-on and as an installed extension, plus a live queue test in the interface.
Licence
GPL-3.0-or-later. The full licence text is included in the download.
Support
Message us here on the market or email [email protected] — questions and bug reports are answered within 72 hours.
Have questions about this product?
Login to message
| Blender Extension Compatible | Yes |
| Published | about 2 months ago |
| Blender Version | 4.2 |
| Extension Type | Add-on |
| Render Engine Used | Cycles, Eevee |
| License | GPL |

Discover more products like this
Workflow product render render queue multi-camera contact sheet camera batch render turntable animation ArchViz