Camera Flow Pro
 Coby Randal Media

Installation (Blender 4.2 - 5.2):
- Blender>Edit>Preferences>Add-ons
- Look in the upper right of the window and click the button with the down arrow (tooltip on mouse hover will say "Add-ons Settings")
- Click, "Install from Disk..."
- Choose the CFP...zip file
- Enable CFP
- You'll now see it in the 3D Viewport N-Panel under "CFP".
Installation method for Blender 3.6 - 4.1.1 is basically the same, but will likely need a legacy version of CFP, available in the downloads.
Pro Tips:
- Hover over the buttons in the CFP panels to see detailed tooltip descriptions for each.
- Resize the panel area to show full text names of each button, OR make them smaller to only show the button icons. This stays unique per active "Workspace" tab in Blender. So if you change CFP's panel sizes in "Layout" workspace, it will NOT change in the "Modelling" workspace. This also applies for collapsing and reordering of panels, allowing you to completely customize your workflow.
- That being said, I recommend having a Properties window present when you desire to perform changes to the delayed follow / Track-To (Flow presets), or camera shake. This ensures you can see the Geometry Nodes Inputs in the Modifier Properties for each of those three features.
- Reset a slider value to default by hovering over it with the mouse and pressing "Backspace".
Button Panel Functions and Tooltips
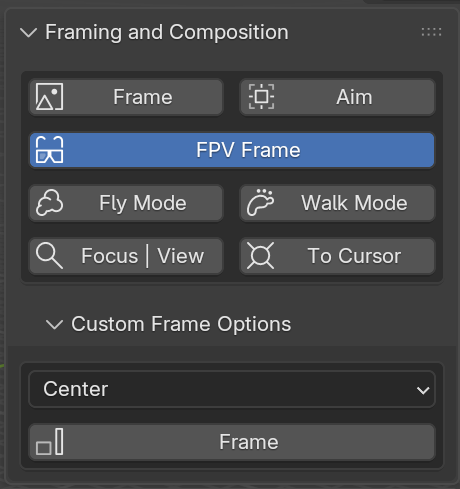
Frame
Frame and focus the rig on the selected object(s) or 3D Cursor, or matches the view of a selected camera. Except for cameras, keeps relative anchor and controller adjustments. Ctrl+Click: while an object is selected, use the 3D Cursor as a camera anchor height placement. Ctrl+Alt+Click: reset level framing. If nothing is selected, offsets entire CFP rig to the cursor location. If a camera is selected, clears the location of the anchors and tracking controllers.
FPV Frame
Unlock the CFP Camera from the rig, and lock it to the 3D viewport perspective (or viewport that is already looking through the camera). Auto frames the camera on the selected object(s) if any are selected. Fly Mode and Walk Mode options appear when this is active, and you can record this to keyframes and even bake camera in this mode.
Fly Mode
Enters Fly Mode in the viewport currently viewing through the active camera. Exit Fly Mode with Right Mouse Button or Esc key.
Walk Mode
Enters Walk Mode in the viewport currently viewing through the active camera. Exit Walk Mode with Right Mouse Button or Esc key.
Focus
Set the Anchor Track-To / DoF Focus to the nearest selected surface in center of camera view, OR if nothing is selected set it relative to the 3D Cursor distance from camera. Alt+Click: set the Anchor Track-To to the origin of selected object(s) or 3D Cursor if nothing is selected. Ctrl+Click: set the Anchor Cam Loc to the selected object(s) or 3D Cursor. Shift+Click: set the Root to the selected object(s) or 3D Cursor. Alt+Shift+Click: set the Root at the selected object(s) or 3D cursor without moving the rest of the rig.
Aim
Aim the rig (Z axis) at the selected object, or selected objects, or 3D Cursor if nothing is selected. Alt+Click: does the same while also adjusting focus to selected or cursor. Shift+Click aims while preserving the Anchor Cam Loc offset.
To Cursor
Move the selected object to the 3D Cursor, especially Anchor objects and Flow objects where Shift+S operations fail to account for parent-child relationships, esp when Root is rotated / scaled. Alt+Click: move the Anchor Track-To to the cursor. Ctrl+Click: move the Anchor Cam Loc to the cursor. Shift+Click: move the rig by the Root to the cursor. Alt+Shift+Click: move the Root to the cursor without moving other parts of the rig; useful for adjusting center point of Turnaround rotation.
Custom Frame Options sub-panel:
Center
Allows various ratios of framing a selected object, including: Center, Upper Half, Lower Half, Upper Third, Lower Third, Upper Fourth, Lower Fourth, Upper Fifth, Lower Fifth, Top, Bottom.
Frame
Set the Camera frame based on the bounding box height divisions specified in the dropdown.
Relations panel:
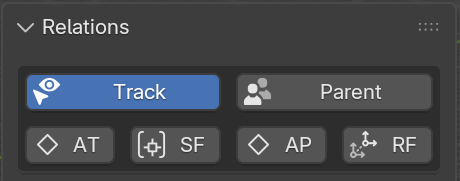
Track
Toggle Track constraint on/off for the selected object. Alt+Click: track without rotation follow. Ctrl+Click: toggle constraint visibility. Ctrl+Shift+Click: toggle visibility and insert keyframes. Shift+Click: switch to constraint properties window. Ctrl+Alt+Click: clear the toggle visibility keyframes. Alt+Shift+Click: disable constraint and keep transform.
Parent
Toggle Parent on/off for the selected object. Alt+Click: parent without rotation follow. Ctrl+Click: toggle constraint visibility. Ctrl+Shift+Click: toggle visibility and insert keyframes. Shift+Click: switch to constraint properties window. Ctrl+Alt+Click: clear the toggle visibility keyframes. Alt+Shift+Click: disable constraint and keep transform.
A Track
Toggle '2. Anchor Track-To' parented on/off for the selected object. Alt+Click: parent without rotation follow. Ctrl+Click: toggle constraint visibility. Ctrl+Shift+Click: toggle visibility and insert keyframes. Shift+Click: switch to constraint properties window. Ctrl+Alt+Click: clear the toggle visibility keyframes. Alt+Shift+Click: disable constraint and keep transform.
Surface Focus
Toggle a surface focus constraint on/off for the selected object. Ctrl+Click: toggle constraint visibility. Ctrl+Shift+Click: toggle visibility and insert keyframes. Shift+Click: switch to constraint properties window. Ctrl+Alt+Click: clear the toggle visibility keyframes. Alt+Shift+Click: disable constraint and keep transform.
A Parent
Toggle '1. Anchor Cam Loc' parented on/off for the selected object. Alt+Click: parent without rotation follow. Ctrl+Click: toggle constraint visibility. Ctrl+Shift+Click: toggle visibility and insert keyframes. Shift+Click: switch to constraint properties window. Ctrl+Alt+Click: clear the toggle visibility keyframes. Alt+Shift+Click: disable constraint and keep transform.
Root Follow
Toggle a constraint on/off for the Root to follow a selected object. Alt: no rotation follow. Ctrl: toggle constraint visibility. Ctrl+Shift: toggle visibility and insert keyframes. Shift: switch to constraint properties window. Ctrl+Alt: clear the toggle visibility keyframes. Alt+Shift: disable constraint and keep transform.
Flow and Camera Settings panel:
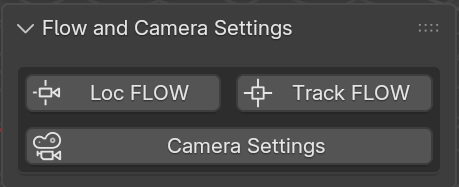
Loc FLOW
View the Camera Flow Location properties panel.
Track FLOW
View the Camera Flow Track-To properties panel.
Camera Settings
View the Camera Data properties panel. Alt+Click: reset the CFP_Camera to default settings.
Auto Focus panel:
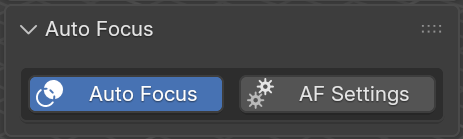
Auto Focus
Toggle Auto Focus. Be sure to choose a collection from the AF Settings panel so autofocus will know what to look for.
AF Settings
View the Auto Focus panel.
Shake panel:
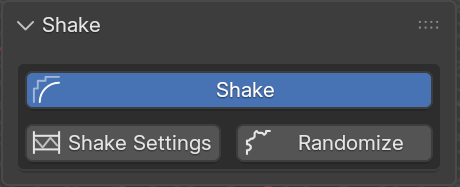
Shake
Toggle Camera Shake on / off in both preview and render.
Shake Settings
View the Camera Shake properties panel. Alt+Click: reset the shake settings to default values.
Randomize
Randomize the camera shake noise w factor. Alt+Click: randomize the noise w and more sub factors (best seen in the CUSTOM preset mode). Ctrl+Click: randomize the sub factors and Shake Preset. Enabling "Normalize" in the Shake Panel can help show the movement better or give new options.
Cache and Bake panel:
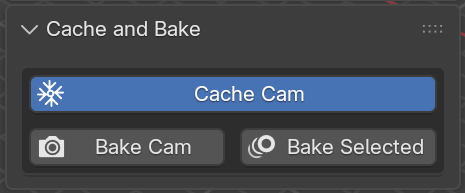
Cache Cam
Toggles the Cache Cam on/off. With Cache Cam enabled, it's easy to scrub your animation for perfect sync checks and even useful for final render. Use the "Bake Cam" button if you want multiple cameras for render or export.
Bake Cam
Bake the CFP_Camera and CFP_DoF_Target to keyframed copies ready for rendering / exporting. Alt+Click: bake and switch view to the baked camera. Ctrl+Alt: bake in reverse. Shift+Click: bake a still frame at the current frame. Auto names your baked / still camera according to your scene name, frame numbers, and if you have other toggles like camera shake etc enabled.
Bake Selected
Duplicate and bake the selected object(s) to visual keyframes (based on the scene start and end frames), and keep the original object selected (useful for multiple bakes quickly). Alt+Click: duplicate and bake, then select the baked object. Ctrl+Click: bake the original to keyframes and keep it selected. Will NOT bake the CFP rig itself. This also works for rigid body objects, but is not accurate for more than one object at a time, though it can work for some quick effects where objects are fine to overlap.
Turnaround and Barrel Roll panel:
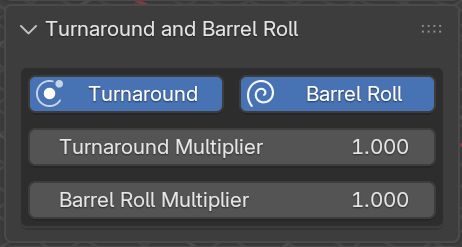
Turnaround
Toggle Camera Turnaround on and off. Orbits around '0. Root Loc Rot Scale' object. Shift+Click: view the object properties for '0. Root Loc Rot Scale'. Delta Transform Rotation X and Y provide tilted orbits if you adjust them AND if you change the Transform>Mode>XYZ Euler to YZX or ZXY etc.
Turnaround Multiplier
Multiplies the rotation cycles. Whole numbers will be seamless based on your scene frames, but fractional / decimal numbers (which will not appear seamless) are also allowed. Use negative values for opposite turn direction. For values beyond 64, manually type the numbers in.
Barrel Roll
Toggle Camera barrel roll on and off. Rotates around the FLOW Track-To object.
Barrel Roll Multiplier
Multiply the barrel rolls per scene.
Trackers and Hitchhike panel:
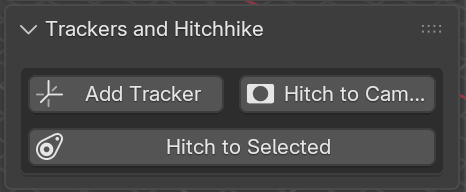
Add Tracker
Add a tracker / empty object at the 3D Cursor location, parented to a selected object. Useful for creating sticky trackers or free trackers if no objects are selected. Alt+Click: add tracker with only location following constraint, not rotation following. Shift+Click: align tracker to world rotation instead of cursor rotation.
Hitch to Camera
Move and match a selected object to the active camera's location and rotation, and make the camera the parent. Alt+Click: do the same but without live rotation following. Shift+Click do not align or move to camera, simply make the camera the parent. Shift+Alt+Click: do the same as Shift+Click: but with only location following, no rotation. ••• With a hitched object selected you can do the following: Ctrl+Click: toggle the constraint visibility. Ctrl+Shift+Click: toggle visibility and insert keyframes. Shift+Click: switch to constraint properties window. Ctrl+Alt+Click: clear the toggle visibility keyframes. Alt+Shift+Click: remove constraint and keep transform. Ctrl+Alt+Shift+Click: remove constraint.
Hitch to Selected
Move and match a selected object to the active object's location and rotation, and make it the parent. Alt+Click: do the same but without live rotation following. Shift+Click: do not align or move to target object, simply make the target the parent. Shift+Alt+Click: do the same as Shift+Click: but with only location following, no rotation. ••• With a hitched object selected you can do the following: Ctrl+Click: toggle the constraint visibility. Ctrl+Shift+Click: toggle visibility and insert keyframes. Shift+Click: switch to constraint properties window. Ctrl+Alt+Click: clear the toggle visibility keyframes. Alt+Shift+Click: remove constraint and keep transform. Ctrl+Alt+Shift+Click: remove constraint.
Resets panel:
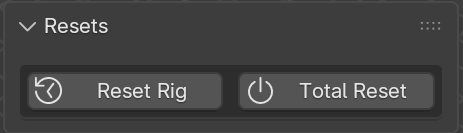
Reset Rig
Delete keyframes. Shift+Click: only untoggle all toggle buttons. Alt+click: delete keyframes and untoggle buttons. Ctrl+Alt+Click: does everything prior, including resetting rig transforms to the 3D Cursor location.
Root Reset Rig
Completely delete the Camera Flow Pro collection (and anything inside of it) and re-adds it brand new. Does not delete Trackers or Baked cameras unless you hold Ctrl+Alt+Click for a total factory reset.
Add-on Preferences settings:
Show Advanced Options
Swap Flow Buttons
Subject Switching
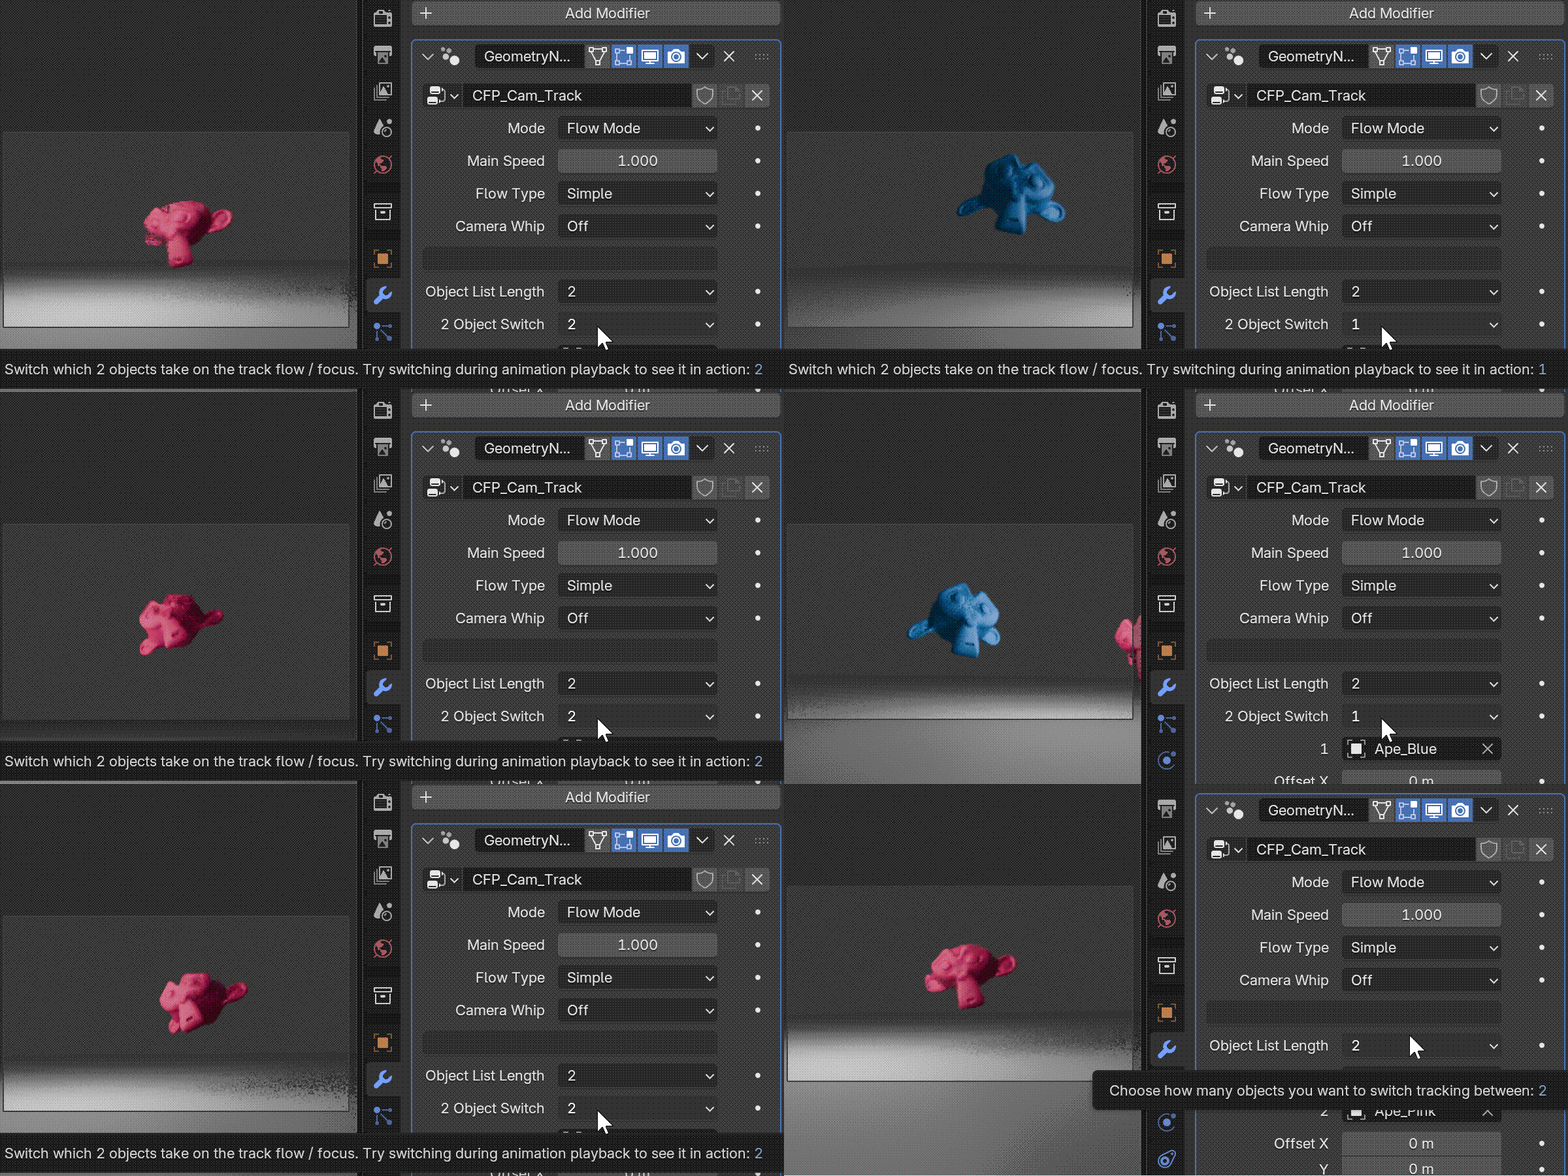
Now a feature in CameraFlowPro_2025_12_1, you can do this with both camera location and camera tracking, and all your favorite smoothing works right alongside it. Instructions:
- N-Panel>Flow and Camera Settings>Track FLOW.
- Modifiers>CFP_Cam_Track>"2 Object Switch"
- Click the drop down menu "1" and change it to "2".
- The menu under that will be blank and "Object" with a picker.
- Click on that blank menu OR use the picker to choose which object in your 3D Viewport you want as your second subject to track to.
- Animate the value of the "2 Object Switch" menu by clicking the circle to the right of it to enable keyframes, and then insert however many keyframes you like.
- Personally, I like to use a 3 button scroll wheel mouse while hovering over this menu and holding "Ctrl" and mouse wheel scrolling up or down to quickly change which subject is being looked at while animation playback is running and with Auto Keying turned on to record this. Make sure you also click the circle to the right of the "2 Object Switch" to enable keyframing of this property so Auto Keying will work with it. If you want to do this with camera location, it's the same process except for step 1 you go to Loc Flow, 2. Modifiers>CFP_Cam_Loc.
- Need to switch between more than 2 objects? "Object List Length" can be increased up to 9.
Seamless Camera Shake + Motion Paths:
Changing Flow or Shake Presets:
- As stated above, have a Properties window present in your workspace for this particular operation.
- CFP>"Mod Panels" provides shortcuts to view the 3 different features + the Camera Data settings.
- Both Cam Flow and Track Flow have nearly identical settings except that Track Flow allows quick changing of "Tracking Type".
- "Flow Type" allows settings 1, 2, or 3 "Simple, Snappy, and Luxe Flow", and the only other sliders that affect them are "Main Speed, Object Controller, Flow Type, and Offset." The other sliders below are for the Enable Advanced Controls.
- "Enable Advanced Controls" is the fourth flow type: Luxe Flow Advanced Controls. If enabled, it overrides the other flow types. It's exactly like Luxe Flow by default, but with advanced control options allowing the use of the other slider settings like "From Min, From Max, To Min, To Max, and Luxe Curve (which has 8 presets)".
- You can always see the names of the presets you've chosen in Modifiers panel by expanding "Internal Dependencies" below the sliders. In Blender 4.1+ it's Manage>Named Attributes.
- Get used to the feeling of the basic flow types 1-3 while animation playback is going, and then come back to the advanced Luxe Flow Controls to try the 8 Luxe Curve presets (Classic, Slow Mo Moment, Magnetic, Splice Drift, Skippy, Speed Splice, Rope Slack Follow, Internet lag).
Recommended Workflows:
Avoid manual keyframing of the two Flow controllers until later. Manual keying for the Flow objects are best only for final cleanup if needed at all. See also "Timeline Scrubbing" section below. See also "Finely Adjust Camera and Track Point After You've Recorded Keyframes" below.
Free Camera Style: Enable Auto Keying in Blender's Timeline window, start timeline playback (spacebar) and record your grab input for the Flow controllers, typically one Flow object at a time if you ultimately need to animate them both. You can certainly transform both at the some time using various types of transforms for experimental shots.
Auto Follow and Track: CFP N-Panel>Relations>Track or Auto Focus, and Copy Location or Parent. You can always clear these relations and start over via CFP N-Panel>Resets>Reset Rig. See the button tooltips in Blender or listed below on this page under "Tooltip Listings". Once you set up relations the way you like, you can add additional camera control using the "Free Camera Style" workflow mentioned above.
Follow a Dummy Camera: Use a default Blender camera object as the motion input for CFP to smooth. Start by making the default Blender camera the main scene camera. Select it, and View>Cameras>Set Active Object as Camera (or Ctrl+numpad 0) and record keyframes for it. You could use any number of keyframing methods for it, including Fly Navigation or Walk Navigation (View>Navigation>Fly Navigation or Walk Navigation). Once your keyframes are recorded, go back to the first frame of animation / timeline. Select the dummy camera, cursor to selected (Shift+S), then select the CFP Root "0. Root Loc Rot Scale", CFP N-Panel>Aiming>Selected to Cursor. Now shift select the dummy camera. N-Panel>Item>Rotation, rightclick on xyz, Copy All to Selected. Now select only the "0. Root Loc Rot Scale", N-Panel>Item>Rotation X, type -90 after whatever is in the X value so that it will subtract 90 from it. Now the location and rotation of both the dummy camera and the CFP camera will be synced. Select the dummy camera, CFP N-Panel>Relations>Track and Parent. Be aware, the Tracking may give inconsistent focus for a subject since it's only based on the dummy camera, but you can choose your Depth of Field subject in CFP_Camera's Object Data Properties>Depth of Field. Alternatively, you can use Auto Focus by selecting your subject (if it's a mesh) and clicking the "AutoFocus" button, along with using the "2. Anchor Track-To" object to influence the point of interest the Auto Focus sticks to. CFP will now follow the dummy camera and you can adjust the smoothing type and speed in the CFP Mod Panels>Cam Flow and Track Flow panels. You can also still modify the keyframes of the dummy camera to taste.
Advanced Techniques:
- Auto Follow and Tracking: Select a character or rigid body object, etc CFP>Aiming>Aim+Focus, CFP>Relations>Track, CFP>Relations>Copy Location. Also try "Parent". You may need to choose the character armature and a particular bone to copy location / be the parent. You can set this in the modifiers panel.
- Dutch Tilt: Select the CFP camera, "R", "Z" x 2. Your rotation is a simple offset that will stay even with tracking and other motion effects active. You can also animate this.
- Loop-de-Loop Drone Mode: CFP>Mod Panels>Track Flow. Modifier Properties>Tracking Type: 3. CFP>Cam Flow, Modifier Properties>Main Speed (make this much slower than Track Flow's Main Speed).
- Camera Crane (fast but hard to edit later method): 3D Viewport>Transform Pivot Point>3D Cursor. Now place your 3D Cursor where you want the rotation to pivot from. Select "3. FLOW Cam Loc", and even "4. FLOW Track-To" if you like. Record and rotate.
- Camera Crane (slower setup but easier to edit): Move "1. Anchor Cam Loc" where you want the crane to pivot from. Move "3. FLOW Cam Loc" where you want the camera to start. Rotate "1. Anchor Cam Loc" during playback / recording to see the Flow smoothing in action, lifting the "3. FLOW Cam Loc" around it. Simply edit the rotation keyframes of "1. Anchor Cam Loc" as you see fit.
- Snapping to Curve Paths: Add a Subdivision Surface modifier to your Curve Path. It will now allow you to snap to the edge of the curve in Blender's Snapping. I like to do a simple deform for easy warping of the curve and then finish it with a Subdivision Surface modifier.
- Glitched-out Jump Cuts: Mod Panels>Cam Flow>Flow Type: (checkbox)Enable Advanced Controls, Luxe Curve 3, 4, 5, 6, and 8. you can also do this with "Track Flow" if needed.
- Record snapping Anchors to vertices for another type of jump cuts. Shift +Tab enables Blender's Snap settings which you can tweak for incremental, vertices, and more. These snapping movements can be auto keyframed / recorded.
- Camera Shake Jump Cuts: Toggle Shake on, Shake Panel>Distortion 1000+, Noise Speed and Noise Scale <0.01, Loc Master Multiply >50.
Before You Render an Animation:
- Caching OR Baking to keyframes is essential so that motion blur and camera tracking and location render correctly. Camera Flow Pro has some buttons to make that much easier for you, explained below.
- "Cache Cam" lets you quickly toggle a temporary baked camera for animation scrubbing or even final render.
- "Bake CFP Cam" creates a dedicated copied and baked camera to keyframes. Select the baked camera, 3D Viewport: View>Cameras>Set Active Object As Camera (Ctrl Numpad 0).
- Concerning rigid body physics objects, you must bake these objects to keyframes. For simple physics simulations that don't involve your live input (moving an object with the mouse), select your dynamic (moving) physics objects and click Camera Flow Pro's "Bake Selected" button. This runs the physics and bakes the selected objects to keyframes. For more advanced physics caching and baking, please see my free add-on "Auto Stop Free".
Baking Multiple Cameras and Switching Cameras in Animation:
I have a couple of workflows for setting up multiple cameras and switching between them in animation. Here's the first with the most control: Setup your first Camera Flow Pro animation; this will be for camera 1, then "Bake CFP Cam". It will copy the CFP_Camera and bake the animation keyframes to it, renamed as CFP_Camera.001. Then Resets>Reset Rig to remove keyframes from the CFP rig (if you want to create a completely different shot than the last one). Repeat this process for camera 2, etc. This is how you can create multiple animated, baked cameras in your scene that are ready to render. Without baking a camera to keyframes, there are often glitches in rendering, so this is a crucial step.
You can also bind cameras to the scene's timeline by selecting the camera in 3D View, and then ctrl+B in the timeline window at the frame you want that camera active. This is very helpful for switching cameras, although you can get similar effects with Camera Flow Pro using some of the glitched out camera jump-cut presets, getting the appearance of multiple cameras all in one camera! Sudden motions like those can have an effect on motion blur if you have that effect enabled, so be sure to test those shots / renders to see if they feel right for you.
This is the second workflow, and what I did for the Android Flair Breakdance Test animation. From the documentation "pro-tips" above: "Glitched-out Jump Cuts: Mod Panels>Cam Flow>Flow Type: (checkbox)Enable Advanced Controls, Luxe Curve 3, 4, 5, 6, and 8 provide various types of jump cuts in real time." all in one camera! Be advised, because this uses one camera which moves suddenly from place to place, motion blur will be affected for better or worse. Once baked to keyframes, you can also export the camera for use in other software (Unreal, Unity etc), and I would very much like to hear how that goes if you do that.
Timeline Scrubbing:
Geometry nodes simulations are not yet cached so please avoid scrubbing or else preview will not be in sync and will give inaccurate views! See also "Quickstart" and "Recommended Workflows" sections above for walkthroughs of these techniques and to enjoy the live smoothness that CFP offers with layers of optional extra control. If you absolutely must scrub, you have to follow some specific rules to workaround this current limitation, and even then I do not recommend. Always start at frame 1 (OR the first scene frame if using relations constraints, OR at least the first keyframe for CFP Flow controllers). Do not scrub backwards. Do not scrub too fast. You can also test against a baked camera to see if the simulation got out of sync. To do so, simply use "Cache Cam" or "Bake CFP Cam". A baked camera should overlap perfectly with the procedural camera, otherwise you know the simulation skipped a frame or two and needs to be played back or scrubbed from frame 1 without skipping.
My recommendation is avoid scrubbing and to instead use spacebar to playback your animation starting from the first keyframe or scene frame (if using relations constraints). Use spacebar to pause along the way and make tweaks via rotating the CFP camera itself (see "dutch tilt"), or using offset controls like the two anchor objects and the flow panel offsets sliders (both of which can be animated). You can also adjust scene frame rate playback in Blender's Output Properties panel to play forward even faster or slower, but after changing the frame rate you must shift + left arrow and playback from your scene's first frame for an accurate preview, then pause along the way and make adjustments like before. I changed my scene to playback at 60 and even 120 fps; playback was quick without desync even though my machine topped out at 60 fps playback.
Finely Adjust Camera and Track Point After You've Recorded Keyframes:
Method 1: Use the Cam Flow and Track Flow location offsets: Mod Panels: Cam Flow>Offset XYZ, and Track Flow>Offset XYZ. You can also animate these, but be careful because no extra smoothing is added. Very helpful for precise control.
Method 2: Move the Anchor objects: "1. Anchor Cam Loc", and "2. Anchor Track-To". You can also animate these. Be careful because Anchor location is not filtered / smoothed; they instantly offset the flow objects' locations. Very helpful for precise control. However, scaling or rotating them IS filtered and smoothed, giving you a bit of extra smooth control when your flow objects are at a different location than their Anchors. Another caution: if you are using the Relations panel features like Track, Parent, or Copy Location, the anchors will behave in turbulent ways (this is helpful if you want the Track-To flow to feel more turbulent when following a spinning object. To do this, simply move the "2. Anchor Track-To" away from the object's center of mass).
Method 3: Move, rotate, or scale the Root object: "0. Root Loc Rot Scale". To keep the focus / tracking where it's at while adjusting the camera location: set 3D Cursor to where the focus / track Anchor is. Select the "0. Root Loc Rot Scale." 3D View>Transform Pivot Point>3D Cursor. Now scale or rotate the Root object. You can also animate this, but be careful because it is not smoothed; it only offsets the flow objects in rotation, size, and location. It can work well if there are no active Relations constraints like Parent, Track, or Copy Location. Reset Rig and adjust.
More ways:
Rotate the camera itself (watch out because it will no longer be aligned exactly to the tracker. You can also animate this. Reset rotation with Alt+R).
Change the camera lens focal length. You can also animate this, functioning like a zoom lens.
Tooltip Listings:
Covers Camera Shake Panel, Camera Flow panel, and Tracking Flow panel (Geometry Node input settings for each).
Camera Shake Panel Tooltips:
Cam Loc Influence: The influence of camera shake on the camera's location.
Track-To Influence: The influence of camera shake on the camera's tracking.
Loc Master Multiply: Diminish or amplify the camera shake 3D volume. Higher values create full motion paths.
Sine Smooth: Generally, enable this when you need smoothing for any slower seamless / looping. Disable for more turbulent noise loops to appear more seamless.
Affect Flow Objs, NOT Anchors: NOT for seamless looping animations. Shake affects flow objects (and gets filtered by their flow / smoothing settings) instead of affecting the flow anchors.
Wave Loops: Must be an even number (2, 4, 6, 8 etc) for seamless looping to work. I recommend leaving this on 2.
Starting Frame: For seamless looping, both this and “Ending Frame” are already set by drivers to follow your active scene's frame_start and frame_end values. Right click and remove the driver if you want to break seamless looping and experiment.
Ending Frame: For seamless looping, both this and “Starting Frame” are already set by drivers to follow your active scene's frame_start and frame_end values. Right click and remove the driver if you want to break seamless looping and experiment.
Wave Offset: Offsets the shake, shifting it around in time. You can also animate this or set a driver to it to produce customized shake. Be sure to remove the drivers from “Starting Frame” and “Ending Frame” and set them both to “1” to turn their influences off if you wish.
Noise Speed: Higher positive or negative values add turbulence. Values closer to 0 are slower and smoother. Negative values are NOT equal opposites, so definitely try those for unique effects.
Noise Scale: Useful to tame or exaggerate “Noise Speed”. Higher positive or negative values add turbulence. Values closer to 0 are slower and smoother. Negative values are NOT equal opposites, so definitely try those for unique effects.
Noise W: Tweak this if you like your other settings but want a quick variation. The “Randomize Shake” button in the CFP N-Panel changes this value to anything between -10000 and +10000.
Detail: Adds finer turbulence within the main turbulence. 0 - 15. Only works if “Roughness” is greater than 0.
Roughness: Determines how much “Detail” finer turbulence is seen. 0 - 1.
Lacunarity: “The scale of a Perlin Noise octave relative to that of the previous octave.” This scales the finer turbulence size relative to the main turbulence.
Distortion: Lower values are smoother and slower, while higher values are faster and more turbulent. Pushing this to very high values and then taming that with “Noise Speed” and “Noise Scale” provide some interesting experimental skips / jump cuts. Negative values are NOT equal opposites, so definitely try those for unique effects.
Divider / Text String Entry Box: Your custom notes for this camera shake preset.
Normalize: Normalize motion to fit between -1 and 1. A convenient way to compress or expand motion to fit your needs.
Map Range: Specify the range of distance the camera shake can go relative to the Root "0. Root Loc Rot Scale" of the camera rig.
Loc XYZ Multiply: Track, Dolly, and Boom multipliers. 0 for off. Negative values work as well.
Loc XYZ Offset: Track, Dolly, and Boom addition or subtraction. 0.5 is Neutral.
Cam Flow Panel Tooltips:
Main Speed: Values closer to 0 are slower, while values of 7+ are ludicrous.
Flow Type: 1. Simple Flow 2. Snappy Flow 3. Luxe Flow. You can always see the names of the presets you've chosen in Modifiers panel by expanding "Internal Dependencies" below the sliders. In Blender 4.1+ it's Manage>Named Attributes.
Enable Advanced Controls: Luxe Flow Advanced Controls. See sliders below.
From Min: Think of as min distance of Flow object from the camera.
From Max: Think of as max distance of Flow object from the camera.
To Min: Starting point of the Luxe Curve expression. 0 is default, but you can start later, thus shaving off parts of the beginning of the Luxe Curve expression. 1 is maximum.
To Max: Ending point of the Luxe Curve expression. 1 is default, but you can end earlier, thus shaving off the end of the Luxe Curve expression. 0 is minimum.
Luxe Curve: 1. Classic, 2. Slow Mo Moment, 3. Magnetic, 4. Splice Drift, 5. Skippy, 6. Speed Splice, 7. Rope Slack Follow, 8. Internet lag. You can always see the names of the presets you've chosen in Modifiers panel by expanding "Internal Dependencies" below the sliders. In Blender 4.1+ it's Manage>Named Attributes.
Divider / Text String Entry Box: Your custom notes for this camera flow location preset.
Offset X Y Z: Offsets the camera location.
Object Controller: Highly experimental feature. Reset and Root Reset Rig do not undo this, so use at your own risk! Default setting: 3. FLOW Cam Loc.
Track Flow Panel Tooltips:
Tracking Type: 1. Track To (most flexible, standard tracking) 2. Damped Track (more rigid, offers unique barrel-rolling) 3. Locked Track (very rigid, but works well for flying loop-de-loops).
Main Speed: Values closer to 0 are slower, while values of 7+ are ludicrous.
Flow Type: 1. Simple Flow 2. Snappy Flow 3. Luxe Flow. You can always see the names of the presets you've chosen in Modifiers panel by expanding "Internal Dependencies" below the sliders. In Blender 4.1+ it's Manage>Named Attributes.
Enable Advanced Controls: Luxe Flow Advanced Controls. See sliders below.
From Min: Think of as min distance of Flow object from the Track-To object.
From Max: Think of as max distance of Flow object from the Track-To object.
To Min: Starting point of the Luxe Curve expression. 0 is default, but you can start later, thus shaving off parts of the beginning of the Luxe Curve expression. 1 is maximum.
To Max: Ending point of the Luxe Curve expression. 1 is default, but you can end earlier, thus shaving off the end of the Luxe Curve expression. 0 is minimum.
Luxe Curve: 1. Classic, 2. Slow Mo Moment, 3. Magnetic, 4. Splice Drift, 5. Skippy, 6. Speed Splice, 7. Rope Slack Follow, 8. Internet lag. You can always see the names of the presets you've chosen in Modifiers panel by expanding "Internal Dependencies" below the sliders. In Blender 4.1+ it's Manage>Named Attributes.
Divider / Text String Entry Box: Your custom notes for this camera flow track-to preset.
Offset X Y Z: Offsets the Track-To location.
Object Controller: Highly experimental feature. Reset and Root Reset Rig do not undo this, so use at your own risk! Default setting: 4. FLOW Cam Track-To.
Emergency Fix Procedures
Don't forget, Geometry Nodes Simulations can go to sleep. Although this was a problem in Blender 3.6 - 4.0.2, this has not been a problem since Blender 4.5, possibly even 4.2, but the "Refresh Sim" feature is still available if you need it in Add-on preferences.
Also, you can save in an older version of Blender and open in a newer version, but you must NOT open a newer version .blend in an older version of Blender. Simulations will break and not work at all. If you save in 4.1 for example, do not open that .blend in 4.0.
"Reset Rig" and "Total Reset" can also help but the following list are exceptions. Unless you know what you're doing, avoid:
- Adding custom constraints to the rig instead of using the Relations panel buttons.
- Deleting all or part of the rig.
- Renaming part of the rig.
- Moving one or more parts of the rig outside of the Camera Flow Pro collection.
- Deleting or renaming the Camera Flow Pro collection.
- Deleting or renaming the Geometry Nodes node trees.
- Deleting or renaming one or more of the rig constraints.
"Total Reset" - Ctrl+Alt+Click deletes all trackers and bakes, deletes CFP entirely and re-adds it fresh. Gives you a warning.
Don't worry. You can always try Ctrl+Z to undo. If that doesn't work, you can revert to a previously saved .blend or try to manually correct the changes. If you must use your current .blend and nothing else seems to work, do the following:
- Delete the entire Camera Flow Pro collection in the Outliner window (right click the collection and choose "Delete Hierarchy"). Be sure to delete all parts of the rig that may have gone outside of that collection.
- File>Clean Up>(go through all of these until no more data shows as being deleted).
- N-Panel: CFP>Initialize>Add Camera Flow Pro. You should see the Camera Flow Pro collection and proper names of the rig added. You should NOT see any of those with a .001 or .002 etc at the end of their names.
- All button functions and resets should now work correctly.
QUICKSTART (old) - Initializing the Camera Flow Pro Rig and See the Flow in Action!
- In the CFP tab under the "Initialize" panel, click "Add Camera Flow Pro".
- Select the outer ring of the rig named "0. Root Loc Rot Scale" and use it to move / rotate the rig into the general area of your scene you want.
- Select the Cone "4. FLOW Track-To", start animation playback (spacebar), and move it around your scene. See the camera flow delay track-to in action!
- Select the Empty Sphere "3. FLOW Cam Loc", start animation playback and move it around your scene. See the camera flow delay location in action!
- Feel free to enable "Auto Keying" in Timeline window so your movements will be recorded to keyframes during animation playback.
- That was just the basics to get a feel for manipulating the rig essentials. You can switch cam loc and track-to flow presets via the Mod Panels>Cam Flow and Track Flow buttons.
- Now let's discuss some more advanced tips and techniques.
Video Walkthrough (old):
Changes logs:
Camera Flow Pro 2025_12_1
Released with Blender 4.5 LTS support in mind, also tested and currently working with Blender 5.0. This version of Camera Flow Pro officially supports Blender 4.2 - 4.5.5 on Windows and Linux (Mac is untested). This version will be supported as long as Blender 4.5 LTS is (until July 2027). Latest changes include:
- Framing and Composition panel
- FPV Frame mode
- Focus
- Relations with toggle feedback and keyframing options
- New slider mode, camera whip option, and switch focus objects between up to 9 objects in flow settings! Yes, you can animate this, making point-to-point camera movement and aiming a breeze
- Fulltime Autofocus mode
- Enhanced Shake options and randomization
- Caching that toggles on and off for scrubbing animation or even rendering
- Smart camera baking that names cameras according to your scene, frames, and other CFP options that are toggled
- Barrel Roll pairs nicely alongside the Turnaround option.
- Trackers that help you create points of of interests, sticking to a selected object or freely existing.
- Hitchhike snaps an object to the camera as a child and allows you to move and animate that object as smoothly as the camera.
- Bake Selected option enhanced with copy bake, useful for both Hitchhike objects and even Rigid Body Physics objects.
- Resets have even more options to help you keep your project clean
- Add-on preferences has options for showing or hiding advanced features (shown by default)
Hover over each button for a detailed descriptions, as nearly all of them now include alternate functions depending on if you regular click, alt+click, ctrl+click etc. See below for detailed tooltips listing.
Camera Flow Pro 24_9_4
- New panel, new powers! 🔄 Auto Turnaround feature: at the click of a button, get a perfectly seamless looping 360 turnaround camera orbit that auto adjusts based on your scene frames. This works right along with camera shake and the other CFP features, OR as a great standalone tool to show off your model, spice up your logos / motion graphics, and more. Options for tilting the orbit, flipping orbit direction, and multiplying the number of orbits are included.
- The CFP rig has been slightly offset so that the Root is now at world center. This makes it easier to simply move the camera location anchor, then click Toggle Turnaround.
- CFP camera is now auto set as the active camera when appending, saving you the time of previously having to set it as the active camera yourself.
- Relations lines are hidden in whatever active workspace you append the CFP rig in, giving you a cleaner view. 3d Viewport>Overlays>Relations. Other workspace tabs remain unchanged.
- Non-editable parts of the rig are now auto hidden from the 3D viewport, cleaning up the view.
- Bake CFP Camera button icon changed from film to a render camera. 📷
- Tooltip info has been updated for Bake Selected button.
- A glitch has been fixed for Bake Selected. Previous behavior created a baked rigid body collection when none existed. New behavior works as expected, only creating collections for baked rigid bodies if they exist and are baked.
- Proper links to documentation and also bug reporting have been added in the addon settings.
- Versioning format has been changed to year, month, day. This version is 24.9.4.
- Addon Description and Location have been updated in the addon settings.
- Minor tooltip typos have been fixed.
Tested and working with Blender 3.6.12 - 4.2.1
CameraFlowPro_24_08_13
✅Camera Shake: “Noise Speed” now auto compensates for your scene length. Previous behavior example: a scene of 50 frames would appear to have much faster Camera Shake Noise Speed than one of 500 frames; you had to manually adjust Noise Speed to compensate for this. Now the camera shake speed should feel much more stable and similar when changing your scene frame length. This processing is done under the hood in geometry nodes, and as always you can adjust the Noise Speed slider in the Shake Panel for more control. 24-08-13
✅Renamed Camera Data block from “CFP_Camera.005” to “CFP_Camera”. Previous behavior example: when baking 5 or more cameras, it auto skipped CFP_Camera.005 and named it CFP_Camera.006 because of this. 24-08-13
- If at any time you don't see the proper rig response / motion while animation playback is running, CFP Npanel>Resets>Refresh Sim. Geometry Nodes Simulations sometimes go to sleep, so this "Refresh Sim" button will wake them back up no problem (this has not been an issue in more recent versions of Blender from 4.5+).
- Blender 3.6 (unlike 4.0+) limits tooltip length of Geometry Nodes inputs; Blender 4.0+ recommended OR refer to this page for the full tooltip listings.

Discover more products like this
motion action looping auto-camera drone camera shake slow parent slow follow slow Keyframe smoothing Custom Camera Shake parent Motion Smoothing looping animation seamlesss smooth camera jump cuts Shake jump-cut gimbal