 Tokugawa Electronics
Updated to 0.7.184 · Undo fixes, console recovery and faster playback startup. See what changed ↓
TOKUGAWA ELECTRONICS / CINEMAOPERATOR
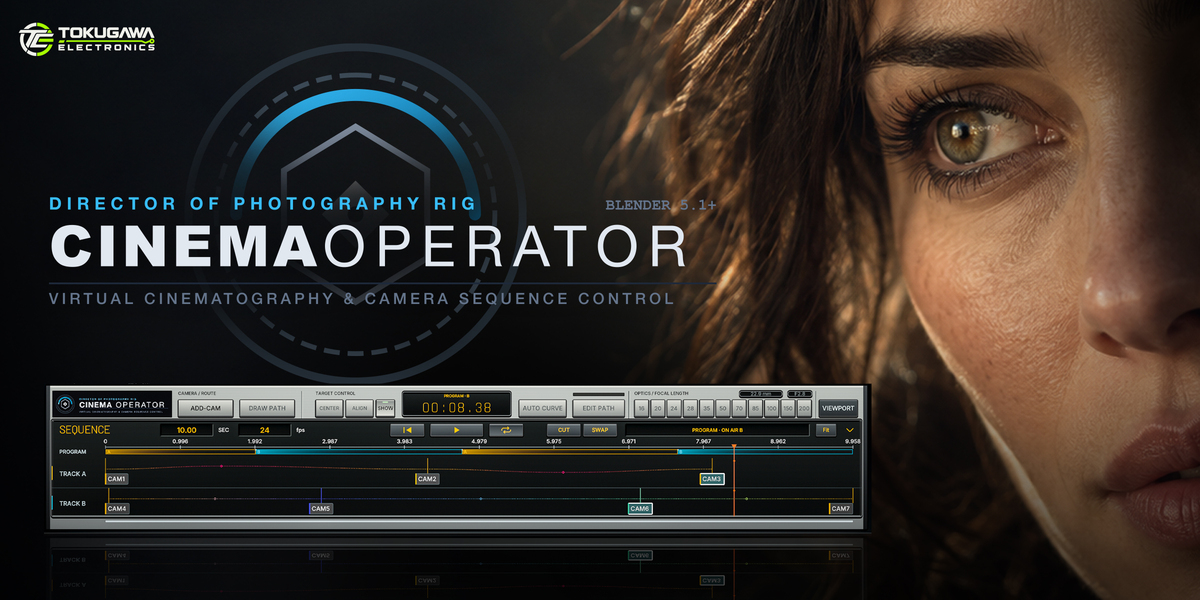
Camera work, designed for filmmakers.
Compose a shot, place your camera positions on a timeline, and watch them become a smooth camera move. CinemaOperator brings a hands-on camera console, editable paths and two-track cuts into Blender.
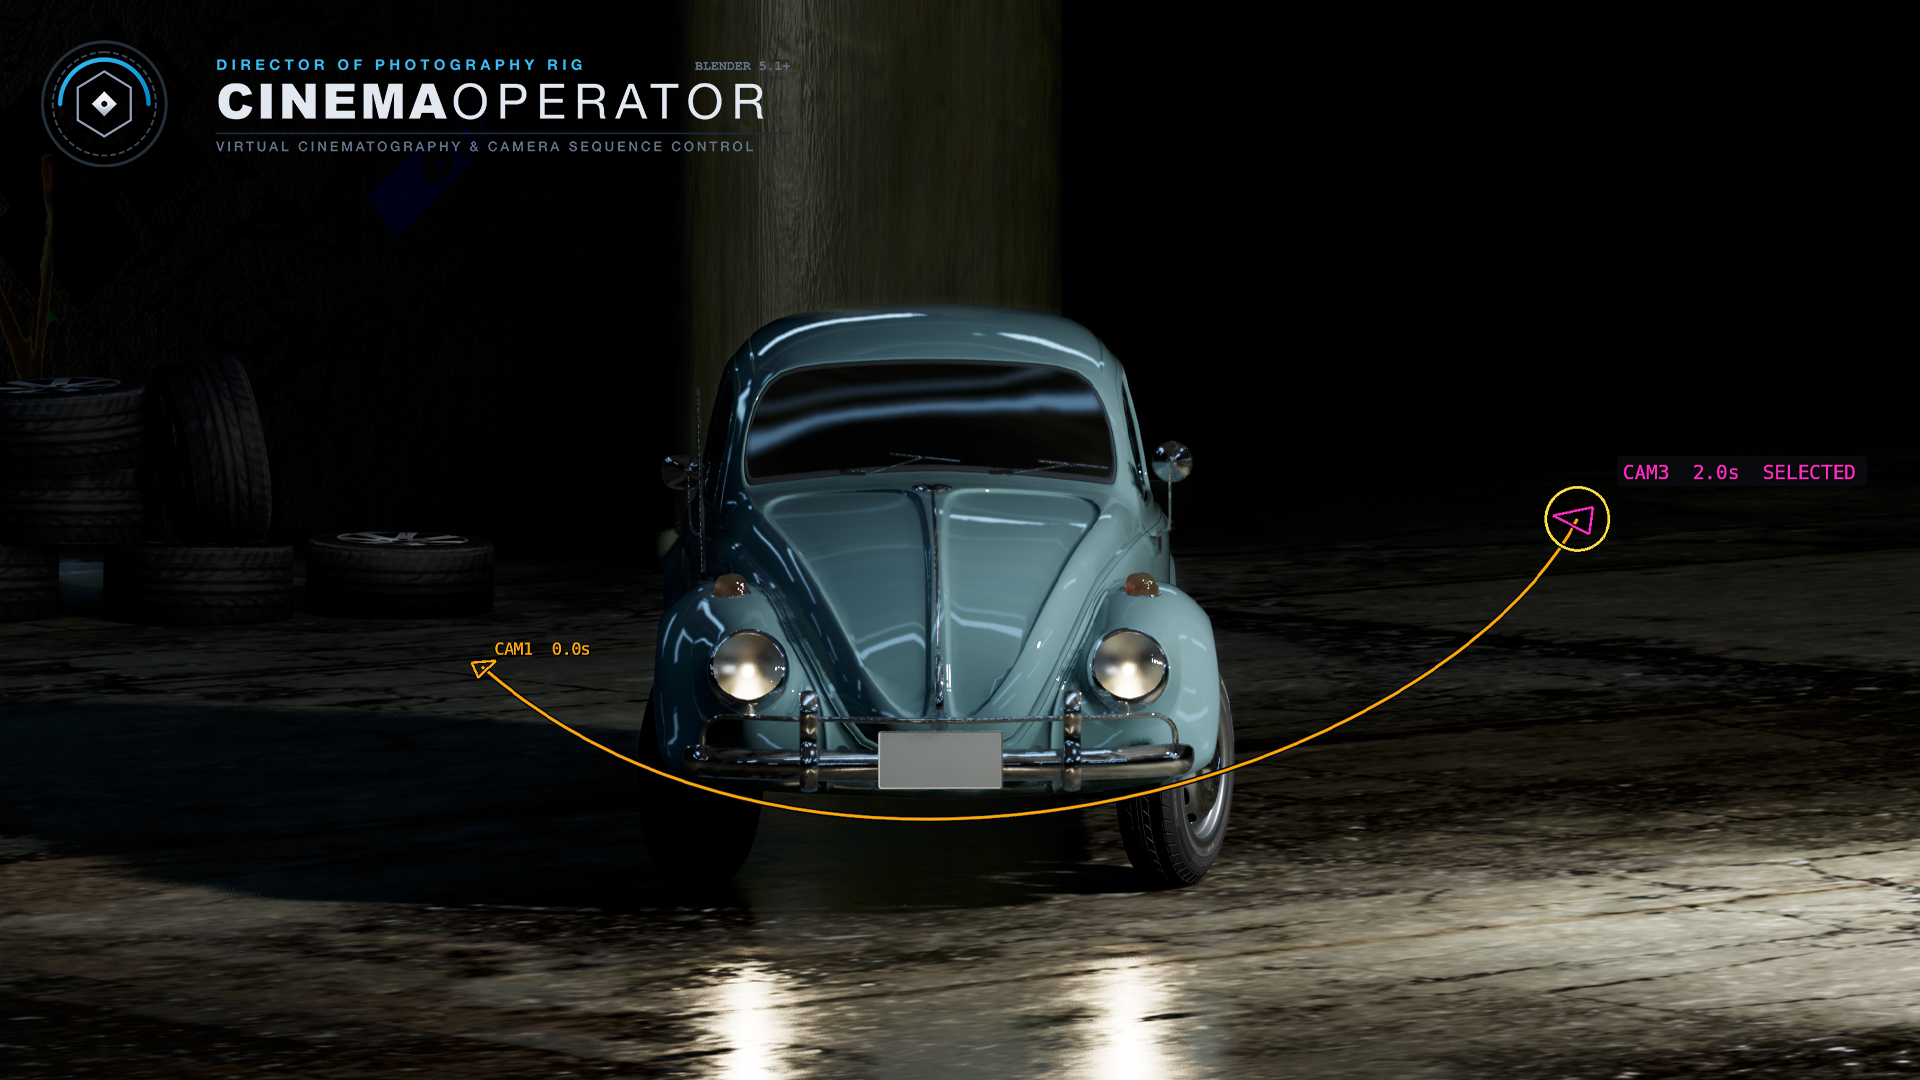

From an idea to a camera move
- Compose by eye. Use the camera frame and controls to slide, orbit, push in and adjust your shot.
- Build a continuous move. Add CAM cards to the timeline for the compositions you want the camera to pass through.
- Shape the path while watching the shot. Edit the route in 3D with the camera preview beside it.
- Cut between two camera moves. Create independent tracks A and B, then choose when to switch between them.
- Deliver your work. Render with the add-on enabled or bake the movement to Blender camera keyframes for handoff.
Help shape CinemaOperator — 10 free feedback copies
Tell us what you would like to create with CinemaOperator using Contact the creator on this page. We will review your message and send a private free-copy code to 10 selected participants who are willing to share their experience, questions and suggestions directly with us. Limited to 10 participants; applications close when the places are filled or on November 30, 2026. A public review is not required.
Create an orbit shot in 3 steps
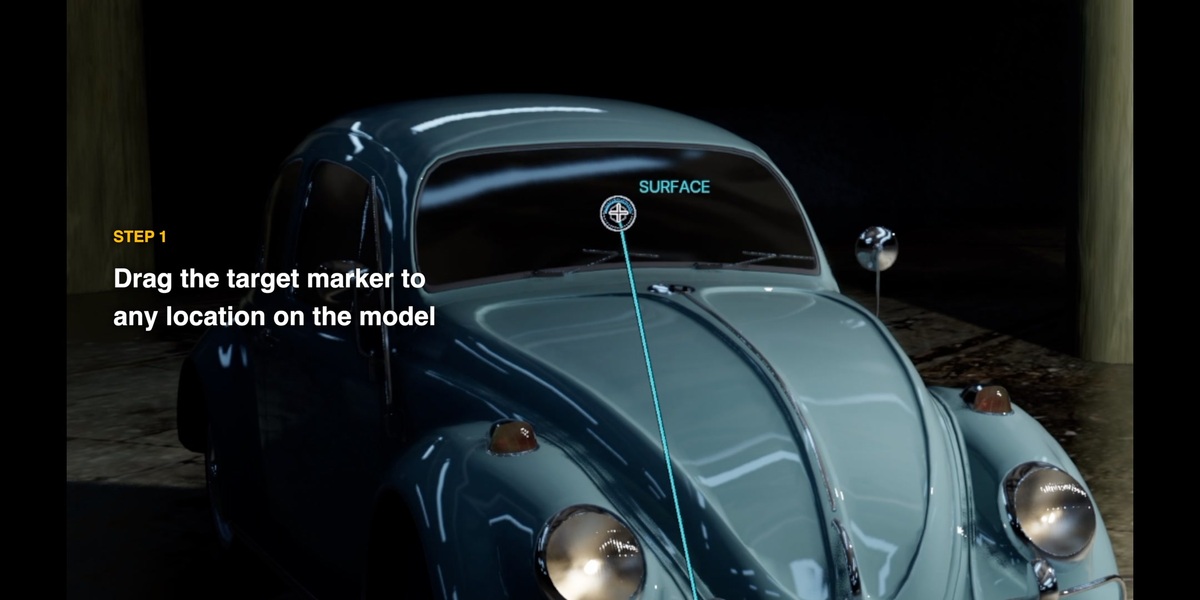
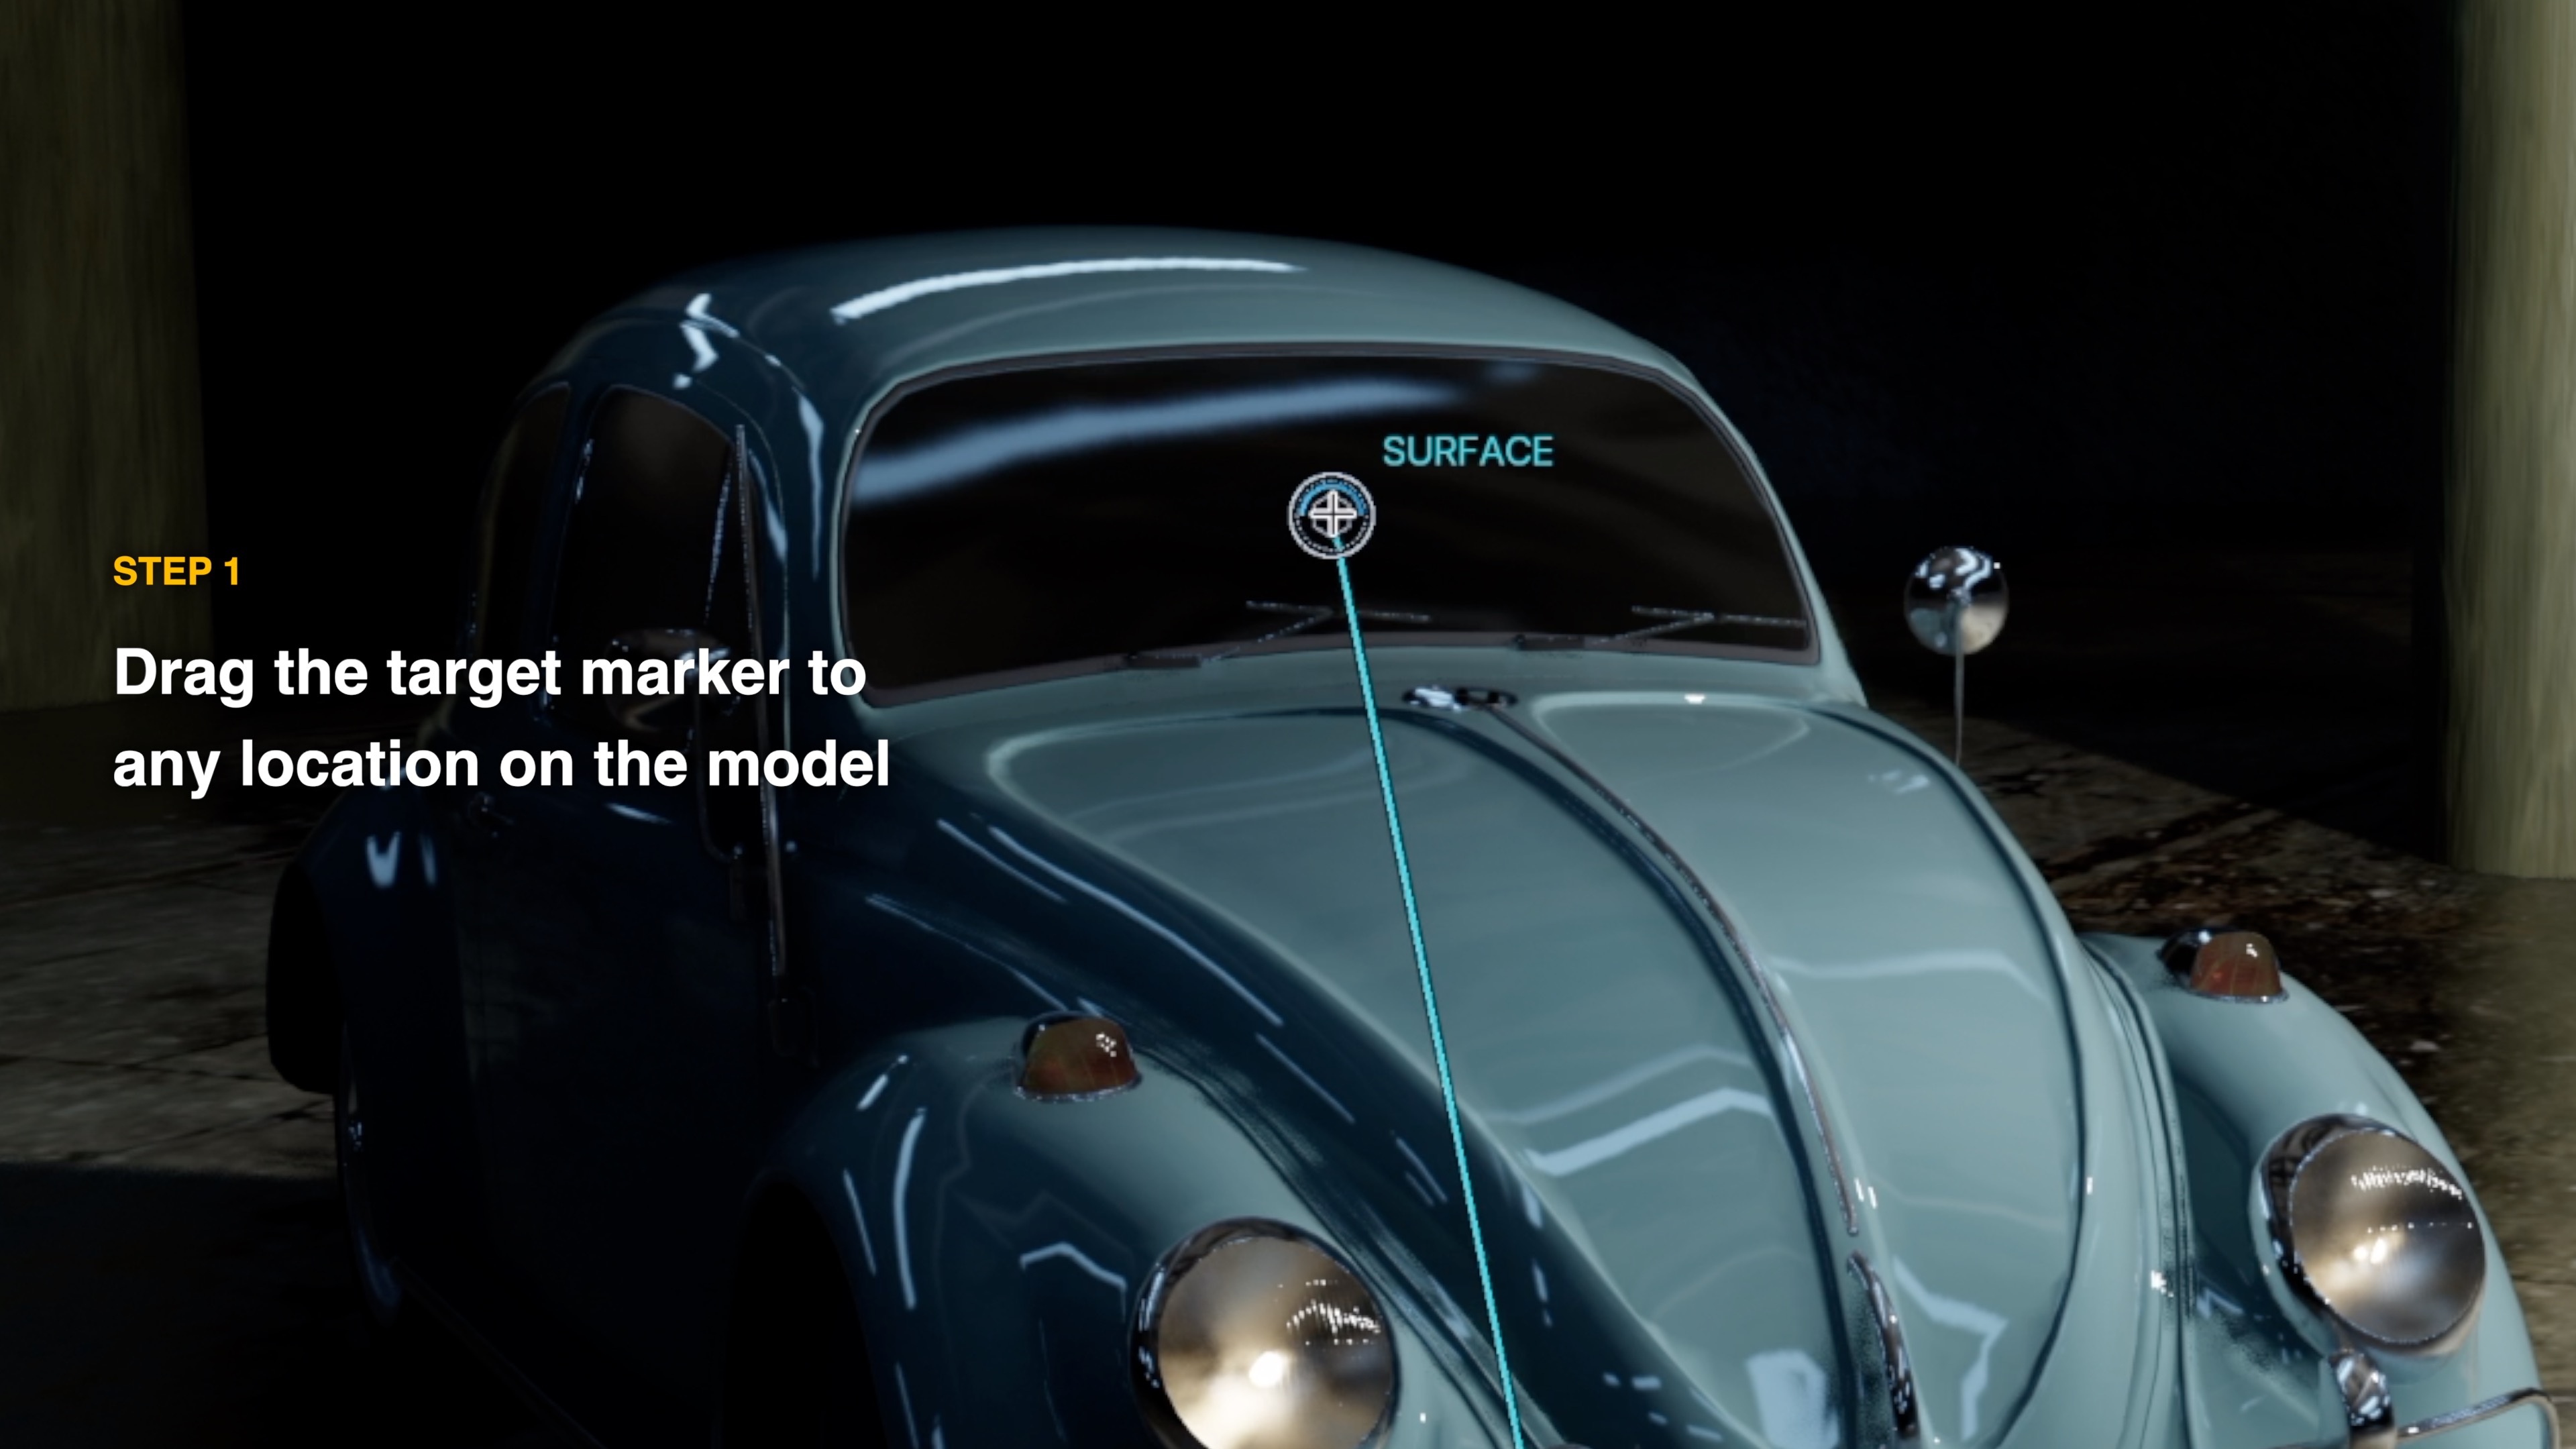
STEP 1 — Set your target
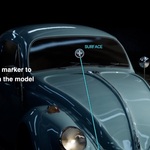
Place the target marker on your model to build your composition around it. Pan & tilt, slide & crane, orbit, and push & pull all use this marker as their reference point.
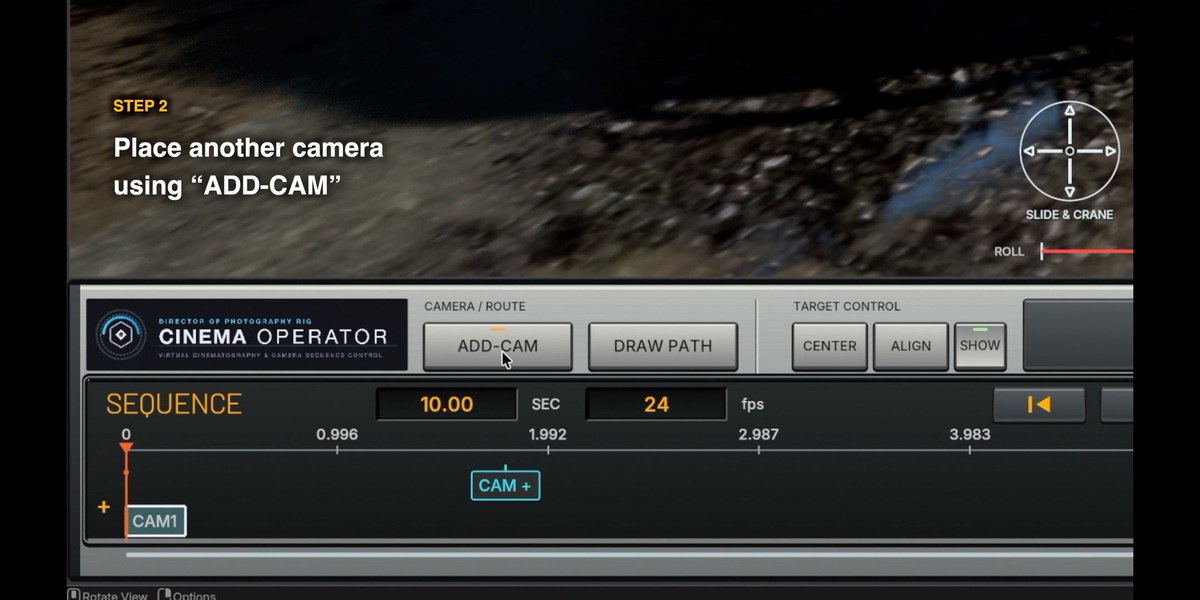
STEP 2 — Add a CAM
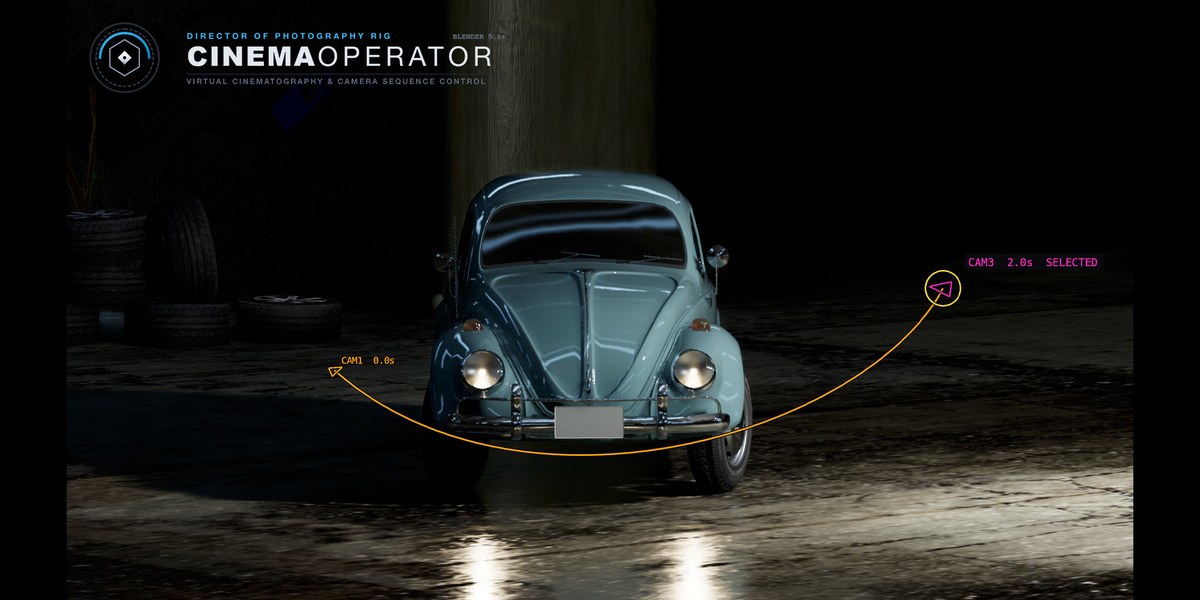
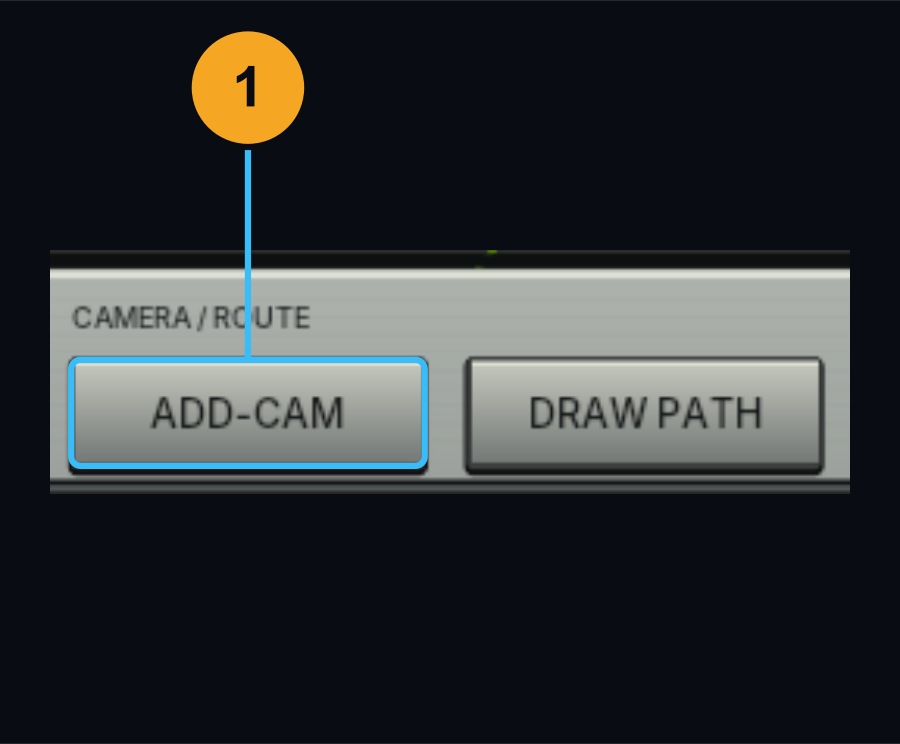
Add a CAM card and place it at any time in the sequencer. A curve connecting the CAMs is generated automatically.
STEP 3 — Adjust and play
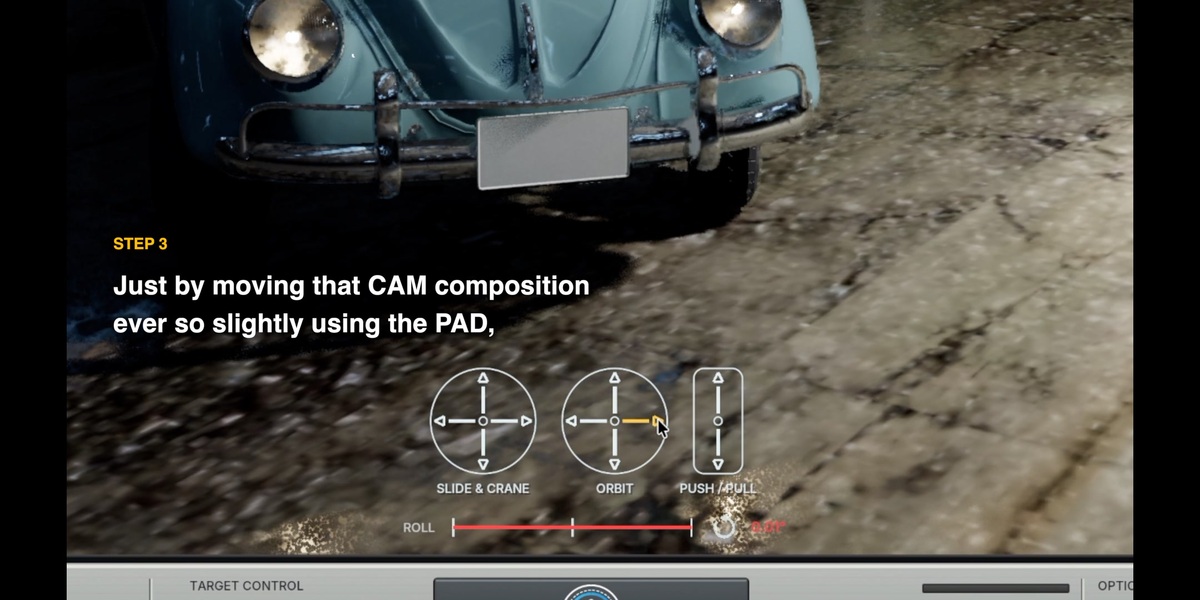
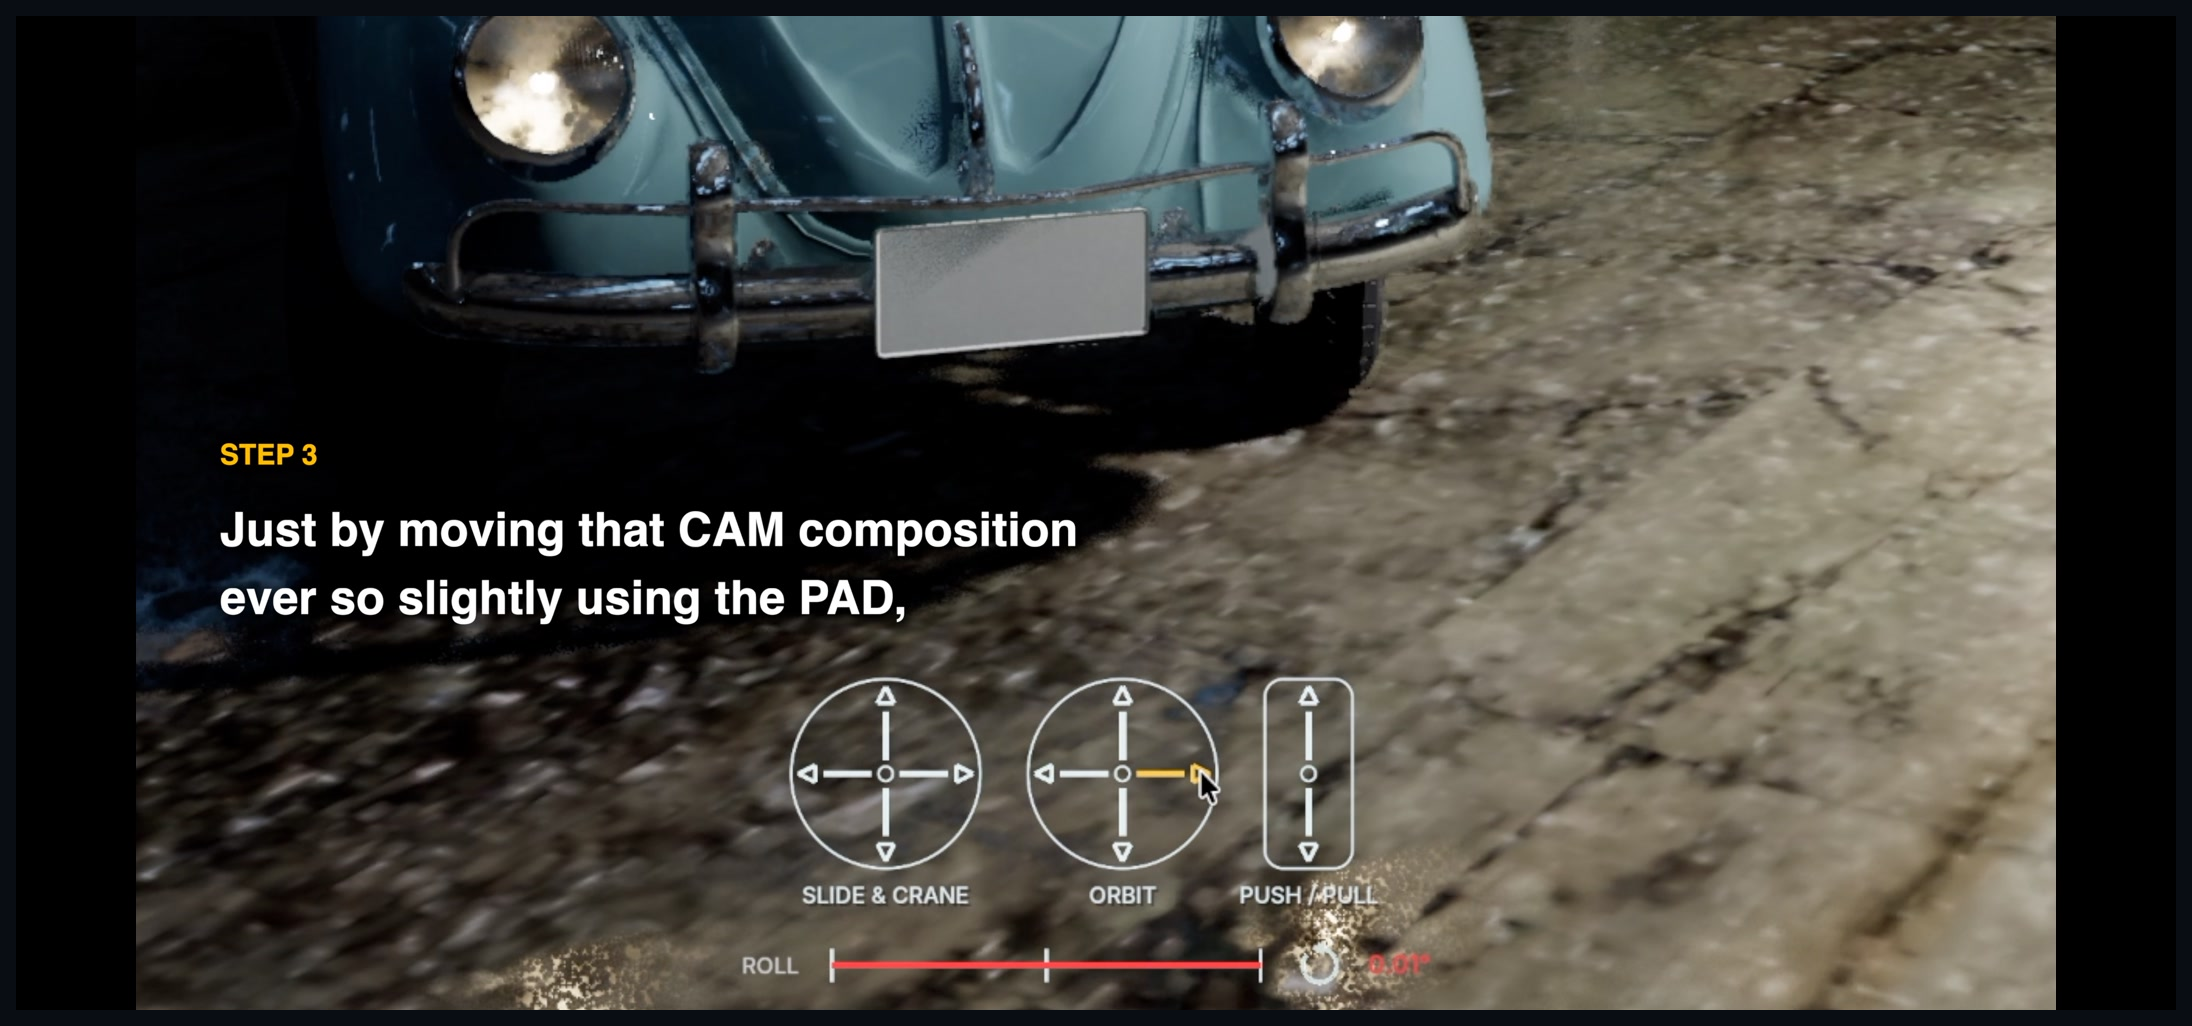
Use the pads to change the new CAM’s composition. Here, we simply clicked the left orbit arrow a few times. Start with a rough move, then play the sequence to see it in motion.
00 — Compose first. Shape the move.
CAM cards are framing waypoints along a continuous shot. Build the compositions you want to pass through, then refine the journey between them.
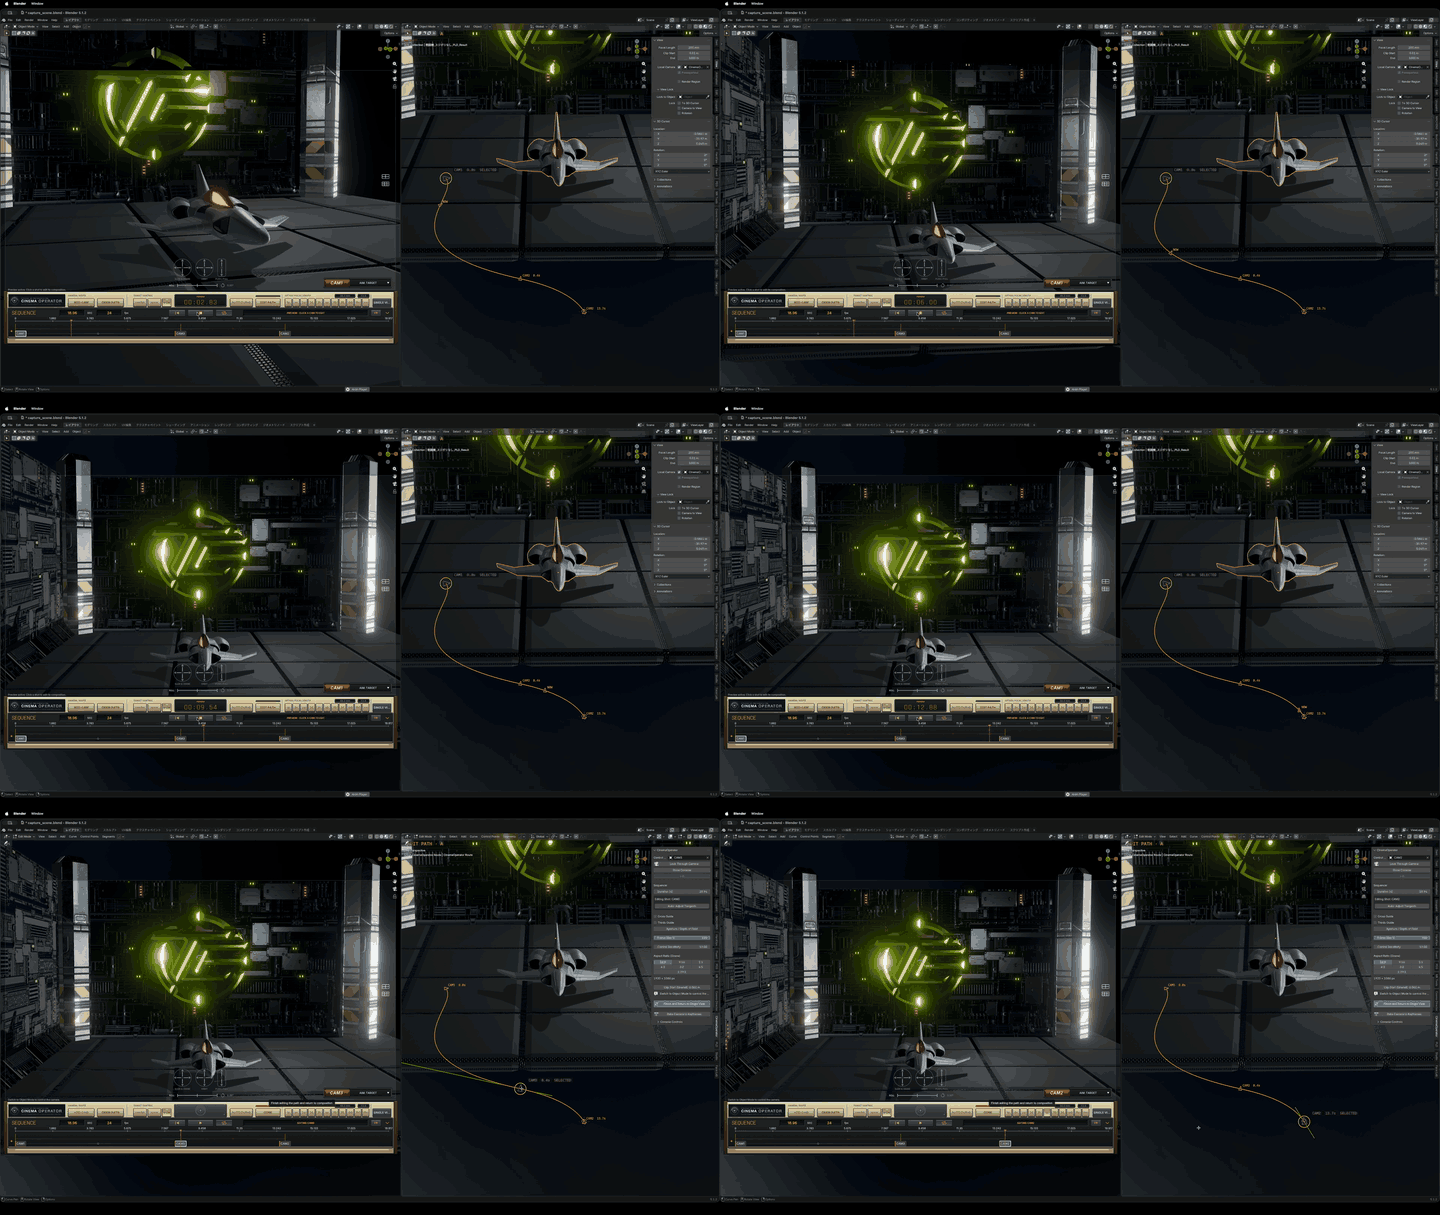
Left: the camera viewfinder. Right: the 3D path. One camera moves through the framing waypoints.
Explore the controls below: numbered callouts match the short descriptions beneath each image. Click an image to view it at full size.
The numbered control diagrams below were captured in an earlier version. Some screen layouts and controls have since changed; the current 0.7.184 guide in the download shows the latest interface.
01 — Start with a view you love
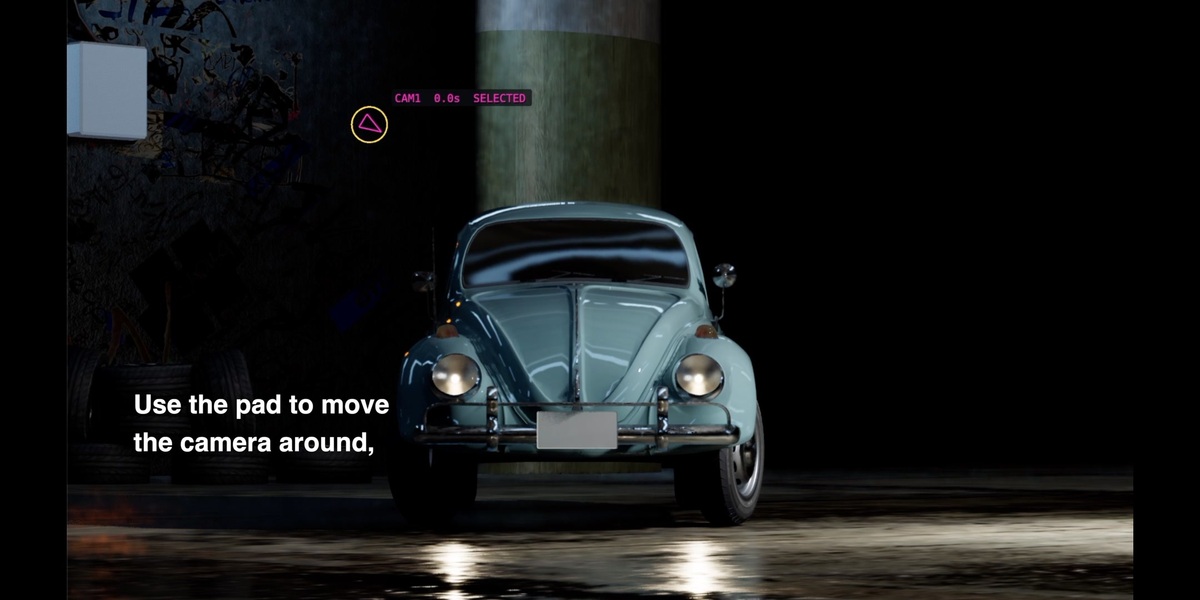
Frame your subject in the viewport. Create your first CAM from that view and start shaping the shot.
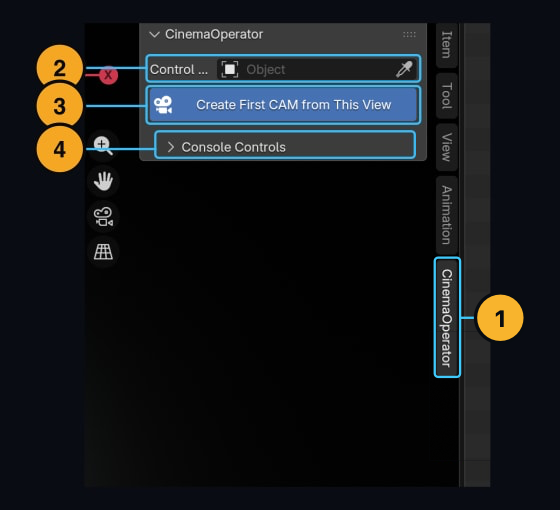
- 01 CinemaOperator tab — Open your camera workspace from the N-panel.
- 02 Control Camera — See which camera you are working with.
- 03 Create First CAM from View — Turn your current perspective view into CAM 1.
- 04 Shared controls — Keep playback and viewing tools close at hand.
02 — Compose by feel
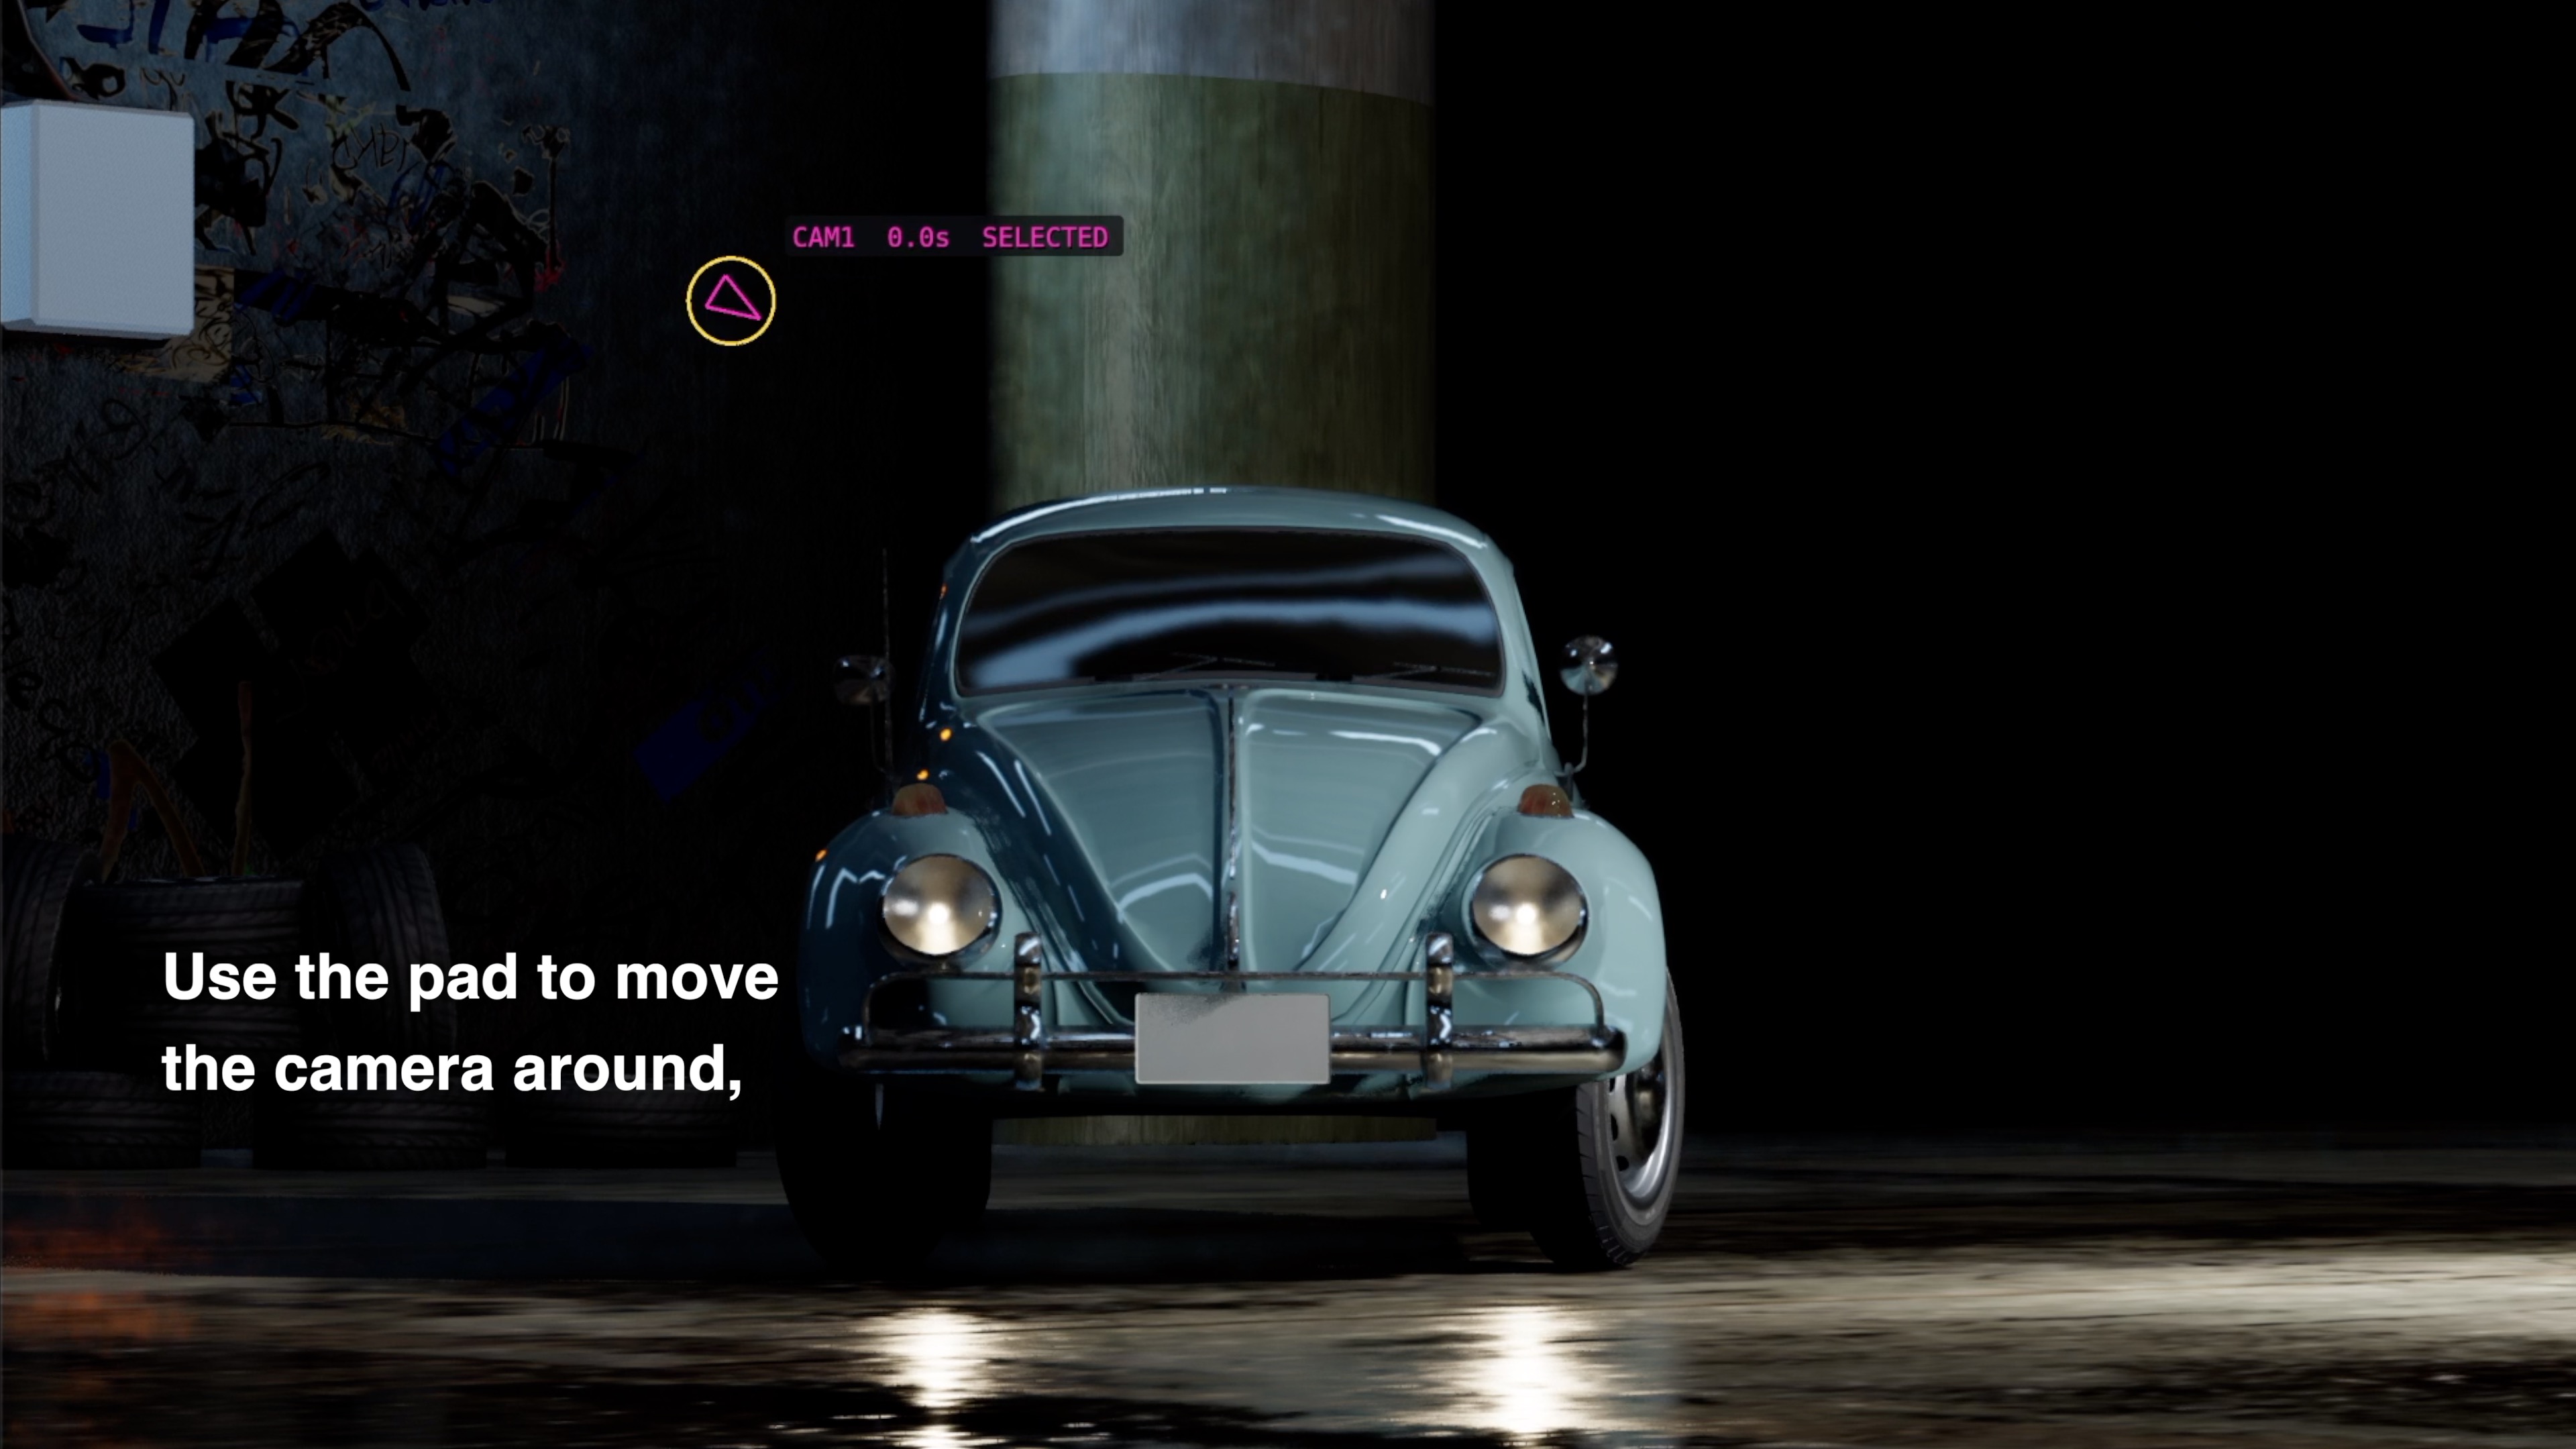
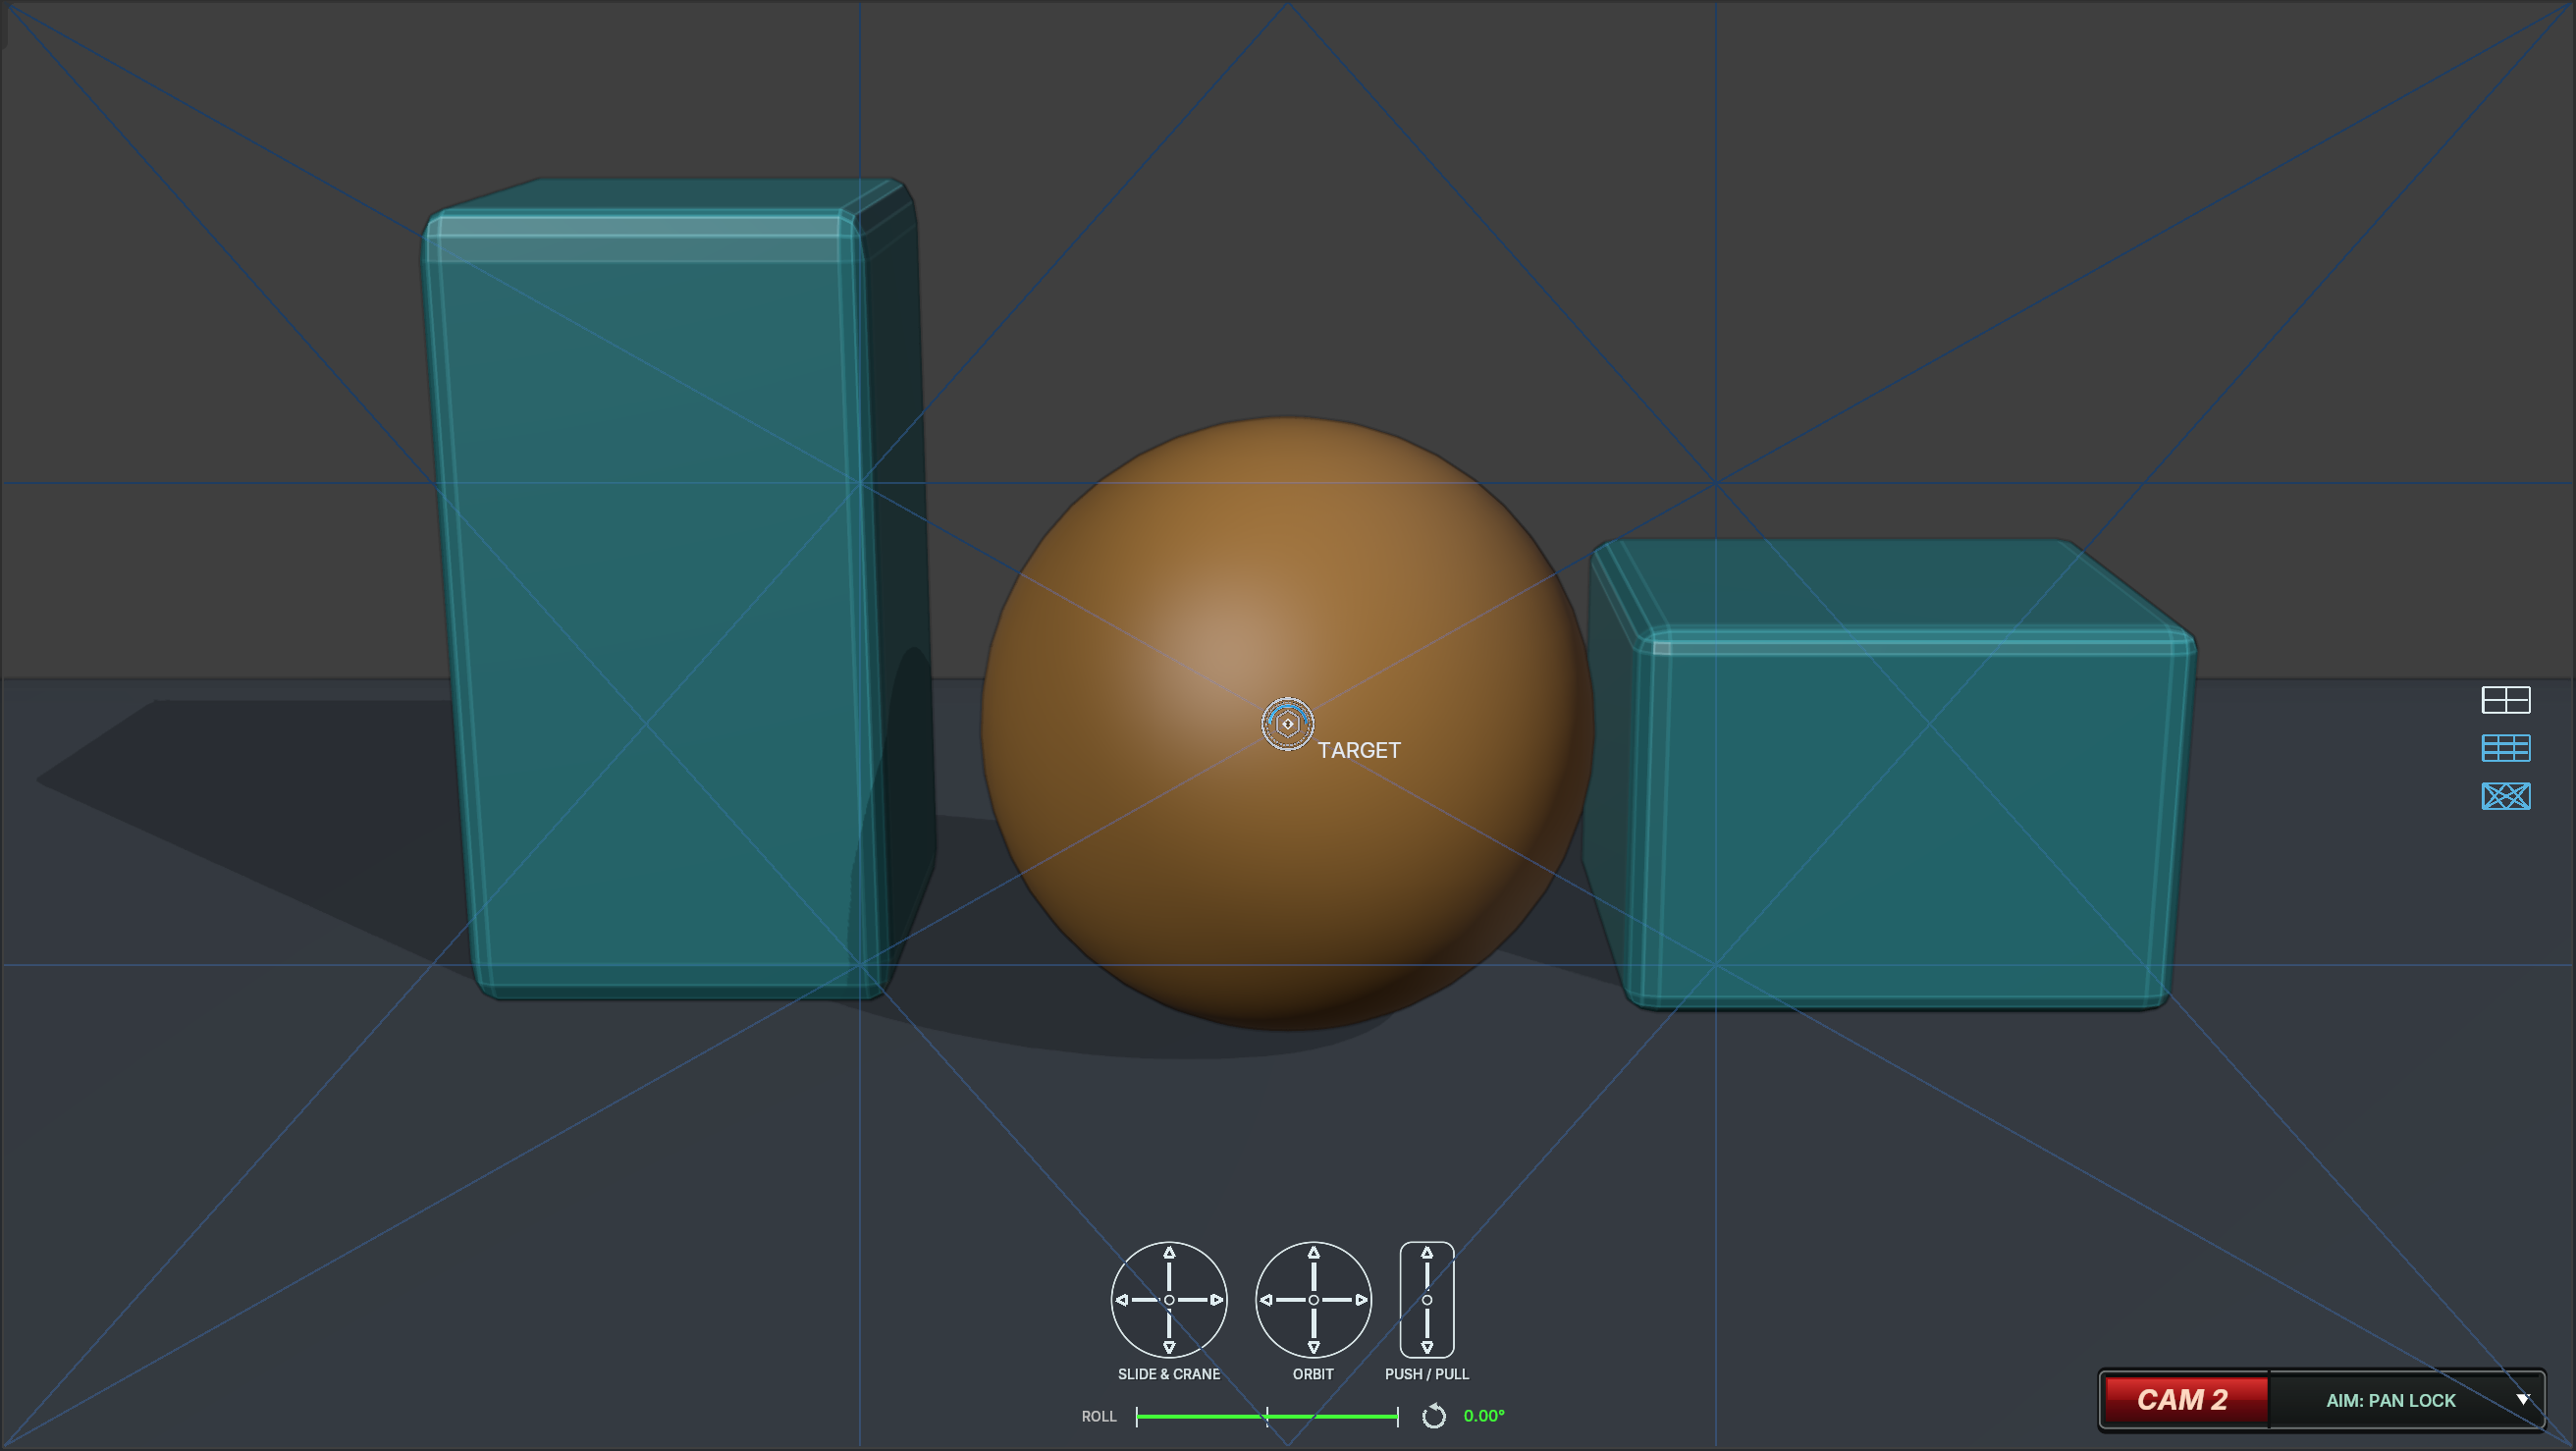
Slide, orbit and push in while watching the actual camera frame.
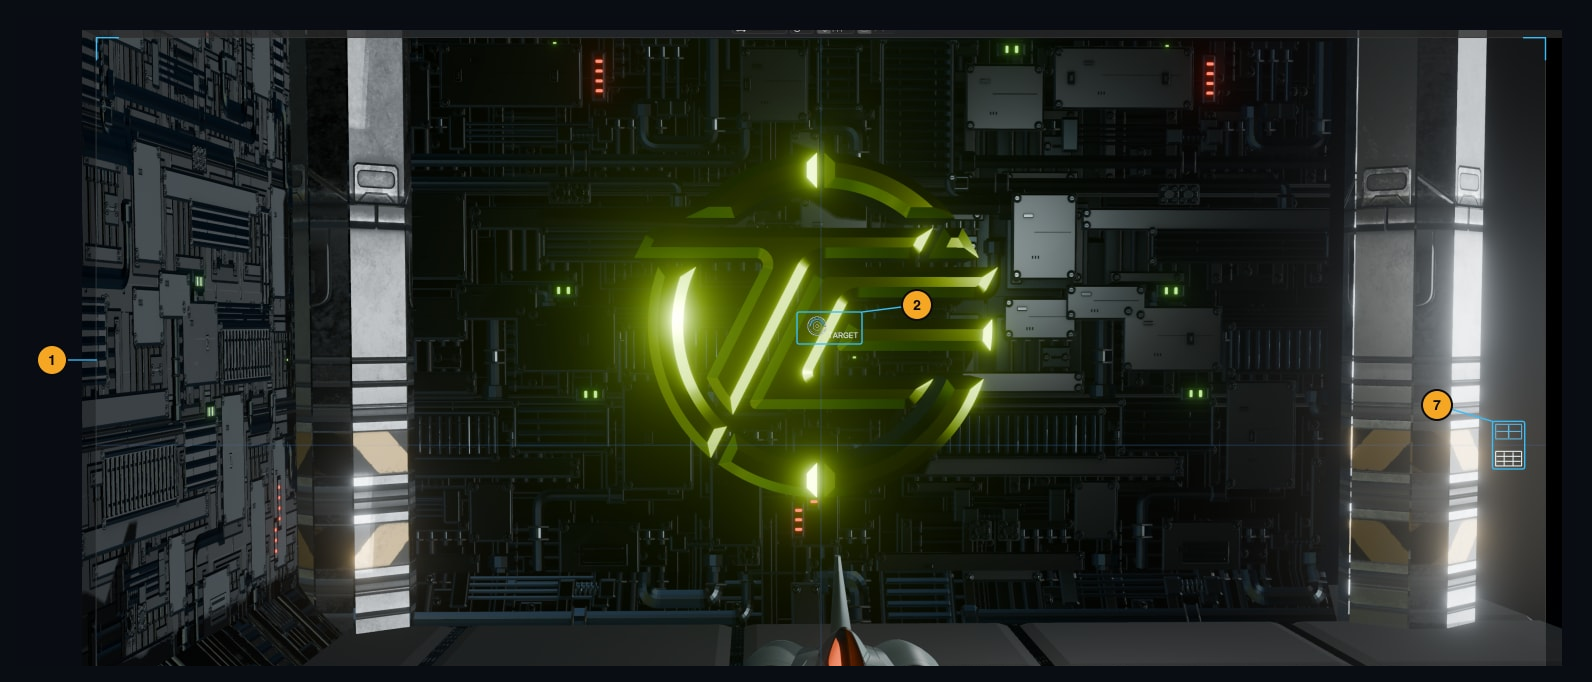
- 01 Viewfinder — See the composition you will render.
- 02 TARGET — Set the reference point for aim and focus.
- 07 Guides — Show a center cross, rule-of-thirds grid or diagonal guides to help frame your shot.
The camera pads, enlarged:
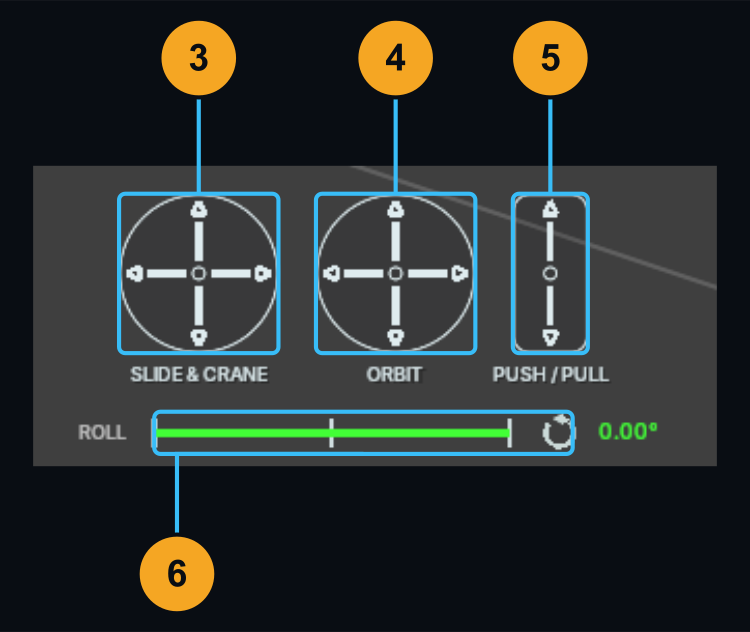
- 03 SLIDE & CRANE — Move sideways or vertically.
- 04 ORBIT — Move around your target.
- 05 PUSH / PULL — Dolly closer or farther away.
- 06 ROLL — Tilt the horizon, or reset it to level.
The following numbered controls are from an earlier interface; 0.7.183 also includes PAN LOCK.
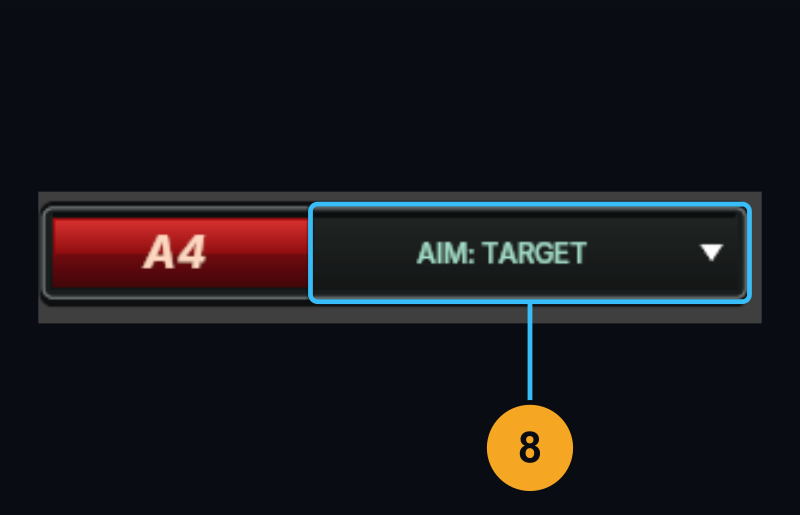
- 08 AIM — Follow a target, look along the path, turn smoothly between saved directions, or use PAN LOCK to keep facing the same way until the next CAM.
In 0.7.183, switch on diagonal guides as well as the cross and thirds grid. Guides do not appear in the render.
03 — Your camera controls, together
Add framing waypoints, smooth the route and choose your lens from one console. The controls are shown in two close-ups so every button is easy to find.
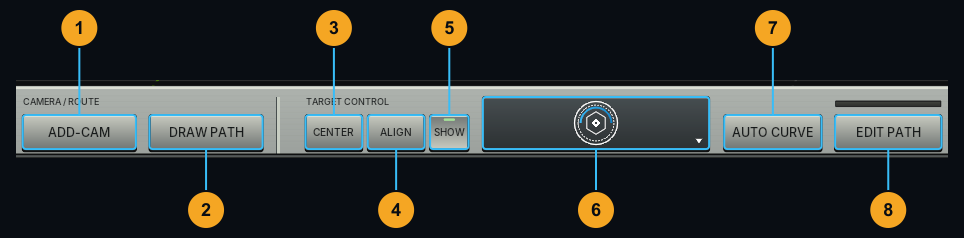
- 01ADD-CAM — Place the next composition on the timeline.
- 02DRAW PATH — Sketch a camera route, or extend an existing one.
- 03CENTER — Place the target in the center of the frame.
- 04ALIGN — Align the camera to useful world-axis views.
- 05SHOW — Show or hide the target marker.
- 06SET TARGET — Drop your aim and focus point onto a surface.
- 07AUTO CURVE — Smooth the path handles at all selected CAMs. Select one CAM for a local adjustment, or box-select several to smooth them together.
- 08EDIT PATH — Open the 3D path beside the camera preview.
Choose the lens and depth of field that fit your shot.
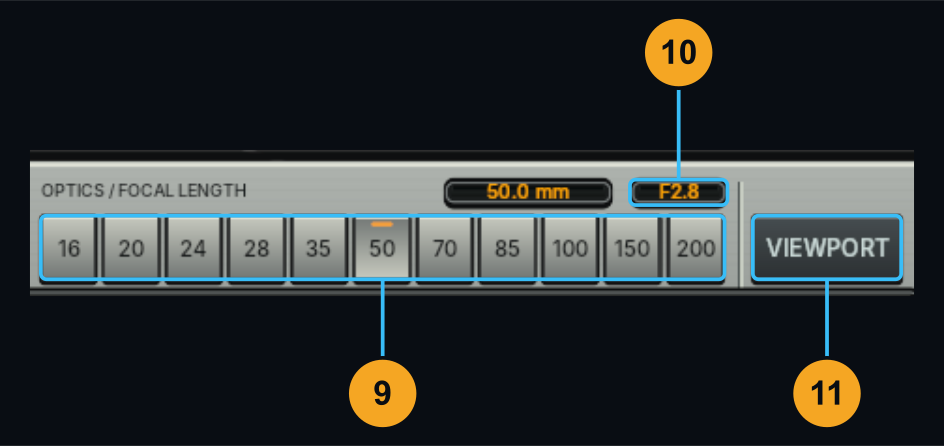
- 09Focal Length — Choose a lens preset or enter a custom value.
- 10F-Stop — Set aperture and depth of field.
- 11VIEWPORT — Return to the working viewport.
04 — Give the move its rhythm
Keep the rhythm you like, even when the duration changes. Set the new length, then fit every CAM on the active track to it—or space them evenly for a fresh starting point.
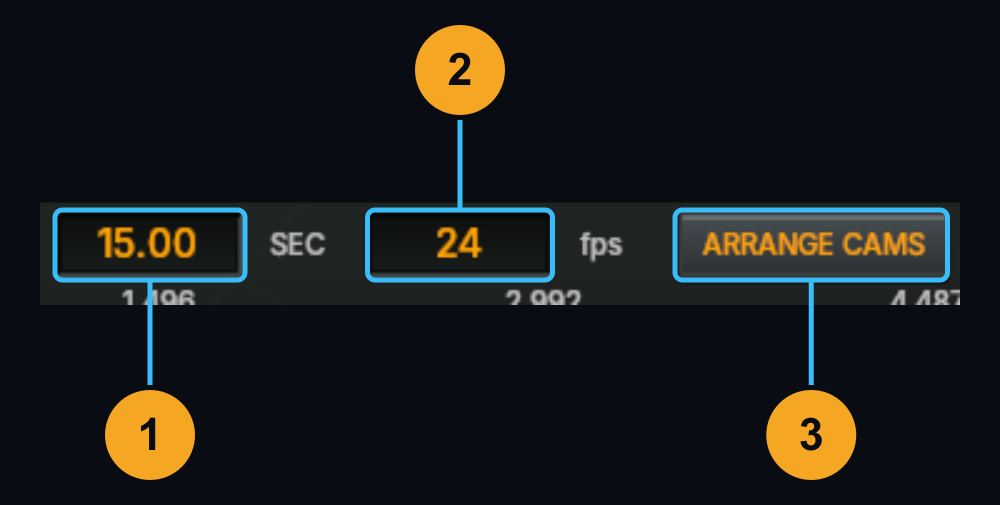
- 01SEC — Set the sequence duration.
- 02fps — Set the frame rate.
- 03ARRANGE CAMS — Choose FIT TO DURATION to preserve the relative timing between CAMs, or SPACE EVENLY to distribute them evenly across the available duration.
For example, extend a 10-second move to 15 seconds with FIT TO DURATION. The pauses and faster passages keep their relative proportions. Auto TAIL reserves room for motion beyond the last CAM.
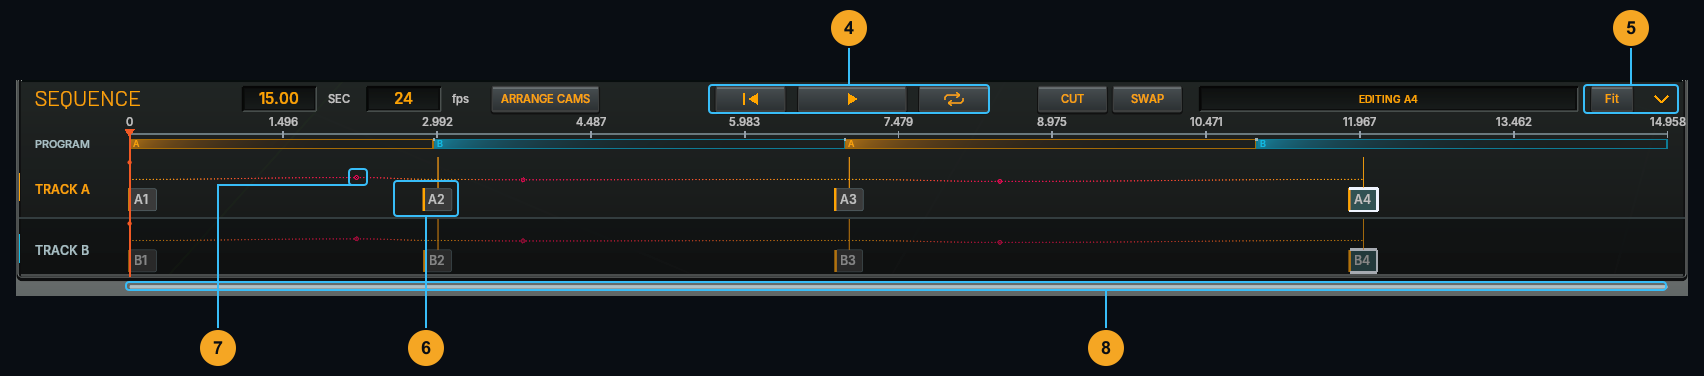
- 04Playback — Rewind, play and loop the shot.
- 05Fit / Collapse — Fit the timeline or fold the console away.
- 06CAM cards — Select a composition or drag it to change its timing. Box-select multiple cards for AUTO CURVE.
- 07Work transition — Shape the path or orientation handoff, depending on AIM mode.
- 08Timeline navigation — Scrub the time ruler and scroll through the sequence.
ARRANGE CAMS acts on all CAMs in the active EDIT A/B track, including disabled cards. The other track and PROGRAM cut times stay unchanged. The spatial path is preserved; times are rounded to frames. Use it with playback stopped, outside DRAW PATH and PROGRAM, with at least two CAMs. Preview again after retiming animated subjects.
05 — Two moves. Your cut.
Build independent camera moves on TRACK A and TRACK B, then choose what goes on air.
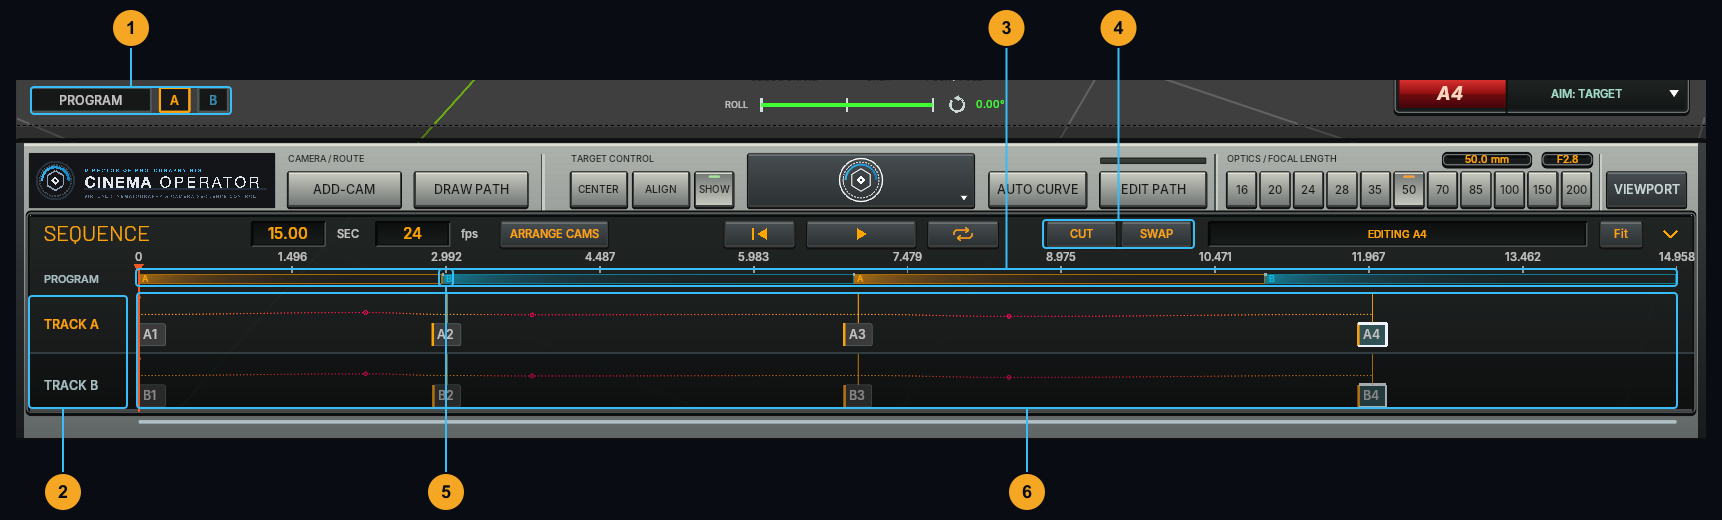
- 01 PROGRAM / A / B — Preview the final cut or an individual track.
- 02 Track selector — Choose the track to edit.
- 03 PROGRAM band — See which track is on air.
- 04 CUT / SWAP — Add a cut or swap the on-air tracks.
- 05 Cut boundaries — Drag to trim a cut frame by frame.
- 06 A / B timelines — Keep each track’s CAMs and path independent.
06 — Set the format. Deliver the move.
Switch output formats and export camera motion to standard Blender keyframes when you need a handoff.
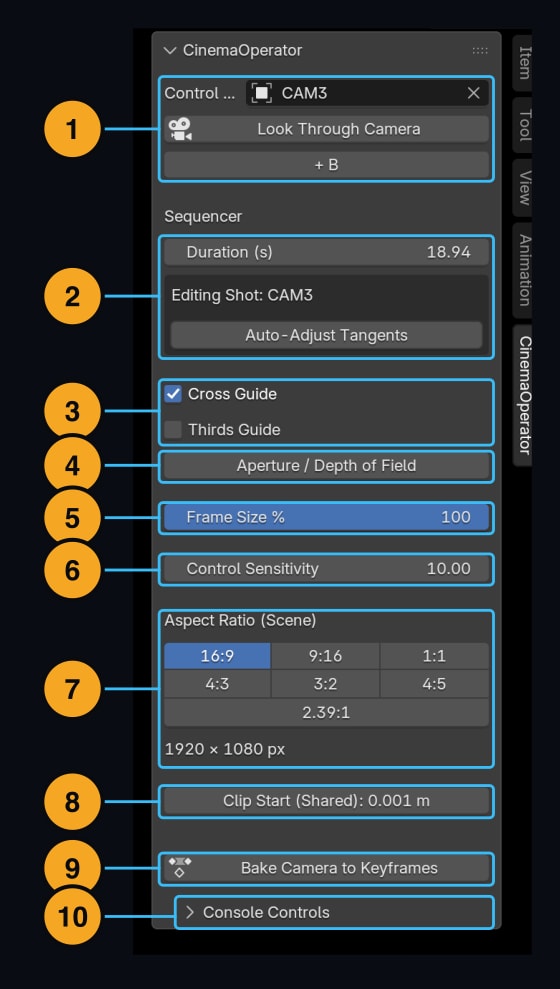
- 01 Camera / + B — Return to the camera view or add a second track.
- 02 Duration / CAM — Check timing and the active composition.
- 03 Guides — Toggle framing guides.
- 04 Depth of Field — Configure aperture and focus settings.
- 05 Frame Size — Resize the on-screen viewfinder only.
- 06 Sensitivity — Tune the feel of composition controls.
- 07 Aspect Ratio — Choose landscape, portrait, square or scope.
- 08 Clip Start — Adjust the near clipping distance.
- 09 Bake Camera — Export to standard Blender camera keyframes.
- 10 Shared controls — Access auxiliary console tools.
Bake just the part you need
Render directly with CinemaOperator enabled, or bake a selected IN / OUT range for another computer or pipeline.

- 01 IN / OUT — Choose the range to export.
- 02 Range readout — Enter exact times numerically.
- 03 BAKE > — Configure and create the baked camera animation.
- 04 CANCEL — Return without baking.
07 — Sculpt the path. Watch the shot.
EDIT PATH opens three views. Watch your shot at the upper left, reshape the camera path at the upper right, and use the console below.
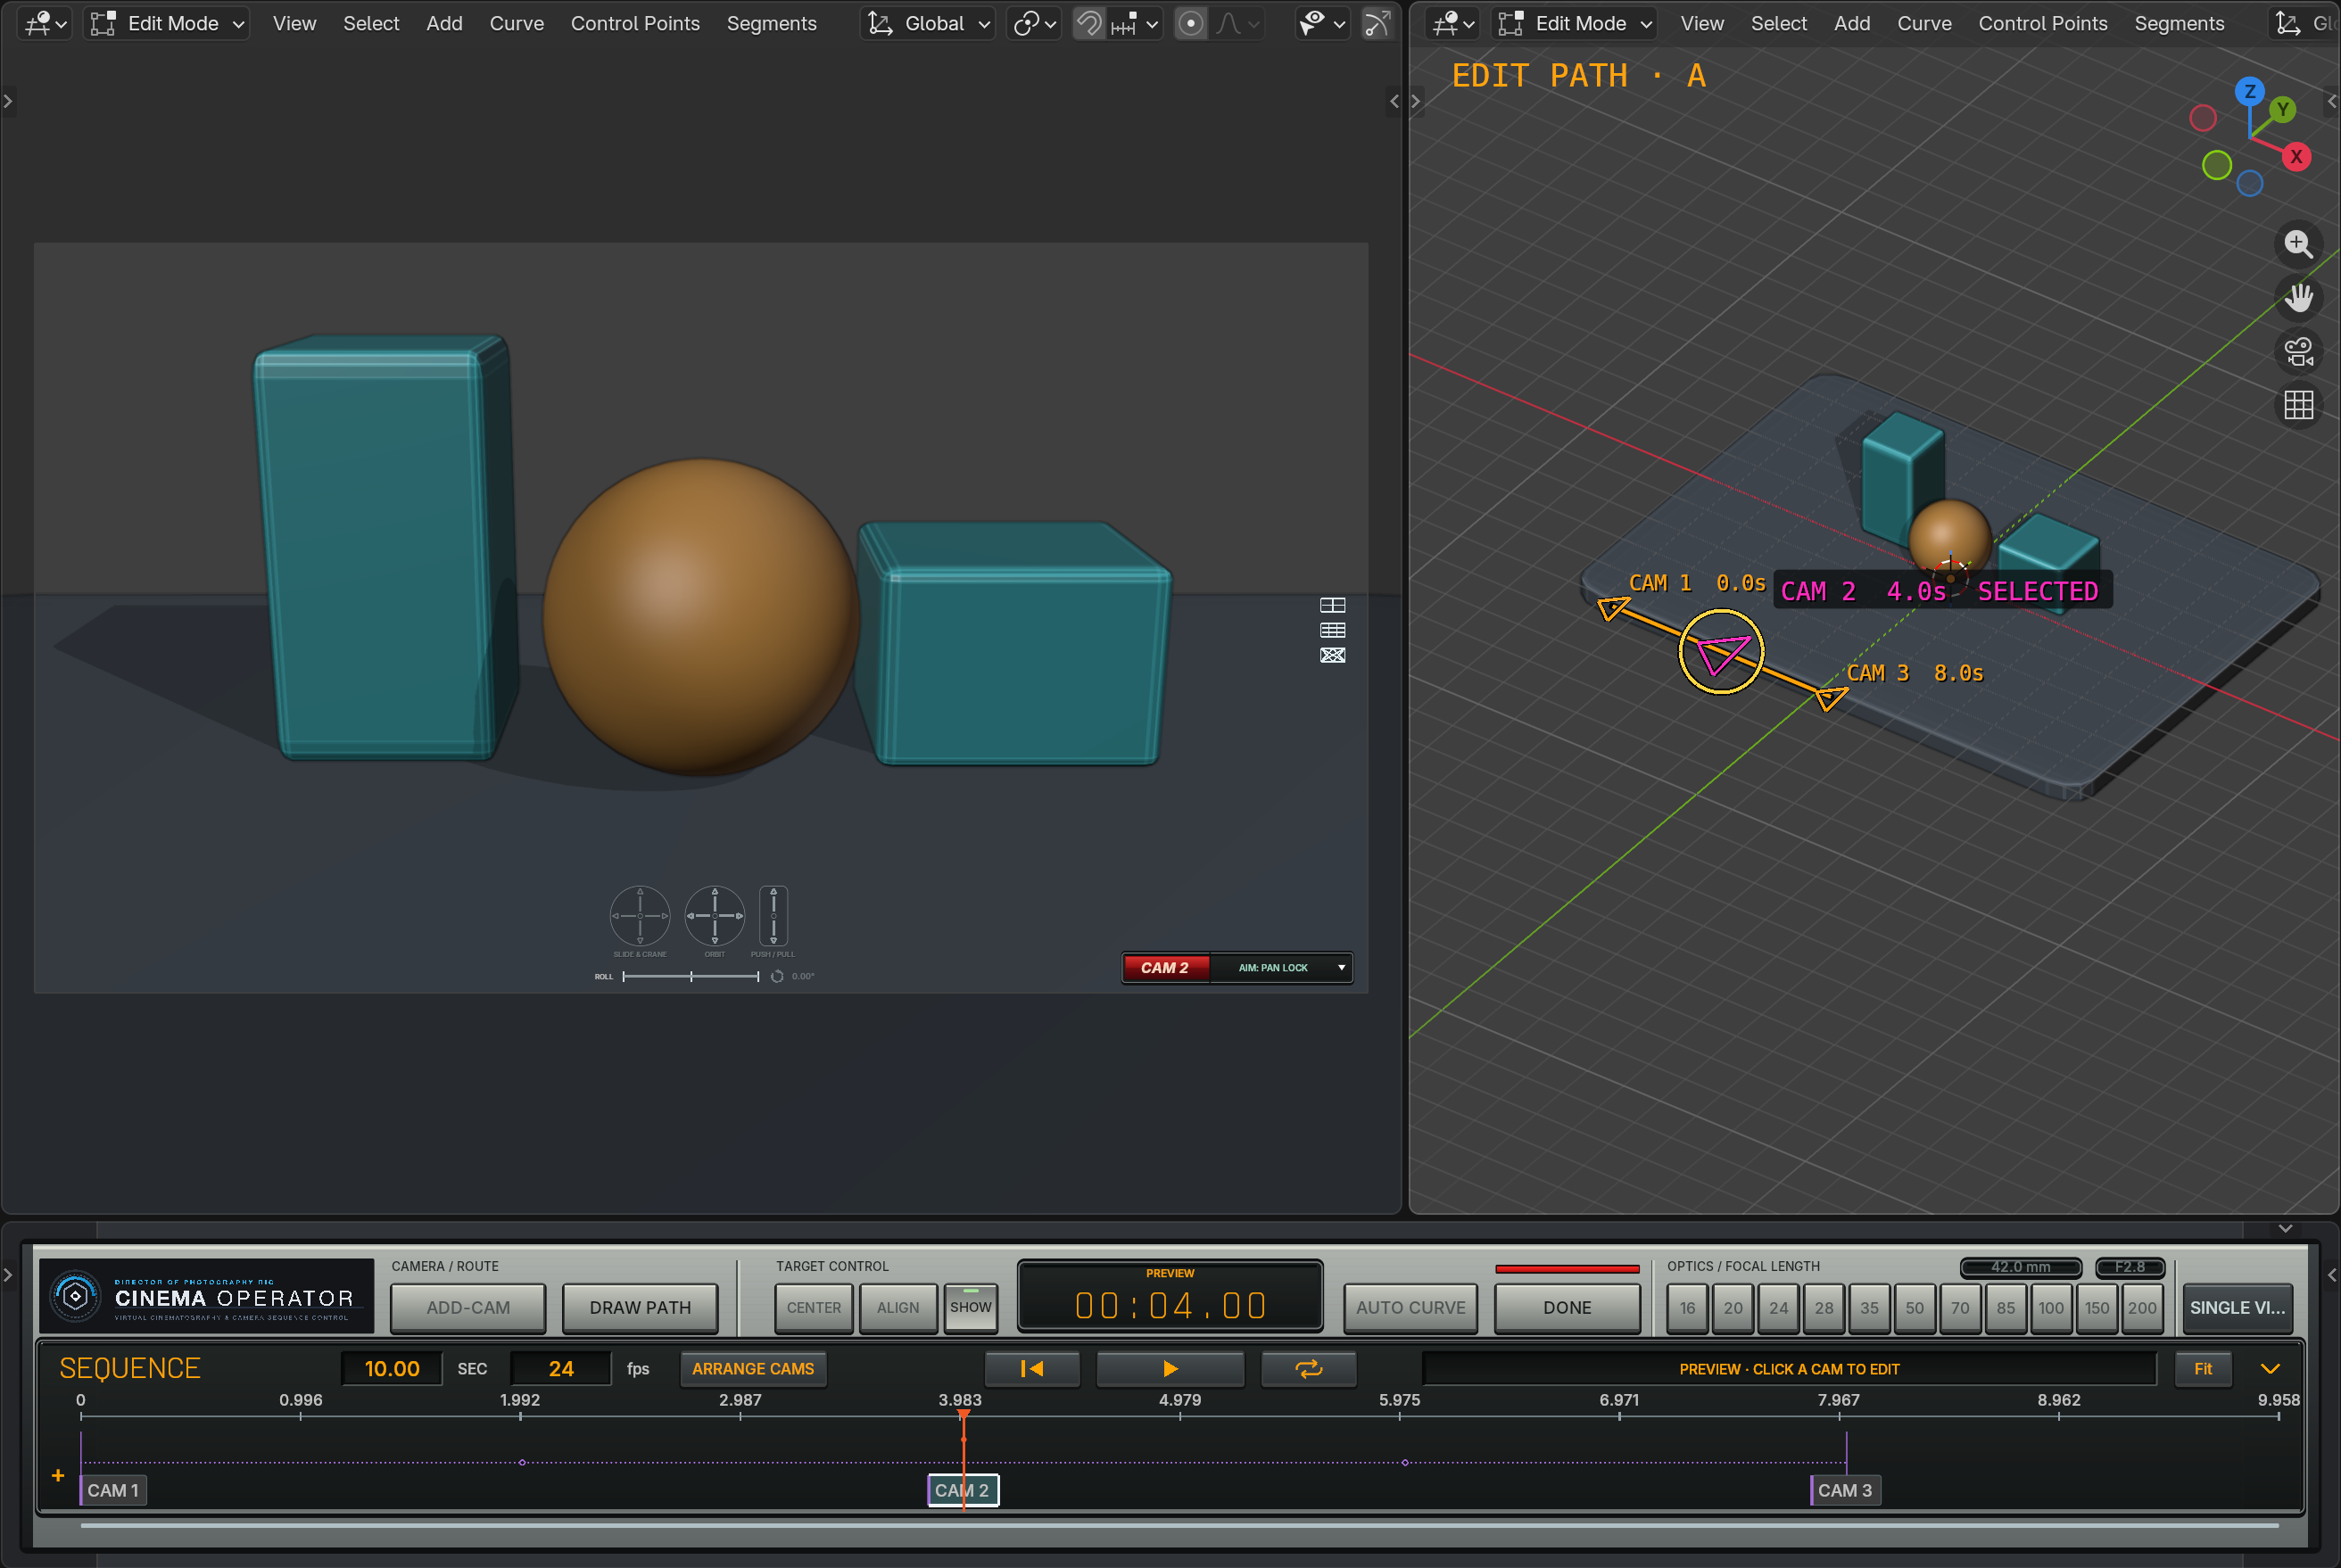
CinemaOperator 0.7.183. Click the image to view it larger.
- Camera preview: Check the framing as you edit.
- 3D path: Select the path points and use Blender’s move, rotate and scale commands to change the route.
- Console: Use DONE to finish editing while keeping the three views, or SINGLE VIEW to return to one viewport.
- CAM cards: Clicking a CAM card ends path editing and opens that CAM’s composition. Press EDIT PATH to continue editing the route.
08 — Draw where the camera should go
Sketch a route in 3D space, then generate CAMs along it.
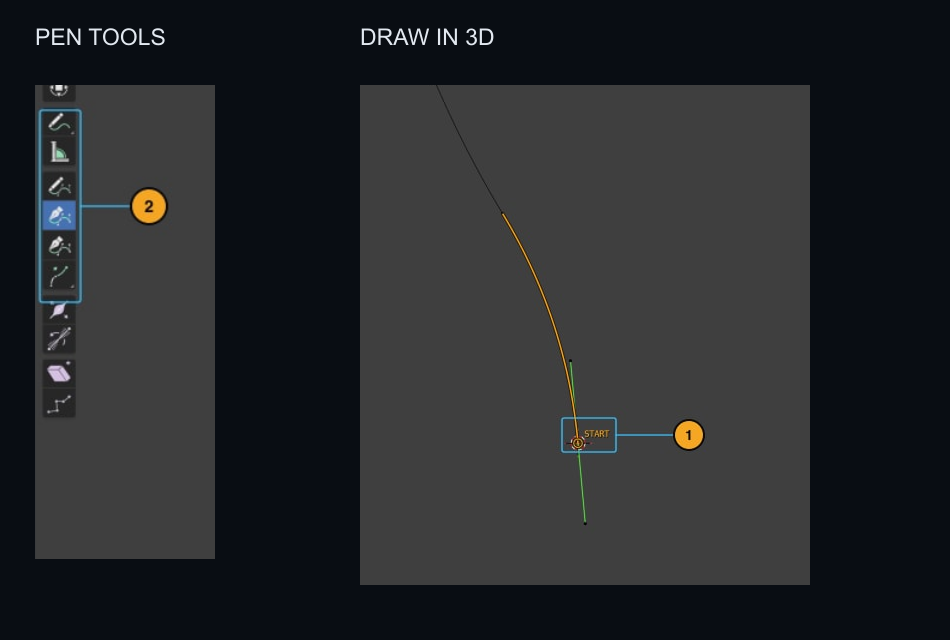
- 01 START — Continue from the end of an existing route.
- 02 Draw tools — Sketch the new path.
The console, shown separately at a readable size:
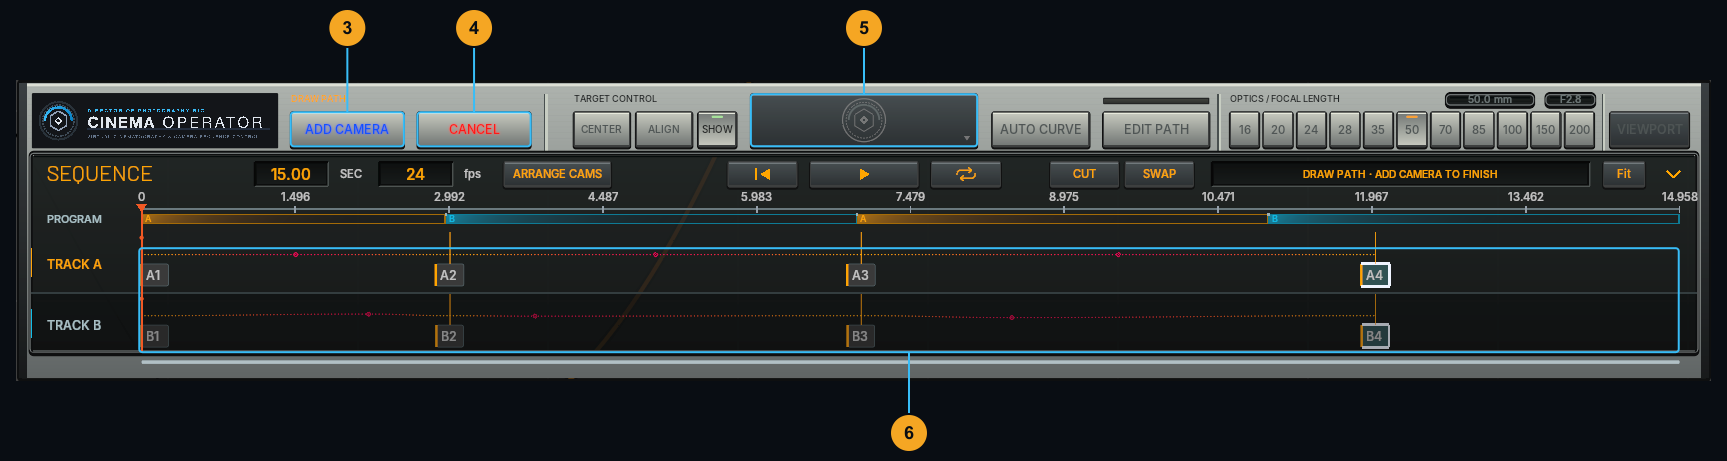
- 03 ADD CAMERA — Generate CAMs along the curve.
- 04 CANCEL — Discard the sketch.
- 05 Console — Framing controls resume after drawing.
- 06 Sequencer — See the CAMs that make up your move.
09 — Put character into the camera
Right-click a destination CAM to add continuous roll or procedural handheld motion to its incoming segment.
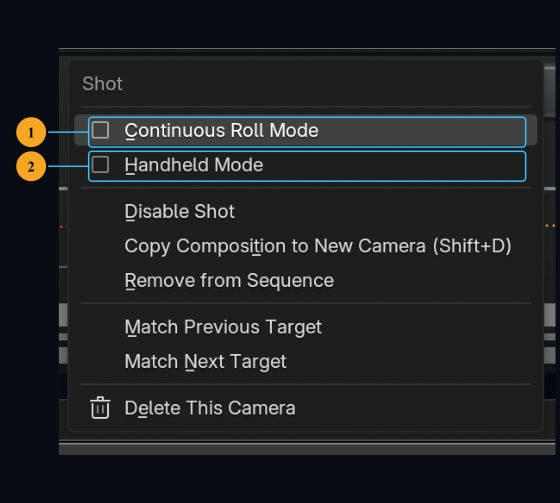
- 01 Continuous Roll — Record full turns for barrel rolls beyond 360°.
- 02 Handheld — Add positional and rotational motion over the base path.
Continuous Roll and Handheld are mutually exclusive on the same CAM.
Choose the motion’s character
Right-click the hand icon on the timeline to adjust handheld settings.
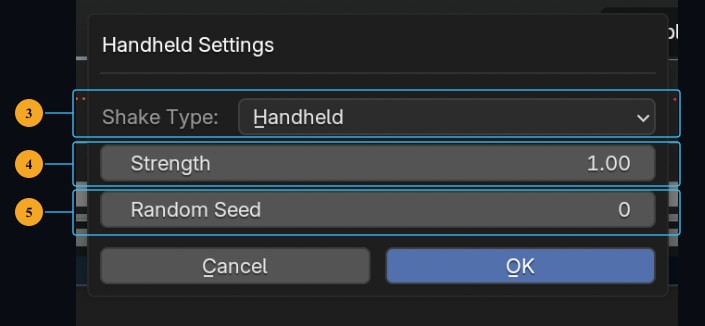
- 03 Style — Choose HANDHELD, WALK or VEHICLE motion.
- 04 Strength — Dial the shake up or down.
- 05 Seed — Change the pattern while keeping it repeatable.
10 — Make the console yours
Choose from 5 sculpted hardware skins and 7 flat themes. The same camera controls, in a look that suits your workspace.
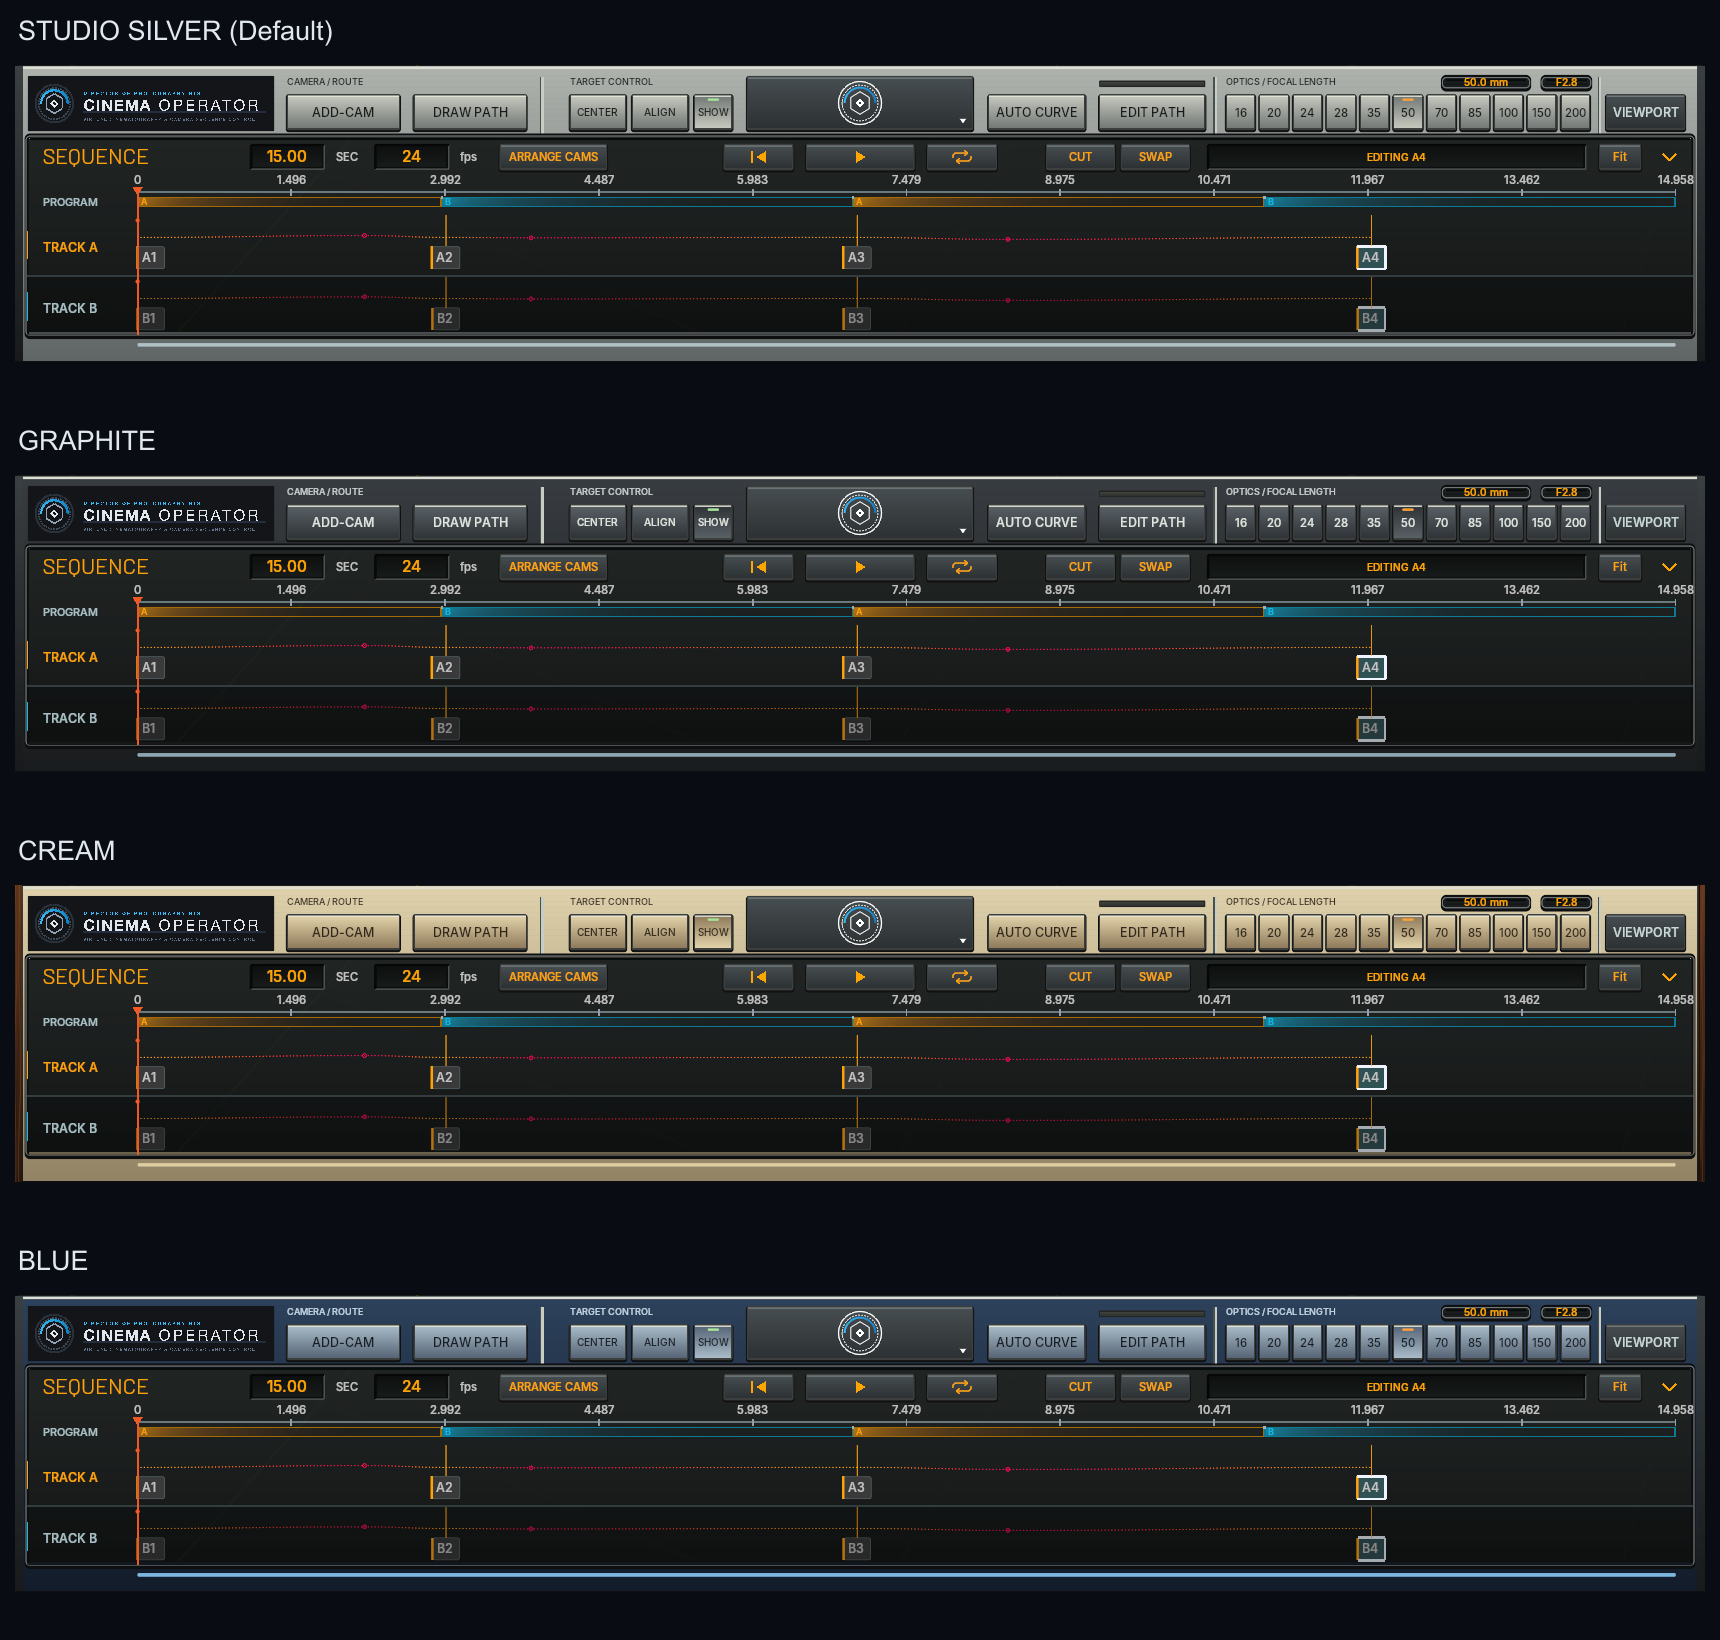
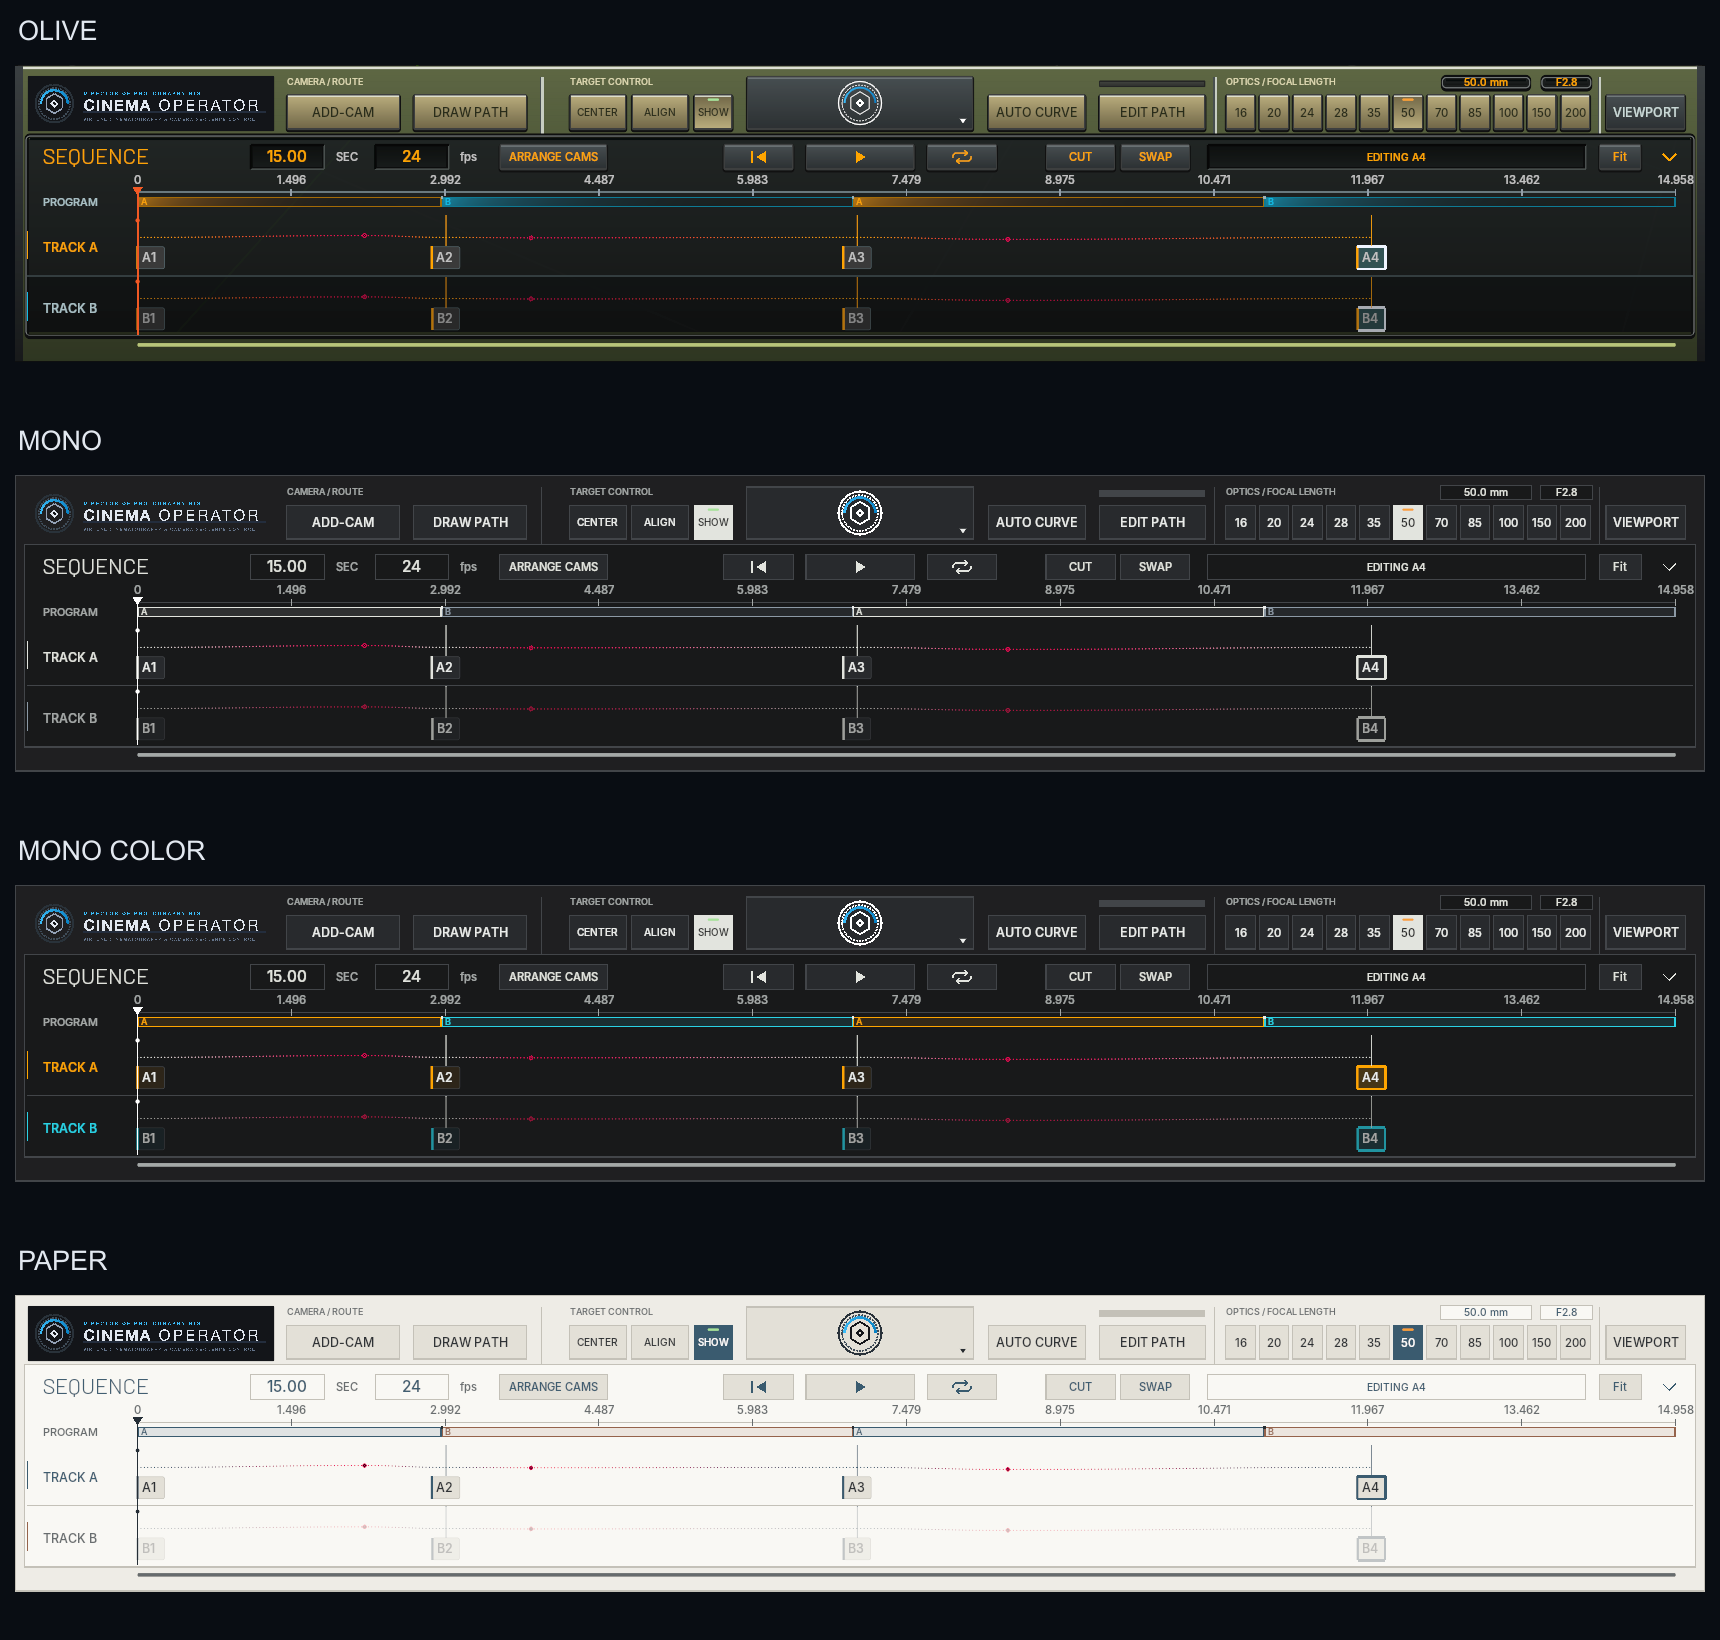
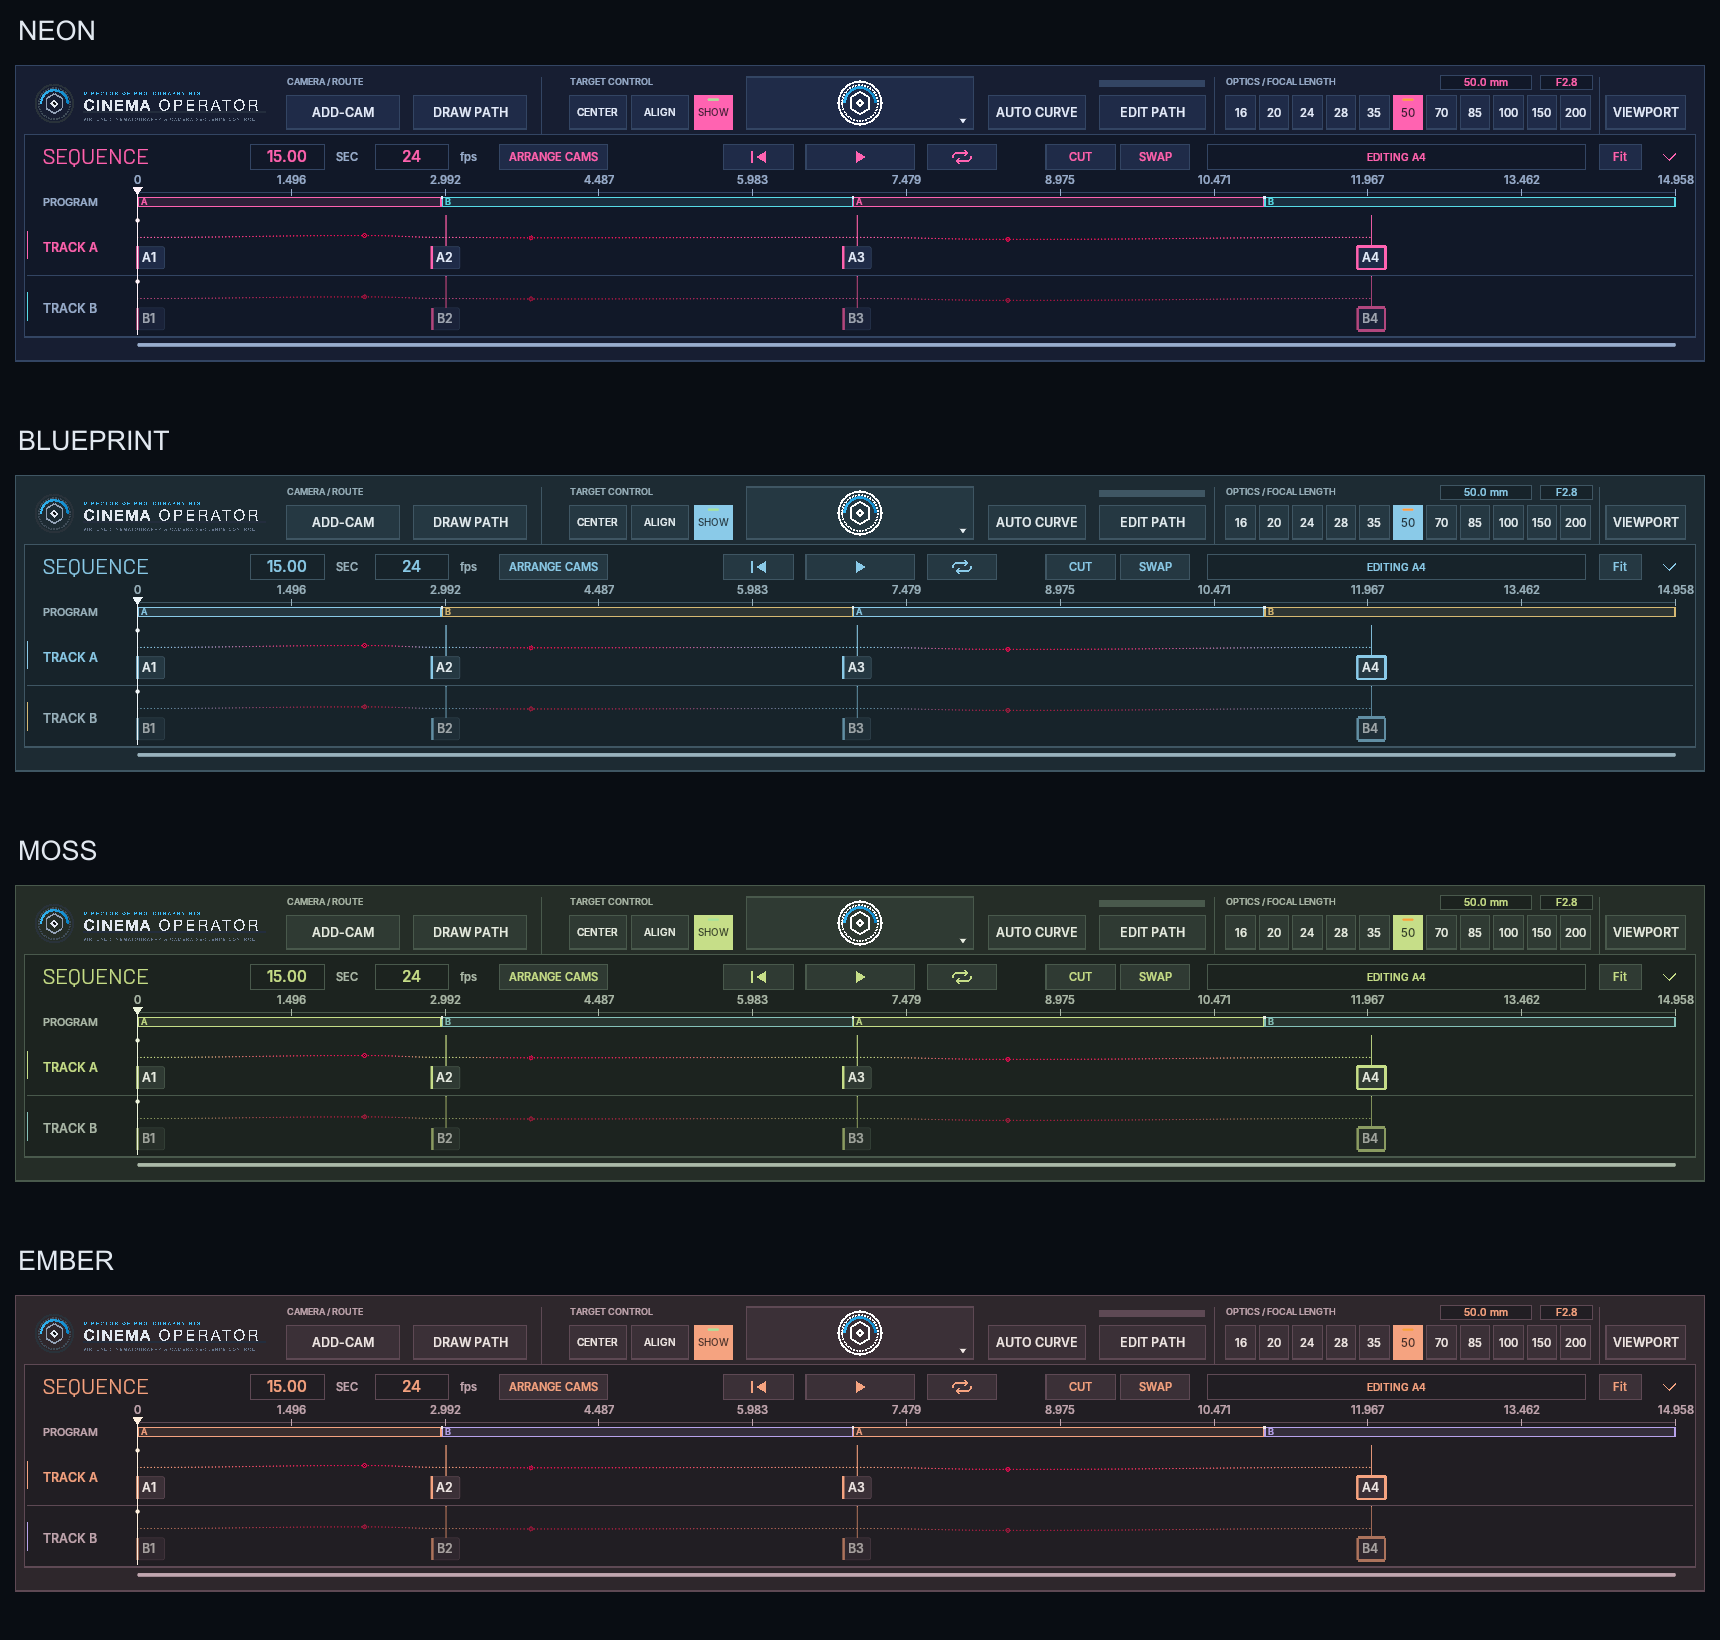
Change SKIN / THEME in Blender Preferences → Add-ons → CinemaOperator.
Your move, ready to deliver
Choose a lens and depth of field, set the output aspect ratio, and render your animation in Blender. Need to send the camera move to another computer without the add-on? Bake the full move or a selected range into standard Blender camera keyframes.
Included: CinemaOperator 0.7.184 installer, illustrated English and Japanese HTML manuals, installation instructions and release notes.
Extract the distribution ZIP, then install the enclosed CinemaOperator_0.7.184_Release.zip from Blender Preferences without extracting that inner ZIP. Open Manual/Manual_EN.html or Manual/Manual_JA.html for the illustrated guide.
What’s new in 0.7.184
- Undo after deleting CAMs: Fixed an issue where undoing deletion with Delete or Backspace could fail to restore the camera and leave the console hidden.
- Undo for the M key: Enabling or disabling CAMs with M can now be undone correctly.
- Console recovery: If the camera being controlled is no longer in the scene, the console switches to another valid CAM when one is available.
- Left-edge pan: Fixed the left toolbar overlapping the camera frame and blocking pan clicks.
- Playback startup: Reduced the delay before playback starts with the Play button or Space. Frame drops caused by viewport rendering load may still require display-setting adjustments.
Includes English and Japanese illustrated guides and release notes. Save your work and restart Blender after updating.
What’s new in 0.7.183
- PAN LOCK: Keep the camera facing the same direction as it moves from one CAM to the next. On reaching the next CAM, it immediately switches to the direction set there. Handheld shake can still be added.
- Three-view EDIT PATH: See the camera image, route editor and console at the same time.
- Precise framing: Click the camera frame edges to pan or tilt. Hold Shift for one-tenth of the normal step, or Shift+Ctrl for one-hundredth.
- Diagonal guides: Add six diagonal lines to help plan your composition.
- CAM timing and AIM: The clock shows the CAM name and destination time while dragging a card. Change its AIM mode from the right-click menu.
- A clearer workspace: The route is hidden when you return to the normal viewport; turn on Show Path in the sidebar to inspect it.
- Setup fix: Fixed clicks on Blender’s first-run setup popup also reaching the view behind it when a saved console was restored.
Compatibility and helpful notes
For Blender 5.1 and 5.2 LTS. Tested on macOS and Windows with Blender 5.1.2 and 5.2.2 LTS. Console faceplate labels are in English; menus and tooltips support English and Japanese.
CinemaOperator is designed primarily for continuous camera moves; use the A/B PROGRAM switcher for cuts. When baking, check motion blur and camera cuts before final output. For renders without baking, enabling Blender’s Render > Lock Interface is recommended; it does not guarantee against crashes.
The demonstration videos and animated clips were recorded with an earlier version; their interface can look different. Screenshots labeled 0.7.183 show the current interface.
Questions or feedback? Use “Contact the creator” on this product page. We would love to see what you make.
If you would like to include CinemaOperator — TOKUGAWA ELECTRONICS in your end credits, it would mean a great deal to us as developers. Sharing your work, sending feedback, and adding a credit are entirely optional.