Clothify
 MarkoPetrush



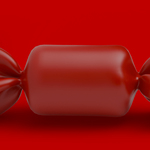
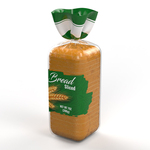
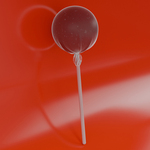
Clothify Documentation
Clothify - Documentation
Thank you for using Clothify! This guide will walk you through everything you need to know to get the most out of this powerful simulation toolkit.
1. Installation
Installing the add-on is a standard Blender process:
- Go to
Edit>Preferences>Add-ons. - Click the Install... button at the top.
- Navigate to where you saved the Clothify.zip file and select it.
- Enable the add-on by ticking the checkbox next to its name.
The add-on panel will now appear in the 3D Viewport. Press the N key to open the sidebar and look for the "Clothify" tab.
2. Quick Start Guide
Create a complete cinched cloth simulation in under a minute:
-
Assign Objects: In the "Scene Setup" section, select your
Bag Object(the cloth) andContent Object(the object inside). -
Define Pin Group: Go to Edit Mode on your Bag Object, select the vertices you want to cinch, and in the "Defining Control Groups" section, click
Createunder "Pin Group Definitions". -
Generate Ring: Go back to Object Mode. In the "Scene Setup" section, click
Generate From Pins. A ring object will be created at the center of your pin group. -
Setup Simulation: In the "Defining Control Groups" section, click the
Setup Simulationbutton. This automatically adds all necessary modifiers. -
Animate & Bake: In the "Animation & Bake" section, click
Animate All Rings, then clickBake. Play the animation to see the result.
3. User Interface (UI) Explained
Scene Setup
- Bag Object: The cloth object to be simulated. Must be a mesh.
- Content Object: The object inside the bag that the cloth will collide with.
-
Ring Objects: These are the objects that 'pull' the cloth shut. You can have one for each Pin Group.
- Generate From Pins: Automatically creates and places rings based on your Pin Groups.
- Add Manually: Adds an empty slot for you to assign your own custom ring object.
Defining Control Groups
- Pin Group Definitions: These vertex groups define where the rings will attach to the cloth. Create them from a vertex selection in Edit Mode.
- Stiff Area Definitions: These vertex groups define areas of the cloth that should be stiffer and less prone to bending.
- Setup Simulation: The main operator. This button sets up the entire modifier stack (Hooks, Cloth, Collision, etc.) based on your defined groups and objects.
Physics & Simulation Setup
- Preset Management: Save, load, and manage your cloth physics settings. The addon comes with several built-in presets (Silk, Leather, Denim, Cotton, Velvet, and a Default).
- Physics Properties: After setting up the simulation, this section gives you direct access to all the important cloth settings, such as Quality, Mass, various Stiffness values, and Collision properties.
Animation & Bake
- Animate All Rings: Automatically creates a cinching animation for all active rings.
- Animation Duration: Controls how many frames the cinching animation lasts.
- Twist Amount: Sets how many degrees the rings will rotate during the animation.
- Bake / Delete Bake: Standard Blender operators to cache or delete the physics simulation.
Finalizing the Mesh
- Convert to Shape Key: 'Freezes' the result of the simulation at the current frame into a shape key and removes the heavy simulation modifiers. This is great for performance.
- Apply Shape Keys: Makes the deformation from the shape key permanent on your mesh.
Cleanup Tools
- Apply All Modifiers: A utility to apply all modifiers on the Bag, Content, or Ring objects.
- Clean Objects: A destructive tool that removes all modifiers and vertex groups from the Bag, Content, and Ring objects.
- Reset Panel: Resets the entire addon panel to its default state, clearing all object selections and generated data.
4. Troubleshooting & FAQ
-
Q: The "Setup Simulation" button is greyed out.
A: Make sure you have assigned a Bag Object, a Content Object, and have at least one Pin Group linked to a Ring Object. All three are required. -
Q: My cloth explodes or behaves weirdly.
A: This is a classic cloth simulation issue. Try the following: 1) Increase the `Quality Steps` in the Physics panel. 2) Decrease the `Time Scale`. 3) Check for intersecting geometry between your cloth and collision objects at the start frame. 4) Make sure you have applied scale and rotation to all your objects. -
Q: When I remove a manual ring from the UI, the object is not deleted.
A: This is intentional. Removing a ring from the UI list only unlinks it from the simulation setup, allowing you to keep the object in your scene for other purposes or re-link it later. -
Q: "Clean Objects" doesn't remove the animation from my rings.
A: This was a bug in a previous version. Please ensure you are using the latest version of the addon, where this has been fixed.
5. Contact & Support
If you encounter a bug, have a feature request, or need any help, please contact me at [email protected]. I am committed to providing dedicated customer support.
Thank you again for your support!
Discover more products like this
cloth simulation Cinching bread bag animation fabric Product Renders packaging physics candy product Design gift