 Shift4cube


CutLink Studio
Split your 3D models into printable parts and create fitted interlocking connectors — directly inside Blender.
CutLink Studio is a Blender add-on designed for preparing 3D models for printing. Create straight, angled, curved, manual, or surface-following cuts, cap the resulting cut surfaces, and optionally add matching male/female connectors in the same workflow.
Cut your model your way
Whether you need a quick straight split or a custom path around a complex surface, CutLink Studio gives you multiple cutting workflows:
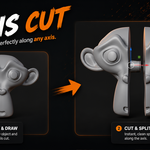
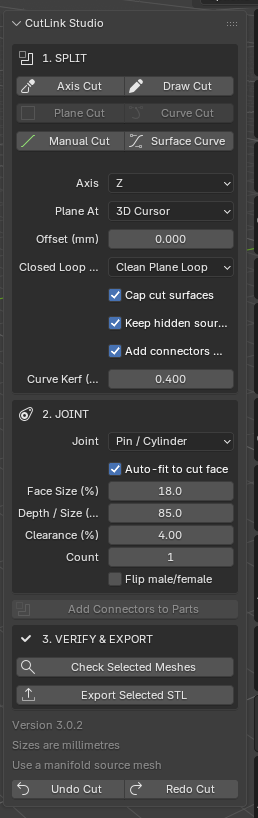
Axis Cut • Draw Cut • Plane Cut • Curve Cut • Manual Cut • Surface Curve
After cutting, you can create fitted connectors such as pins, keys, wedges, and snap-style joints to help align your printed parts.
Designed for 3D printing
CutLink Studio can cap the newly created cut surfaces and automatically configure connector sizing, spacing, clearance, and edge margins. Completed parts also receive a non-destructive Smooth by Angle setup at 30 degrees.
From model to printable parts
CUT → CONNECT → VERIFY → EXPORT → PRINT
Check your finished parts for non-manifold edges and export the selected parts directly to STL.
3. Features
✂️ Six Powerful Cut Modes
Axis Cut
Quick straight cuts perpendicular to the X, Y, or Z axis, positioned using the 3D Cursor or Object Origin.
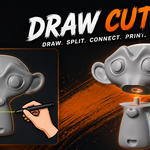
Draw Cut
Create visual angled cuts by simply dragging a line across your model. The line and current viewport determine the cutting plane.
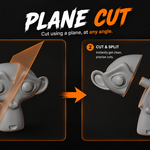
Plane Cut
Use a guide plane to create precisely rotated cuts. The guide plane's local Z direction defines the cutting direction.
Curve Cut
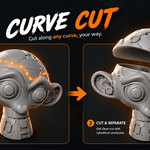
Use a Bezier or Poly curve to create a curved cutter through the model. Curve Kerf controls the material gap removed by the cutter.
Manual Cut
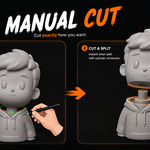
Place editable control points directly on the model to create custom surface polylines.
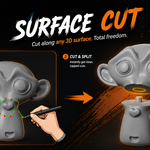
Surface Curve
Create smooth surface-following paths by smoothing the controls and projecting the sampled curve back onto the mesh surface.
🔗 Smart Connectors
Choose from:
- Dovetail Wedge
- Pin / Cylinder
- Snap Clip
- Rectangular Key
- Hex Pin
- None — split and cap without a connector.
Automatic Connector Fit
Automatically configure:
- Connector size
- Insertion depth
- Clearance
- Connector count
- Edge margin
- Male/female orientation
Connectors can be distributed automatically across the longer direction of the cut face.
Interactive Connector Preview
Use the green preview to:
- Resize connectors with the mouse wheel
- Reposition connectors with the Move gizmo
- Cycle between multiple connectors
- Orbit the viewport
- Confirm or cancel the connector placement
🧩 Clean Cut Surfaces
Cap the newly created cut surfaces to produce separated parts suitable for further 3D-print preparation.
↩️ Cut Undo & Redo
CutLink Studio can preserve the original source and restore it with Undo Cut. Redo Cut restores the completed parts, including connector geometry and manual connector placement.
✅ Verification
Use Check Selected Meshes to see the number of non-manifold edges on each selected mesh before printing.
🖨️ STL Export
Select your completed parts and export them directly as STL files, then verify their dimensions and scale in your slicer.
4. Installation Instructions
Installation
Step 1 — Remove previous versions
If you have an older Print Joint Studio or CutLink Studio installation, disable and remove it first to avoid duplicate operator registration.
Step 2 — Open Blender Preferences
In Blender:
Edit → Preferences → Add-ons
Step 3 — Install CutLink Studio
Choose:
Install from Disk
Select:
CutLink-Studio-Addon-3.0.2.zip
Do not extract the ZIP.
Step 4 — Enable the add-on
Find CutLink Studio in the Add-ons list and enable it.
Step 5 — Open CutLink Studio
Go to the 3D View, press N, and select the CutLink tab.
That's it — you're ready to start cutting.
5. Requirements
Blender
Blender 4.2 or newer
The guide also notes Boolean solver compatibility including Blender 5.1.
Object
A selected Mesh object is required.
A closed manifold source mesh is strongly recommended.
Scale
Avoid zero scale and extreme non-uniform scale.
Applying scale is recommended when practical.
Units
CutLink values are expressed in millimetres.
In a unitless Blender scene, one Blender unit is treated as one millimetre.
Package
Traditional Blender add-on ZIP.
It is not installed as a Blender Extension.