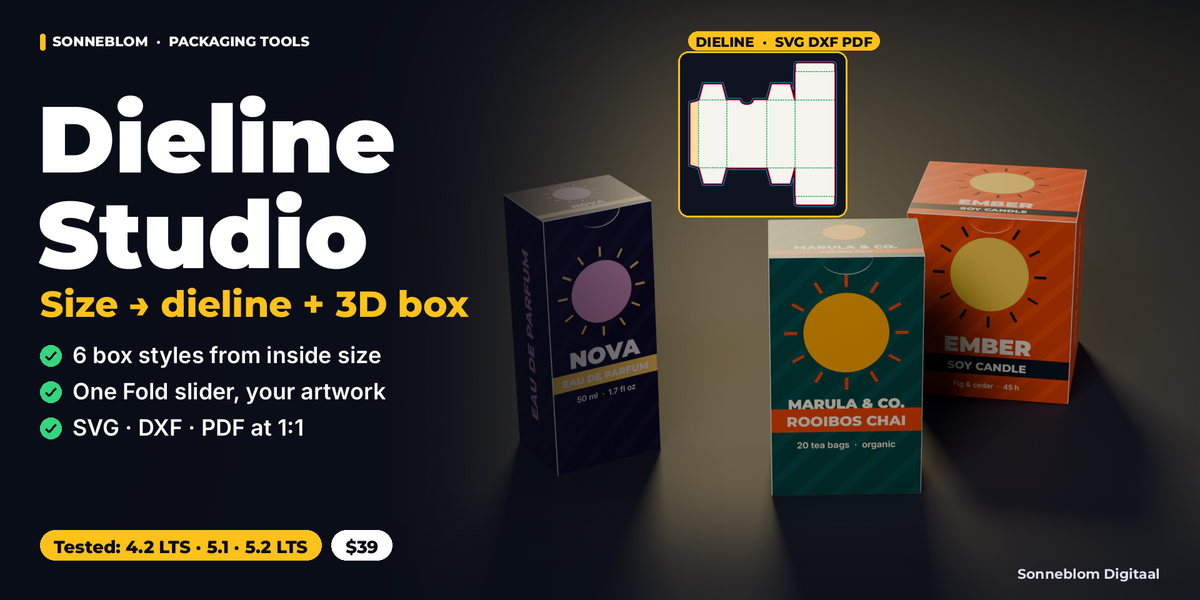
Dieline Studio - Packaging Dielines & Folding 3D Boxes
 Sonneblom Digitaal
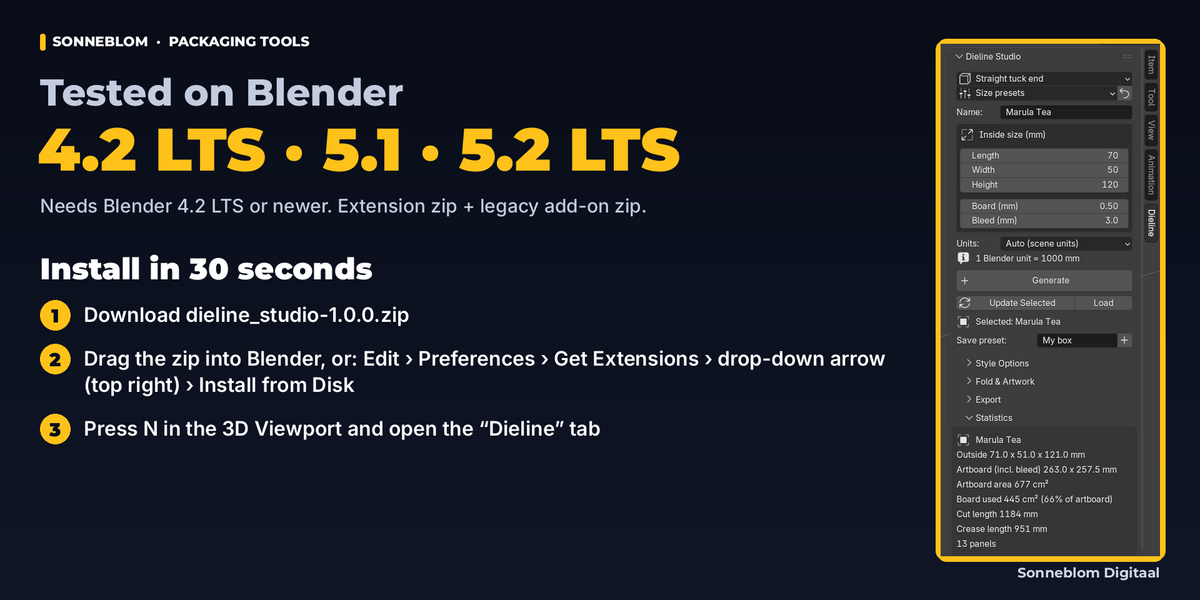
Install
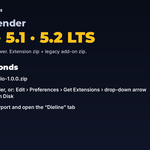
Extension (Blender 4.2+): download dieline_studio-1.0.0.zip, then Edit > Preferences > Get Extensions > drop-down arrow (top right) > Install from Disk, and pick the zip (or drag the zip into Blender). Legacy add-on zip: dieline_studio-1.0.0-legacy.zip via Edit > Preferences > Add-ons > Install from Disk, then tick Dieline Studio. Do not install both at once.
Uninstall
Edit > Preferences > Get Extensions (or Add-ons), find Dieline Studio, click the arrow and Uninstall (or Remove). Boxes you made stay in your files and keep folding: the drivers do not need the add-on.
Quick start
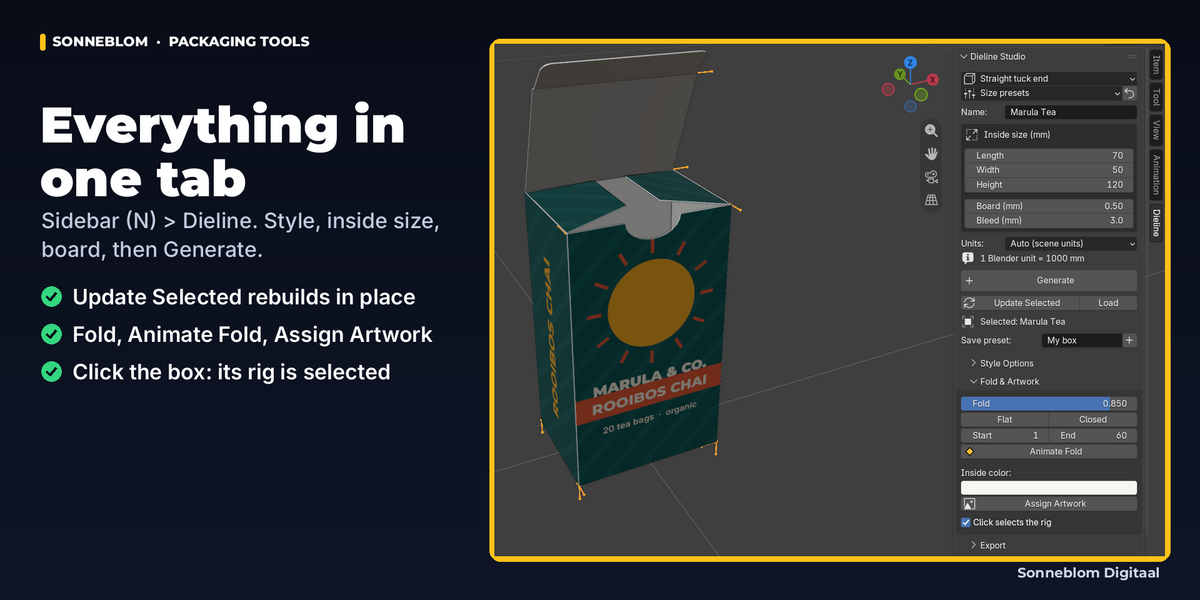
- 3D Viewport > press N > Dieline tab.
- Style: Straight tuck end; Length 60, Width 40, Height 120, Board 0.5.
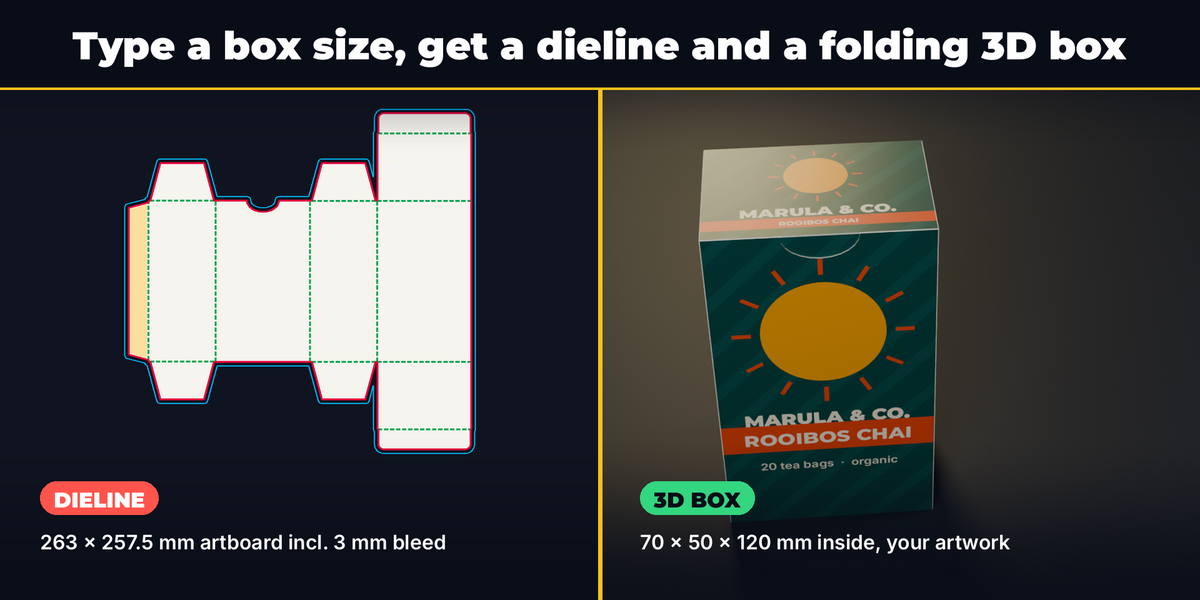
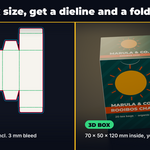
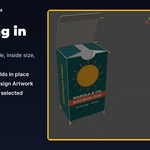
- Click Generate: three objects appear in this scene's "Dieline Studio" collection: Carton (the rig, holds the Fold property), Carton Box (folding 3D box) and Carton Dieline (flat, print side up).
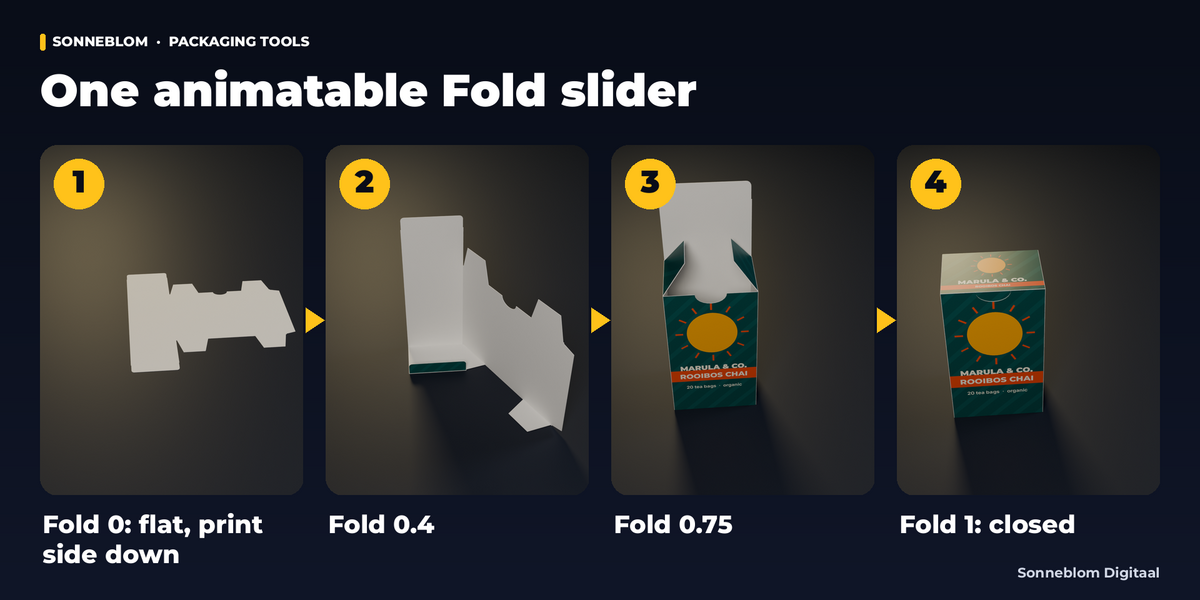
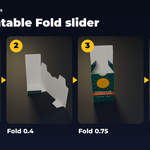
- Fold & Artwork: drag Fold to 1 to close the box, or click Animate Fold.
- Export: pick a Folder and click Export. With the default ticks this writes the dieline (SVG, DXF, PDF) and the artwork template (PDF, PNG) in one go.
- Design on the template, then click Assign Artwork. The dieline files from step 5 are the ones for your printer; tick Overwrite (or change File name) if you export again after changing the box.
Panel and settings
The tab has a main panel and five sub-panels: Fold & Artwork, Export and Statistics start open; Style Options and Help start closed. Buttons that need a box are grayed out with a hint line until you select one (any part of the box works).
| Setting | Default | What it does |
|---|---|---|
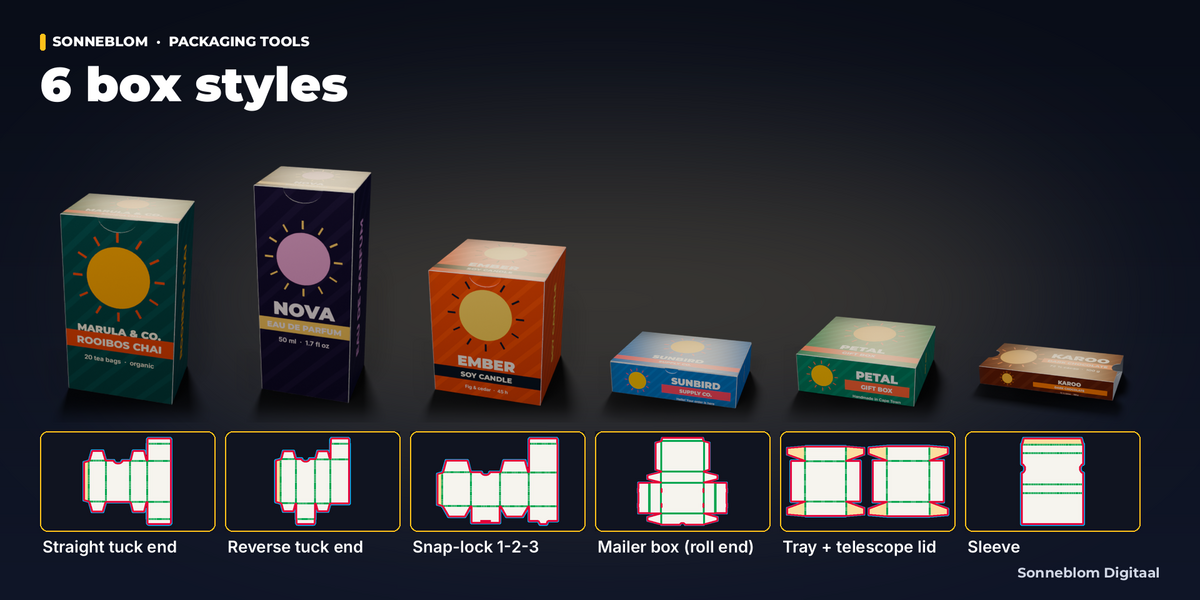
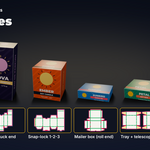
| Style | Straight tuck end | Box style: Straight tuck end, Reverse tuck end, Snap-lock bottom (1-2-3), Mailer box (roll end), Tray + telescope lid, Sleeve. |
| Size presets (menu) | - | 10 built-in sizes and your own presets; fills style, size and board. |
| Reset (arrow icon) | - | Reset style, inside size, board, bleed and the flap options to the defaults (style, board and bleed from the preferences). Name, units, color and export options stay. |
| Name | Carton | Name of the NEW box made by Generate: <Name>, <Name> Box, <Name> Dieline. Update Selected keeps a box's own name. |
| Length (mm) / Width (mm) / Height (mm) | 60 / 40 / 120 mm | INSIDE size. Limits 5-1500 mm. |
| Board (mm) | 0.5 | Board thickness (caliper), 0.1-10 mm, at most 1/6 of the smallest side. |
| Bleed (mm) | 3 | Artwork extension past the cut line, 0-20 mm. |
| Units | Auto (scene units) | How long one Blender unit is. Auto follows Scene > Units: 1 unit = 1 m x Unit Scale (default scene 1 m; Unit Scale 0.001 = 1 mm; Unit System None = 1 m). Or fixed 1 mm / cm / m / inch. The line under it shows the result. |
| Generate | - | Make a new box at the 3D cursor (switches to Object Mode first). Also in Shift+A > Dieline Box; afterwards Adjust Last Operation (F9, or the panel at the bottom left) shows Style, Length, Width, Height and Board, and changes there also go to the sidebar. The rig object (named like the box) ends up selected: move, rotate or scale that one; the Box mesh is locked to the rig because the fold works in the rig's space, and a click on the Box selects the rig (see Click selects the rig). When the new box is under 0.5 Blender units (Blender's default scene counts 1 unit as 1 m) the report says so: press View > Frame Selected (numpad .). |
| Update Selected | - | Rebuild the selected box(es) in place with the panel's style and sizes. Each box keeps its own unit size (1 Blender unit = N mm, stored when it was made), so changing Units never rescales a box silently. When the panel differs from the selected box a warning line says so; when only the Units differ, the hint "Units differ from this box" shows an Update with Panel Units button that applies the panel's units (this resizes the box in the scene). With several boxes selected the button reads "Update N Boxes" and a confirm popup ("Update N boxes?") names the boxes first. Every box is checked first, so a problem changes nothing. |
| Load | - | Copy the active box's settings, its name and its unit size (Units) into the panel. |
| Save preset: name + "+" | My box | Save the current style, size and board as your preset. |
| Glue flap (mm) / Glue taper (°) | 15 mm / 15° | Glue flap width (5-50) and end angle (0-45). STE, RTE, snap-lock, sleeve. |
| Tuck flap (mm) / Tuck corners (mm) | 15 mm / 4 mm | Tuck length (3-100, shortened to fit) and corner radius (0-30). |
| Dust flaps / Dust flap length (mm) | On / 0 (auto) | Auto = 40 % of the panel (cartons) or half the wall height (mailer lid). |
| Thumb notch | On | Half-round finger notch where the tuck goes in; sleeve: both open ends of the top. |
| Lock tongue (mm) | 0 (auto) | Snap-lock bottom tongue length; auto = 15 % of the width, max 10 mm. |
| Lid height (mm) / Lid clearance (mm) | 0 (= tray height) / 1 mm | Tray + lid only. |
| Fold | 0 | 0 = flat dieline, 1 = closed box. Press I over it to keyframe. |
| Flat / Closed | - | Set Fold to 0 or 1 on every selected box (a box whose Fold is animated is skipped with a hint, because its keys would override it). |
| Start / End + Animate Fold | 1 / 60 | Replace the Fold animation of every selected box with keys 0 at Start and 1 at End. |
| Inside color (Fold & Artwork) | the box's own | Shows and changes the selected box's own inside material. Boxes that share that material (Shift+D copies) change together, as with any Blender material; a line tells you when it is shared. If you put your own material in the inside slot, the line names it and the add-on never changes it. |
| New box inside color (Style Options) | warm white | Inside color that Generate gives new boxes. |
| Click selects the rig | On | A click on a box's 3D mesh selects its rig instead, so G / R / S move the whole box. Turn off to select the Box mesh itself (for its modifiers or materials). |
| Assign Artwork | Pack: on | Pick the outside print image (made on the template) for the active box. Images up to 0.2 % off the template's proportions count as exact; more gives the "stretched" warning. Assigning again replaces the previous artwork image (it is removed from the file when nothing else uses it). Pack (in the file browser's side panel) stores it inside the .blend; off keeps a link (relative when the file is saved). Flatten transparent PNGs first. |
| Folder | (empty) | Export folder; empty = preferences default, else next to the .blend (or home). |
| File name | (empty = box name) | Files get _dieline.svg / .dxf / .pdf, _cut.svg / .dxf and _template.svg / .pdf / .png. |
| SVG / DXF / PDF | On / On / On | Dieline files (all layers + legend). |
| Cut SVG / Cut DXF | Off / Off | Cutting-machine files: only CUT and CREASE lines, page = dieline + margin. |
| Artwork template: SVG / PDF / PNG | Off / On / On | Artwork template files. |
| PDF page | Fit to dieline | Page of the dieline PDF: Fit, A4, A3, A2, A1, A0, Letter, Tabloid; always 100 %. PDF pages can be at most 5080 mm (200 inch) a side: bigger dielines are refused for PDF, use SVG / DXF. The SVG page always fits the dieline. |
| Margin | 10 mm | White margin around the dieline in SVG / PDF. |
| PNG DPI | 150 | 72-600; max 60 megapixels. |
| Overwrite | Off | Off = refuse when a file exists (nothing written). |
| Preferences: default folder / style / board / bleed | empty / STE / 0.5 / 3 | Defaults for new files, for the open scene when you first enable the add-on, for a scene added with Scene > New (applied the first time the Dieline panel is shown in it) and for Reset to Defaults; your presets list. |
| Export (button) | - | Exports the active box; with several boxes selected the button reads "Export <name>". |
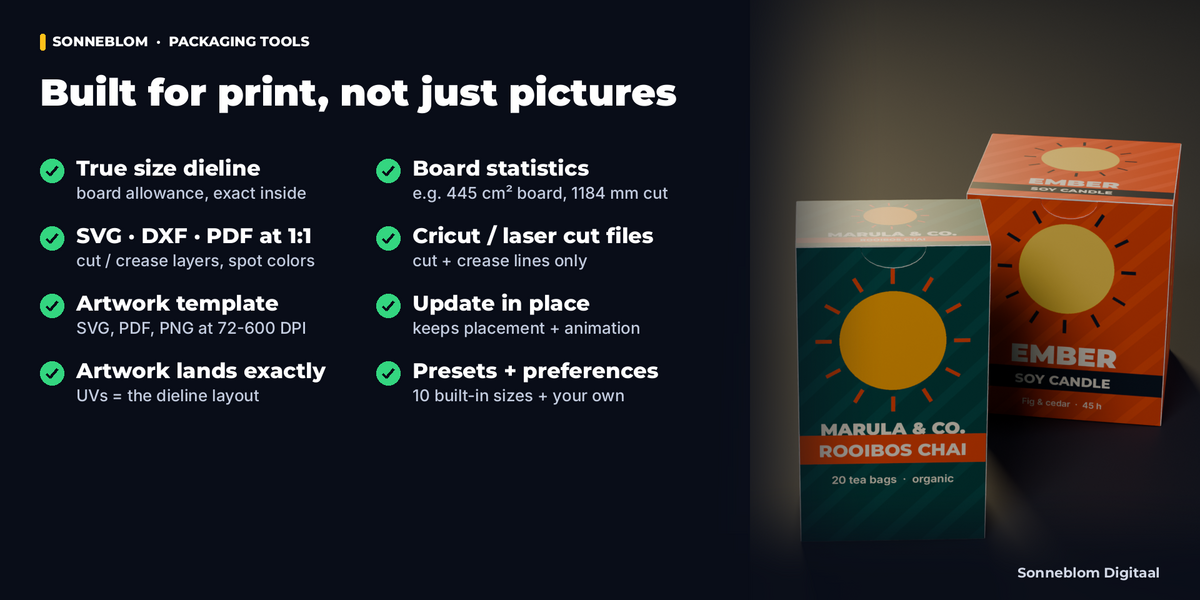
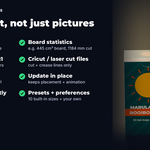
| Statistics | - | Outside size, artboard (dieline bounding box + bleed) and its area, "Board used N cm² (P % of artboard)", cut and crease length, number of panels and the notes of the box (for example a flap that was shortened or left out). |
| Help (closed) | - | The steps in short and an Open Product Page button (documentation and messages on Superhive). |
Box styles and the board formula
t = board thickness. Panels sit on the board mid-plane: crease-to-crease panel = inside + t. Expected outside sizes (all tested):
| Style | Panels | Outside size |
|---|---|---|
| Straight tuck end | 4 walls, glue flap, top + bottom lids on the back with tucks, 4 dust flaps, thumb notch | L+2t x W+2t x H+2t |
| Reverse tuck end | as above, bottom lid on the front | L+2t x W+2t x H+2t |
| Snap-lock bottom (1-2-3) | tuck top; bottom: 2 side flaps (1), front flap with slit (2), back flap with lock tongue (3) | L+2t x W+2t x H+2t |
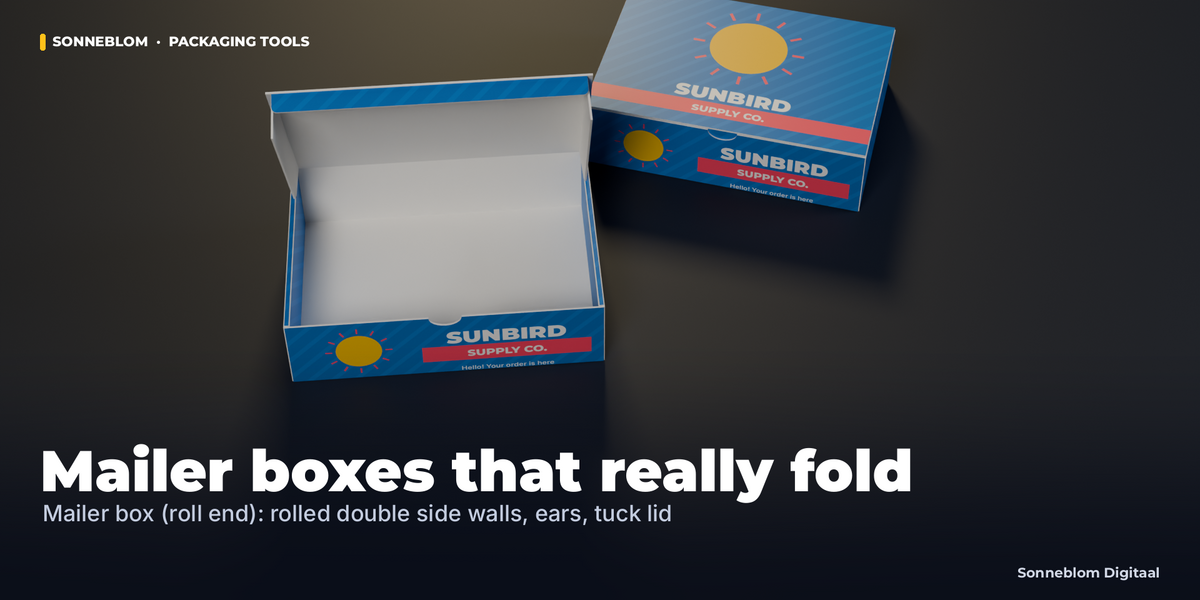
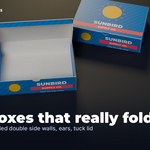
| Mailer box (roll end) | base, front + back with 4 ears, double side walls (rolled, 2 locking tabs each, slots in the base), lid with tuck and 2 dust flaps | L+8t x W+3t x H+2t (inside = cavity with the lid closed) |
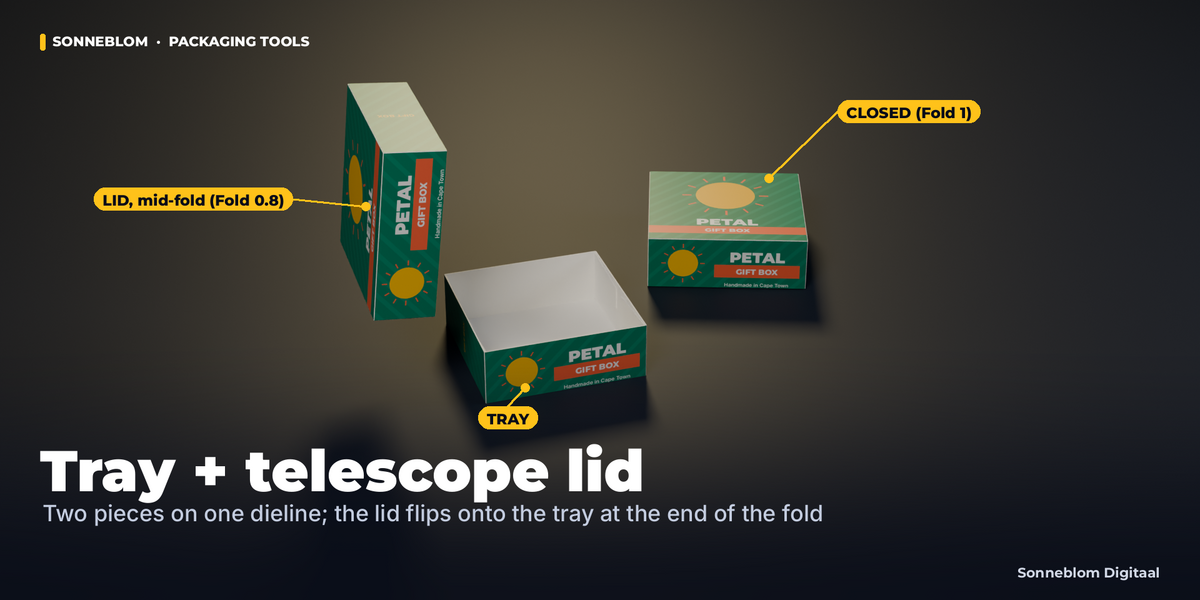
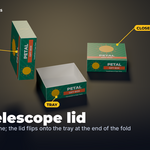
| Tray + telescope lid | tray: base, 4 walls, 4 glued ears; lid: same, inside = tray outside + clearance; one dieline with both pieces | L+8t+c x W+4t+c x H+2t |
| Sleeve | 4 panels + glue flap, open ends | L x W+2t x H+2t |
Workflows
Mockup with your artwork
Generate > Export the template (template SVG for Illustrator (it opens with real layers; Illustrator puts all PDF layers on one layer), template PDF for Affinity / Acrobat, template PNG for Photoshop / Krita at e.g. 300 DPI) > design on the page (keep the page size; fill to the cyan bleed line) > export your design as PNG/JPG > select the box > Assign Artwork. The image fills UV 0-1, which is exactly the template page (dieline bounding box + bleed).
Fold animation
Set Start / End and click Animate Fold, or keyframe Fold yourself (hover it and press I). Panels fold in stages (walls, dust flaps, lids, tucks; the tray lid flips on at the end).
Print shop
Send the dieline PDF (CutContour spot color for cut, Crease spot color for creases, layers you can switch off) or the DXF. Check the 50 mm scale bar after printing (it is on the printing TEXT layer).
Cricut, Silhouette, laser cutters
Tick Cut SVG (or Cut DXF) and export: the file holds only the cut outline and the crease lines, at 1:1 in mm. Cricut Design Space: Upload the SVG, ungroup, select the green CREASE lines (Design Space shows them solid) and set their operation to Score (needs a scoring tool), keep the red CUT outline as Basic Cut; check the size is unchanged. Silhouette Studio: SVG import needs Designer Edition or higher (Basic Edition: use the Cut DXF); set the green CREASE lines to a light perforate or score pass. LightBurn / laser software: import the Cut DXF; CUT (red) and CREASE (green) arrive as separate layers or colors: cut the CUT layer, score the CREASE layer at low power. Do a test cut on scrap board first.
Changing a box
Select the box > Load > change sizes > Update Selected. Transform, materials, extra modifiers and Fold keyframes stay. The box mesh itself is new: your own vertex groups come back by name (so modifiers that use them keep working) but empty, and shape keys or attributes you added to it are not kept.
Exports
- Cut SVG / Cut DXF: only CUT and CREASE, no bleed, glue or legend, for cutting machines.
- Dieline SVG: page in mm (dieline + bleed + margin + legend, always fitted), layers CUT (solid red), CREASE (dashed green), BLEED (cyan), GLUE (orange), TEXT (legend + 50 mm bar).
- Dieline DXF: R12 ASCII. R12 itself has no unit setting, so the file is unitless and drawn in millimeters: if the importer asks for units, choose mm (the header also carries $INSUNITS = mm for newer programs and $DWGCODEPAGE ANSI_1252 for the text); layers CUT / CREASE (DASHED linetype) / BLEED / GLUE / TEXT; cut outlines as closed polylines.
- Dieline PDF: vector, 1 mm = 1 mm, optional content layers, CutContour / Crease spot colors, printed legend with a 50 mm scale bar. Pages up to 5080 mm (200 inch) a side, the PDF limit.
- Template SVG / PDF: page = dieline + bleed exactly (PDF TrimBox = dieline bounding box, BleedBox = page), layer LABELS with panel names.
- PDF layers: dieline PDF: BLEED and GLUE are non-printing guides (visible on screen, off when printed); CUT and CREASE print in their spot colors set to overprint, so they never knock out artwork underneath; TEXT (legend, color key in process colors, 50 mm scale bar) prints. Template PDF: every layer prints (panel names, bleed, glue), it is your design guide. Text uses the standard Helvetica / Helvetica-Bold fonts (not embedded).
- Template PNG: same page at the chosen DPI (DPI stored in the file), colored panels, lines and labels. Big PNGs run in the background with a progress bar; Esc cancels and leaves no partial file.
Tips
- Folding carton is usually 0.3-0.6 mm, E-flute corrugated about 1.5 mm, B-flute about 3 mm.
- Small boxes in the default scene (1 unit = 1 m) are only a few hundredths of a unit: if close-ups clip, lower View > Clip Start, or set Unit Scale 0.001 before you Generate (after it, press Update Selected on existing boxes so they get their real size again).
- Scene units: the box always has its real size. With Unit Scale 0.001 one Blender unit is 1 mm. Very big boxes in a 1 unit = 1 mm scene can pass the viewport Clip End (1000 units by default): the Generate report tells you, raise View > Clip End.
- The Statistics panel shows the artboard (dieline bounding box + bleed), board used (and its % of the artboard) and cut / crease length before you generate: handy for quotes.
- Hide the armature (the rig object) if the bones distract you; Update Selected still works.
- The template preview texture on a new box shows where every panel ends up.
Troubleshooting
Every message Dieline Studio can show and what to do. When a message appears, nothing in the scene was changed (exports: nothing was written) unless it says otherwise.
| Message | What to do |
|---|---|
| Nothing made: Board X mm is too thick for a Y mm side | Use thinner board or a bigger box (board at most 1/6 of the smallest inside side). |
| The box is too small for a glue flap / too low for a tuck flap / too small for a snap-lock bottom / the mailer is too low for this board / too small for its corner ears | Make the box bigger, use thinner board, or pick a simpler style (e.g. Straight tuck end). |
| Nothing made. These settings give flaps that would overlap or not close | Try a bigger box, thinner board or shorter flaps. The system console has one line with the details for support. |
| Select a Dieline Studio box first | Click the box (selects its rig), its dieline or its armature, then try again. |
| X is not a Dieline Studio box | You selected another object. Select a box made with Generate. |
| X is a collection instance of a Dieline Studio box; to fold or edit it, make it a library override first (Object > Library Override > Make) | A linked or instanced collection cannot be changed. Make a library override (Fold and Animate Fold then work), or Make Local to change its shape. |
| Units differ from this box (box: 1 unit = N mm) | A hint, not an error: Update keeps the box's own unit size. Click Update with Panel Units only if you want the box rescaled to the panel's Units, or Load to copy the box's units into the panel. |
| Update N boxes? (popup) | Several boxes are selected and all get the panel's style and sizes; click Update or move the mouse away to cancel. |
| Box settings unreadable | The settings property on the rig was edited by hand; Generate a new box. |
| Statistics unavailable | Same cause as above; the console has the details. |
| The dieline PDF / template PDF page would be W x H mm, but a PDF page can be at most 5080 mm (200 inch) a side | The dieline is bigger than any PDF page can be. Untick PDF and Template PDF and export SVG / DXF (no size limit). Nothing was written. |
| X is linked from another file; make it local first / Fold can only be changed on a local box or a library override | Object > Relations > Make Local, then Update / Fold / Artwork work. Export works on linked boxes. |
| X is a library override; Fold and Animate Fold work, but to change its shape make it local first | Fold is overridable, so you can animate a linked box asset through a library override; Update and Assign Artwork need a local box. |
| X has no box mesh; press Update Selected to rebuild it | The 3D box object was deleted: Update Selected makes it again with its materials. |
| Fold is animated, so its keyframes set it on every frame change | Drag Fold and press I, use Animate Fold, or delete the Fold keys first. |
| Fold property missing: press Update Selected | The Fold custom property was deleted by hand; Update Selected restores the rig. |
| Panel settings differ from this box: Update: use panel values · Load: use the box's values | A hint, not an error: Update Selected would apply the panel values. Press Load to copy the box's own settings first. |
| Note: the artwork was made for another layout (W x H mm template), the new one is W x H mm and panels may have moved | After Update Selected the layout changed: export the new template, adjust your artwork and Assign Artwork again. |
| An export is still running | Wait for the progress bar or press Esc. |
| Could not write X: ... Close the file in other programs | The file is open (for example in Acrobat) or the disk is full. Files written before it are listed. |
| That preset does not exist | The preset list changed; open the Size presets menu again. |
| Dieline Studio is already enabled (installed twice ...) | You installed both the extension and the legacy zip: remove one in Preferences. |
| X is read-only; Overwrite does not replace read-only files | Make the old file writable in your file manager, or change the File name. |
| The export folder (...) is not a full path / The default folder in the preferences ... is not a full path or is relative (//) to an unsaved file | Pick the folder with the folder button (a full path), or save the .blend first when you use // folders. |
| Could not write ...: ... The path is too long / The disk is full / Close the file in other programs | Choose a shorter folder or name, free disk space, or close the file in Acrobat / Illustrator (Windows locks open files) and export again. |
| X is not in the active view layer (excluded collection?) | Tick the box's collection in the Outliner so it is in the view layer. |
| X is in a collection that is hidden in the viewport; show that collection (eye icon) and try again | Shown by Update Selected (the bones are edited in Edit Mode, which needs a visible object). Click the eye icon of the box's collection in the Outliner, then try again. Generate does not need this: when the "Dieline Studio" collection is hidden, new boxes go into a new, visible "Dieline Studio" collection. |
| The box settings stored on this object are damaged | The settings property was edited by hand. Generate a new box. |
| Export: Tick at least one export format | Switch on a dieline, cut or template format. |
| The folder is relative to the .blend file (//), but this file is not saved yet | Save the .blend first or choose an absolute folder. |
| (exported the box's own settings; the panel differs ...) | Export always uses the selected box's stored settings. Press Update Selected first if you want the panel values. |
| Switch to Object Mode first (Tab) | Leave Edit / Sculpt mode, then try again. |
| X has 2 'Box' objects (a duplicate is still parented to it) | Delete the copy or clear its parent (Alt+P) and its 'dieline_part' property. |
| Inside slot keeps your material 'X' | Not an error: your own material in the inside slot is never changed. Remove it to get the add-on's inside color back. |
| Export folder does not exist / is read-only / Cannot write to ... | Choose a folder you can write to. Nothing was written. |
| N file(s) already exist ... Nothing was written | Tick Overwrite or change the file name. |
| The dieline needs W x H mm ... does not fit on A4 ... Nothing was written | Choose 'Fit to dieline' or the page size the message suggests. |
| The PNG would be ... MP ... the limit is 60 MP | Lower the PNG DPI as suggested, or use the PDF / SVG template for very big artboards. |
| Export cancelled; no partial PNG left | You pressed Esc during a big PNG; vector files written before it are listed. |
| Image file not found / Blender cannot read X as an image | Pick a PNG, JPG or TIFF file that exists. |
| Its aspect ... differs from the template's ...: it is stretched | The artwork was applied, but it does not have the template's proportions. Make it on the exported template page. |
| The end frame must be after the start frame | Set End larger than Start for Animate Fold. |
| Enable Dieline Studio in Preferences > Add-ons to save presets | Presets live in the add-on preferences; enable the add-on normally. |
| Could not make / update the box, set Fold, insert the Fold keyframes, load the settings or assign the artwork (...); see the system console | Unexpected problem. Generate leaves nothing behind; Update and Assign Artwork say "Press Ctrl+Z" when they had already changed something: Ctrl+Z restores the box. Send us the console line (Windows: Window > Toggle System Console; macOS / Linux: start Blender from a terminal and copy the line from there). |
| Note: tuck flap shortened / dust flaps shortened / glue flap narrowed / glue flap taper reduced / tuck corner radius reduced | Not an error: a flap was made smaller so the box still closes. |
| Note: dust flaps left out / lid dust flaps left out / thumb notch left out / thumb notches left out | Not an error: the box is too small for that part, so it was left out (the note says why). Make the box bigger if you need it. |
| Note: lid height limited to the tray height / lid height raised to the minimum | Tray + lid: the Lid height was more than the tray height (a lid cannot be taller), or below the 3 mm minimum. |
| Note: 1 Blender unit = N mm here, so the box is only X units big | Not an error: in Blender's default scene (1 unit = 1 m) a small box is tiny in the viewport. Press View > Frame Selected (numpad .); if it clips, lower View > Clip Start in the sidebar's View tab. |
Data on the objects
-
<Name> (armature, hidden in renders): custom property
Fold(0-1, library-overridable) anddieline_studio(the box settings as JSON). One bone per panel, each with one simple-expression driver; your own drivers on the rig are kept by Update. -
<Name> Box: transforms locked (move the rig instead; a click on the Box selects the rig); one face per panel with the face attribute
dieline_panel(panel index), a vertex group per panel, modifiersDS Fold(Armature) andDS Board(Solidify, the board thickness; inside material on the inner shell). UV map "Dieline". Your extra modifiers stay after Update. -
<Name> Dieline: the flat layout, print side up. Edge attribute
dieline_line(1 = cut, 2 = crease), crease edges are also seams, cut edges sharp; face attributedieline_panel. It renders like any object: hide it in renders (camera icon) if you only want the box.
Limits
- Six built-in styles; no import of external DXF dielines, no auto-bottom (crash lock) style.
- 1-2-3 bottom: tongue-and-slit lock, layered in 3D. Mailer tab slots are cut lines only.
- Some panels can intersect briefly during the fold animation; the closed state is exact.
- PDF pages max 5080 mm (200 inch) a side, the PDF format limit; bigger dielines export as SVG / DXF. PNG template max 60 megapixels. PDF / DXF text is Windows-1252 (Western; "?" for other characters). PDF fonts (Helvetica, guide layers only) are not embedded.
- Generate, Update Selected, Fold, Animate Fold and Assign Artwork register normal Blender undo steps (Ctrl+Z / Ctrl+Shift+Z). Undo and redo are checked in a real Blender window by our own GUI test (Generate, Update Selected, Assign Artwork, Animate Fold on all three tested versions); the headless tests also check that running each twice gives the same result. Presets live in the preferences and are not part of scene undo.
- Board corners: the Solidify board is centered on each panel, so at every outer corner a t/2 x t/2 step shows in close-ups of thick (E-flute) board.
- The preference defaults (style, board, bleed) apply to new files, to a new scene when the Dieline panel is first shown in it, and to Reset to Defaults.
- Automated tests run on Linux only (Blender 4.2 LTS, 5.1, 5.2 LTS); Windows and macOS are not tested by us (the add-on is pure Python with no platform-specific code). Versions between 4.2 and 5.1 (4.3-4.5 LTS, 5.0) are not tested; the code checks Blender features, not version numbers.
FAQ
Do I need a DXF from packaging CAD (ArtiosCAD etc.) to start?
No. Dieline Studio draws the dieline itself from the inside size and board thickness, for six standard styles. It does not import an existing DXF dieline.
Are the sizes inside or outside sizes?
Inside. For folding cartons every crease-to-crease panel is inside + 1 x board, so the inside is exact and the outside is inside + 2 x board; the mailer, tray and sleeve formulas are in the "Box styles and the board formula" table of the documentation. The Statistics panel shows the outside size.
Can my printer, Cricut, laser or plotter use the files?
Yes: SVG in millimeters, DXF R12 (unitless, drawn in mm: choose mm on import), vector PDF at 100 %, and Cut SVG / Cut DXF files with only the cut and crease lines for Cricut, Silhouette and laser software, with cut and crease on separate layers (PDF: CutContour and Crease spot colors). The dieline PDF prints a 50 mm scale bar so you can check the print scale. Always confirm sizes with your printer before production.
How do I get my artwork exactly on the panels?
Export the artwork template (PDF, SVG or PNG), design on that page in any editor, export your image at the same proportions and click Assign Artwork. The UVs are the dieline layout, so it lands exactly. Panel names on the template are turned to read upright on the closed box.
Does the fold animation work without Python auto-run or on a render farm?
Yes. Each panel has one simple-expression driver reading the Fold property; Blender evaluates those without Python auto-run. This is tested by reopening a file with auto-run off.
Can I change the size after I animated and textured the box?
Yes. Select it, change the settings (or press Load first) and click Update Selected: the same objects keep their transform, unit size, materials, extra modifiers and Fold keyframes.
Why does the box look plain white from above at Fold 0?
At Fold 0 the flat board lies print side down, exactly as you fold a real carton; the print is underneath. The separate Dieline object lies print side up.
Which Blender versions does it support?
Blender 4.2 LTS or newer; tested on 4.2 LTS, 5.1 and 5.2 LTS (versions in between are not tested; the code checks Blender features, not version numbers). Our tests run on Linux; Windows and macOS are not tested by us. Both the extension zip and a classic add-on zip are included.
Will it slow down my big scenes?
No. It only touches the box's own objects; exports rebuild the dieline from the stored settings and never read your meshes. Tested next to a 1-million-face mesh: a box generated in 0.12-0.2 s on our 2-CPU Linux test server (the test fails above 2 s).
Changelog
1.0.0 (2026-11-04) - Initial release: six box styles, board allowance, folding 3D box with one Fold slider, artwork UVs and Assign Artwork, SVG / DXF / PDF dieline export at 1:1, artwork template SVG / PDF / PNG, statistics, Update Selected (keeps each box's unit size), Animate Fold, presets, Shift+A > Dieline Box with Adjust Last Operation. Tested on Blender 4.2 LTS, 5.1 and 5.2 LTS.
License
GPL-3.0-or-later. Copyright 2026 Sonneblom Digitaal.
Have questions about this product?
Login to message
| Blender Extension Compatible | Yes |
| Published | 4 days ago |
| Blender Version | 4.2 - 5.2 |
| Extension Type | Add-on |
| License | GPL |
Discover more products like this
dieline folding animation box mockup product-visualization packaging svg export dxf cricut