 Ilyasse


Patch Note
v1.2.0
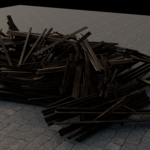
Added the Physics Brush (Ctrl+Shift+C): paint physical copies that fall and settle, with per-stroke undo and source sampling.
Added Stack Mode: copies land exactly on what you point at (books on shelves, crates on pallets), with a Gap dial (0 = spine to spine) and Scale Variation for varied sizes.
Added Shapes: lay assets along a freehand curve, straight line, polyline or circle (ring / honeycomb / grid fills). Release the click and the shape stays; the wheel sets the exact count; a click lays it.
Added the Palette: weighted multi-object source with per-slot size range and Keep Upright; feeds the brush, all shapes and Stack Mode.
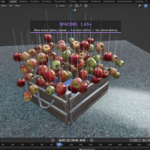
Added Water and floating: one-click Setup Water, volume-based buoyancy, automatic waves and foam shader, Live Float, Float Now / Freeze, and Bake Live to Keyframes.
Added Cascade drops (objects release one after another, sweeping across your view) and cascade along shapes.
Added simulation quality presets (Fast / Balanced / Stable) and force-field support.
Added custom toolbar tools with their own icons (a click still selects, a drag acts), full key remapping, a progressive HUD with an F1 cheat sheet, and Save My Defaults.
Added a Capsule collision shape, and an Automatic option for Environment Shape.
Carry Contents now lifts real loads: a flat tray can raise a crate.
The classic Bullet crash traps (convex hull on a flat plane, solid water colliders) are detected and neutralised automatically, and crash recovery returns everything a crashed session borrowed.
Fixed: starting the Physics Brush from the panel button no longer locks it in painting mode.
Every release is tested on Blender 4.5.8 LTS, 5.0.1 and 5.1.2 before it ships.
v1.1.0
Added Duplicate & Drop (D) with adjustable release distance.
Improved Carry Contents detection when using extra carry distance.
Added Industry Compatible navigation and Blender 5.x support.
Improved collision handling and cancellation cleanup.
Dynamic Grabber 1.2.0 - Quick User Guide
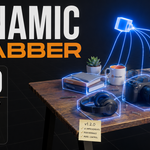
Dynamic Grabber lets you grab, drop and paint mesh objects with real-time physics inside Blender.
Objects collide with the environment, react to gravity, and can be placed naturally in the scene. And with the water tools, they can float, ride waves and get a foam ring, fully automatically.
Where to find it
After installing and enabling the add-on:
Open the 3D Viewport.
Press N to open the sidebar.
Go to the Dynamic Grabber tab.
You can also find the tools in the Object menu, and Dynamic Grab and the Physics Brush sit in the T-toolbar as regular Blender tools with their own icons: a simple click still selects, a drag starts the tool.
Default shortcuts
Ctrl + Shift + G : Dynamic Grab
Ctrl + Shift + D : Dynamic Drop
Ctrl + Shift + C : Physics Brush
D : Duplicate & Drop, while Dynamic Grab is active
Every shortcut is remappable in the add-on Preferences, and the Controls panel always shows the cheat sheet with your own keys.
Basic use
Select one or more mesh objects.
Press Ctrl + Shift + G.
Move your mouse to drag the objects.
Click to place them.
Press Esc or Right Click to cancel.
If Settle on Release is enabled, the objects will fall and settle naturally after placement.
When using Blender's Industry Compatible keymap, Alt viewport navigation remains available while using Dynamic Grabber.
Happy with your settings? Controls panel > Save My Defaults: every future file starts with your values (Forget goes back to factory).
Main tools
Dynamic Grab
Starts an interactive physics grab. Use this when you want to move objects by hand while keeping collisions active.
During the grab:
Left Click : place the objects
Esc / Right Click : cancel
X / Y / Z : lock movement to an axis
Shift + X / Y / Z : lock movement to a plane
S : spread or compress the pack
F : formation (line / grid / circle)
Q : snap rotation ("Tetris" mode: 90 / 45 / 30 degrees, arrow keys to yaw and tip over)
D : Duplicate & Drop the grabbed selection
R : rotate the grabbed objects
G : toggle gravity on/off
Hold T : slow motion
Hold H : hold the current target position
F1 : full shortcut list
Lifting a tray? Its contents come along. That's Carry Contents, on by default.
Dynamic Drop
Drops the selected objects and lets them settle under gravity. Use this when you want objects to fall naturally without manually dragging them.
Enable Cascade (Cascade panel) and the objects release one after another, sweeping across your view, with an adjustable delay. Combine with Record Keyframes for a ready-made rigid-body animation.
Duplicate & Drop
Creates a duplicate of the currently grabbed objects and drops it into the scene.
Press D while using Dynamic Grab to create the duplicate. The duplicate stays attached briefly, then releases once the grabbed objects move far enough away.
Use this to quickly scatter copies of objects while keeping physics collisions active. Duplicate & Drop is not available while Hold mode or Record Keyframes is active.
Physics Brush
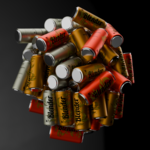
Paints physical copies of your selection, of a whole collection, or of a palette, that fall and settle where you paint.
While painting:
Hold Left Click : paint
F (drag) : resize the brush radius
Wheel : copies per stamp
S : sample the object under the cursor as the new source
U : undo the last stroke
G : toggle gravity
Enter : keep everything and exit
Esc Esc : discard the session
F1 : full shortcut list
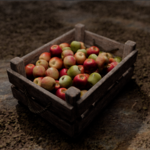
Stack Mode (Physics Brush panel) places each copy exactly on top of what you point at: point at a shelf and books land on it, standing; point at a book and the next one stacks on top. It works whatever the object's origin or rotation. The Gap setting spaces the row (0 = the object's own size, so books pack spine to spine), and Scale Variation works here too, so stacked crates come out slightly different sizes.
Shapes
Lay assets along a path instead of painting them, from inside the Physics Brush:
Ctrl + drag : freehand curve following your mouse
Ctrl + Shift + drag : straight line (snapped to 45 degree steps)
Ctrl + click, click... : polyline (Enter or double-click lays it)
Ctrl + Alt + click : circle. It appears and stays with you. Move the mouse to size it, H moves the whole circle, F cycles the fill (Ring, Honeycomb, Grid).
The one rule to remember: release the click, and the shape stays put. Then the wheel sets the exact number of copies (Shift + Wheel: plus or minus 10), F cycles the pattern, and a click lays it. Esc cancels. Nothing commits until you click.
Align to Path turns each copy to face the direction of travel (fences, dominoes, book rows). Cascade Along Path makes the stations appear one by one. One shape = one stroke: U removes it whole.
Palette
A real shelf isn't forty copies of the same book. Tick Use Palette (Physics Brush panel), add several objects with the plus button, give each a frequency, a size range, and Keep Upright for bottles and mugs so physics never leaves them on their side.
The palette feeds the brush, all shapes and Stack Mode, so one stroke paints a varied, believable mix. S (sample) temporarily switches back to a single source.
Water and floating
Everything lives in the Floating panel:
Click Setup Water. No water in the scene? The add-on creates a "Water" collection and a wave-ready water plane sized to your scene. Have your own water surfaces? Put them in a collection, pick it as Water, then click the button.
Select objects and click Can Float. They fall in, splash, and float with a realistic waterline computed from the mesh volume: tall ships float on their hull, masts stay dry.
Place them with grab, drop or brush. Copies painted from a buoyant source are buoyant too.
Auto Waves and Foam Shader each have their own checkbox and act the moment you toggle them. The foam ring forms around everything touching the surface; switching it off swaps to a plain water material. A material you assigned yourself is never replaced. Heavy meshes (more than 20k vertices) get their wave brush on an invisible lightweight stand-in, so big ships never slow the scene down.
Live Float
With Live Float on, placed floaters keep bobbing whenever the timeline plays: no rigid bodies, survives file reloads, cannot corrupt your scene.
Float Now sets any selected mesh afloat instantly; Freeze stops it at its current pose.
Bake Live to Keyframes converts all the bobbing into plain location/rotation keyframes, over the frame range you choose, with a progress bar (Esc cancels). The file then plays anywhere, on render farms and machines without the add-on included.
Ride Variation randomises each floater's ride height a little, so fleets feel organic instead of cloned.
Show Badges draws BUOYANT / LIVE tags on flagged objects in the viewport.
Placement settings
Grab Strength
Controls how strongly objects follow the mouse.
Higher value = objects follow faster and more tightly.
Lower value = softer, looser movement.
Max Pull Distance
Limits how far the grab force can stretch.
Use this to avoid objects being pulled too aggressively. Set to 0 for no limit.
Gravity
Controls gravity strength while using the tool. Default is similar to real-world gravity.
Settle on Release
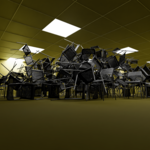
When enabled, objects keep simulating after placement until they settle. Good for dropping objects into containers, onto tables, or into piles.
Tip-Over Angle
Adds a small tilt when objects settle. Useful for tall upright objects that might otherwise stay perfectly balanced. Set to 0 to disable it.
Carry Contents
When enabled, objects inside or sitting on top of the grabbed selection can move with it. Example: if cans are sitting on a tray, grabbing the tray can carry the cans too. Since 1.2.0 this lifts real loads: a flat tray can raise a crate.
Carry Distance
Adds extra detection range for Carry Contents. Increase it if nearby objects are not being carried correctly, especially when carrying larger objects.
Record Keyframes
Records the simulated movement as keyframes while you place. It works with grab, drop, cascade and the Physics Brush. After placing the objects, play the Blender timeline to replay the motion in real time.
Physics Brush settings
Source
The brush paints your selection by default. Pick a Scatter Collection to paint random objects from a whole collection instead, or tick Use Palette for the weighted palette.
Brush Radius / Gap
Brush Radius is the spawn area of each stamp. In Stack Mode the dial becomes Gap: the spacing between stacked copies along rows and shapes. Gap 0 = the object's own size, so books pack spine to spine. F (drag) resizes the right one for the current mode.
Spawn Count
How many duplicates spawn at each brush point (free scatter).
Brush Drop Height
How high above the painted point the copies appear before dropping.
Random Rotation / Scale Variation
Random Rotation adds a random spin to each painted copy (free scatter only, stacking stays axis-aligned).
Scale Variation randomises the size of every copy, in free scatter and Stack Mode alike.
Align to Surface
Orients painted copies to the surface normal before dropping.
Placement Sound
Plays a small click each time the brush places objects, with its own volume dial.
Cascade
One shared Delay, and where it applies: Dynamic Drop releases objects one by one, and brush Shapes lay their stations one after another. Combine with Record Keyframes for ready-made animation.
Collision settings
Object Shape
Controls the collision shape used for grabbed objects.
Recommended default: Automatic
Automatic measures each mesh and picks the cheapest shape that really fits: box-like objects get a Box on their own. For heavy scenes, choose the collision shape manually when needed.
Available modes:
Automatic : best-fit shape per object.
Convex Hull : good general-purpose collision.
Fast Convex Hull : faster setup, less accurate.
Box : fastest option, best for simple shapes or low-spec setups.
Cylinder : good for cans, bottles, rods, straws.
Sphere : good for round objects.
Capsule : rounded rod, the smoothest tumbling.
Mesh : most accurate, useful for hollow shapes like glasses or containers.
Environment Shape
Controls how the surrounding scene is used as collision.
Automatic : best fit per object, cheap primitives where possible, exact mesh where concavity matters (a shelf stays hollow). Recommended default.
Mesh : most accurate, slower.
Convex Hull : faster approximation.
Box : fastest option.
Animated
Use this if the environment objects are animated and should act as moving colliders.
Friction
Controls how much objects grip surfaces.
Higher friction = objects slide less.
Lower friction = objects slide more.
Rotation Damping
Controls how much objects resist spinning.
Lower value = objects rotate freely.
Higher value = objects stay more stable.
Density
Controls the mass of simulated objects. This setting currently has a subtle effect in most cases.
Ignore Physics
Ignore
Marks the selected objects so Dynamic Grabber ignores them. Ignored objects will not act as colliders, and other objects can pass through them.
Useful for:
trigger objects
helper meshes
ghost geometry
objects you do not want to affect the simulation
Include
Removes the Ignore Physics flag from the selected objects. The objects will be used normally again.
Select Ignored
Selects all objects currently marked as ignored.
Dynamic Paint
This section appears when Dynamic Paint objects are detected.
Pause While Placing
Freezes all Dynamic Paint during placement sessions, so placing runs at full speed; waves resume on confirm. Off by default.
Suspend
Temporarily disables Dynamic Paint on selected objects during the grab. Use this when you want the object to behave like a normal physics object instead of staying live as a Dynamic Paint object.
Keep Live
Keeps Dynamic Paint active during the grab. Use this when you want the Dynamic Paint effect to keep working.
Select Suspended
Selects all Dynamic Paint objects currently marked as suspended.
Simulation settings
Quality presets
Fast / Balanced / Stable set the solver in one click. Pick Fast for heavy scenes, Stable for delicate stacks.
Substeps
Controls the number of physics steps per frame.
Higher value = more stable simulation, but slower.
Lower value = faster, but less precise.
Solver Iterations
Controls physics solver accuracy. Higher value = better contacts and stability, but slower.
Max Drop Frames
Maximum number of frames used by Dynamic Drop and Settle on Release. Increase it if objects need more time to settle.
Lock When Idle
Freezes objects when the mouse stops moving. Useful to reduce jitter or unwanted spinning while grabbing.
Force fields
Blender force fields can act on the simulation while you place.
Clean Up Helpers
Removes every helper object the add-on ever created from the file. Wave stand-ins are recreated by one Setup Water click.
Controls
The Controls panel shows the full shortcut cheat sheet (it reflects your remapped keys), plus Save My Defaults / Forget, and Open Diagnostic Log.
Something misbehaving? Open the diagnostic log and attach the file to your report: [email protected]m.
Recommended starting settings
For most scenes:
Object Shape: Automatic
Environment Shape: Automatic (Mesh if a container must be exact)
Grab Strength: 80
Settle on Release: On
Carry Contents: On
Record Keyframes: Off, unless you want to replay the motion
Substeps: 10
Solver Iterations: 15
For heavy scenes or low-spec setups:
Use Box for Object Shape when possible.
Use Fast Convex Hull if Box is too simple.
Use Box or Convex Hull for Environment Shape.
Avoid Mesh unless accurate collisions are required.
Lower Substeps if needed, or just click the Fast preset.
Keep object counts reasonable for your CPU.
Dynamic Grabber can work on low-spec setups, but it still needs a reasonably capable CPU. For example, a Ryzen 5 2600-class CPU can be usable, but heavy scenes may not feel smooth.
Dynamic Grabber 1.1.0 - Quick User Guide
Dynamic Grabber lets you grab selected mesh objects and move them with real-time physics inside Blender.
Objects collide with the environment, react to gravity, and can be placed naturally in the scene.
Where to find it
After installing and enabling the add-on:
Open the 3D Viewport.
Press N to open the sidebar.
Go to the Dynamic Grabber tab.
You can also find the tools in the Object menu.
Default shortcuts:
Ctrl + Shift + G : Dynamic Grab
Ctrl + Shift + D : Dynamic Drop
Basic use
Select one or more mesh objects.
Press Ctrl + Shift + G.
Move your mouse to drag the objects.
Click to place them.
Press Esc or Right Click to cancel.
If Settle on Release is enabled, the objects will fall and settle naturally after placement.
When using Blender's Industry Compatible keymap, Alt viewport navigation remains available while using Dynamic Grabber.
Main tools
Dynamic Grab
Starts an interactive physics grab. Use this when you want to move objects by hand while keeping collisions active.
During the grab:
Left Click : place the objects
Esc / Right Click : cancel
X / Y / Z : lock movement to an axis
Shift + X / Y / Z : lock movement to a plane
S : spread or compress the pack
D : Duplicate & Drop the grabbed selection
R : rotate the grabbed objects
G : toggle gravity on/off
Hold H : hold the current target position
Dynamic Drop
Drops the selected objects and lets them settle under gravity. Use this when you want objects to fall naturally without manually dragging them.
Duplicate & Drop
Creates a duplicate of the currently grabbed objects and drops it into the scene.
Press D while using Dynamic Grab to create the duplicate. The duplicate stays attached briefly, then releases once the grabbed objects move far enough away.
Use this to quickly scatter copies of objects while keeping physics collisions active. Duplicate & Drop is not available while Hold mode or Record Keyframes is active.
Placement settings
Grab Strength
Controls how strongly objects follow the mouse.
Higher value = objects follow faster and more tightly.
Lower value = softer, looser movement.
Max Pull Distance
Limits how far the grab force can stretch.
Use this to avoid objects being pulled too aggressively. Set to 0 for no limit.
Gravity
Controls gravity strength while using the tool. Default is similar to real-world gravity.
Settle on Release
When enabled, objects keep simulating after placement until they settle. Good for dropping objects into containers, onto tables, or into piles.
Tip-Over Angle
Adds a small tilt when objects settle. Useful for tall upright objects that might otherwise stay perfectly balanced. Set to 0 to disable it.
Duplicate Release Distance
Controls how far the grabbed objects must move before a duplicated object is released.
Higher value = the duplicate stays attached longer.
Lower value = the duplicate drops sooner.
Carry Contents
When enabled, objects inside or sitting on top of the grabbed selection can move with it. Example: if cans are sitting on a tray, grabbing the tray can carry the cans too.
Carry Distance
Adds extra detection range for Carry Contents. Increase it if nearby objects are not being carried correctly, especially when carrying larger objects or objects slightly farther from the grabbed selection.
Record Keyframes
Records the simulated movement as keyframes when the objects are placed. After placing the objects, play the Blender timeline to replay the motion in real time.
Collision settings
Object Shape
Controls the collision shape used for grabbed objects.
Recommended default: Automatic
Automatic tries to choose the best shape for each object, but it is not always the fastest or most optimal option. For heavy scenes, choose the collision shape manually when needed.
Available modes:
Automatic : chooses a shape automatically.
Convex Hull : good general-purpose collision.
Fast Convex Hull : faster setup, less accurate.
Box : fastest option, best for simple shapes or low-spec setups.
Cylinder : good for cans, bottles, rods, straws.
Sphere : good for round objects.
Mesh : most accurate, useful for hollow shapes like glasses or containers.
Environment Shape
Controls how the surrounding scene is used as collision.
Mesh : most accurate, slower.
Convex Hull : faster approximation.
Box : fastest option.
Use Mesh when you need accurate collisions, like objects falling into a jar or container. Use Box or Convex Hull when you need better performance.
Animated
Use this if the environment objects are animated and should act as moving colliders.
Friction
Controls how much objects grip surfaces.
Higher friction = objects slide less.
Lower friction = objects slide more.
Rotation Damping
Controls how much objects resist spinning.
Lower value = objects rotate freely.
Higher value = objects stay more stable.
Density
Controls the mass of simulated objects. This setting currently has a subtle effect in most cases.
Ignore Physics
Ignore
Marks the selected objects so Dynamic Grabber ignores them. Ignored objects will not act as colliders, and other objects can pass through them.
Useful for:
trigger objects
helper meshes
ghost geometry
objects you do not want to affect the simulation
Include
Removes the Ignore Physics flag from the selected objects. The objects will be used normally again.
Select Ignored
Selects all objects currently marked as ignored.
Dynamic Paint
This section appears when Dynamic Paint objects are detected.
Suspend
Temporarily disables Dynamic Paint on selected objects during the grab. Use this when you want the object to behave like a normal physics object instead of staying live as a Dynamic Paint object.
Keep Live
Keeps Dynamic Paint active during the grab. Use this when you want the Dynamic Paint effect to keep working.
Select Suspended
Selects all Dynamic Paint objects currently marked as suspended.
Simulation settings
Substeps
Controls the number of physics steps per frame.
Higher value = more stable simulation, but slower.
Lower value = faster, but less precise.
Solver Iterations
Controls physics solver accuracy. Higher value = better contacts and stability, but slower.
Max Drop Frames
Maximum number of frames used by Dynamic Drop and Settle on Release. Increase it if objects need more time to settle.
Lock When Idle
Freezes objects when the mouse stops moving. Useful to reduce jitter or unwanted spinning while grabbing.
Recommended starting settings
For most scenes:
Object Shape: Automatic
Environment Shape: Mesh for accurate containers, Box for speed
Grab Strength: 80
Settle on Release: On
Carry Contents: On
Record Keyframes: Off, unless you want to replay the motion
Substeps: 10
Solver Iterations: 15
For heavy scenes or low-spec setups:
Use Box for Object Shape when possible.
Use Fast Convex Hull if Box is too simple.
Use Box or Convex Hull for Environment Shape.
Avoid Mesh unless accurate collisions are required.
Lower Substeps if needed.
Keep object counts reasonable for your CPU.
Dynamic Grabber can work on low-spec setups, but it still needs a reasonably capable CPU. For example, a Ryzen 5 2600-class CPU can be usable, but heavy scenes may not feel smooth.
Dynamic Grabber 1.0 - Quick User Guide
Dynamic Grabber lets you grab selected mesh objects and move them with real-time physics inside Blender.
Objects collide with the environment, react to gravity, and can be placed naturally in the scene.
Where to find it
After installing and enabling the add-on:
Open the 3D Viewport.
Press N to open the sidebar.
Go to the Dynamic Grabber tab.
You can also find the tools in the Object menu.
Default shortcuts:
Ctrl + Shift + G : Dynamic Grab
Ctrl + Shift + D : Dynamic Drop
Basic use
Select one or more mesh objects.
Press Ctrl + Shift + G.
Move your mouse to drag the objects.
Click to place them.
Press Esc or Right Click to cancel.
If Settle on Release is enabled, the objects will fall and settle naturally after placement.
Main tools
Dynamic Grab
Starts an interactive physics grab. Use this when you want to move objects by hand while keeping collisions active.
During the grab:
Left Click : place the objects
Esc / Right Click : cancel
X / Y / Z : lock movement to an axis
Shift + X / Y / Z : lock movement to a plane
S : spread or compress the pack
R : rotate the grabbed objects
G : toggle gravity on/off
Hold H : hold the current target position
Dynamic Drop
Drops the selected objects and lets them settle under gravity. Use this when you want objects to fall naturally without manually dragging them.
Placement settings
Grab Strength
Controls how strongly objects follow the mouse.
Higher value = objects follow faster and more tightly.
Lower value = softer, looser movement.
Max Pull Distance
Limits how far the grab force can stretch.
Use this to avoid objects being pulled too aggressively. Set to 0 for no limit.
Gravity
Controls gravity strength while using the tool. Default is similar to real-world gravity.
Settle on Release
When enabled, objects keep simulating after placement until they settle. Good for dropping objects into containers, onto tables, or into piles.
Tip-Over Angle
Adds a small tilt when objects settle. Useful for tall upright objects that might otherwise stay perfectly balanced. Set to 0 to disable it.
Carry Contents
When enabled, objects inside or sitting on top of the grabbed selection can move with it. Example: if cans are sitting on a tray, grabbing the tray can carry the cans too.
Carry Distance
Adds extra detection range for Carry Contents. Increase it if nearby objects are not being carried correctly.
Record Keyframes
Records the simulated movement as keyframes when the objects are placed. After placing the objects, play the Blender timeline to replay the motion in real time.
Collision settings
Object Shape
Controls the collision shape used for grabbed objects.
Recommended default: Automatic
Automatic tries to choose the best shape for each object, but it is not always the fastest or most optimal option. For heavy scenes, choose the collision shape manually when needed.
Available modes:
Automatic : chooses a shape automatically.
Convex Hull : good general-purpose collision.
Fast Convex Hull : faster setup, less accurate.
Box : fastest option, best for simple shapes or low-spec setups.
Cylinder : good for cans, bottles, rods, straws.
Sphere : good for round objects.
Mesh : most accurate, useful for hollow shapes like glasses or containers.
Environment Shape
Controls how the surrounding scene is used as collision.
Mesh : most accurate, slower.
Convex Hull : faster approximation.
Box : fastest option.
Use Mesh when you need accurate collisions, like objects falling into a jar or container. Use Box or Convex Hull when you need better performance.
Animated
Use this if the environment objects are animated and should act as moving colliders.
Friction
Controls how much objects grip surfaces.
Higher friction = objects slide less.
Lower friction = objects slide more.
Rotation Damping
Controls how much objects resist spinning.
Lower value = objects rotate freely.
Higher value = objects stay more stable.
Density
Controls the mass of simulated objects. This setting currently has a subtle effect in most cases.
Ignore Physics
Ignore
Marks the selected objects so Dynamic Grabber ignores them. Ignored objects will not act as colliders, and other objects can pass through them.
Useful for:
trigger objects
helper meshes
ghost geometry
objects you do not want to affect the simulation
Include
Removes the Ignore Physics flag from the selected objects. The objects will be used normally again.
Select Ignored
Selects all objects currently marked as ignored.
Dynamic Paint
This section appears when Dynamic Paint objects are detected.
Suspend
Temporarily disables Dynamic Paint on selected objects during the grab. Use this when you want the object to behave like a normal physics object instead of staying live as a Dynamic Paint object.
Keep Live
Keeps Dynamic Paint active during the grab. Use this when you want the Dynamic Paint effect to keep working.
Select Suspended
Selects all Dynamic Paint objects currently marked as suspended.
Simulation settings
Substeps
Controls the number of physics steps per frame.
Higher value = more stable simulation, but slower.
Lower value = faster, but less precise.
Solver Iterations
Controls physics solver accuracy. Higher value = better contacts and stability, but slower.
Max Drop Frames
Maximum number of frames used by Dynamic Drop and Settle on Release. Increase it if objects need more time to settle.
Lock When Idle
Freezes objects when the mouse stops moving. Useful to reduce jitter or unwanted spinning while grabbing.
Recommended starting settings
For most scenes:
Object Shape: Automatic
Environment Shape: Mesh for accurate containers, Box for speed
Grab Strength: 80
Settle on Release: On
Carry Contents: On
Record Keyframes: Off, unless you want to replay the motion
Substeps: 10
Solver Iterations: 15
For heavy scenes or low-spec setups:
Use Box for Object Shape when possible.
Use Fast Convex Hull if Box is too simple.
Use Box or Convex Hull for Environment Shape.
Avoid Mesh unless accurate collisions are required.
Lower Substeps if needed.
Keep object counts reasonable for your CPU.
Dynamic Grabber can work on low-spec setups, but it still needs a reasonably capable CPU. For example, a Ryzen 5 2600-class CPU can be usable, but heavy scenes may not feel smooth.
-
$90
For a team of 3+
-
$30
For solo users
-
$1
Try the addon before buying (Free on gumroad)
Have questions about this product?
Login to message
| Blender Extension Compatible | Yes |
| Sales | 60+ |
| Rating | 2 ratings |
| Dev Fund Contributor | |
| Published | 4 months ago |
| Blender Version | 4.5 - 5.2 |
| Extension Type | Add-on |
| Render Engine Used | Arnold, Blender-Internal, Blender-Game-Engine, Cycles, Eevee, Freestyle, Luxrender, Mental-Ray, Octane, Vray, Yafaray |
| License | GPL |
