Easy Interactive Scattering
 NodeMonkey




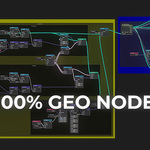
📖 Easy Interactive Scattering (v4.2) – Official Documentation
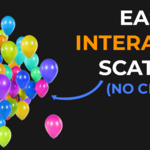
Welcome to the official documentation for the Easy Interactive Scattering tool. This 100% Geometry Nodes setup is designed to automatically resolve instance intersections, avoid obstacles, and create highly optimized, production-ready biomes.
Below is a detailed breakdown of every setting in the Modifier Panel, organized exactly as they appear in your Blender interface.
🛠️ Getting Started: How to Append the Modifier
Before you can use the tool, you need to bring the Geometry Nodes setup into your current Blender project and apply it to your mesh.
Append the Modifier
In your active Blender project, go to the top menu and select File > Append.
Navigate to where you saved the downloaded Easy_Interactive_Scattering_v4.2.blend file and double-click it.
You will see several folders. Open the NodeTree folder.
Select the Easy Interactive Scattering node group and click the Append button.
Select the 3D object in your scene that you want to scatter items onto (e.g., a landscape or floor plane).
Go to the Modifier Properties panel (the blue wrench icon on the right).
Click Add Modifier > Geometry Nodes.
In the new Geometry Nodes modifier, click the drop-down menu icon (next to the "New" button) and select Easy Interactive Scattering.
🧠 Core Concepts: Simulation vs. Repeat Zone
Before tweaking settings, it is important to understand the two calculation engines driving the physics in this tool, located in the Physics tab:
Simulation Zone (For Animation): Calculates physics frame-by-frame. Best for continuous movement, floating objects (asteroids), and dynamic obstacle avoidance. Requires playback on the timeline.
Repeat Zone (For Static Scenes): Calculates all physics instantly on a single frame by looping the math in the background. Best for static environment art (forests, grass) where you just want objects to spread out instantly without pressing play.
💡 Pro Tip - "Iteration Scaling": Throughout the modifier, you will see checkboxes for Iteration Scaling. This setting only applies when using the Repeat Zone. It smoothly decreases the physics force toward the end of the calculation loop, resulting in a much softer, more natural resting position for your instances.
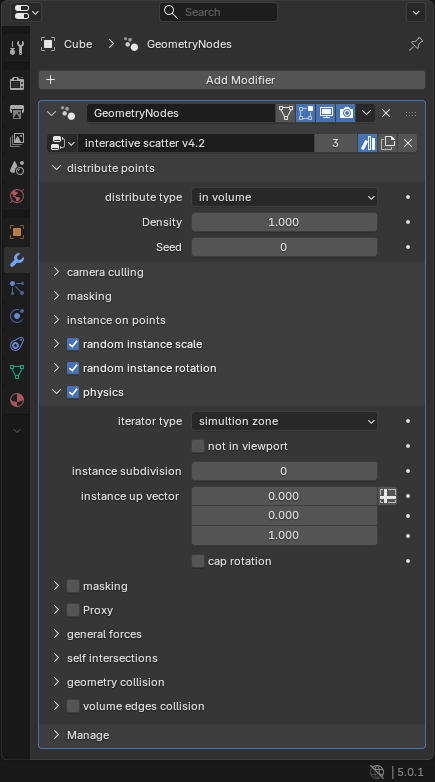
1️⃣ Distribute Points
This section controls where and how your points are initially spawned on your base mesh.
-
Distribute Type:
On Surface: Scatters points across the faces of the mesh. Unlocks the Min Distance slider to prevent points from spawning too close together initially.
In Volume: Scatters points inside a 3D mesh.
⚠️ Note: Volume scattering requires a fully closed (manifold) geometry. When using Volume, the original input mesh will be hidden and not joined with the scattered instances.
Density: Controls the total amount of points scattered.
Seed: Changes the random pattern of the point distribution.
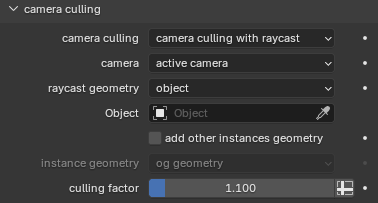
2️⃣ Camera Culling
A vital optimization feature that deletes instances outside of the camera's view to save memory and increase viewport FPS.
-
Camera Culling:
No Culling: Feature disabled.
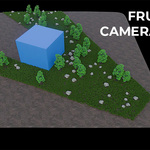
Culling: Deletes instances outside the camera frustum (field of view).
Culling with Raycast: Advanced culling that also deletes instances hidden behind other objects (occlusion culling).
Camera: Choose to cull based on the Active Camera (scene default) or select a Custom Camera.
Raycast Geometry (If Raycast is enabled): Select whether the obstacle hiding your instances is a single Object or a Collection.
Add Other Instances Geometry: If you have multiple scatter modifiers stacked (e.g., Rocks, then Trees), checking this box allows the current scatter to recognize instances from previous modifiers as obstacles to hide behind.
Instance Geometry (Proxy): When raycasting against complex instances, calculating every polygon is slow. Change this to Bounding Box or Convex Hull to speed up the raycast calculations.
Culling Factor: Expands the camera's border slightly. Increase this value (e.g., 1.100) to ensure objects on the very edge of the screen aren't deleted too early, preventing visible "popping" at the edges of your render.
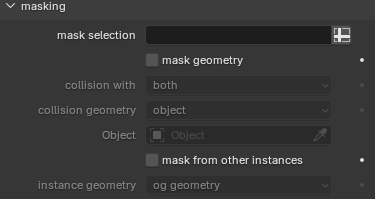
3️⃣ Masking (Scatter Mask)
Controls where points are allowed to spawn on the base mesh.
Mask Selection: Plug in a Vertex Group here to manually weight-paint where instances should spawn.
Mask Geometry: Enable this to mask out areas based on the proximity of another 3D object.
Collision With: Choose how the mask interacts (e.g., Object, Collection, or Both).
Collision Object: Select the object that will act as the "eraser" for your instances.
Mask From Other Instances: Automatically prevents current instances from spawning inside instances created by previous Geometry Node modifiers on the same mesh.
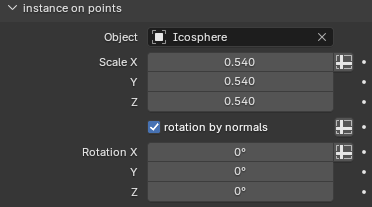
4️⃣ Instance on Points
Controls the initial geometry and base transforms of your scattered objects.
Object: Select the 3D model you want to scatter (e.g., a rock, grass blade, or balloon).
Scale X / Y / Z: The base uniform or non-uniform scale of the instances.
Rotation by Normals: When checked, instances will align themselves to the slope and direction of the underlying terrain (crucial for grass on hills).
Rotation X / Y / Z: Base rotation offset for all instances.
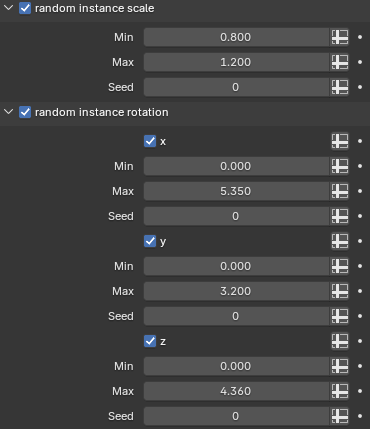
5️⃣ Random Instance Scale & Rotation
Adds natural variety to your scatter before physics are applied.
Random Instance Scale: Check to enable. Set a Min and Max multiplier.
Random Instance Rotation: Check to enable. You can toggle X, Y, and Z individually. Set the Min and Max rotation limits (in radians/degrees) for each axis.
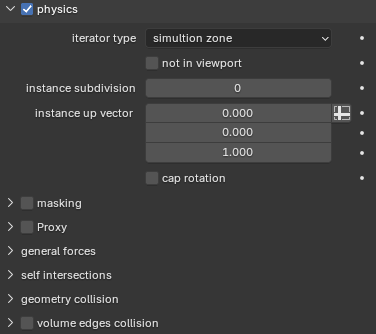
6️⃣ Physics (Core Settings)
The engine room for the tool's behavior.
Iterator Type: Choose between Simulation Zone (Animation) or Repeat Zone (Static Scenes).
Not in Viewport: Disables physics calculations in the viewport for maximum performance while modeling, applying them only during final render.
Instance Subdivision: Subdivides the instances to allow for smoother bending calculations (useful for long grass blades).
Instance Up Vector: Defines which direction is "Up" for your object (usually Z = 1.0).
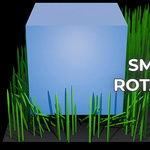
Cap Rotation: Prevents instances from tipping over too far. Essential for foliage so grass or trees don't accidentally rotate upside down and clip through the ground after a collision.
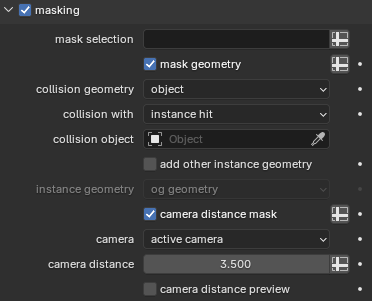
7️⃣ Physics Masking
Unlike the standard scatter mask (which deletes points), this mask determines which points participate in the physics calculations.
Mask Geometry / Object Selection: Works identically to standard masking, but applies only to the physics engine.
Camera Distance Mask: Highly recommended for large scenes. Only calculates physics for instances close to the camera.
Camera Distance: The radius (in meters) around the camera where physics are active. Instances beyond this distance remain static, saving massive amounts of CPU power.
Camera Distance Preview: Check this to visually highlight which instances are currently inside the active physics radius.
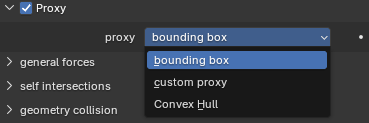
8️⃣ Physics Proxy
Replaces high-poly instances with low-poly mathematical shapes during physics calculations for lightning-fast performance.
-
Proxy Type:
Bounding Box: The fastest calculation. Good for square/blocky objects.
Convex Hull: Shrink-wraps a low-poly cage around your object. Best balance of speed and accurate collision shape.
Custom Proxy: Allows you to select your own custom low-poly mesh to use as the collision bounds.
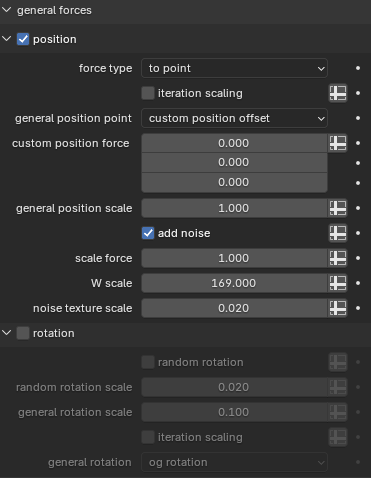
9️⃣ General Forces
Applies environmental forces to your instances, even if they aren't colliding with anything.
-
Position:
Force Type: Choose To Point (pulls objects to a specific location), Vector (pushes objects in a direction like wind), or Both.
General Position Point: Set to OG Position to make instances fight to return to their original spawn points, or Custom Position to attract them to a specific target.
Add Noise: Applies a procedural turbulence field (like wind).
Scale Force / W Scale / Noise Texture Scale: Controls the strength, evolution (animation speed), and size of the noise waves.
-
Rotation:
Random Rotation: Applies a continuous random tumble to instances.
General Rotation (OG Rotation): A powerful feature that acts like a spring. For example, if a heavy object bends a blade of grass, this force will make the grass blade rotate back to its original upright position after the object passes.
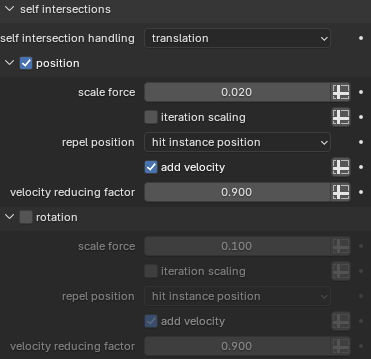
🔟 Self Intersections (The Core Feature)
Calculates how instances react when they touch each other.
-
Self Intersection Handling:
Nothing: Instances clip into each other.
Deletion: Instances that collide will be deleted.
Translation: The primary feature—instances will push and rotate away from each other until they are no longer touching.
Position / Rotation Toggles: Enable one or both to dictate how the objects resolve the collision (by sliding away, leaning away, or both).
Repel Position: Choose Hit Instance Position (calculates push direction based on the exact center of the other object) or custom hit positions for different sliding behaviors.
-
Add Velocity & Velocity Reducing Factor:
Important: Use this primarily with the Simulation Zone. It adds momentum and friction (damping) so objects glide smoothly away from each other rather than instantly snapping.
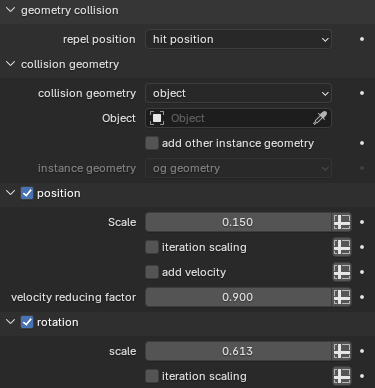
11 Geometry Collision (Obstacle Avoidance)
Calculates how instances react when they touch an external object (like a character, vehicle, or wall).
-
Repel Position:
Hit Position: Objects push away from the exact point of contact on the geometry surface (more accurate).
Object Position: Objects push away from the origin point of the collider.
Collision Geometry: Select the Object or Collection acting as the obstacle. (Note: If using a Collection, only 'Hit Position' is supported).
Position & Rotation: Identical to Self-Intersections. Enable these and use Add Velocity to make grass part smoothly around a walking character or rocks tumble away from a moving vehicle.
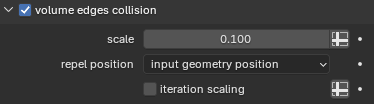
12 Volume Edges Collision
Only applies when the Distribute Type is set to "In Volume" (See Section 1).
Volume Edges Collision: When instances inside a volume use physics (like Self-Repel) to push away from each other, they might accidentally push themselves outside the walls of the base mesh. Enabling this creates an invisible boundary wall at the edges of your mesh, keeping all instances trapped inside the volume.
❓ Need more help?
If you have a question about a specific slider, or want to share your renders, join the NodeMonkey Discord!
Join the Discord Server Here
Have questions about this product?
Login to message
| Dev Fund Contributor | |
| Published | 7 months ago |
| Blender Version | 5.0 - 5.2 |
| Render Engine Used | Cycles, Eevee |
| License | Royalty Free |
Discover more products like this
procedural geometry nodes scatter physics avoid collision clipping environment collision aware no-overlap