Easy Texture Converter
 VP.studio3d


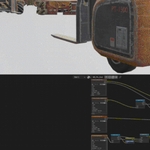
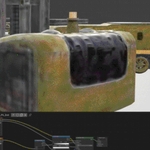
Вот подробная и структурированная документация для твоего аддона на английском языке (чтобы идеально вписаться в страницу продукта или файл README.md), а также полезный FAQ в конце.
📖 Easy Texture Converter VPs – Official Documentation
🚀 Getting Started
Installation:
In Blender, go to
Edit > Preferences > Add-ons.Click Install... and select the downloaded
.pyor.zipfile.Enable the checkbox next to Image: Easy Texture Converter VPs.
Open the 3D Viewport, press
Nto open the side panel, and click on the EasyTex tab.
🎛️ User Interface Breakdown
1. Main Controls
Process Textures: The main execution button. Click this to start the batch conversion process based on your settings.
-
Convert Embedded Textures:
Unchecked: The add-on processes external images located in a folder on your hard drive.
Checked: The add-on processes textures that are packed inside your current
.blendfile and automatically rebuilds the material nodes.
Revert to Original: Appears only after processing embedded textures. It forcefully restores all original materials and textures. (Note: Press
Ctrl+Zto restore the physical node layout).
2. Texture Folder
(Only active when "Convert Embedded Textures" is OFF)
Folder: Select the directory containing the textures you want to process.
Filter Suffix / Presets: Type a specific suffix (e.g.,
_diffuse) or use the checkbox presets (Base Color, Normal, etc.) to process only matching files.-
Work Pipeline:
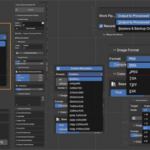
Output to Processed Textures: Creates a new subfolder and saves converted images there.
Replace & Backup Originals: Overwrites the current files but moves the originals to a safe "backup_originals" folder.
Recursive Search: If checked, the add-on will process textures in all subfolders.
3. Resolution
Target Resolution: Force all processed textures into a standard power-of-two square (e.g., 2048x2048).
Scale: Multiply or divide the current resolution (e.g.,
÷ 2halves the resolution).-
Use Custom Resolution: Overrides standard scaling. Lets you set exact pixel dimensions (e.g., 1920x1080) or choose from UI/Game Engine presets.
Resize Modes: Choose how the image fits the custom resolution: Center Crop, Scale to Fit, or Stretch.
4. Image Format
Format: Choose between PNG, JPEG, TGA, TIFF, or EXR.
Quality/Compression: Adjust JPEG Quality (10-100) or PNG Compression (0-100).
5. Color Correction
Base Color (Hue/Saturation/Value): Globally adjust the color properties of your Base Color / Albedo maps.
Roughness Gamma: Adjust the contrast/gamma curve of Roughness maps to make materials globally wetter or rougher.
6. Overlays (Layers)
Add visual layers like watermarks, logos, or dirt maps on top of your textures. You can stack multiple overlays!
Image: Select the overlay file (e.g., a transparent PNG logo).
Only for Base Color: If checked, the watermark is only applied to the Base Color map, ignoring Normals, Roughness, etc.
Mode: Choose how the overlay behaves (Center Crop, Scale to Fit, Stretch, or Original).
Transparency:
0.0is fully visible (opaque),1.0is completely invisible.Scale & Position: Fine-tune the size and X/Y pixel offset of the overlay.
7. Advanced Settings
Force Normals to PNG: Prevents compression artifacts by forcing Normal maps to save as lossless PNGs, even if your global setting is JPEG.
Invert Normal Green: Flips the green channel. Perfect for converting DirectX normal maps to OpenGL (Blender's native format).
Split ARM: Automatically slices combined ARM textures (Ambient Occlusion, Roughness, Metallic) into 3 separate image files and reconnects them in the shader editor.
Make it Tile: Blends the edges of your image to create a seamless, tileable texture.
Convert Normal to Height: Extracts a basic black-and-white height/bump map from a Normal map.
Delete Unused: Automatically purges old, unlinked textures from your
.blendfile to save memory.-
Smart Compression & Try to fit in:
Type a target size (e.g.,
100 MB). The add-on will run test passes and calculate the exact scale needed to fit your budget.Smart Aggression: Protects the quality of Base Color and Normal maps while heavily compressing Roughness, Metallic, and AO maps to save maximum space without losing visual fidelity.
Only Selected (Textures / Mesh): Limits processing to the specifically selected nodes in the Shader Editor or materials on the active Mesh object.
Have questions about this product?
Login to message
| Blender Extension Compatible | Yes |
| Published | 3 months ago |
| Blender Version | 5.0 - 5.1 |
| Extension Type | Add-on |
| Render Engine Used | Cycles |
| License | GPL |

Discover more products like this
image compression color correction texture optimization pbr-textures texture texture converter Channel Packing Batch processing watermark resize textures Texture Management unreal