Enosis Core
 Passion Beyond


Installation
- Download the .zip file. Do not unzip it.
- In Blender, go to Edit > Preferences > Add-ons.
- Click Install, select the downloaded .zip, then enable the checkbox next to Enosis Core.
- Press N in the 3D viewport to open the sidebar, then select the Enosis Core tab.
Updating from a previous version: disable the old version first, restart Blender, then install the new version. Installing over a running version can cause keymap or panel issues.
The Sidebar
Enosis Core adds one tab to the N-panel, split into three sections:
- ORGANIZE — Color Pipeline, Cleanup & Prepare, Scene Check
- OPTIMIZE — Performance, Mesh Analyzer, Texture Manager
- OUTPUT — Render Presets, Comp Setup, Multi-Format Export
Each section can be collapsed independently.
Color Pipeline
Click Setup ACES to switch the scene's color management from the default AgX to ACES / ACEScg in one step. This sets the working color space, view transform and display device together.
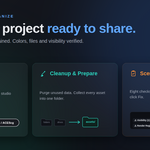
Cleanup & Prepare
Purge Unused Data removes data-blocks with zero users (materials, meshes, images, node groups, etc.) and lists exactly what was removed. Images currently open in an Image Editor are protected even if unused elsewhere.
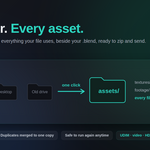
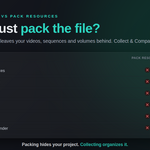
Collect & Compact requires a saved .blend file. Click it to:
- Scan the scene for every texture, HDRI, UDIM set, video file, volume and reference image
- Copy each file into an
assets/folder created next to your .blend, organized into subfolders by source - Relink every path to the new location
- Skip any file that's already been collected, so it's safe to run again
This does not move your original source files; it copies them.
Scene Check
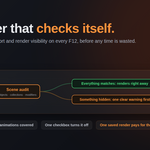
Click Run Scene Check to run eight checks:
- Visibility (viewport/render mismatches on objects and collections)
- Missing files
- Render Region left on
- Resolution below 100%
- Empty image slots
- Modifier viewport/render mismatches
- Instancing issues
- Particle system issues
Only failing checks are shown, each with a Fix button that resolves it directly.
F12 Pre-Render Guard
This runs automatically, no setup needed. Every time you press F12 (or Ctrl+F12 for animation), Enosis Core checks for the same visibility mismatches as Scene Check.
- If everything matches, the render starts immediately
- If something doesn't match, a dialog lists each issue before the render starts. Click OK to render anyway, or Esc to cancel and fix it
To disable: go to Edit > Preferences > Add-ons > Enosis Core and uncheck Pre-render Check (F12).
Performance
Toggle Viewport Optimizer to cap subdivision levels, particle counts and texture display size in the viewport only. Your render settings are not affected. Toggle it off to instantly restore full detail.
The Modifier Manager below it lets you scan, disable, enable or remove modifier types either across the whole scene or only your current selection, depending on the mode toggle.
Mesh Analyzer
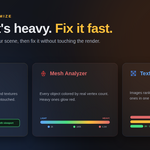
Click Analyze to color every mesh object by its real vertex count after modifiers (Subsurf, Multires, Geometry Nodes, etc.). Blue and green are light, red is heavy. Click Exit to restore your original viewport shading.
Texture Manager
Click Scan to list every image in the project sorted by memory usage. Set a target resolution and click Resize All to downscale oversized textures.
Important: this permanently overwrites the image files on disk. Run this only on a collected copy of your project, not your original source files. Image sequences and UDIM tiles are automatically skipped to prevent damaging footage.
Render Presets
Click any resolution, frame rate or format preset to apply it instantly to the active scene's render settings.
Comp Setup
Click Build Compositor to generate a compositing node tree. Pro mode adds a Denoise node with Normal and Albedo input, and splits the File Output into a DWAA-compressed EXR for the beauty pass and a separate lossless ZIP EXR for Cryptomatte passes.
Running this again replaces the previously generated Enosis nodes without leaving duplicates behind.
Multi-Format Export
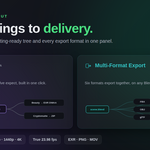
Tick the formats you want (FBX, OBJ, glTF, STL, USD, Alembic), set the shared scale, axis and modifier options, then click Export. Each ticked format is exported to the chosen folder in one pass.
Troubleshooting
- F12 shows a warning every time: you likely have objects intentionally hidden in the viewport but visible in render (or vice versa). Either fix the listed items, or disable the check in preferences.
-
Collect & Compact says "save your file first": the .blend must be saved at least once so Enosis Core knows where to create the
assets/folder. - Texture resize didn't apply to a file: sequences and UDIM tiles are skipped by design. Single-image textures only.
- Addon feels slow after updating: disable the old version and restart Blender before installing the new one, to avoid duplicate keymaps.
-
$15
For a single artist. Use on your personal machines
-
$40
For small studios and teams. Licensed for up to 4 artists.
-
$60
for studios with more than 5 artists. Unlimited internal use.
Have questions about this product?
Login to message
Discover more products like this
project-optimization output 3d asset collection blender addon 118 Assets 3D asset optimization