Environmental Sculpting Kit
 tykuii's lil shop


Tykuii’s Environment Sculpting Kit

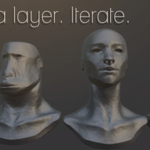
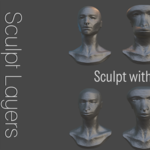
Sculpt Layer
Select from the list to designate an active sculpt layer to work on.
Create New Sculpt Layer
Create a sculpt layer on the current actively selected object.
Remove / Delete Selected Sculpt Layer
Remove the selected sculpt layer on the current actively selected object.
Flatten Layers
Manually bakes all layer data onto the mesh, making permanent changes to the geometry.
Toggle Visibility
Disable the layer's influence completely. (OFF if monitor is not glowing and ON elsewise).
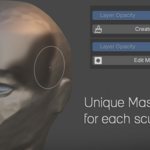
Layer Opacity
1 = Full Value (Full opacity / weight of the sculpt layer onto the mesh).
0 = No weight / no value of the sculpt layer onto the mesh (no influence).
-1 = Inverted influence of the sculpt layer onto the mesh (opposing influence).
2 = Double the influence of the sculpt layer onto the mesh.
Create Mask:
Enters sculpt mode. Ensure that you properly select the mask brush (default key is M) and create a masking selection before saving the mask!
After a mask is created, two new operations will appear.
Edit Mask:
Edit the mask associated with the selected layer.
Delete Mask:
Removes the mask from the layer and the system.
Noise Selection
Sine Waves
White Noise
Perlin Noise
Voronoi / Cell Noise
Custom Texture
Noise Scale
Size of the noise.
Noise Strength
Strength of the noise ( amplitude / gain ).
Seed
Randomization of the noise when relevant.


Algorithm Selection
Conformal Willmore
Safe Laplacian
Safe Taubin
Fast Stylized (Experimental)
Fast stylized is an experimental algorithm that is currently heavily prone to issues. Use at your own risk!
Global Strength:
Influence of the algorithm over the mesh.
Iterations:
Times the operation is ran sequentially.
Apply Algorithm
Applies the algorithm to the selected sculpt layer.
Pinch Strength:
Increases the strength of pinching for areas of the mesh that drastically change angles based on curvature.
Chisel Strength:
Increases the operation strength of transition areas between edges and large plain areas on the mesh based on curvature.
Smooth Strength:
Increases the smoothing operation based on the Macro Radius that smooths out areas on the mesh that are designated as areas that are not drastically changing angles.
Macro Radius:
Increases the radius taken into consideration between vertex neighbors in the overall operation.
Threshold: Neighbor distance threshold.
Preserve Details:
Attempts to preserve details associated with pinch strength.
Edge Contrast:
Increases the weight of transition neighbors between edge transitions.

Offset Value
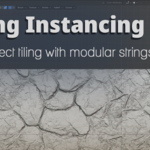
Global distance between string collection instances, can be overridden.
Snapping On / Off
Snap the value to the grid on the closest rounded value.
Direction
Positive or Negative along the selected Axis.
Axis
The axis designated to spawn the string along (X, Y, or Z).
Same as above, sorry for the miss label!
Spawn Clearance
Distance away from the origin of the world.
Collection Slot Letter Designation
User inputs a letter to associate with the slotted collection.
Collection Selection
User selects an existing scene collection for instancing.
Stride Value
Distance of length that the collection is supposed to occupy.
Add Slot
Add a collection slot, then assign a letter value.
Remove Slot
Removes the relevant collection slot.
Pattern String Text Input
Use letters assigned to the slot collections (their designated letters) to generate strings
E.g. Add slot collection with letter A and another with B
Input A,A,A to get three instances of collection A that utilize either the global offset value or the stride value if not 0.00.
Input A,B,A to get the collection instance B surrounded by collection instances A utilizing either the global offset value or the stride value if not 0.00.
Generate Modular String
Operation that utilizes the Pattern string above to generate the instances.
Sync Instances to Source
Updates the generated modular string instances to match whatever updates were made to the source collection.
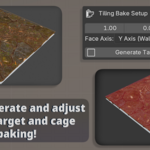
Plane Scale
Resizes both the target plane and the cage plane synchronously.
Target Offset
Offsets the distance of the target plane.
Cage Distance
Offsets the distance of the cage from the target plane.
Generate Target & Cage
Generates the cage based on the above parameters.
Recommended to remove the setup if it already exists– currently it doesn’t properly adjust pre-existing setups when changing axes.
Face Axis
Choose the axis (X, Y, or Z) on which to spawn the baking setup.
Forgot to include the label! It is right above Generate Target & Cage.
-
$20
This version includes 10 custom-made 4k high quality noise textures: cl2_iukuk, cracked_concrete, fractal_patch, gross_bark, lumpy_dirt, moisture_noise, porous_clouds_subtraction, roughly_scratched, rusted, and scraped_damage_big
-
$18
This version does not come included with the 10 custom-made 4k high quality noise textures. Therefore it will be easier to download and cheaper!
Have questions about this product?
Login to message
| Published | 5 months ago |
| Blender Version | 5.1 |
| Extension Type | N/A |
| Render Engine Used | Blender-Internal, Cycles, Eevee |
| License | GPL |
Discover more products like this
plugin layers 3D modular kit 3denvironment tiling Sculpt seamless