 EFX
EFX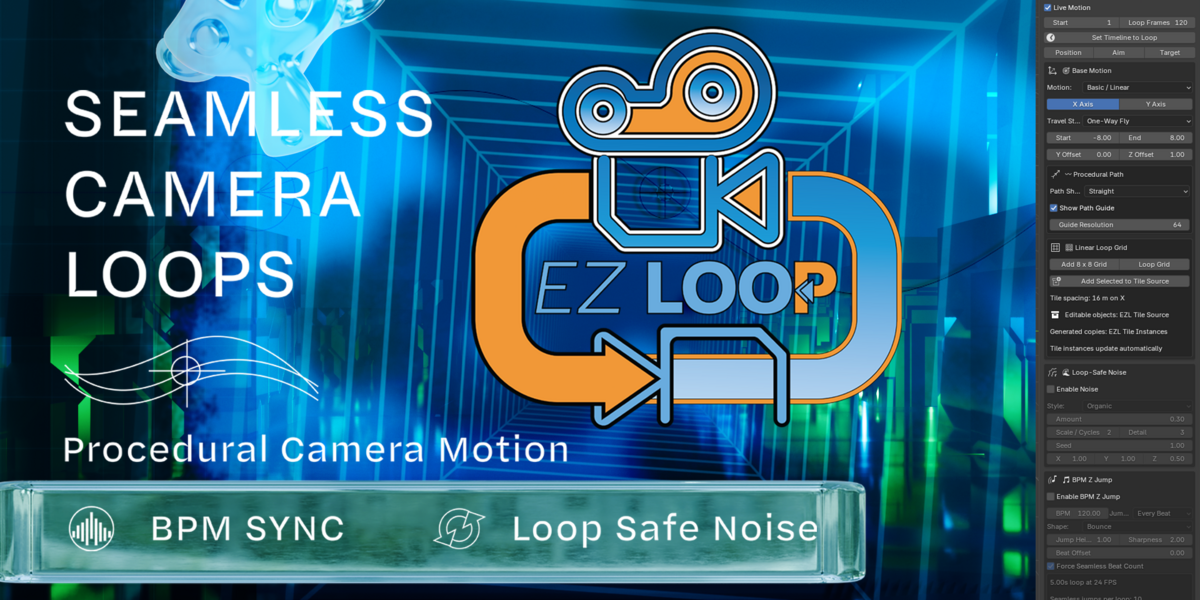
EZ Loop Camera Documentation
EZ Loop Camera is a Blender 5.2 LTS add-on for building smooth, loop-safe procedural camera animation without manually creating every keyframe. It includes linear fly-throughs, orbit and figure-eight motion, seamless noise, BPM-synchronized movement, focal-length animation, repeating environment tools, and optional keyframe baking.
Motion Blur should be disabled and only added in the compositor , I added a button that will add the vector blur setup automatically.
(EZ Loop is designed around a post-production motion-blur workflow)
Support
When requesting support, please include:
Render engine
A description of the motion mode and settings used
A screenshot of the EZ Loop panel
The exact error message or crash-log section when applicable
Use the Message Support button on the Superhive product page for product support.
Version
EZ Loop Camera 0.4.0
Developed by EFX with AI-assisted coding tools.
Licensed under the GNU General Public License v3.0 or later.
Requirements
Blender 5.2 LTS
A scene with an active camera, or permission for EZ Loop Camera to create one
Blender 5.2 LTS
A scene with an active camera, or permission for EZ Loop Camera to create one
The add-on is located in:
3D Viewport → Sidebar (N) → EZ Loop
Installation
Download the EZ Loop Camera ZIP file.
Leave the file compressed.
Open Blender.
Go to Edit → Preferences → Get Extensions.
Open the menu in the upper-right corner and choose Install from Disk.
Select the downloaded ZIP file.
Enable EZ Loop Camera if it is not enabled automatically.
Return to the 3D Viewport, press N, and open the EZ Loop tab.
Download the EZ Loop Camera ZIP file.
Leave the file compressed.
Open Blender.
Go to Edit → Preferences → Get Extensions.
Open the menu in the upper-right corner and choose Install from Disk.
Select the downloaded ZIP file.
Enable EZ Loop Camera if it is not enabled automatically.
Return to the 3D Viewport, press N, and open the EZ Loop tab.
Do not extract the ZIP before installation.
Quick Start
Open 3D Viewport → Sidebar → EZ Loop.
Click Create Loop Camera Rig.
Set Start and Loop Frames.
Choose a motion type.
Adjust the motion controls while Live Motion is enabled.
Play or scrub the timeline to preview the loop.
When the motion is final, use Bake to Keyframes before final rendering.
Open 3D Viewport → Sidebar → EZ Loop.
Click Create Loop Camera Rig.
Set Start and Loop Frames.
Choose a motion type.
Adjust the motion controls while Live Motion is enabled.
Play or scrub the timeline to preview the loop.
When the motion is final, use Bake to Keyframes before final rendering.
EZ Loop Camera creates separate controls for camera position and camera aim. Use the Position, Aim, and Target buttons near the top of the panel to select the corresponding control object.
Loop Length and Timeline
Start
The first frame of the loop.
Loop Frames
The total number of frames included in the exported loop.
For example, a 120-frame loop starting at frame 1 should be rendered from:
Frame 1 through Frame 120
When baked, EZ Loop Camera may place a matching closing keyframe on frame 121. This frame closes the motion mathematically but should not be included in the exported animation.
Set Timeline to Loop
Updates Blender's timeline start and end frames to match the EZ Loop settings.
Motion Types
Basic / Linear
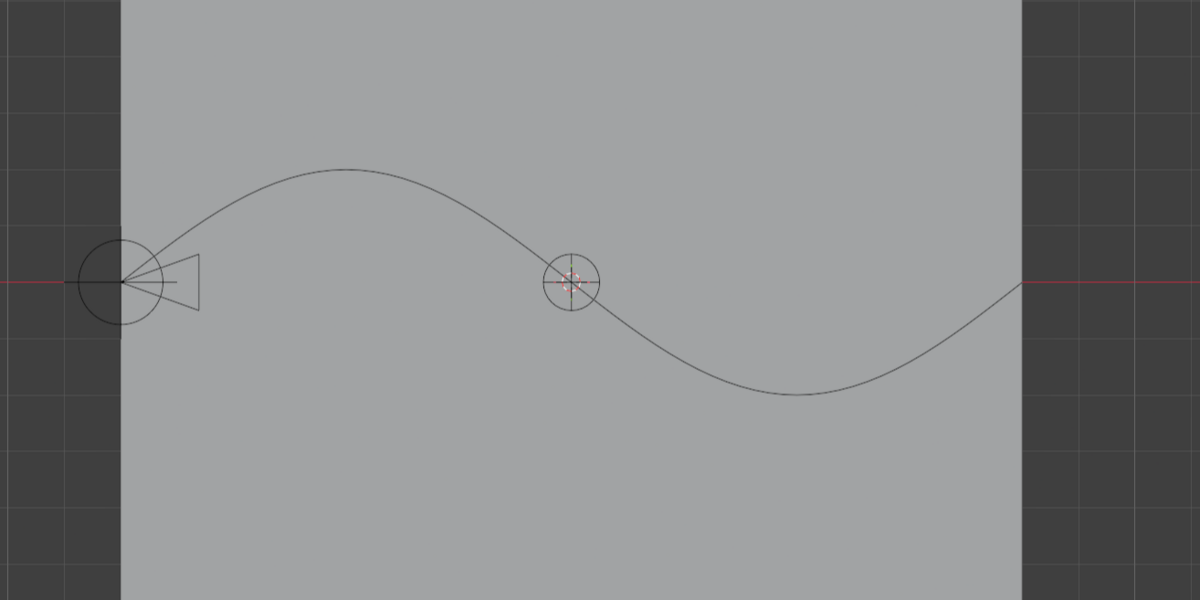
Creates a straight, bent, or snaking fly-through along the X or Y axis.
Controls include:
Travel Axis: X or Y
Travel Style: One-Way Fly or Smooth Return
Start / End: Beginning and ending positions
Side Position: Offset perpendicular to the travel direction
Z Offset: Camera height
Path Shape: Straight, Single Bend, or Snake
One-Way Fly
Moves continuously from Start to End. This is intended for scenes that repeat along the direction of travel, such as tunnels, roads, hallways, or tiled environments.
Smooth Return
Moves from Start to End and returns to the starting position within the same loop.
Path Shapes
Straight: Direct travel from Start to End
Single Bend: Adds a smooth adjustable midpoint bend
Snake: Adds repeating horizontal and optional vertical wave motion
Straight: Direct travel from Start to End
Single Bend: Adds a smooth adjustable midpoint bend
Snake: Adds repeating horizontal and optional vertical wave motion
Enable Show Path Guide to display a non-rendering viewport guide.
Orbit
Creates elliptical motion around the selected center or target.
Sway
Creates layered motion across the X, Y, and Z axes.
Figure 8
Creates a continuous figure-eight camera path.
Circular
Creates a simple circular path with adjustable radius and height. Circular mode follows the target by default.
Curve
Moves the camera along a selected Blender curve. Select the curve in the Curve field before previewing the motion.
Ease Through Loop
Smooths the timing through applicable closed-loop motion modes. Leave this disabled when constant-speed movement is more important.
Aim and Orientation
EZ Loop Camera separates camera movement from camera orientation.
Position Control
Moves the complete camera rig along the selected procedural path.
Aim Control
Controls the camera's viewing direction and roll independently from its position.
Follow Target
Aims the camera toward the selected target object.
Aim Along Path / Aim Along Motion
Points the camera in the direction it is traveling instead of aiming at a target.
Reset Linear Aim
Restores the default forward-facing aim for Basic / Linear mode.
Roll
Adds seamless camera roll.
Roll: Maximum roll angle
Roll Cycles: Number of roll cycles during the loop
Loop-Safe Noise
Enable Noise to add procedural position movement without introducing a start/end seam.
Available styles:
Organic: Balanced layered motion
Smooth Random: Random-looking wrapped movement
Slow Drift: Large, calm movement
Handheld: Faster, detailed camera movement
Wobble: Rhythmic two-frequency movement
Controls:
Amount: Overall movement strength
Scale / Cycles: Number of noise cycles during the loop
Detail: Complexity of the movement
Seed: Generates a different motion variation
X / Y / Z Influence: Controls how strongly noise affects each axis
For subtle camera movement, begin with a low Amount such as 0.02 to 0.10.
BPM Z Jump
The BPM Z Jump adds loop-safe vertical camera motion synchronized to music.
Controls include:
BPM: Tempo of the music
Jump Rate: Every 2 beats, every beat, 2x per beat, or 4x per beat
Shape: Bounce, Kick, Pulse, or Smooth Sine
Jump Height: Vertical movement amount
Sharpness: Controls how sudden or rounded the jump feels
Beat Offset: Moves the beat timing through the loop
Force Seamless Beat Count: Rounds the result to a whole number of jumps
Fit Loop to BPM
Set the number of bars and beats per bar, then click Fit Loop to BPM to match the loop duration to the selected tempo and scene frame rate.
Focal Length Loop
Enable Focal Length Loop to animate the camera lens continuously.
Controls include:
Wide: Minimum focal length
Tele: Maximum focal length
Zoom Shape: Smooth, Zoom Punch, or Zoom Pulse
Zoom Sharpness: Controls the shape of punch and pulse motion
Zoom Offset: Moves the zoom timing through the loop
Zoom Cycles: Number of zoom cycles
Sync to BPM: Synchronizes focal motion with the shared BPM controls
Use moderate lens ranges for comfortable movement. Extremely wide focal lengths can make camera motion, roll, and blur appear much stronger.
Linear Loop Grid
The Linear Loop Grid tools help build repeating environments for Basic / Linear → One-Way Fly motion.
Add 8 × 8 Grid
Creates an editable grid plane sized to the current Start-to-End travel distance.
Add Selected to Tile Source
Moves selected scene objects into the editable EZL Tile Source collection. These objects become part of every generated loop tile.
Loop Grid
Creates another collection instance exactly one loop distance farther along the selected travel axis.
Repeat Loop Grid as needed to extend the environment.
EZ Loop Camera creates these collections:
EZL Camera Rig: Camera and control objects
EZL Tile Source: Editable source tile and repeatable objects
EZL Tile Instances: Generated collection instances
Because the repeated sections are collection instances, edits made inside EZL Tile Source are reflected across the generated tiles.
Avoid placing unnecessary lights, global volume objects, cameras, or simulation objects in the Tile Source collection unless they are intentionally meant to repeat.
Baking to Keyframes
Live Motion is designed for fast setup and previewing. For final rendering, baking is recommended.
Bake to Keyframes
This tool:
Evaluates the procedural camera motion across the loop
Creates editable keyframes for position and aim
Bakes focal-length animation when enabled
Adds a closing keyframe after the final exported frame
Disables Live Motion when finished
Baking replaces existing animation data on the EZ Loop rig controls. Save a backup before baking when you may need to return to an earlier version.
After baking, the camera animation can be edited using Blender's Graph Editor or Dope Sheet.
Final Rendering
Recommended workflow:
Save a backup copy of the
.blendfile.Confirm the loop looks correct in the viewport.
Click Bake to Keyframes.
Confirm Live Motion is disabled.
Set the output frame range to the intended loop only.
Render to a PNG or OpenEXR image sequence.
Assemble and encode the final video in Blender, DaVinci Resolve, Premiere Pro, or another editor.
Rendering to an image sequence allows a render to be resumed from the last completed frame if Blender or the computer closes unexpectedly.
Vector Blur Setup
Create Vector Blur Setup
Enables the Vector and Depth passes and creates an EZ Loop Vector Blur node in Blender's compositor. Native EEVEE motion blur is disabled when this setup is created.
Controls:
Samples: Blur quality
Blur: Blur amount in frames
Maximum Speed: Clamps extreme motion vectors
Curved Motion: Uses curved interpolation
Suggested starting settings for a camera move:
Samples: 4 to 8
Blur: 0.15 to 0.25
Maximum Speed: 32 to 64
Curved Motion: Off for faster tests
Vector Blur is optional. Full-frame camera movement can make it slower than expected, and volumetric fog does not always blur like physically sampled motion blur. It may be preferable to render without blur and add motion blur during post-production.
Prepare Stable Render
This convenience tool:
Bakes the EZ Loop camera motion
Disables Live Motion
Disables native motion blur
Enables Lock Interface when available
Enables the required render passes
Creates the Vector Blur compositor setup
This button changes compositor and render settings. Save a backup before using it in a scene with an existing custom compositor.
Troubleshooting
The camera does not move
Confirm Live Motion is enabled.
Confirm an EZ Loop rig has been created.
Confirm the timeline is inside the selected Start and Loop Frames range.
Use the Position, Aim, and Target selection buttons to confirm the rig objects still exist.
Confirm Live Motion is enabled.
Confirm an EZ Loop rig has been created.
Confirm the timeline is inside the selected Start and Loop Frames range.
Use the Position, Aim, and Target selection buttons to confirm the rig objects still exist.
The loop pauses or repeats one frame
Render only the intended loop range. For a loop from frame 1 to frame 120, do not include the closing keyframe on frame 121.
The camera points in the wrong direction in Basic / Linear mode
Click Reset Linear Aim, then enable either Aim Along Path or Follow Target as needed.
The first frame has an extreme native motion-blur streak
When using EEVEE native motion blur with a one-way loop, set Motion Blur Position to Start on Frame, or disable native blur and use Vector Blur or post-production blur.
Vector Blur is slow
Reduce Samples to 4 or lower for testing.
Disable Curved Motion.
Lower Maximum Speed.
Temporarily disable Compositing to compare render time.
Render without blur and add it in post-production.
Reduce Samples to 4 or lower for testing.
Disable Curved Motion.
Lower Maximum Speed.
Temporarily disable Compositing to compare render time.
Render without blur and add it in post-production.
Rendering is slow with fog or volume
A large cube using Principled Volume can fill the complete camera frustum and remain expensive even without ray tracing. Reduce the volume range, volume steps, object size, or density when possible.
Blender crashes during or after a render
Bake the EZ Loop motion.
Confirm Live Motion is disabled.
Render a short test range to an image sequence.
Disable third-party add-ons that continuously use GPU previews, offscreen rendering, atmosphere previews, or background timers.
Restart Blender and test again.
Review Blender's crash log. If the Python backtrace names another add-on, contact that add-on's developer with the crash report.
Bake the EZ Loop motion.
Confirm Live Motion is disabled.
Render a short test range to an image sequence.
Disable third-party add-ons that continuously use GPU previews, offscreen rendering, atmosphere previews, or background timers.
Restart Blender and test again.
Review Blender's crash log. If the Python backtrace names another add-on, contact that add-on's developer with the crash report.
A crash involving another add-on's GPU watcher or offscreen preview is not necessarily caused by EZ Loop Camera, even when the crash occurs after preparing or rendering EZ Loop motion.
The grid does not repeat selected objects
Select the objects and click Add Selected to Tile Source. Confirm they appear inside the EZL Tile Source collection in the Outliner.
Have questions about this product?
Login to message
| Blender Extension Compatible | Yes |
| Dev Fund Contributor | |
| Published | about 2 months ago |
| Blender Version | 5.2 |
| Extension Type | Add-on |
| Render Engine Used | Cycles, Eevee |
| License | GPL |
Discover more products like this
procedural setup vjloop grid generator bpm-sync animation loop Auto Loop animation tools looping animation motion graphics blender camera rig radial animation vj visuals