 peterz


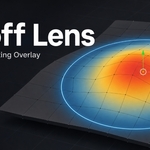
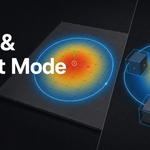
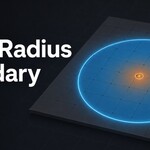
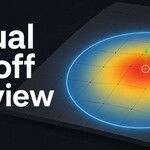
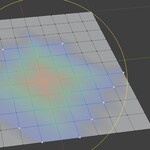
Falloff Lens is a Blender 4.2+ add-on that provides a visual preview of proportional editing influence before geometry or objects are transformed.
It displays a viewport overlay showing which vertices, edges, faces, or object origins are affected by Blender’s proportional editing radius. The overlay uses a cold-to-hot gradient to represent influence strength and can also draw a clear boundary around the active falloff radius.
Falloff Lens is non-destructive. It does not modify mesh data or object data; it only draws a visual guide in the 3D Viewport.
Requirements
- Blender 4.2 or newer
- Mesh Edit Mode or Object Mode
- Proportional editing enabled for falloff preview behavior
Installation
- Open Blender.
- Go to
Edit > Preferences > Add-ons. - Click
Install.... - Select the Falloff Lens ZIP file.
- Enable Falloff Lens in the add-on list.
- Open the 3D Viewport sidebar with
N. - Go to the Falloff Lens tab.
The overlay can also be accessed from:
View > Falloff Lens Overlay
Basic Usage
Mesh Edit Mode
- Select a mesh object.
- Enter Edit Mode.
- Select one or more vertices, edges, or faces.
- Enable Blender’s proportional editing.
- Adjust the proportional editing radius and falloff type.
- Enable Falloff Lens Overlay.
Falloff Lens will display the affected mesh area using weighted viewport colors.
Object Mode
- Enter Object Mode.
- Select one or more objects.
- Enable proportional editing.
- Enable Object Mode Overlay in the Falloff Lens panel.
- The overlay will preview proportional influence across visible object origins.
When Object Bounds is enabled, affected objects can also display weighted bounding boxes.
Panel Controls
Enable Overlay
Turns the Falloff Lens viewport overlay on or off.
Auto Proportional Only
When enabled, Falloff Lens only draws the overlay while Blender proportional editing is active.
Object Mode Overlay
Enables proportional editing visualization in Object Mode.
Object Bounds
Draws weighted bounding boxes around affected objects in Object Mode.
Show Gradient
Displays the cold-to-hot color gradient that represents influence strength.
Show Face Tint
Adds a semi-transparent weighted fill over affected faces in Mesh Edit Mode.
Disable this option if you only want vertex and edge visualization.
Show Boundary
Draws a clear radius boundary around the proportional editing influence area.
Always Visible
Draws the overlay on top of hidden or occluded geometry using transparency.
Opacity
Controls the visibility strength of the main overlay.
Face Opacity
Controls the opacity of the face tint overlay.
Object Bounds Opacity
Controls the opacity of object bounding-box visualization.
Point Size
Controls the display size of overlay points.
Refresh Interval
Sets the minimum time between expensive overlay rebuilds.
This is useful for improving performance in heavy scenes.
Max Vertices
Limits overlay generation for very dense meshes.
If a mesh exceeds this limit, Falloff Lens may skip the preview to protect viewport performance.
Max Objects
Limits Object Mode overlay generation for large scenes.
Adjusting Radius
Falloff Lens includes an interactive radius adjustment tool.
Use:
View > Adjust Falloff Radius
Default shortcut:
Ctrl + Alt + R
During radius adjustment:
- Drag horizontally to change the proportional radius.
- Hold
Shiftfor finer adjustments. - Hold
Ctrlto round the radius value.
The tool modifies Blender’s proportional editing radius directly.
Projected Proportional Editing
When Blender’s projected proportional editing is enabled, Falloff Lens uses a screen-space approximation based on the active 3D View.
Because projected influence depends on the current viewport angle, the preview updates when the view changes.
Add-on Preferences
Falloff Lens stores default overlay behavior in:
Edit > Preferences > Add-ons > Falloff Lens
Use Apply Falloff Lens Defaults to copy the add-on preference defaults into the current scene.
Performance Notes
Falloff Lens automatically refreshes its overlay cache when relevant scene data changes, including:
- Proportional editing settings
- Mesh updates
- Object updates
- Dependency graph changes
- Manual refresh actions
For large scenes, use these settings to keep performance stable:
- Increase Refresh Interval
- Lower Max Vertices
- Lower Max Objects
- Disable Show Face Tint
- Disable Object Bounds when not needed
Limitations
- Falloff curves are visual approximations.
- Projected proportional editing is approximated in screen space.
- The overlay is intended for previewing influence range and relative strength, not for exact numerical measurement.
- Very large meshes or scenes may be skipped depending on performance limits.
Recommended Workflow
- Enable proportional editing.
- Turn on Falloff Lens Overlay.
- Adjust the radius until the boundary matches the intended edit area.
- Choose the desired Blender falloff type.
- Check the gradient for influence strength.
- Perform the transformation.
- Disable the overlay when it is no longer needed.
Troubleshooting
The overlay does not appear
Check that:
- Falloff Lens is enabled in Blender preferences.
- Enable Overlay is turned on.
- You are in Mesh Edit Mode or Object Mode.
- Proportional editing is enabled if Auto Proportional Only is active.
- A valid mesh or object selection exists.
The overlay feels slow
Try:
- Increasing Refresh Interval
- Reducing Max Vertices
- Reducing Max Objects
- Disabling Show Face Tint
- Disabling Object Bounds
The projected preview changes when rotating the view
This is expected. Projected proportional editing depends on screen-space distance, so the preview changes with the viewport projection.
Have questions about this product?
Login to message
| Sales | 10+ |
| Published | 3 months ago |
| Blender Version | 4.2 - 5.2 |
| Extension Type | Add-on |
| Render Engine Used | Cycles, Eevee |
| License | GPL |
Discover more products like this
falloff addon blender soft selection deformer mesh editing workflow tool proportional editing geometry editing viewport overlay proportional Visualization soft selection