Foliagelab - Cluster
 Michael G. Art


FoliageLab Cluster
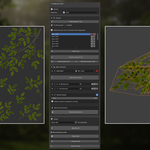
FoliageLab Cluster is a Blender add-on that assembles foliage clusters by scattering plane meshes onto anchor points placed on a base mesh. It organises meshes into Buckets, applies per-bucket parameters and deformations, then bakes the result into a clean, LOD-ready asset.
Installation
FoliageLab Cluster is distributed as a .zip archive. Do not extract the archive -- install the .zip file directly in Blender.
- Open Blender and go to Edit > Preferences > Add-ons
- Click Install...
- Navigate to the downloaded FoliageLab_Cluster.zip, select it and click Install Add-on
- Tick the checkbox next to FoliageLab Cluster to enable it
- The panel appears in the FoliageLab tab of the N-Panel (press N in the 3D Viewport)
Important: Do not unzip the archive. Installing a folder instead of a .zip will cause Blender to fail to recognise the add-on.
Overview and Workflow
- Set Source - Point the tool to the collection containing your foliage plane meshes.
- Detect Meshes - Scan the source collection to populate the actor list.
- Place Anchors - Select an actor and place anchor points on the base mesh in the viewport.
- Set Up Buckets - Organise actors into Buckets and configure rotation, scale, seed, and deformations per bucket.
- Preview and Adjust - The preview updates live. Use Manual Adjustments to tweak individual instances.
- Bake - Click Bake Branch to finalise the cluster, then Bake LODs to generate the full LOD chain.
Keyboard Shortcuts
- N - Open / close the N-Panel in the 3D Viewport.
- Click - Place a new anchor on the surface of the base mesh.
- Click + Drag - Place an anchor and set its growth angle simultaneously.
- Click on disc - Select an existing anchor.
- Scroll on disc - Change the anchor index (1-4) to control which Bucket spawns on it.
- Delete - In Manual Adjustments mode: remove the selected instance.
- Esc - Finish anchor placement and exit the modal.
Reset Settings resets all FoliageLab Cluster settings to their default values. Does not delete already baked objects from the scene.
Display
Controls the viewport material of the preview instances. These settings do not affect baked output.
- Display mode - Switch the viewport material: PBR, Albedo, Opacity, Normal, Roughness, or AO.
- Apply Opacity - Apply the opacity mask in the viewport preview.
- Invert Glossiness - Invert the roughness channel in the viewport. Use when source textures store glossiness instead of roughness.
Source
Collection - Select the Blender collection containing your foliage plane meshes. All objects in this collection become available as actors.
Meshes -- Detecting and Placing Anchors
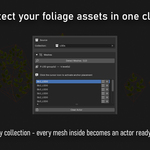
The Meshes section lists all detected actors from the source collection and lets you place anchor points on the base mesh for each one.
- Detect Meshes - Scan the source collection and populate the actor list.
- Cursor icon (per row) - Activate anchor placement mode for that actor. Click in the viewport to place anchors on the base mesh surface.
- Remove (per row) - Remove that actor from the list.
- Clear Actor - Remove all actors from the list at once.
Anchor Points
Anchor points define where foliage instances are placed on the base mesh. Each anchor has an index (1-4) that controls which Bucket spawns on it.
- Add Anchor Points - Enter anchor placement mode. Click on the base mesh surface to place anchors.
- Confirm Anchors - Exit anchor placement mode and confirm all placed anchors.
- Clear Anchors - Remove anchors for the currently active actor.
- Clear All Anchors - Remove all anchors for all actors at once.
While in placement mode, scroll the mouse wheel on an anchor disc to change its index (1-4). The index determines which Bucket's actors spawn at that anchor.
Mesh Hierarchy and Buckets
Base Mesh
The Base Mesh is the main object already present in the scene -- typically a trunk or primary branch. All anchor points are placed on its surface.
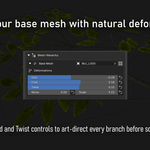
The following deformation sliders affect the Base Mesh itself. Each has a reset button.
- Curl - Bends the Base Mesh along the Z axis: tip curves up or down.
- Bend - Bends the Base Mesh edges left and right along the X axis.
- Twist - Twists the Base Mesh around its Y axis from base to tip.
- Noise - Amplitude of random deformation noise applied to the Base Mesh.
- Noise Scale - Frequency of the deformation noise. Higher values create finer detail.
Buckets
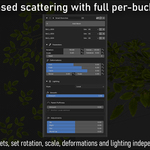
Buckets define groups of actors that share the same placement rules. Each bucket maps to one or more anchor indices.
- Add Anchor Actors - Add a new empty Bucket to the hierarchy.
- Bucket name - Click the name field to rename the bucket.
- Move up / down - Reorder buckets in the list.
- Duplicate - Duplicate this bucket with all its settings and actors.
- Add Mesh - Assign an actor from the list to this bucket.
- Idx (per actor) - Anchor index this actor spawns on (1-4). "All" means it spawns on any anchor regardless of index.
Bucket Parameters
- Rotation - Central rotation value applied to instances in this bucket, in degrees.
- Rotation Variance - Spread around the center rotation. Higher values create more angular variation between instances.
- Scale - Central scale value applied to instances in this bucket.
- Scale Variance - Spread around the center scale. Higher values create more size variation between instances.
- Parent - Set the parent bucket. Instances of this bucket are scattered on the surface of the parent bucket's instances. Only available from the second bucket onwards.
- Seed - Random seed for this bucket's placement. Change to get a different distribution.
Bucket Deformations
- Curl - Bends each instance along the Z axis, as a ratio of the actor height.
- Fold - Folds the mesh in a V-shape around its centre X axis. Pure rotation, no stretching.
- Twist - Twists the mesh around its Y axis from base to tip.
- Noise - Amplitude of random deformation noise, as a ratio of the actor height.
- Noise Scale - Frequency of the deformation noise. Higher values create finer detail.
Bucket Lighting
Controls vertex normal adjustments for instances in this bucket. Affects shading without modifying geometry.
- Style: None - Normals left unchanged.
- Style: Global - Blend normals toward world-up by size category (Tiny / Small / Medium / Large / Huge). Positive values push normals upward for softer, more uniform shading.
- Style: Local - Smooth (blend toward face normal) and Puffiness (blend toward local centroid for a rounded shading effect), plus fine-grained directional controls: Up, Right, Out, World Up.
Normal Overlay
Displays vertex normals of the selected bucket's preview instances in the viewport. Select a bucket using its select button to display its normals. Useful for checking lighting behaviour before baking.
Manual Adjustments
Manual Adjustments mode locks the preview and lets you move, rotate, scale, or delete individual instances directly in the viewport.
- Manual Adjustments - Enter manual mode. Instances become selectable in the viewport.
- Confirm Adjustments - Save all manual changes and exit manual mode.
- Reset Manual Adjustments - Discard all manual overrides and restore the original preview state.
Select an instance in the viewport while in manual mode to access per-instance options.
- Actor Override - Replace the mesh used by this specific instance with another actor from the same bucket.
- Override / Disable - Enable or disable per-instance deformation overrides for the selected instance.
- Curl / Fold / Twist / Noise / Noise Scale - Per-instance deformation values that override the bucket settings when Override is enabled.
Press Delete in the viewport while an instance is selected to remove it from the cluster.
Output and Baking
- Cluster Name - Base name for all baked objects.
- Bake Branch - Finalise the cluster and create the baked LOD0 mesh. Available when at least one actor and one anchor are configured and a preview exists.
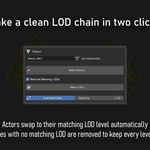
- Remove Missing LODs - When baking LODs, if an actor has no mesh for a given LOD level, remove those instances rather than leaving gaps.
- Bake LODs - Generate the full LOD chain from the baked cluster.
- Explode View - Spread baked LOD objects along the X axis to compare them side by side. Does not affect actual scene positions.
- Spacing - Distance between each LOD level on the X axis in Explode View.
Have questions about this product?
Login to message
| Blender Extension Compatible | Yes |
| Published | 6 months ago |
| Blender Version | 4.2 - 4.5 |
| Extension Type | Add-on |
| Render Engine Used | Cycles, Eevee |
| License | GPL |
Discover more products like this
Billboard scattering real-time Vertex normals deformation Branch foliage LOD game ready procedural Cluster vegetation