 FSX3D
FSX3D


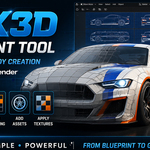
FSX3D Blueprint Tool
Quickly create a low-poly 3D vehicle base mesh from a blueprint image, directly inside Blender.
FSX3D Blueprint Tool is a Blender add-on designed to speed up the first stage of vehicle creation: getting a clean, consistent, and usable base mesh from a multi-view template.
The goal is simple: help you move faster from your blueprint image to a 3D base model, so you can spend more time on refinement, optimization, detailing, and final asset production.
What is FSX3D Blueprint Tool for?
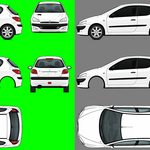
FSX3D Blueprint Tool lets you prepare a vehicle from one image containing several views: left side, right side, front, rear, and top.
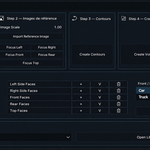
The add-on guides you step by step inside Blender to:
- create the vehicle work frames
- import your blueprint image prepared with the included template
- automatically generate the main outlines
- create a usable base volume
- apply a final texture
- run automatic UV mapping
- manually correct face groups when needed
- quickly add extra assets from a small built-in library.
A simple 5-step workflow
1. Vehicle setup
Define the general dimensions of the vehicle: length, height, and width.
The add-on then creates the reference frames used to organize your workflow inside Blender.
2. Blueprint image import
Prepare your image with the included template, then import it in one step.
The same image is automatically used for the different views required by the workflow.
3. Outline creation
FSX3D Blueprint Tool extracts the useful outlines from your reference image.
This helps you quickly prepare the visual base of the vehicle without having to trace everything manually.
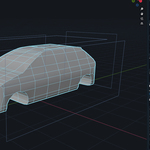
4. Volume creation
Once the outlines are created, the add-on automatically generates a first 3D base for the vehicle.
The result is a starting point for your modeling, cleanup, and customization work.
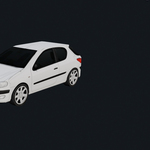
5. Material + UV Mapping
Load your final texture, check the face groups if needed, then run automatic UV mapping.
You can preview detected groups, manually adjust a selection, and lock your corrections before launching the mapping again.
Included template
The add-on is designed to work with an included work template.
This template lets you place each vehicle view in a dedicated area:
- left side
- right side
- top
- front
- rear
- bottom / extra texture area.
For best results, use a clean image with a uniform green background and well-centered silhouettes in each area.
Ideal for
- quickly creating low-poly vehicles;
- preparing a body base before advanced modeling;
- producing assets for games or real-time projects;
- saving time on the early modeling stages;
- testing multiple vehicle silhouettes quickly;
- creating a 3D base from a clean blueprint.
Built-in asset library
FSX3D Blueprint Tool includes a small asset library, available directly from the add-on panel.
In this version, you can add car or truck wheels to quickly complete your vehicle base.
Assets can then be moved, adjusted, modified, or replaced depending on your needs.
Key features
- Clear step-by-step workflow;
- direct integration in Blender’s sidebar;
- single reference image import for all views;
- Focus buttons to quickly navigate between views;
- fast low-poly 3D base generation;
- automatic UV mapping using the included template;
- optional manual corrections for face groups;
- car / truck UV profiles;
- built-in asset library;
- ideal for speeding up simple vehicle creation.
Compatibility
Blender 4.5.x
The add-on appears in Blender’s 3D View sidebar:
View3D > Sidebar > FSX3D Blueprint Tool
Important
FSX3D Blueprint Tool is not a one-click final vehicle generator.
It is designed to quickly create a clean and usable low-poly 3D base.
The quality of the result mainly depends on the quality of the prepared blueprint image: well-aligned views, clean background, readable silhouettes, and correct placement inside the template.
Once the base is created, you can continue working in Blender: adjustments, details, optimization, accessories, materials, and export according to your own pipeline.
In short
FSX3D Blueprint Tool saves time when creating 3D vehicle base meshes.
Prepare your image, import it, follow the steps, generate your volume, apply your texture, and quickly get a low-poly base ready to be improved inside Blender.