 FSX3D
FSX3D


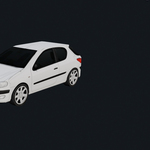
FSX3D Blueprint Tool — Quick Documentation
Overview
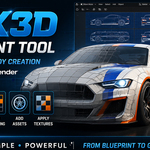
FSX3D Blueprint Tool is a Blender add-on designed to quickly create a low-poly 3D vehicle base from a prepared blueprint image.
It follows a simple workflow: vehicle setup, image import, contour creation, volume generation, texture assignment, automatic UV mapping, and asset placement.
Compatibility
Blender 4.5.x recommended
The add-on is available in Blender from the 3D View: Sidebar / N key > FSX3D Blueprint Tool
Preparing the Blueprint Image
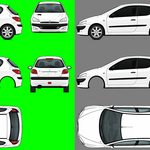
Use the included template to place the vehicle views in the dedicated areas: left side, right side, top, front, rear, and bottom / extra area.
For best results, use a clean image with a uniform green background, centered silhouettes, and consistent views.
Main Workflow
Step 1 — Vehicle Setup
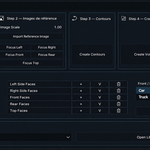
Set the general vehicle dimensions, then click Create Vehicle Setup.
Step 2 — Reference Images
Click Import Reference Image, then use the Focus buttons to quickly check the left, right, front, rear, and top views.
Step 3 — Contours
Click Create Contours. The add-on automatically prepares the main vehicle contours.
Step 4 — Create Volume
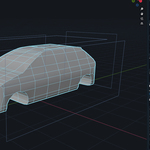
Click Create Volume. The add-on generates the low-poly 3D vehicle base.
Step 5 — Material + UV Mapping
Click Choose Final Texture, then use Auto-Select All Groups. Check the face groups if needed, then click Run Automatic UV Mapping.
UV Corrections
Face groups can be previewed with the V button. The + button lets you lock a manually corrected selection before running automatic UV mapping again.
Car / Truck Profile
The Car / Truck profile helps adapt the UV mapping behavior to the selected vehicle type.
Assets
The add-on includes a small built-in asset library available from the panel. In this version, you can quickly add car or truck wheels, then freely adjust them inside Blender.
Future Updates
FSX3D Blueprint Tool is planned to be strongly improved over time with new features, workflow refinements, additional assets, and expanded content to make vehicle creation even faster and more flexible.
Summary
Prepare the image with the included template.
Create the vehicle setup.
Import the reference image.
Generate the contours.
Create the volume.
Choose the final texture.
Run automatic UV mapping.
Add and adjust assets if needed.
Have questions about this product?
Login to message
| Blender Extension Compatible | Yes |
| Published | 5 months ago |
| Blender Version | 4.5 |
| Extension Type | Add-on |
| Render Engine Used | Blender-Internal |
| License | GPL |