 Kapilari


Documentation
A canvas-based rig selection picker that lives inside Blender itself, one process, one event loop. No foreign application window stealing your focus: every Blender shortcut (Space to play, arrow keys to move through frames, I to insert a keyframe, Ctrl+Z to undo) stays active while your cursor is over the picker.
Installation
gampil_picker.zip file onto the Blender window, or install it through Get Extensions / the Superhive repository.Both methods use the same zip file, it ships in dual format (an Extension manifest alongside the legacy bl_info), so whichever path you use, you are installing the same code.
Quick Start
Generate From Rig, Works With Any Rig
This is Gampil Picker's signature feature: automatically building a complete set of picker buttons from whatever rig you are working with, any rig type, whether that's a popular auto-rigging system or a fully custom rig you built yourself.
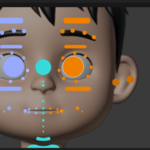
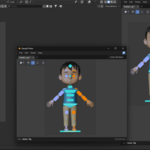
Select your control bones in Pose Mode, right-click the canvas, and choose Generate From Selected Bones. Every bone gets one button, laid out to match the rig from an orthographic viewing angle, with each control widget's shape converted into an editable base shape.
*tongue* or c_eye.?. The default patterns already cover common Auto-Rig Pro and Rigify naming conventions.Working With The Picker
- Click a button to select its bone, hold Shift to add to or toggle the selection.
- Drag a button to move it anytime. If it is part of a Ctrl selection, the entire group moves together.
- Drag on empty canvas to box-select bones. Ctrl-click or Ctrl-drag on the canvas selects buttons for cleanup, aligning, distributing, resizing, or deleting them.
- Right-click brings up a context menu that differs depending on whether you clicked a button or empty canvas space.
- Press F for Frame View, centering the view on the selected buttons, or all buttons if nothing is selected.
.L / .R or _L / _R are adjusted automatically to the opposite side.N-Panel, Button List and Layers
The Button Options tab in the N-panel lists every button on the active tab, ordered from frontmost on canvas to backmost, much like a layer panel in typical design software. Search for a button by its name or its bone's name, and use the arrow column to control draw order.
Scale Selection lets a group of selected buttons be grown or shrunk together around their combined center, keeping the layout's proportions intact. Especially useful when combining the results of multiple Generate From Rig passes, such as body and face generated separately.
The Layers tab provides visibility grouping for buttons, with the same reorder columns for tidying up the layer list without affecting any button's position on the canvas.
Command Buttons, Running Python
Buttons in Command mode can run Python code when clicked. Right-click that button and choose Edit Script to open a dedicated editor window, where your code is saved automatically as you type, no need to manually save it.
Saving and Loading Projects
Every tab is automatically saved inside the .blend file. To share across files or between artists, use the .cpkr format, where one file represents one tab. Save Project saves the currently active tab to its own file, while Open Project opens that file as a new tab without overwriting any existing ones.
Cross-Platform Support
All of the picker's core functionality, the canvas, buttons, bezier shape editing, tabs, bone selection, Generate From Rig, and the .cpkr format, uses the exact same Blender API on Windows, Linux and macOS, so it behaves identically across all three. The differences below involve features that simply have no official API in Blender at all.
 Included
Includes 12 months of
- Support from Kapilari
- Product updates
Extend this product’s Support Period +12 months: 100% of product price
Have questions before purchasing?
Login to message
| Blender Extension Compatible | Yes |
| Published | about 2 months ago |
| Blender Version | 4.0 - 5.2 |
| Extension Type | Add-on |
| Render Engine Used | Cycles, Eevee |
| License | GPL |
Discover more products like this
bone selection character rig rigging rig picker blender addon Workflow animation custom-rig animation tools picker character animation retargeting