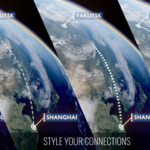
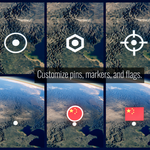
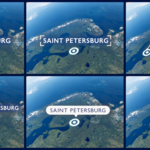
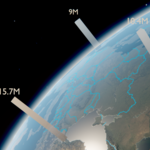
DOCUMENTATION / VERSION 1.9.1
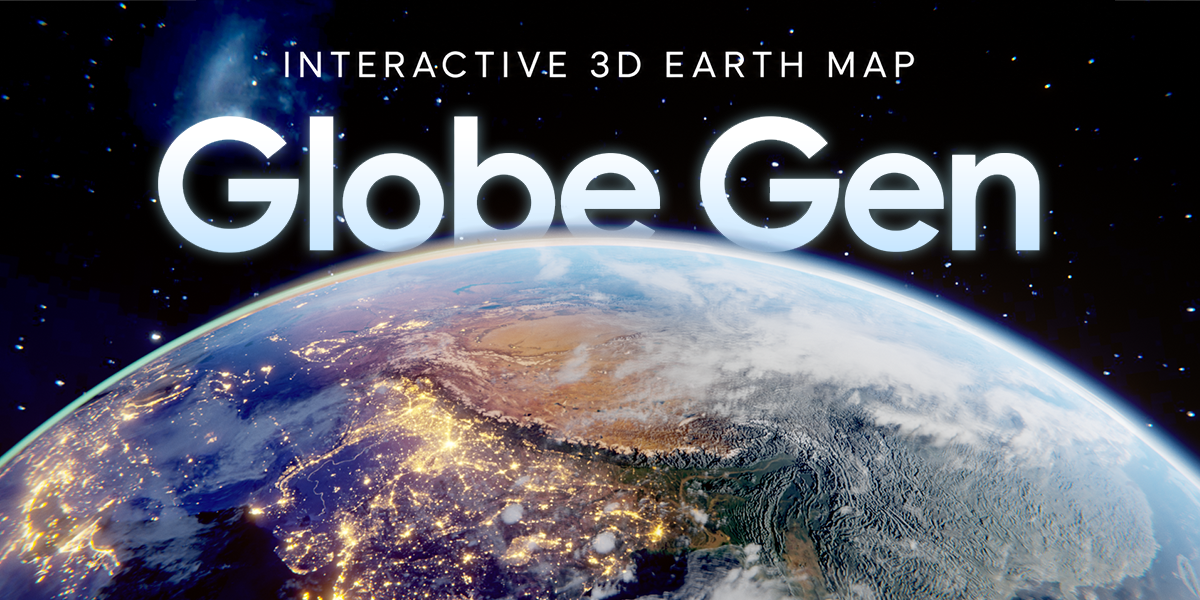
Globe Gen
Interactive 3D Earth Map - User Guide
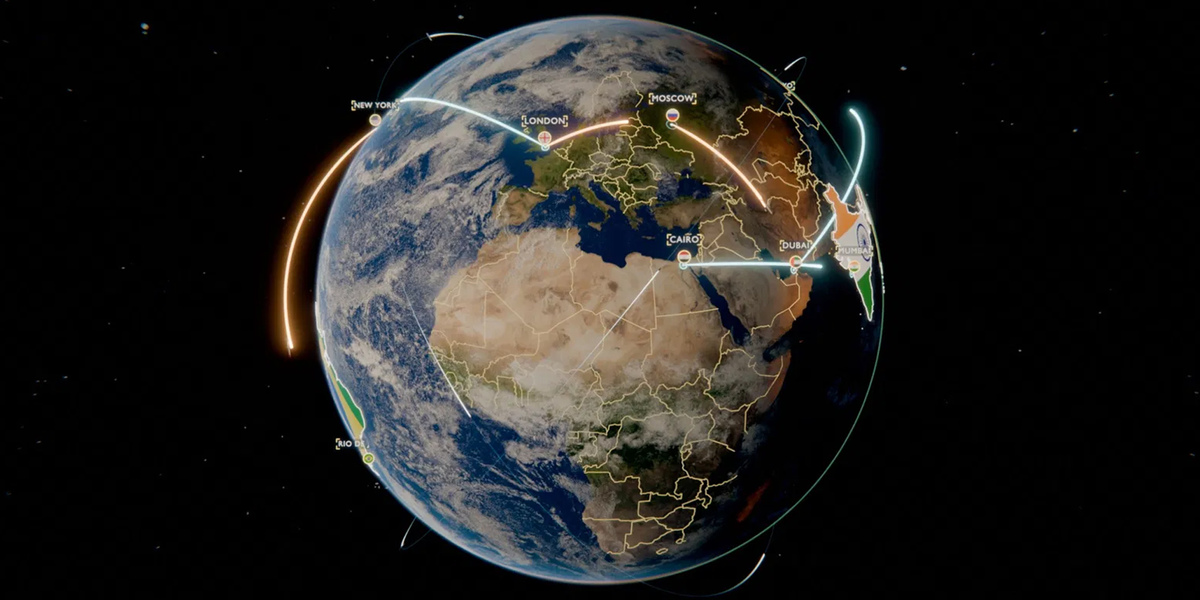
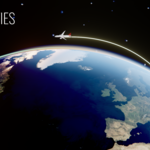
From your first globe to a finished animation. Follow the steps below to install the extension, create your scene, customize locations, routes, countries, map styles and effects, dive from space to a city with Earth Zoom, and render the final video.
01 / USER GUIDE
Install & open Globe Gen

Enable Globe Gen in Preferences - Blender 5.2 / Globe Gen 1.3.2
Globe Gen is a Blender Extension for creating interactive Earth scenes with points, routes, highlighted regions, cameras, and effects. This guide follows the controls in the 1.3.2 archive.
- Blender 4.2 or newer. The project has been tested in Blender 4.2 and 5.2.
-
Eevee and Cycles are supported. Use Cycles for volumetric clouds.
- An internet connection is required for the initial download of standard Earth textures.
- Download the Globe Gen ZIP from your purchase page. Do not extract it.
- Open Blender and choose Edit > Preferences > Add-ons.
- Open the menu at the upper right and choose Install from Disk...
- Select the purchased ZIP and complete installation. Enable the extension if it is not already enabled.
- Close Preferences. Move the pointer over the 3D Viewport and press N to open its sidebar.
- Click the GlobeGen sidebar tab. Expand the panel headings to access their controls.
The product name is Globe Gen. In this build, Blender displays the sidebar tab as GlobeGen and the extension as GlobeGen - Interactive Earth Map.
02 / USER GUIDE
Your first animated route
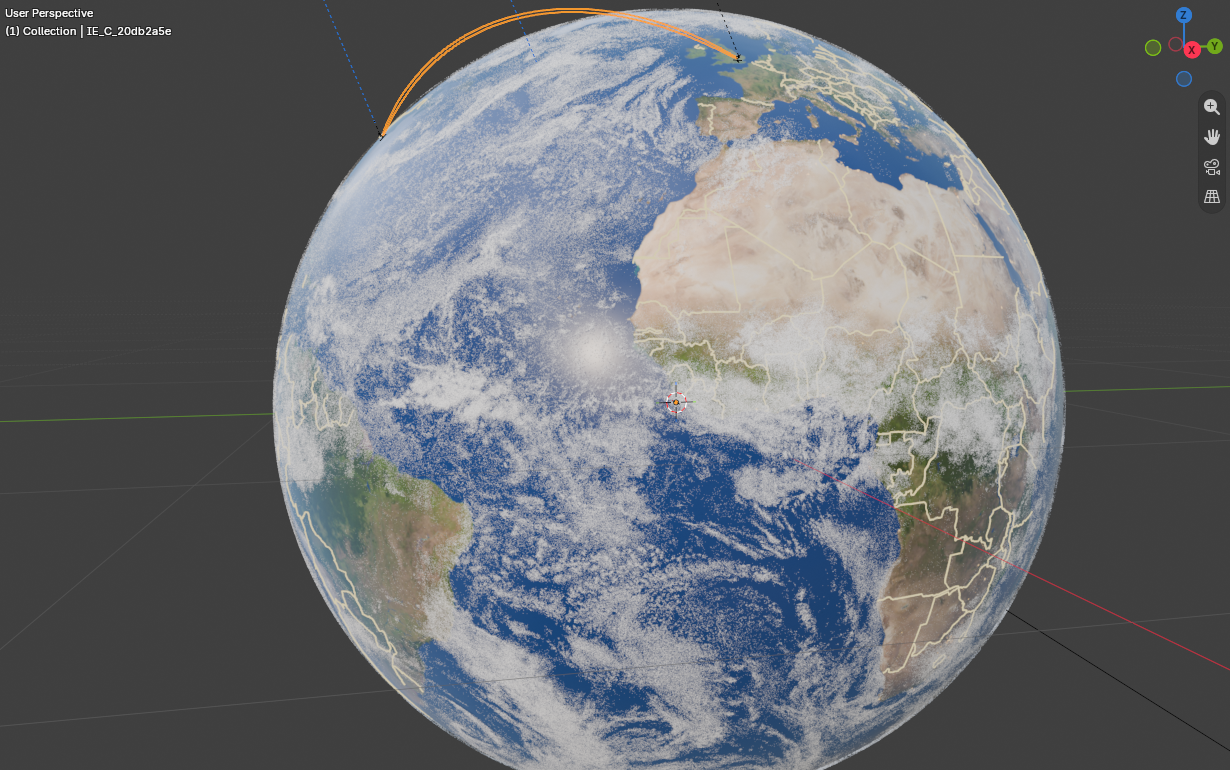
Globe and route in the 3D Viewport - Blender 5.2 / Globe Gen 1.3.2
- Open Textures, choose 8K, and click Download Textures. Wait for the download to finish.
- Open Globe and click Create Earth.
- Open Points. Choose a country and city under Add City, then click Add. Repeat for a second city.
- Open Connections. Choose two different points in the From/To selectors and click Connect.
- Select the new connection in the list. Choose Grow and set its start frame and duration.
- Open Animate All, set the Start, Gap and Duration, then click Animate All to assign coordinated timing.
- In Connections, click Select for Camera for the route you want to film.
- Open Camera Shots and click Create Follow Shot.
- Open Cinematic Look and click Apply Cinematic Look. Switch to Rendered viewport shading to assess the result.
- Press Numpad 0 to inspect the active camera. Play the timeline and save your .blend file.
Timing tip: Animate All assigns route start frames and durations and adjusts point/highlight appearance timing. Run it before creating your final camera shot, then refine individual items as needed.
03 / USER GUIDE
Textures & Ultra maps
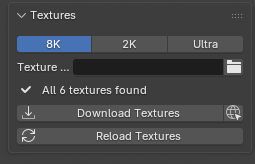
Download Textures and Reload Textures - Blender 5.2 / Globe Gen 1.3.2
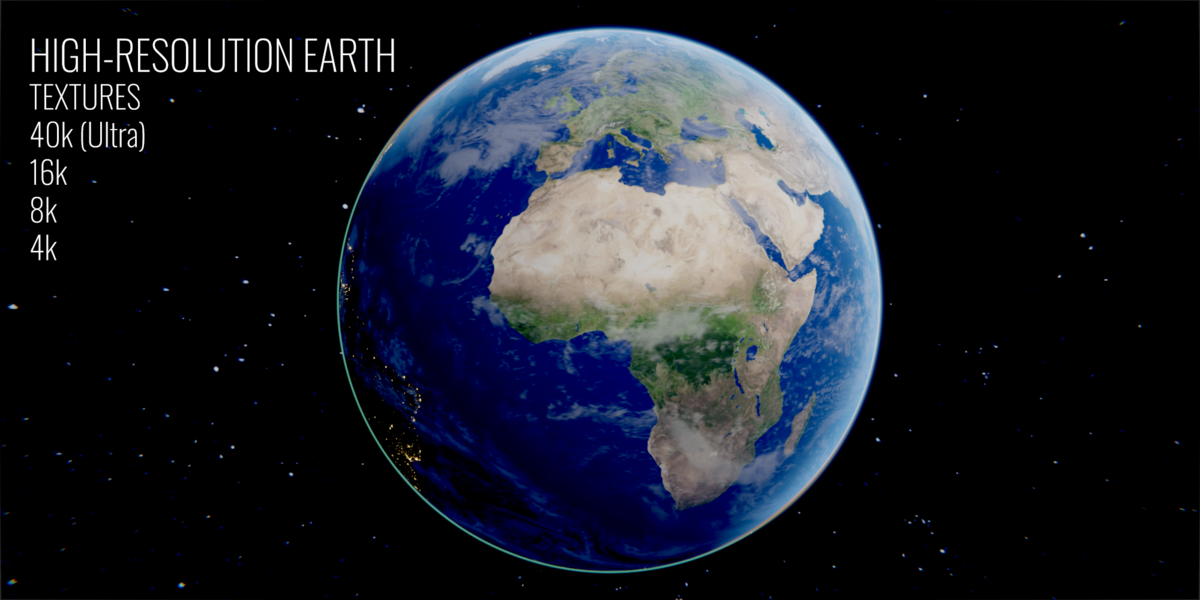
The standard resolution buttons in this build are 8K, 2K, and Ultra. Use 2K for lighter previews and 8K for standard work. Higher-resolution maps are supplied by you through Ultra; they are not additional bundled texture packs.
Download or reload standard textures
- Open Textures and set the texture folder to a writable location if necessary.
- Click Download Textures. If Blender blocks the download, enable Allow Online Access in Preferences > System.
- Wait until the missing-texture warning clears.
- If you change files or texture locations, click Reload Textures to refresh the materials.
Use your own high-resolution maps
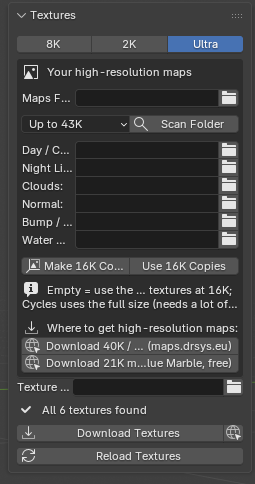
Ultra maps and 16K copies - Blender 5.2 / Globe Gen 1.3.2
- Choose Ultra in Textures.
- Set the folder containing your maps and click Scan Folder.
- Check the detected map slots. Assign individual files manually if a filename was not recognized. Empty slots fall back to the standard 8K maps.
- For lighter work or Eevee, click Make 16K Copies and enable Use 16K Copies.
- For a final Cycles render using the full maps, turn Use 16K Copies off.
Large maps can require substantial memory. This build provides 16K copies for Eevee. Optional map-provider links open external websites; maps must be obtained separately under the provider's own terms.
04 / USER GUIDE
Earth, clouds & country borders
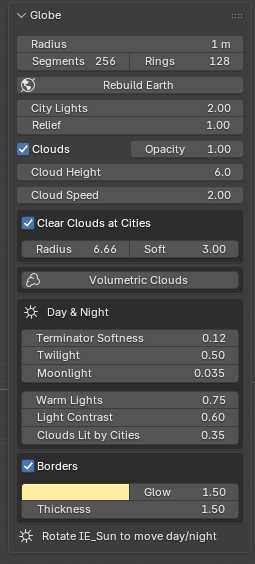
Globe, clouds, day and night, and borders - Blender 5.2 / Globe Gen 1.3.2
- Open Globe. Set Radius and mesh detail before clicking Create Earth.
- Adjust night-light strength and surface relief to suit your shot.
- Enable or disable clouds and adjust their opacity, height, and speed.
- Use Clear Clouds at Cities when clouds obscure your location markers. Adjust its radius and softness.
- Under Day & Night, refine the terminator, twilight, moonlight, city-light warmth, and cloud illumination.
- Toggle country borders on or off, then set their color, glow, and thickness.
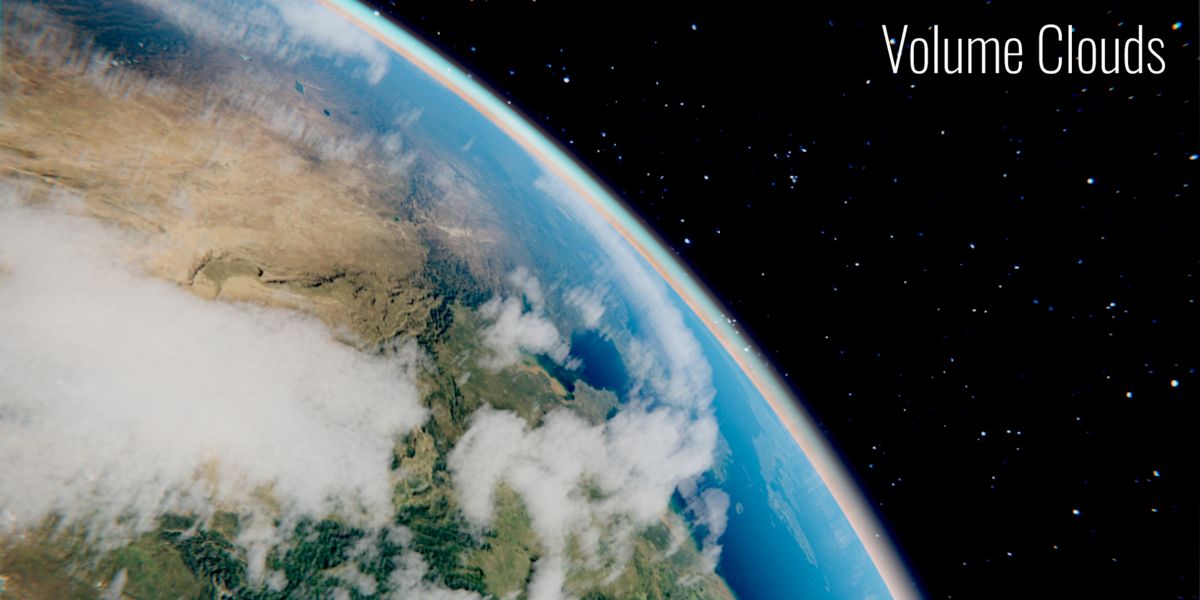
Volumetric clouds
Switch the render engine to Cycles before evaluating volumetric clouds. Enable Volumetric Clouds and adjust base height, thickness, density, detail, and color. The option to hide the flat cloud layer helps avoid combining both cloud treatments unintentionally.
Rotate IE_Sun to change the day/night direction. If you rebuild Earth after creating content, inspect your scene and use Rebuild All when the generated items need refreshing.
05 / USER GUIDE
Map styles & flat map
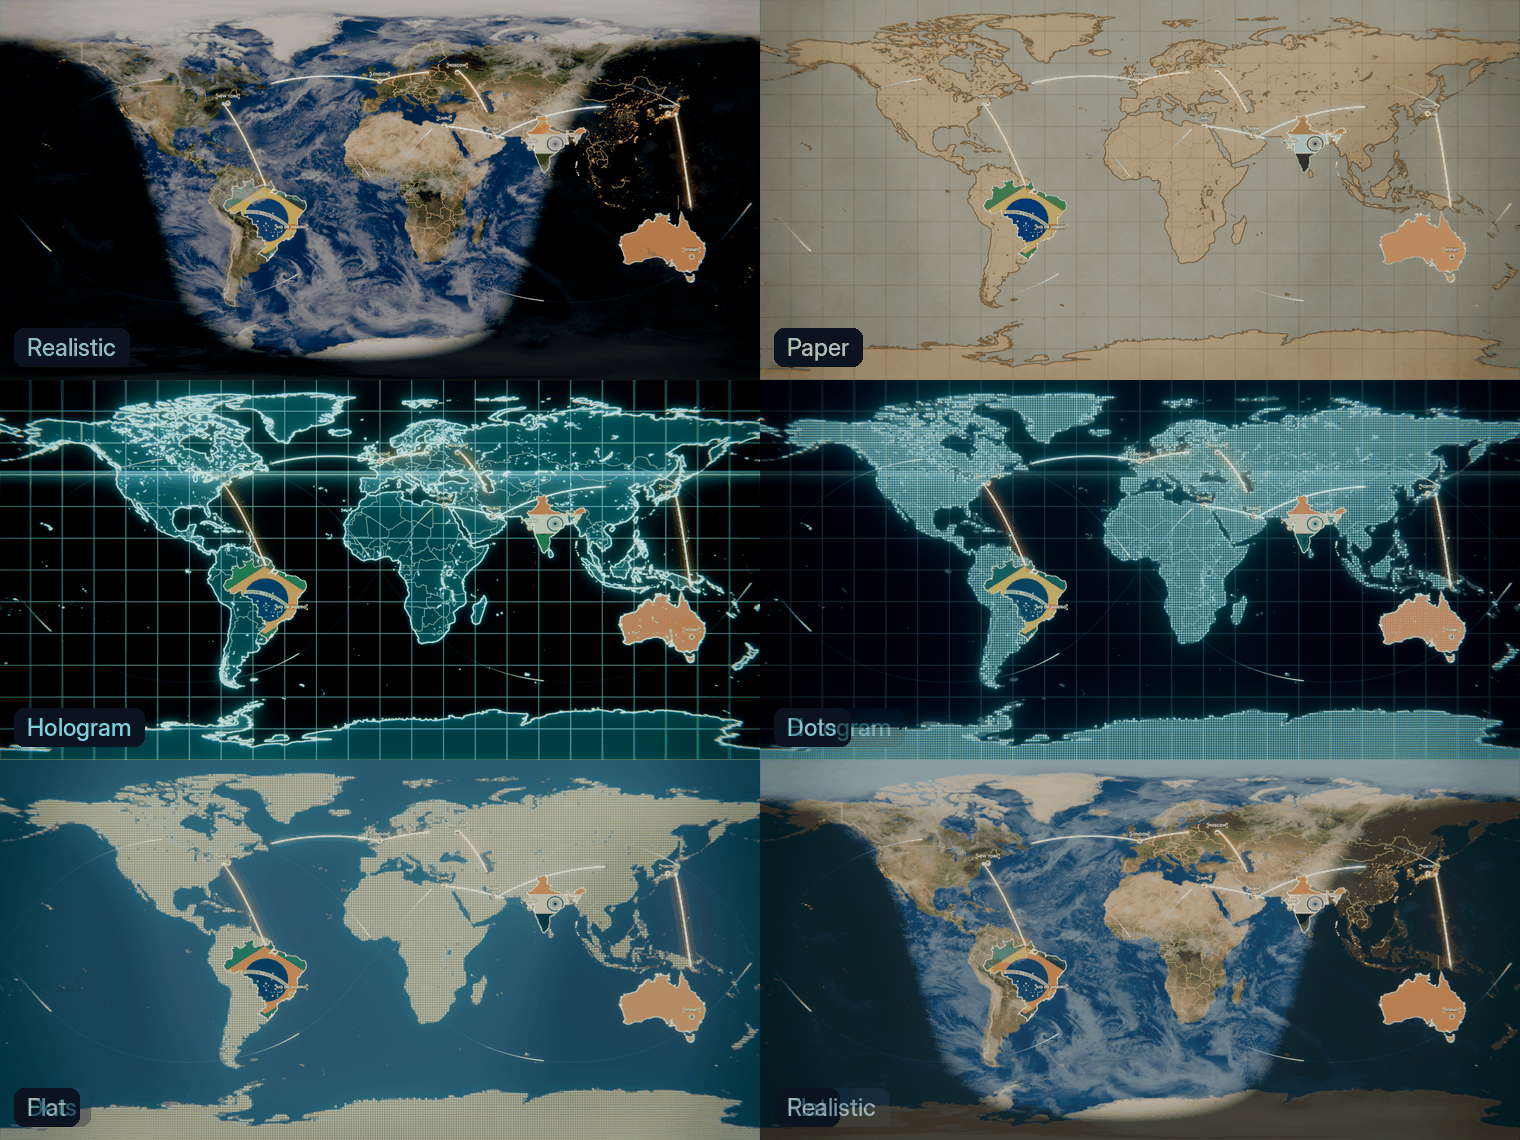
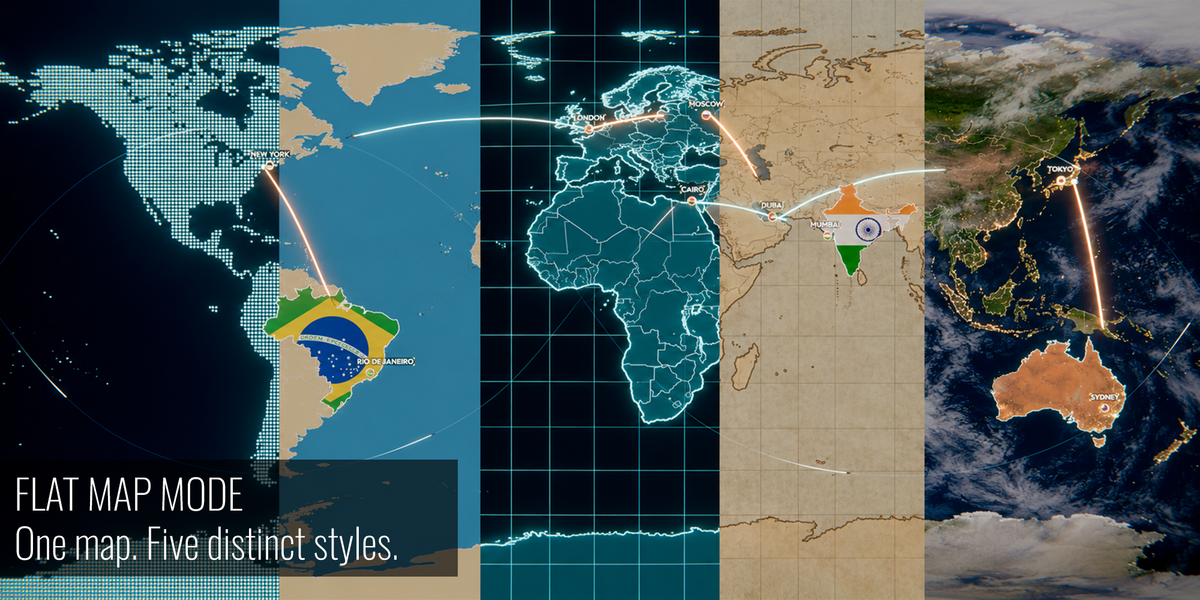
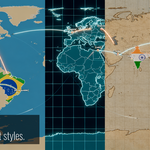
Realistic, Paper, Hologram, Dots and Flat styles on the flat world map
Change the map style
- In the Globe panel, open Map Style and choose Realistic, Paper, Hologram, Dots or Flat.
- For the non-realistic styles, set the Land, Ocean and Lines colors, Coastline Width, Night Shading and the Coordinate Grid with its Step.
- Dots: set Dot Rows and Dot Size. Dots and Hologram: set Glow. Hologram: Scan Speed controls the scanning band (0 removes it, higher is faster).
The styles are built from the Earth textures you already downloaded; no extra files are needed. Atmosphere and clouds are shown only in the Realistic style.
Flat world map
- In the Globe panel, set Map Shape to Flat.
- The Earth becomes a 2:1 world map. Pins, labels, routes, countries, effects, Follow the Line and Earth Zoom keep working and are rebuilt automatically.
- For a full-frame map, use an orthographic camera looking straight down.
- Switch back to Globe at any time.
The flat map has no atmosphere and ignores Earth Orientation.
06 / USER GUIDE
Cities, coordinates, pins & flags
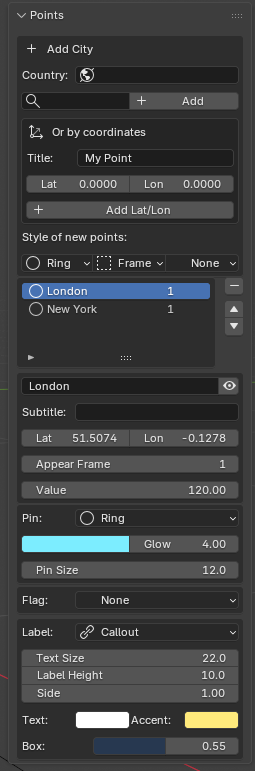
Points and individual marker settings - Blender 5.2 / Globe Gen 1.3.2
Add a database location
- Open Points and choose a country.
- Search/select a city in the city field. English and Russian names are supported.
- Choose the default pin, label, and flag styles for new points, then click Add.
- Select the new point in the list to edit its individual settings.
Add a custom location
- In Points > Or by coordinates, enter a title, latitude, and longitude.
- Use latitude from -90 to 90 and longitude from -180 to 180.
- Click Add Lat/Lon.
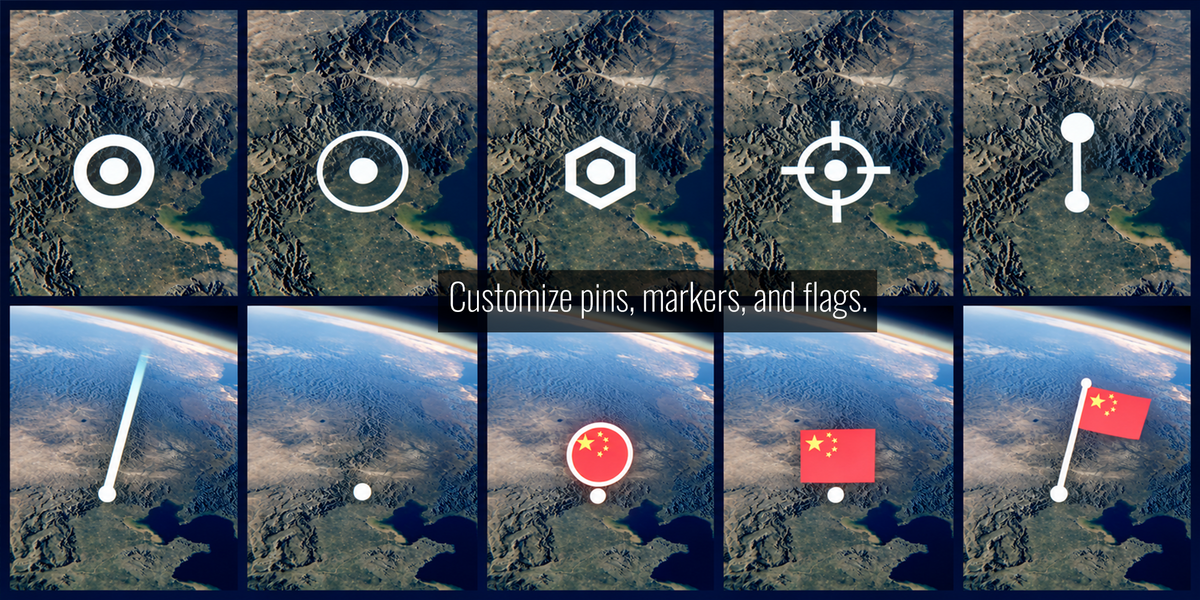
-
Pin: select a marker style and adjust its color, glow, and size. Pulse and beam styles expose additional controls.
-
Flag: choose Round Badge, Rectangle Badge, Flag on a Pole, or None. Override the flag country when needed.
-
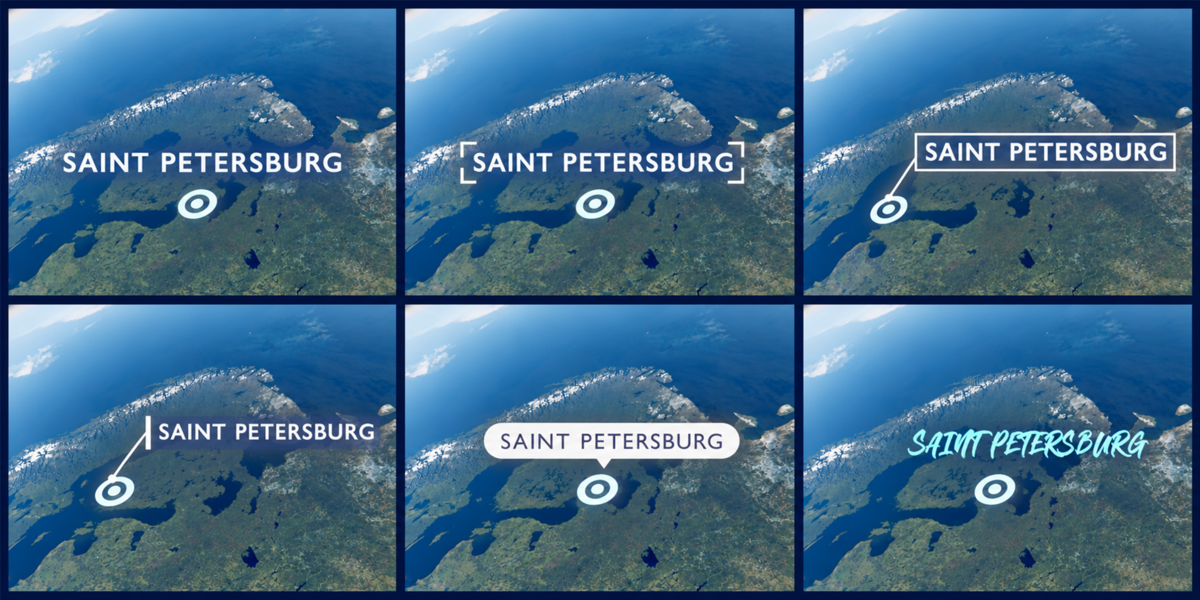
Label: choose Text, Frame, Callout, Card, Tag, or None. Edit the title/subtitle, size, position, text color, and available box/accent controls.
-
Appear Frame: controls when the point appears in the animation.
-
Value: supplies a number for Data Bars when its source is My Points.
For continents, oceans, and polar locations, look for Continents & Oceans in the country selector. Antarctic stations and additional island locations are also available.
07 / USER GUIDE
Routes & traveling objects
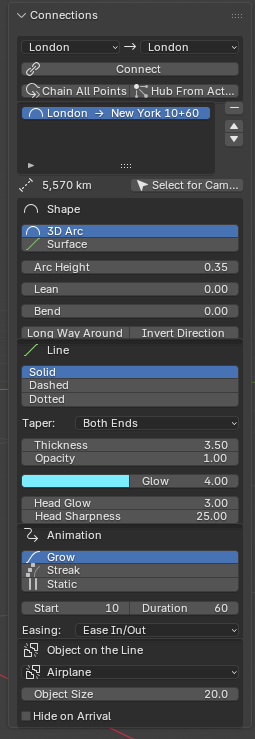
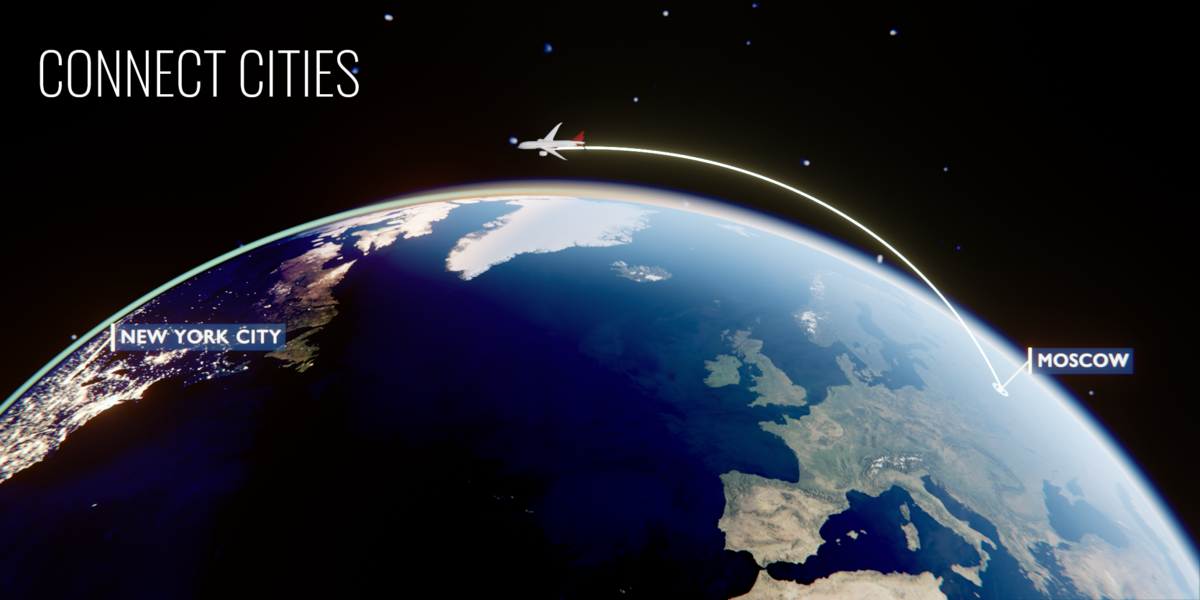
Connections, animation, and an airplane traveler - Blender 5.2 / Globe Gen 1.3.2
- Create at least two points in Points.
- Open Connections, choose two different endpoints, and click Connect.
- Select the connection in the list to edit its shape, line, animation, and traveling object.
-
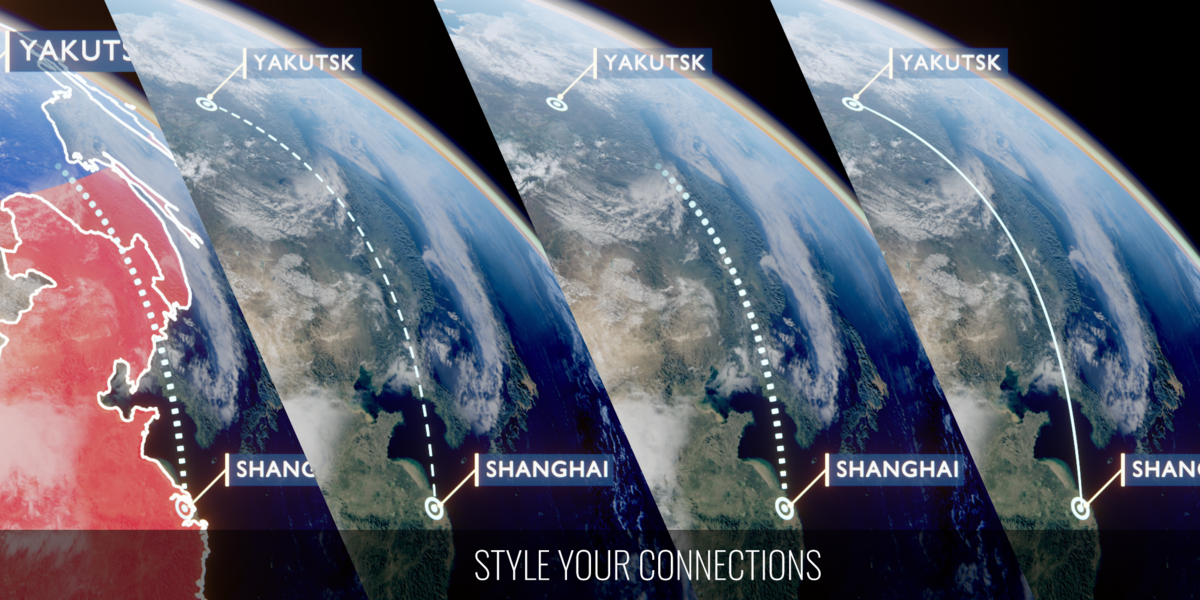
3D Arc / Surface: choose an elevated arc or a route along the globe surface.
-
Height, Lean, Bend: shape the route. Long Way changes the path around the globe; Invert reverses its direction.
-
Solid / Dashed / Dotted: choose the line treatment and refine thickness, taper, color, glow, and opacity.
-
Grow: draws the line and leaves it visible. Streak: sends a short glowing segment along the route. Static: displays the entire route.
-
Start, Duration, Easing: control animation timing and acceleration. Streak also offers length and looping controls.
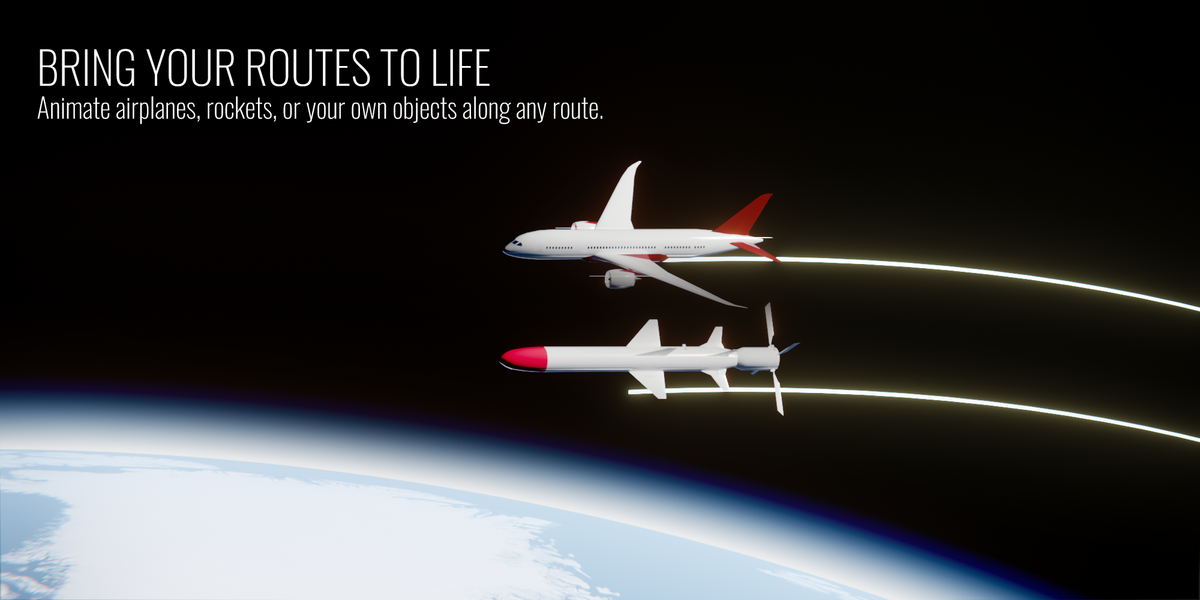
Animate an object along the line
- In the selected connection, find Object on the Line.
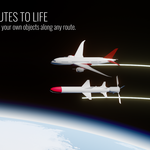
- Choose Airplane, Rocket, or Custom.
- For Custom, pick the source object and set Model Forward to match its forward axis.
- Adjust Object Size and the visibility option, then play the route animation.
Build a network
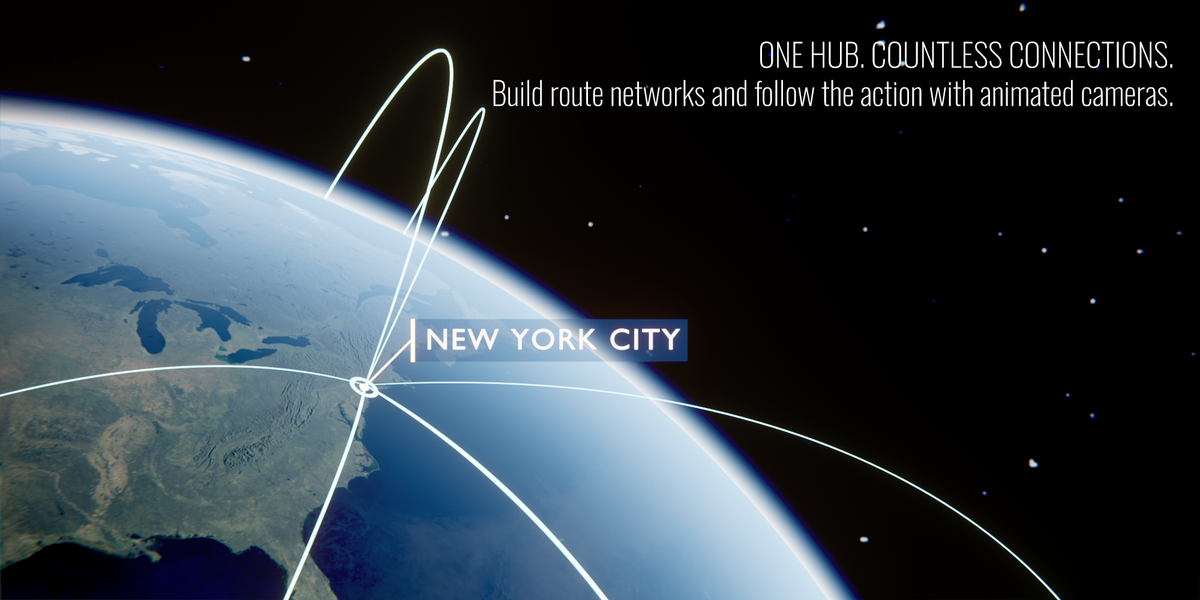
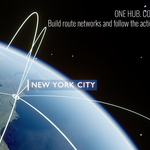
Chain All Points connects points in list order. Hub From Active connects the selected point to the other points. Set the active point in Points before building a hub.
For a camera shot, select the intended connection and click Select for Camera before opening Camera Shots.
08 / USER GUIDE
Highlight countries & US states
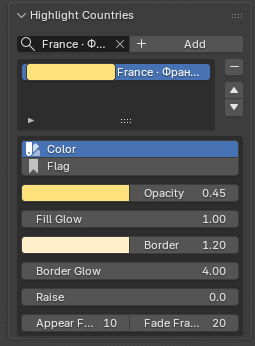
Country highlight controls - Blender 5.2 / Globe Gen 1.3.2
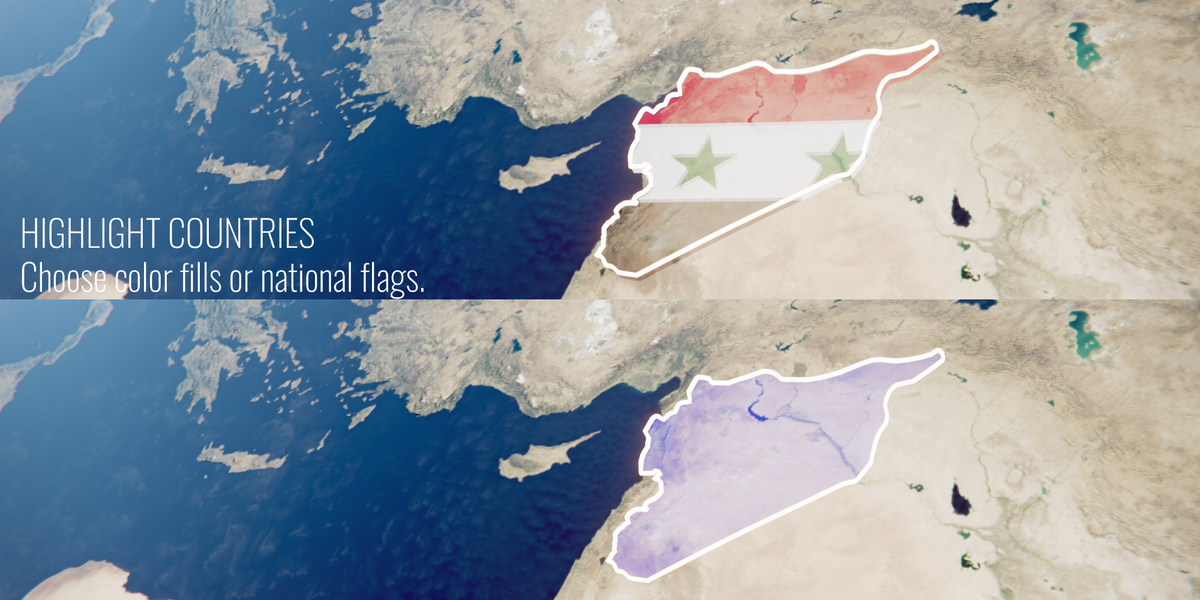
- Open Highlight Countries. Search/select a region and click Add.
- Select the highlight in the list.
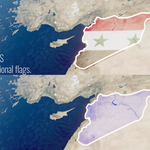
- Choose Color or Flag as the fill mode.
- For a flag fill, choose Keep Proportions or Stretch. For color, choose the fill color.
- Adjust opacity, glow, border appearance, and extrusion.
- Set the appearance frame and fade duration.
US states have no built-in flags: choose Flag and load your own image with Custom Flag (see Custom borders & your own flags).
09 / USER GUIDE
Custom borders & your own flags
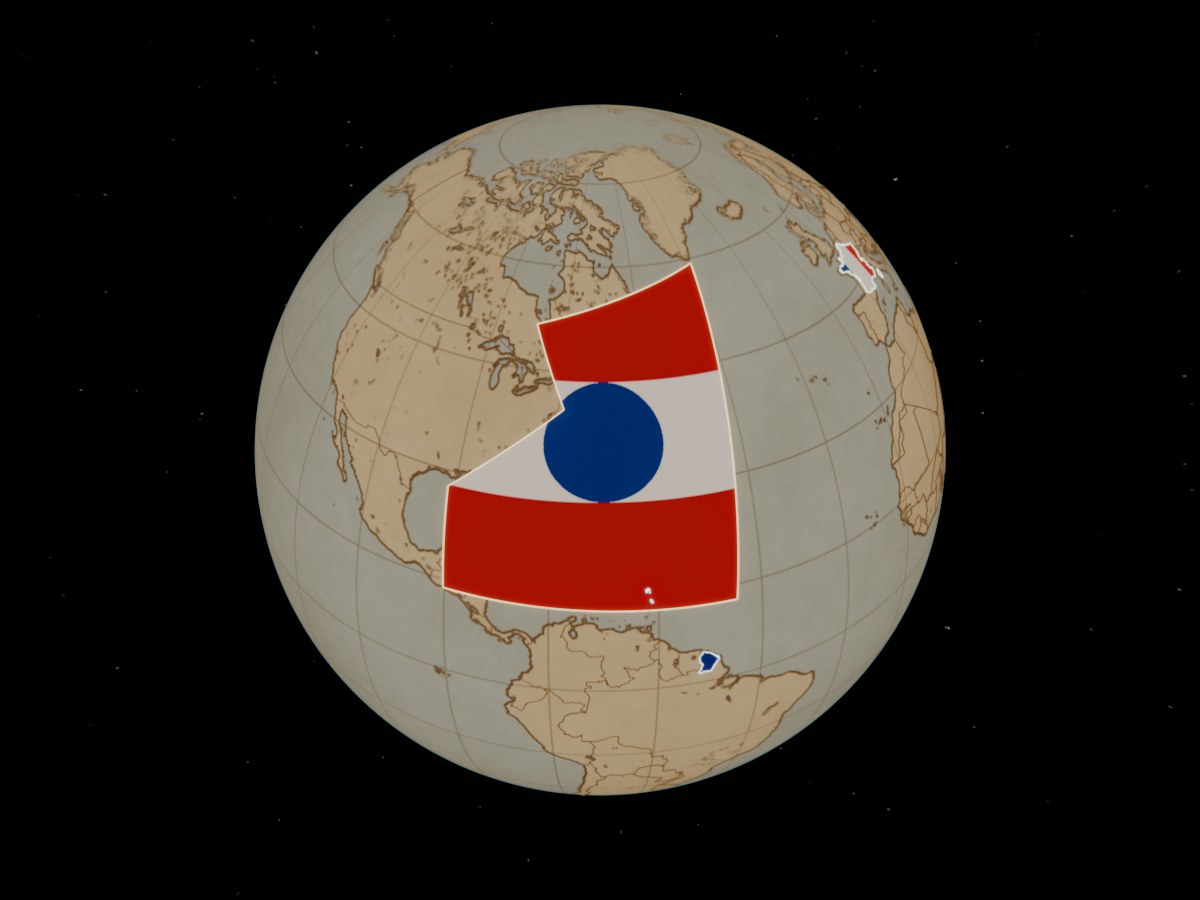
An imported zone filled with a custom flag
Import GeoJSON or SVG
- In Highlight Countries, click Import Borders (GeoJSON / SVG) and choose your file.
- Options: Simplify (lighter geometry), Group by Name, Merge into One Region, Name Field and the maximum number of regions.
- For SVG, also set the Projection (Equirectangular or Mercator) and the map edges West / East / North / South (a full world map is -180 / 180 / 90 / -90).
- Every shape becomes a region in the list; open lines (front lines, rivers) become glowing border lines. Style and animate them like countries.
Draw your own borders
- Open geojson.io and draw with the Draw a polygon tool; close the shape on its first point.
- Click the shape, add a row with the key name and the region name as the value.
- Choose Save > GeoJSON and import the file. Ready historical borders for many dates are available from the free historical-basemaps project.
Use your own flag or emblem
- Select a region and set the fill to Flag.
- In Custom Flag, choose a PNG or JPG: a flag, a coat of arms, a logo. The image keeps its own proportions.
- Choose Keep Proportions or Stretch; raise Fill Opacity to 1 for full color.
Straight sides of imported shapes are densified on import, so the fill and the border follow the same path as on the web map. SVG files in other projections (Robinson, Miller...) will not line up; use GeoJSON for those.
10 / USER GUIDE
Coordinate the animation
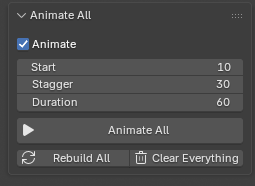
Animate All and Rebuild All - Blender 5.2 / Globe Gen 1.3.2
- Open Animate All.
- Set Start, Gap (frames of pause between one route ending and the next starting) and Duration. Routes play one after another, without overlaps.
- Click Animate All.
- Play the timeline, then select individual points, connections, or highlights to refine their timing.
Rebuild All regenerates points, connections, highlights, and effects when an update is needed. Clear Everything removes the generated items managed by this section; save a copy before using it.
Effect timing is adjusted in each effect's own controls. Check Start, growth/fade duration, orbit timing, and playback range there.
11 / USER GUIDE
Camera shots
Follow the Line uses a route. In Connections, select the route and click Select for Camera, then open Camera Shots.
Follow the Line
- Turn on Whole Route to follow every connected leg of a journey (A to B, B to C...) in one shot. The camera keeps a steady north-up heading, so it does not spin at each city; use Orbit to choose the angle. Turn it off to follow only the selected line.
- Adjust Distance, Orbit, Elevation, Roll, Orbit Spin, Look Ahead, Stabilize and Smoothing.
- Set Zoom: 1 keeps the distance, above 1 starts farther away and moves in, below 1 moves outward. On a whole route the zoom runs over the full journey.
- Click Create Follow Shot. The camera follows the timing of each route; every slider updates the shot live.
- Play the timeline in camera view (Numpad 0) and refine the movement.
On the flat map, a route that crosses the edge of the map is followed with a clean cut to the other side. For a dive from space to one place, use Earth Zoom.
12 / USER GUIDE
Earth Zoom: from space to the city
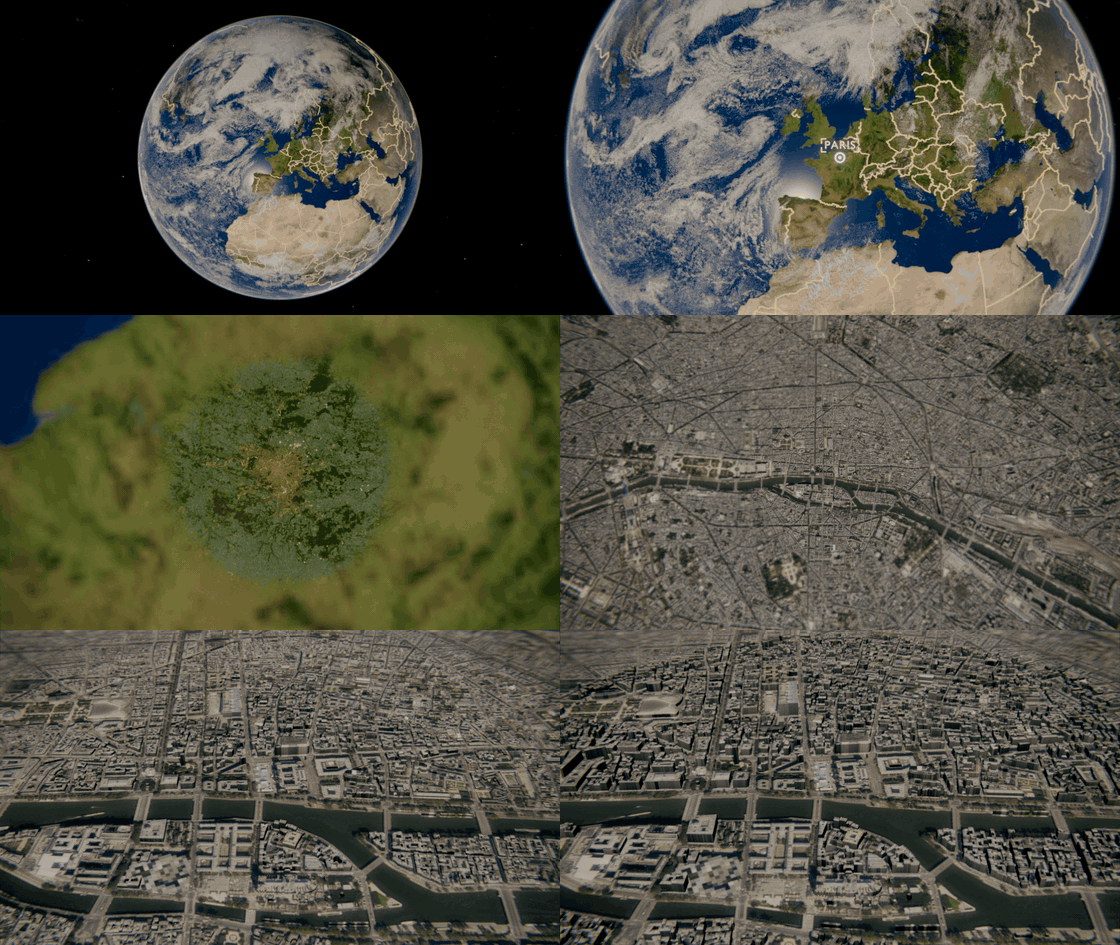
Earth Zoom to Paris: clouds, aerial photos and growing 3D buildings
- Add a point in Points and open the Earth Zoom panel.
- Choose the Point. Satellite pictures and buildings start downloading in the background (Blender needs Preferences > System > Allow Online Access). Wait for Ready.
- Choose Zoom In (space to the point) or Zoom Out, and set Start, Frames and Hold.
- In Camera, set Space Height, Ground Height (km), Tilt, Heading, Spin, Lens, Shake and Shake Speed. Hide Pin Near Ground fades the marker out on the way down.
- Click Create Earth Zoom and play the timeline. Every setting updates the shot live; Remove Earth Zoom deletes it.
Close-up pictures
-
Auto Pictures fills the Region (200 km) and City (20 km) slots with cloud-free Sentinel-2 satellite images (10 m).
-
Sharp Aerial uses national aerial photos where they exist (USA, France, Switzerland, Netherlands, Spain, Japan) for City and Street, down to about 0.6 m per pixel.
- You can put your own picture in any slot (Region, City, Street) with its real width in Size km; your own pictures are never replaced. Mask Softness blends them into the globe.
- Downloads are cached: the same place loads instantly next time.
3D buildings
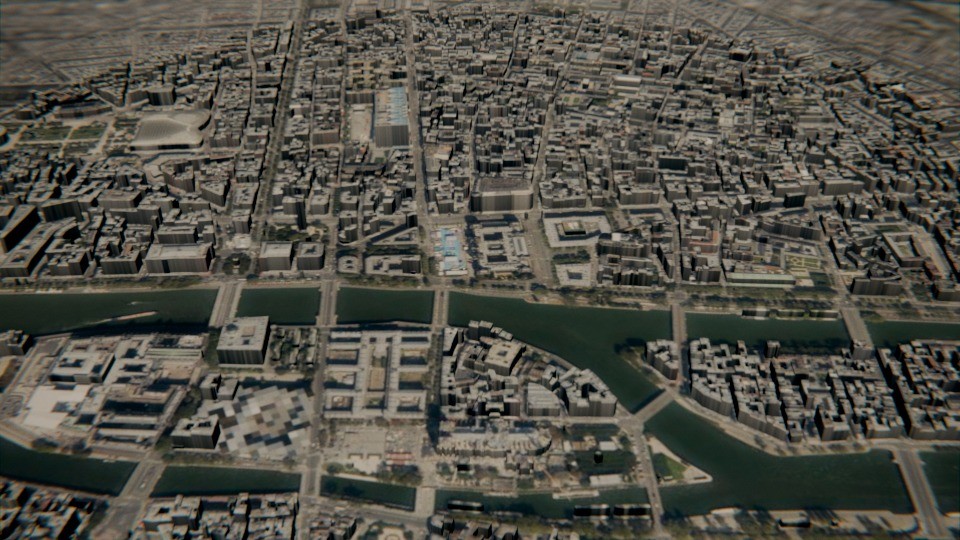
OpenStreetMap buildings with Photo Texture over aerial photos
- Turn on 3D Buildings; footprints and heights come from OpenStreetMap within Radius km.
-
Photo Texture projects the sharpest picture of the place from above (roofs get the photo, walls a darker version, see Wall Brightness). Without it, choose the White, Color or Glow look.
- Set Height, and the growth timing: Start Before End, Grow Frames, Spread.
- To see the buildings well, use Ground Height 1 to 2 km and Tilt 50 to 60 degrees.
Fly-through clouds & final shot
-
Fly Through Clouds: set Layers, Size, Density and the Top / Bottom height in km.
-
Final Shot: choose your own photo or video and its Cross-fade. When rendered from the Render panel, it stays exactly as the original: the color grade, LUT and effects never touch it.
Public OpenStreetMap servers are sometimes busy. If you see "servers are busy", wait a minute and press the download button next to Sharp Aerial. A larger Radius means a longer download and a heavier scene.
13 / USER GUIDE
Orientation, labels & cinematic look
Earth orientation
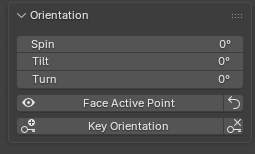
Orientation controls - Blender 5.2 / Globe Gen 1.3.2
Use Orientation to adjust Spin, Tilt, and Turn. Face Active Point brings the selected location forward. Use Key Orientation to key the orientation at the current frame.
Shared label styling
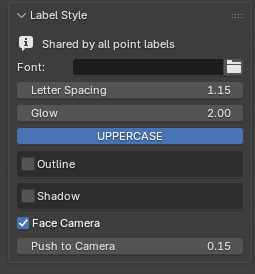
Font, outline, shadow, and Face Camera - Blender 5.2 / Globe Gen 1.3.2
Open Label Style to set the font, spacing, glow, uppercase treatment, outline, and shadow for point labels. Use Face Camera for camera-facing text. Individual point label styles and colors remain in Points.
Cinematic Look
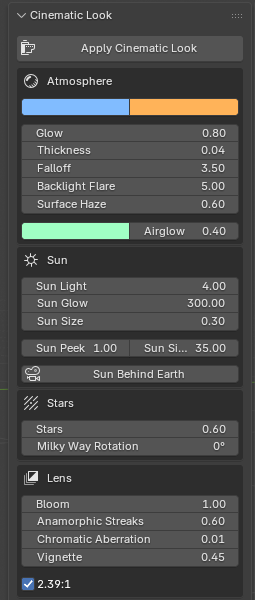
Atmosphere, sunlight, stars, and lens effects - Blender 5.2 / Globe Gen 1.3.2
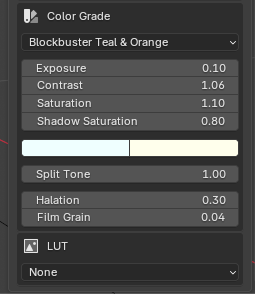
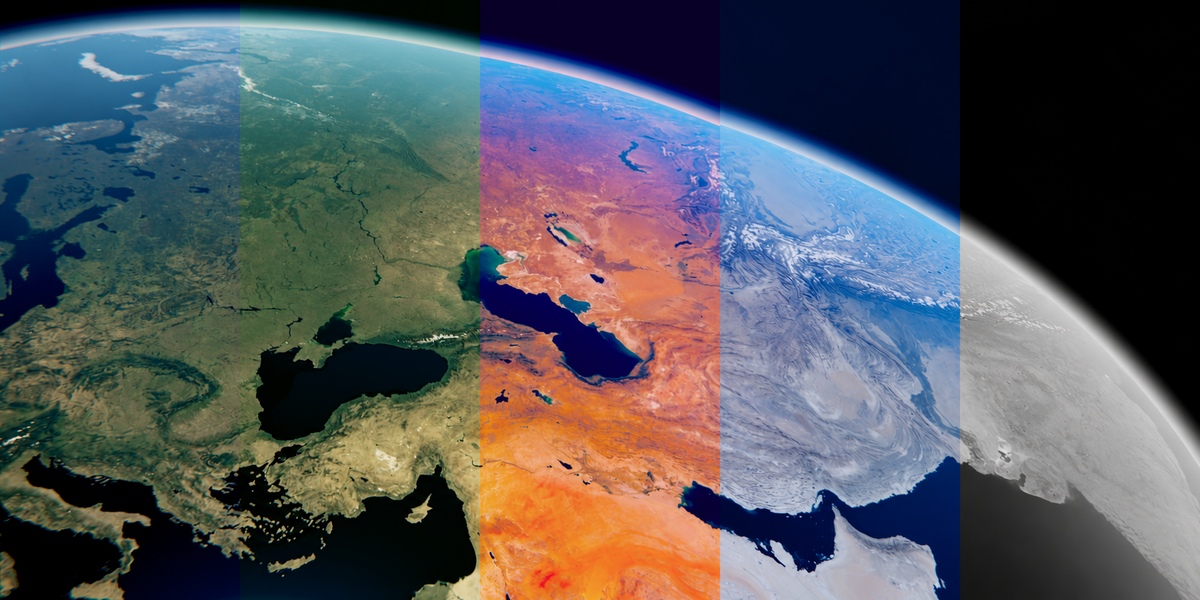
Color Grade and LUT - Blender 5.2 / Globe Gen 1.3.2
- Open Cinematic Look and click Apply Cinematic Look.
- Adjust Atmosphere controls for color, strength, thickness, falloff, haze, and airglow.
- Refine Sun and Stars, then set Lens effects such as bloom, streaks, aberration, vignette, and widescreen framing.
- Under Color Grade, choose a preset and refine exposure, contrast, saturation, and tints.
- Under LUT, choose a color look and adjust LUT Strength.
The LUT section uses built-in color-correction nodes. It does not import external .cube LUT files. Assess glow and grading in a rendered/composited result; Solid viewport shading does not show the final look.
14 / USER GUIDE
Effects
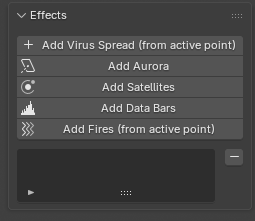
Add an effect - Blender 5.2 / Globe Gen 1.3.2
Open Effects and click an Add button. Select the effect in its list to edit its controls. Multiple effects can be added to a scene.
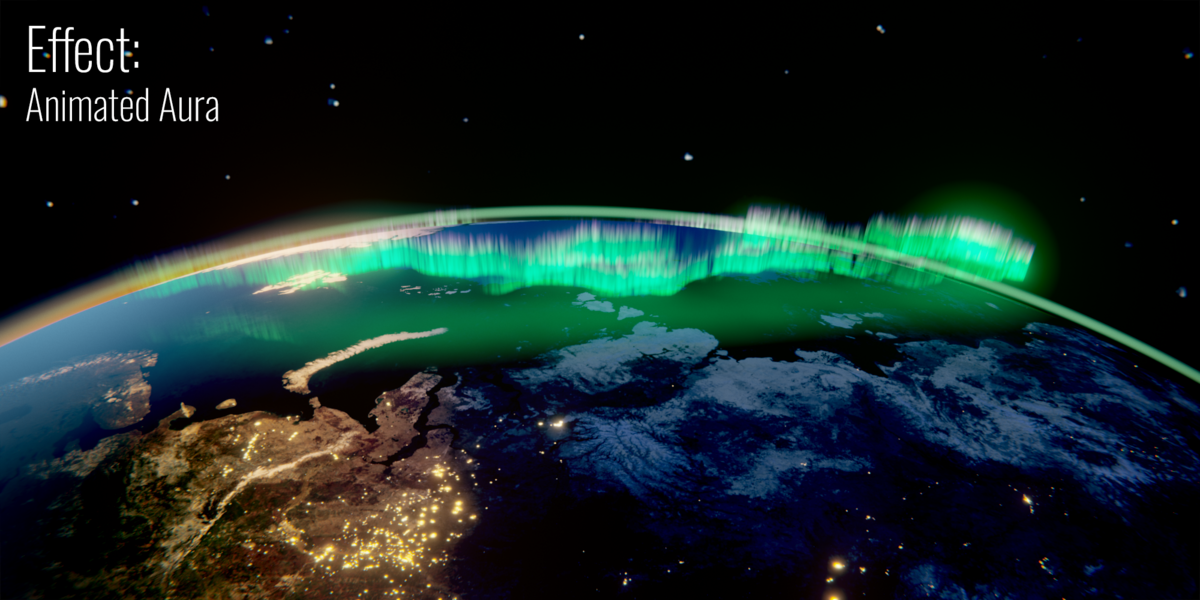
Aurora
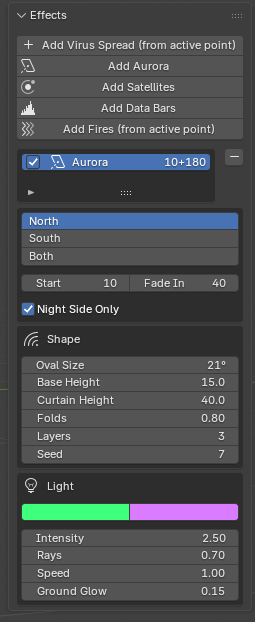
Aurora settings - Blender 5.2 / Globe Gen 1.3.2
- Click Add Aurora.
- Choose the northern hemisphere, southern hemisphere, or both.
- Set Start and fade timing. Enable Night Only when you want the effect restricted to the night side.
- Adjust oval size, base height, height, waviness, layers, colors, intensity, rays, speed, and ground glow.
Satellites
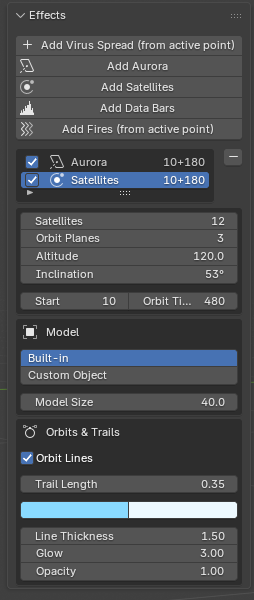
Satellites, orbits, and trails - Blender 5.2 / Globe Gen 1.3.2
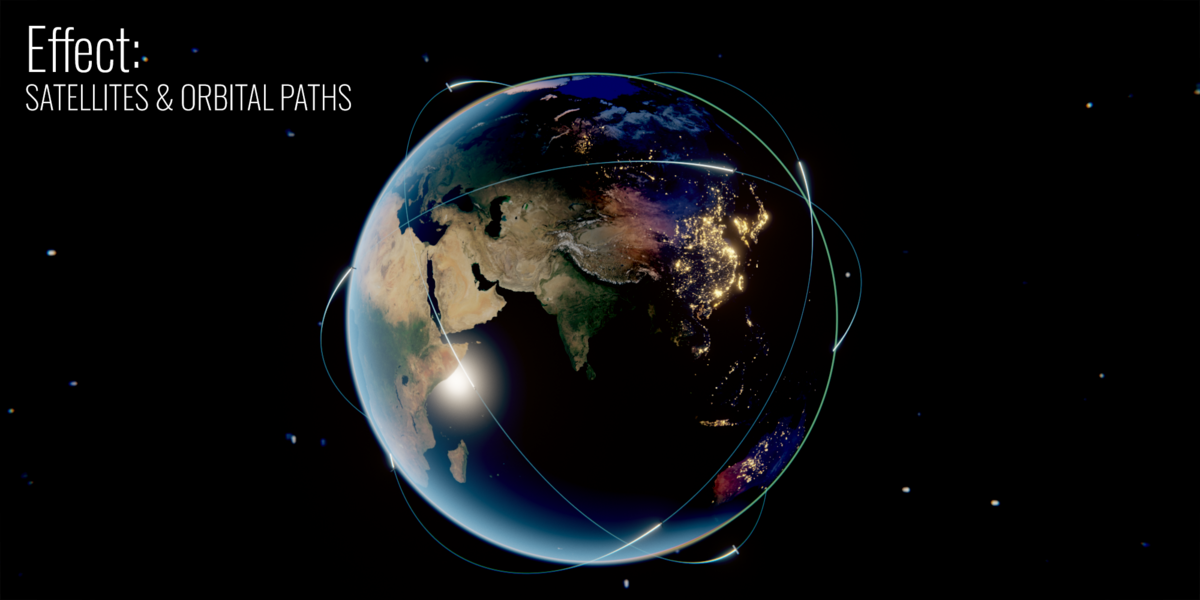
- Click Add Satellites.
- Set the number of satellites, orbital planes, altitude, and inclination.
- Adjust Start and Orbit Time. A larger Orbit Time produces slower motion.
- Choose the built-in model or a Custom object. Custom satellite models should point along +Y.
- Enable orbit lines and/or trails, then adjust their appearance.
Data Bars
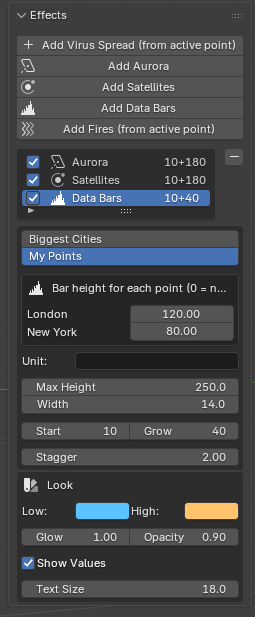
My Points values and animated bars - Blender 5.2 / Globe Gen 1.3.2
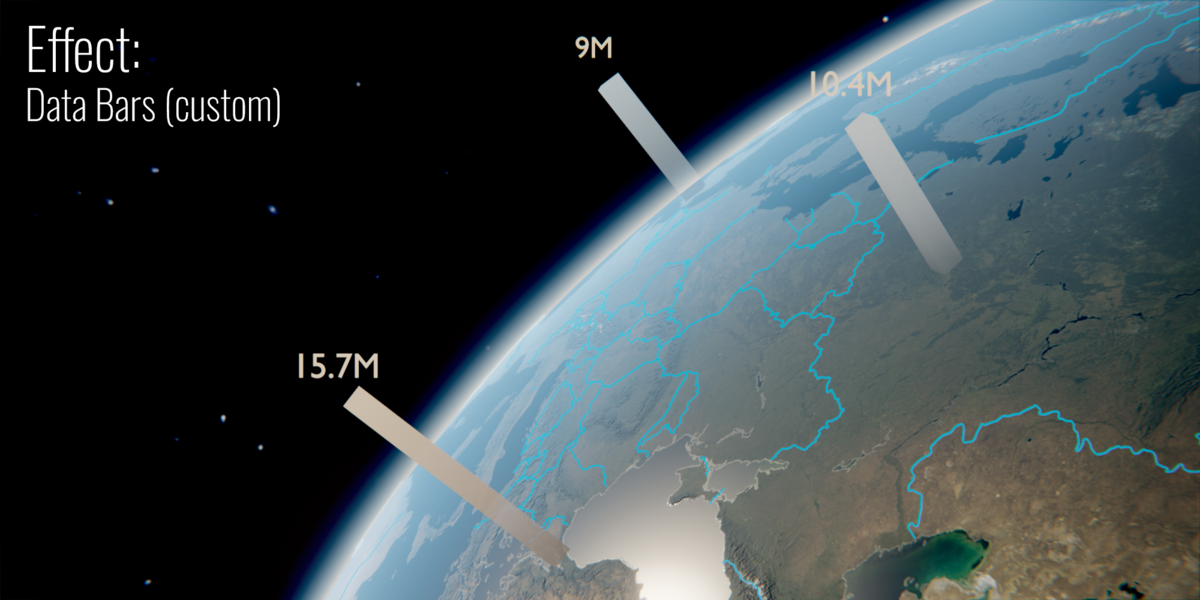
- Click Add Data Bars.
- Choose Biggest Cities for population data or My Points for your own values.
- For My Points, enter values in the effect panel. You can also set a point's Value in Points. At least one value must be greater than zero.
- Set the unit suffix, maximum height, width, Start, Grow duration, and stagger.
- Adjust the low/high colors, glow, opacity, and value labels.
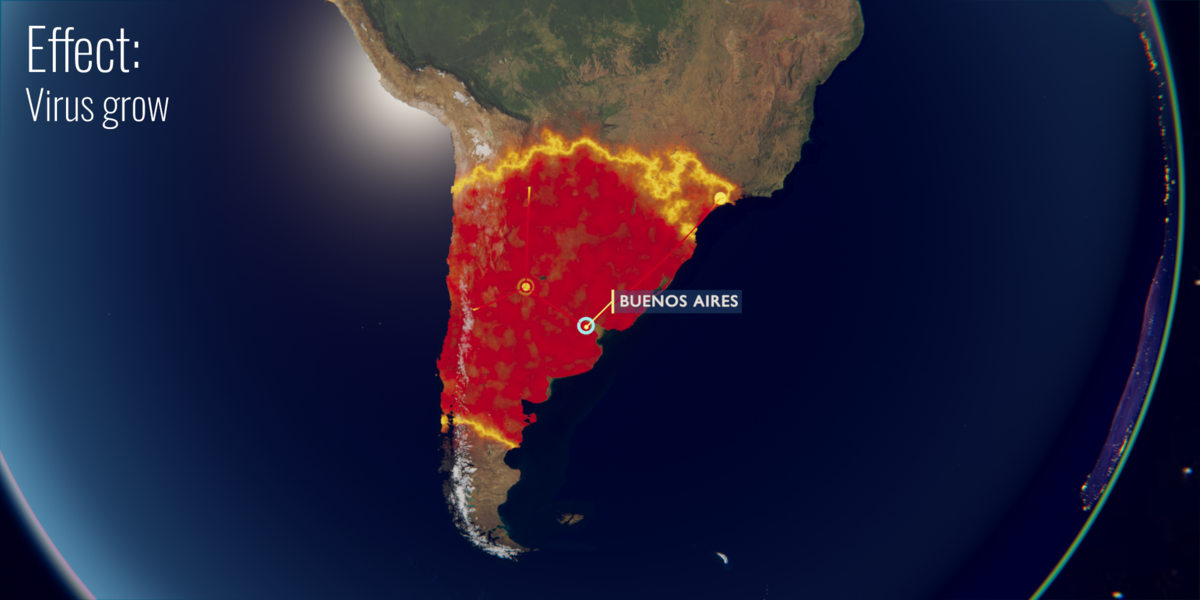
Virus Spread
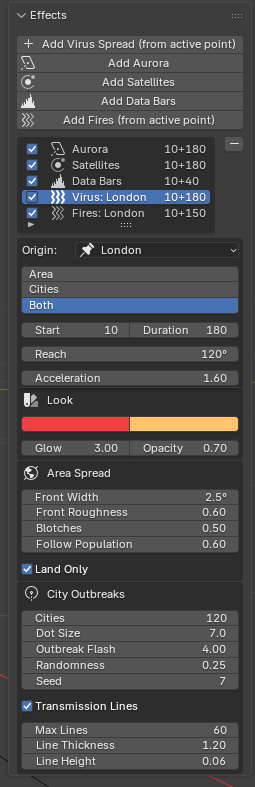
Virus Spread settings - Blender 5.2 / Globe Gen 1.3.2
- Select a point in Points.
- Click Add Virus Spread (from active point).
- Check the Origin and choose Area, Cities, or Both.
- Adjust Start, Duration, reach, acceleration, appearance, and the available spread/city controls. Enable transmission lines when needed.
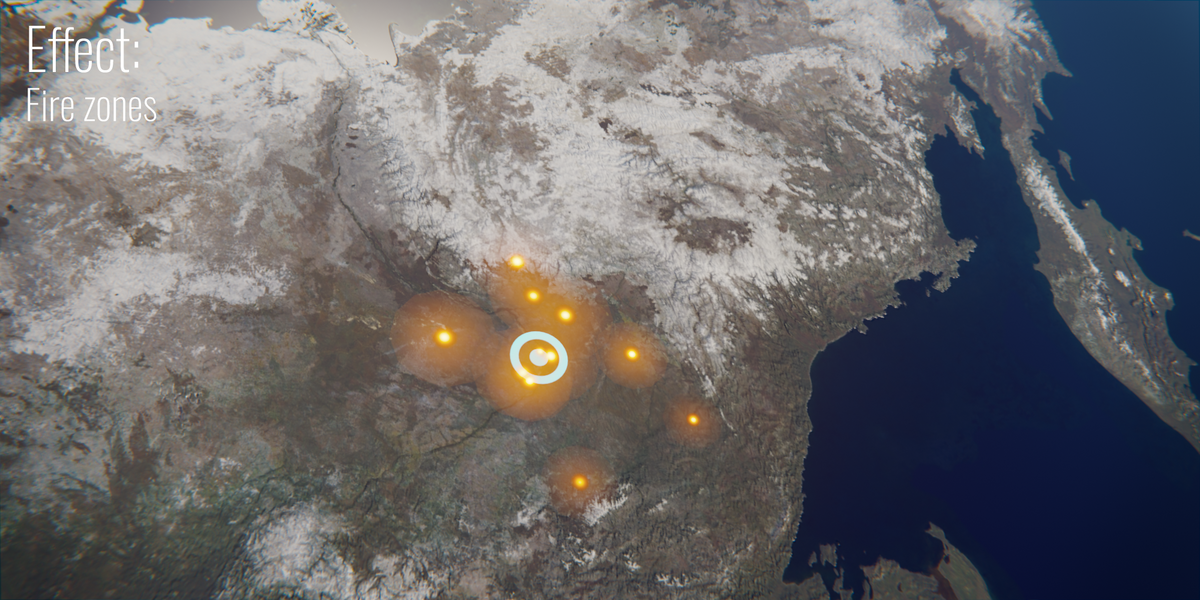
Fires
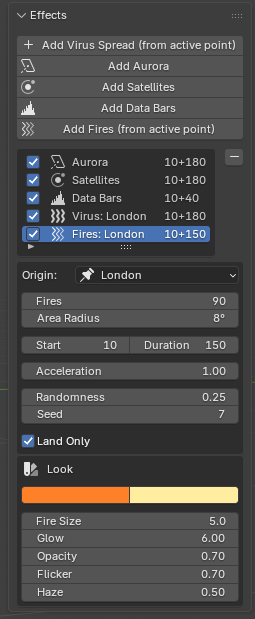
Fire placement, timing, and appearance - Blender 5.2 / Globe Gen 1.3.2
- Select a point in Points.
- Click Add Fires (from active point).
- Check Origin and set the number of fires and Area Radius.
- Adjust Start, Duration, growth, jitter, seed, fire size, colors, glow, flicker, and smoke.
- Use the land-only control to keep fire placement over land.
Virus Spread and Fires are visual storytelling effects, not scientific simulations or live geographic datasets.
15 / USER GUIDE
Render
- Preview timing with the timeline and check the active camera with Numpad 0.
- Open the Render panel at the bottom of the Globe Gen tab.
- Choose MP4 Video (H.264, with Quality Medium / High / Best) or PNG Sequence.
- Pick a resolution (HD, Full HD, 2K, 4K, Cinema 2.39, vertical Reels / Shorts, square or Custom), the FPS, a Scale % for quick drafts, and the Engine.
- Optionally use Custom Frame Range, and Render Region (in camera view draw the region with Ctrl+B, clear it with Ctrl+Alt+B).
- Set the Folder and Name and press RENDER VIDEO. The folder button opens the result.
- Save the .blend file. If moving the project, collect or pack the external textures, fonts and custom assets it uses.
With an Earth Zoom final photo or video, the render runs in two passes: first the graded frames, then your footage is laid on top unchanged. A normal F12 / Ctrl+F12 render passes the footage through the color grade.
Very large maps, volumetric clouds, many effects, dense networks and big building radii increase memory use and render time. Begin with lower settings, then raise quality for the final render.
16 / USER GUIDE
Troubleshooting
Check texture status and reload maps - Blender 5.2 / Globe Gen 1.3.2
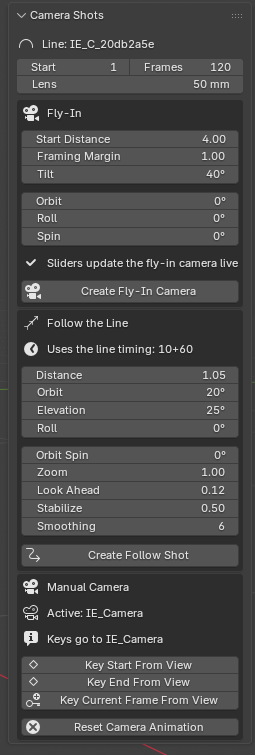
Check the selected route before creating a camera - Blender 5.2 / Globe Gen 1.3.2
The sidebar tab is missing
Move the pointer over the 3D Viewport and press N. Check that the extension is enabled in Edit > Preferences > Add-ons. The tab name in this build is GlobeGen.
Earth is pink or textures are missing
Open Textures, check the folder and missing-map status, finish Download Textures, then click Reload Textures. Check Ultra slots and external paths if you moved the project.
The download does not start
Enable Allow Online Access in Blender Preferences > System, check your internet connection, and use a writable texture folder. Retry Download Textures after fixing the cause.
Create Follow Shot is disabled
Create a connection, select it in Connections, and click Select for Camera. Follow the Line needs a valid route.
Pins, routes, or effects are not visible
Check the current frame against the item's appearance/start frame, opacity, size, and visibility. Confirm the intended point or route is selected and use Rebuild All if generated items need updating.
Volumetric clouds look incorrect
Switch to Cycles. Check density, thickness, and color. If clouds remain too dark, check volume bounces; enabling the effect normally sets this to 4. Inspect whether both flat and volumetric layers are visible.
Labels are hard to read
Increase size or contrast, use a background/callout style, or enable outline/shadow in Label Style. Check Face Camera and inspect the active render camera.
Satellites look heavily blurred
Increase Orbit Time for slower movement or turn off Motion Blur in the relevant render settings.
A custom object faces the wrong way
For route travelers, choose the correct Model Forward axis in Connections. Custom satellite models should point along +Y.
Earth Zoom pictures or buildings do not download
Enable Preferences > System > Allow Online Access, check your internet connection, then choose the point again or press the download button. If the message says the servers are busy, wait a minute and retry. Street-level aerial photos exist only for the USA, France, Switzerland, the Netherlands, Spain and Japan.
The final Earth Zoom video looks color graded
Render with the RENDER VIDEO button of the Render panel; it keeps the final footage clean. F12 / Ctrl+F12 render it through the grade.
How do I update or uninstall?
Save your projects first. For the supplied update workflow: remove the old version, restart Blender, then install the new ZIP through Install from Disk. The extension preferences include Uninstall GlobeGen. Keep a backup of any custom files before removing the extension.
17 / USER GUIDE
Credits & support
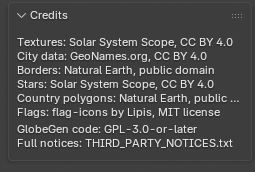
Built-in credits and third-party notices - Blender 5.2 / Globe Gen 1.3.2
- Product and included satellite, airplane and rocket models: Artem Yakovlev / AA Academy.
- Extension code: GPL-3.0-or-later.
- Earth textures: Solar System Scope, CC BY 4.0; downloaded separately.
- City database: GeoNames, CC BY 4.0.
- Geographic boundaries: Natural Earth, public domain.
- Flag artwork: flag-icons, MIT.
- Russian country names: iso-codes, LGPL.
- Earth Zoom satellite pictures: contains modified Copernicus Sentinel data 2021, ESA WorldCover, CC BY 4.0.
- Aerial photos: USGS, IGN France, swisstopo, PDOK, IGN España, GSI Japan.
- Buildings: © OpenStreetMap contributors, ODbL.
See LICENSE.txt and THIRD_PARTY_NOTICES.txt in the extension archive for the supplied notices. Optional external maps and the pictures and data downloaded by Earth Zoom have their own terms; when you publish a video, credit the sources listed above in its description.
For support, contact the creator through the product page where you purchased Globe Gen. Include your Blender version, Globe Gen version, render engine, the steps that reproduce the issue, and the exact error message or a screenshot.
Globe Gen / AA Academy
 AA - Artem Academy