Hdri Forge
 Brock Creative



HDRI Forge — Product Documentation
Version 1.0.0 | BrockCreative
Table of Contents
- Introduction
- Requirements
- Installation
- Getting Started
- Interface Overview
- Features — Full Reference
- Workflows
- Tips & Best Practices
- Troubleshooting
- FAQ
- Changelog
1. Introduction
HDRI Forge is a professional HDRI lighting addon for Blender that turns any 360° equirectangular HDRI into a real, light-linkable dome light object in Cycles.
By default, Blender's World HDRI lights every object in your scene equally — there is no native way to assign different HDRIs to different objects. HDRI Forge solves this using Cycles light linking, giving you the per-object dome light workflow found in professional 3D applications, natively inside Blender.
Every object. Its own HDRI. One scene.
2. Requirements
| Requirement | Detail |
|---|---|
| Blender version | 4.0 or higher |
| Renderer | Cycles (required for light isolation) |
| File formats | .hdr, .exr |
| HDRI library | Not included — bring your own |
| Operating system | Windows, macOS, Linux |
Important: Light linking is a Cycles-only feature in Blender. EEVEE users will see a warning in the HDRI Forge panel. Domes will still render as emissive backdrop objects in EEVEE, but per-object isolation will not function until you switch to Cycles.
Recommended free HDRI source: Poly Haven — 750+ free HDRIs in .hdr and .exr format.
3. Installation
Step 1 — Download
Download hdri_forge.zip. Do not unzip the file. Blender installs addons directly from the zip archive.
Step 2 — Install in Blender
Open Blender → Edit → Preferences → Add-ons → Install
Navigate to and select hdri_forge.zip → click Install Add-on
Step 3 — Enable Search for "HDRI Forge" in the add-on list and enable the checkbox.
Step 4 — Open the panel In the 3D Viewport, press N to open the N-panel. Select the HDRI Forge tab.
Step 5 — Set renderer Go to Properties → Render → Render Engine → set to Cycles. Light isolation will not work in EEVEE.
Step 6 — Optional — Set HDRI Library folder Go to Edit → Preferences → Add-ons → HDRI Forge → set your HDRI Folder to a directory containing your .hdr or .exr files. Subfolders are scanned automatically.
4. Getting Started
Your first isolated dome light — three steps
Step 1 — Add a dome Click Add HDRI Light in the HDRI Forge panel. A dome appears in your scene and a file browser opens. Select your HDRI file.
Step 2 — Isolate it With the dome selected, open the Light Linking sub-panel. Click Isolate (Enable Light Linking). The dome now has light linking active.
Step 3 — Assign objects Select the objects you want this dome to light. Click Add Selected in the Light Linking panel. Those objects now receive light only from this dome.
Repeat for each additional dome with a different HDRI and different object assignments.
Your first multi-HDRI scene — quick setup
- Add your first dome via Add HDRI Light — assign to Object A
- Add a second dome via Add HDRI Light — assign to Object B
- Both domes auto-stagger their radius and compensate brightness — no manual adjustment needed
- Grade each dome independently in the Exposure & Grading panel
- Hit F12 — each object renders with its own isolated HDRI
5. Interface Overview
The HDRI Forge panel lives in the N-panel of the 3D Viewport under the HDRI Forge tab. It is organised into collapsible sub-panels:
HDRI Forge
├── Add HDRI Light
├── Add HDRI for Selected
├── From World HDRI
├── HDRI Library
├── HDRI Layers          (visible when HDRI dome is selected)
├── Exposure & Grading   (visible when HDRI dome is selected)
├── Visibility           (visible when HDRI dome is selected)
├── Light Linking        (visible when HDRI dome is selected)
├── Tools                (visible when HDRI dome is selected)
└── Scene Manager
Sub-panels marked above only appear when an HDRI dome object is the active selection. Select your dome in the viewport or via the Scene Manager to access its controls.
6. Features — Full Reference
6.1 Add HDRI Light
Location: HDRI Forge panel — top button
Creates a new HDRI dome light in your scene. A file browser opens immediately for you to select your .hdr or .exr file.
The dome is created as an inverted sphere with an emissive material that projects the HDRI inward using Object texture coordinates. It is added to the HDRI Lights collection in your outliner and is invisible to the camera by default.
Each new dome auto-staggers its radius relative to existing domes to prevent z-fighting, and compensates its emission strength via inverse-square law so all domes deliver matched brightness regardless of size.
6.2 Add HDRI for Selected
Location: HDRI Forge panel — second button
Creates a dome pre-linked to the current selection. On execution:
- A dome is created and sized to fit the bounding box of the selected objects
- Light linking is enabled automatically
- The selected objects are added to the dome's receiver list immediately
Use this for the fastest single-click setup when you already know which objects should receive this dome's light.
6.3 From World HDRI
Location: HDRI Forge panel — third button
Converts your scene's existing World HDRI into an HDRI Forge dome object. The current HDRI image, rotation and strength are transferred to the new dome. The World shader is left intact — disable it manually in World Properties if you no longer want it active.
6.4 HDRI Library
Location: HDRI Forge panel — Library box
A thumbnail browser for your local HDRI collection.
Setup: Go to Edit → Preferences → Add-ons → HDRI Forge and set the HDRI Folder to a directory containing .hdr or .exr files. All subfolders are scanned automatically. Files in subfolders are labelled with their folder path (e.g. Outdoor / sunset_4k) so same-named files in different folders remain distinct.
Usage:
- Click any thumbnail to select an HDRI
- Use the ◀ ▶ arrows to step through the library one HDRI at a time
- If an HDRI dome is the active object, the arrows load each HDRI live onto that dome for real-time preview without clicking Load
- Click Load to Active to apply the selected HDRI to the active dome
- Click New Dome to create a new dome with the selected HDRI
6.5 HDRI Layers
Location: Sub-panel, visible when a dome is selected
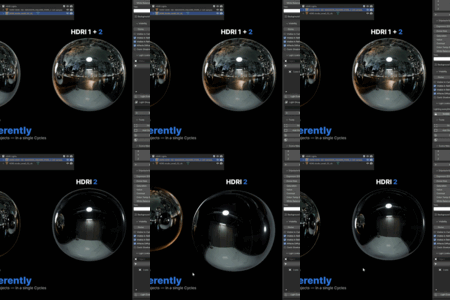
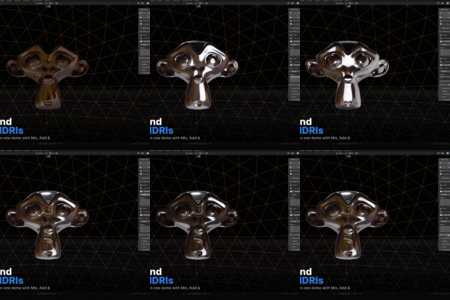
Stack multiple HDRIs on a single dome and blend them together. Each layer is an independent HDRI that contributes to the dome's final lighting output.
Per-layer controls:
| Control | Description |
|---|---|
| Image picker | The .hdr or .exr file for this layer |
| Load HDRI | Open file browser to select an image |
| From Library | Load the currently selected Library HDRI into this layer |
| Strength | Multiplier for this layer's contribution (0 = off, 1 = full, higher = amplify) |
| Rotation X / Y / Z | Rotate this HDRI independently of other layers |
| Blend mode | How this layer combines with the layer below — Mix, Add, Multiply, Screen |
Add HDRI Layer — adds a new blank layer above the current stack. Layers blend sequentially from bottom to top.
Use cases:
- Blend a warm sunset HDRI with a cool studio HDRI for a transitional look
- Add a secondary HDRI at low strength as an ambient fill
- Combine an outdoor sky HDRI with an interior bounce HDRI
6.6 Exposure & Grading
Location: Sub-panel, visible when a dome is selected
Per-dome colour grading controls that affect the HDRI's contribution to lighting and reflections.
| Control | Range | Description |
|---|---|---|
| Exposure (EV) | -10 to +10 | Brightness in photographic stops. 0 = neutral. +1 = double brightness. -1 = half brightness |
| Dome Size | 0.01 to 100 | Scales the dome mesh. Use Fit Dome to Selected for automatic sizing |
| Saturation | 0 to 2 | 0 = greyscale, 1 = neutral, 2 = double saturation |
| Value | 0 to 2 | Overall lightness multiplier |
| Contrast | -1 to 1 | Increases or decreases tonal contrast |
| Color Temp (K) | 800 to 20000 | Colour temperature in Kelvin. 3200K = warm tungsten. 6500K = neutral daylight. 10000K = cool overcast. Always active — no secondary amount slider needed |
| Tint | colour picker | Additive colour tint applied on top of the grading chain |
| Background Override | checkbox + colour | When enabled, sets a solid background colour visible to camera when the dome is in Backdrop or camera-visible mode |
6.7 Visibility
Location: Sub-panel, visible when a dome is selected
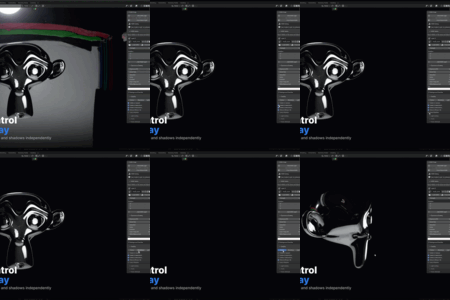
Per-ray visibility controls for this dome. Each toggle determines whether the dome's emissive surface interacts with that ray type in Cycles.
| Toggle | Description |
|---|---|
| Visible to Camera | Whether the dome surface appears directly in renders |
| Visible in Reflections | Whether the HDRI appears in reflective surfaces |
| Visible in Refractions | Whether the HDRI appears through refractive/glass materials |
| Affects Diffuse / GI | Whether the dome contributes to global illumination and diffuse lighting |
| Casts Shadows | Whether the dome shell casts shadows (almost always leave off) |
Presets:
| Preset | Camera | Reflections | Refractions | GI | Description |
|---|---|---|---|---|---|
| Dome | Off | On | On | On | Standard dome light — lights the scene, invisible to camera |
| Backdrop | On | Off | Off | Off | Visible background only — no lighting contribution |
| Light Only | Off | Off | Off | On | Diffuse / GI only — invisible to all specular rays |
6.8 Light Linking
Location: Sub-panel, visible when a dome is selected
Requires Cycles. Controls which objects in the scene receive light from this dome.
| Control | Description |
|---|---|
| Isolate (Enable Light Linking) | Activates Cycles light linking for this dome. Once enabled, only objects in the receiver list will be lit by this dome |
| Receiver list | The list of objects this dome currently lights. Drag objects in or use Add Selected |
| Add Selected | Adds the current viewport selection to the receiver list |
| Light Everything (Disable Linking) | Removes all light linking. The dome returns to lighting the full scene |
| Light Group (AOV) | Assign this dome to a named light group for use in compositing render passes |
| New Light Group | Create a new named light group |
Important: When Isolate is first enabled, the receiver list is empty — meaning the dome lights nothing until you add objects. Use Add Selected or drag objects into the list immediately after isolating.
6.9 Tools
Location: Sub-panel, visible when a dome is selected
| Tool | Description |
|---|---|
| Fit Dome to Selected | Resizes the dome to wrap the current selection with a comfortable margin. Useful after moving or scaling objects |
| Lock to Camera | Adds a Copy Location constraint so the dome follows the active camera. Click again to remove the constraint |
| Push to World | Converts this dome back to a standard Blender World HDRI. The dome object is removed and the scene World is updated with the dome's HDRI |
6.10 Scene Manager
Location: HDRI Forge panel — bottom sub-panel (always visible)
Lists all HDRI dome objects in the current scene.
| Control | Description |
|---|---|
| Dome list | All HDRI domes in the scene, listed by name |
| Solo | Mutes all other domes so only this one contributes to lighting |
| Mute | Disables this dome's contribution without deleting it |
| Camera | Toggles camera visibility for this dome |
| Select | Makes this dome the active object |
| Unmute All | Re-enables all domes in the scene |
7. Workflows
Workflow A — Product Visualisation
Goal: Different lighting environments per hero object, clean black background
- Switch renderer to Cycles
- Enable Film > Transparent in Render Properties
- Add HDRI Light → pick a studio .hdr → assign to your primary product
- Add HDRI Light → pick a second environment → assign to your secondary object
- Set both domes to Dome preset in Visibility (camera off, GI on)
- Grade each dome independently — Exposure, Colour Temp, Saturation
- F12 — each object renders with its own isolated HDRI, transparent background
Workflow B — Character Lighting
Goal: Key HDRI for the character, fill HDRI for background, separated control
- Add HDRI Light → your key environment → isolate to character mesh
- Add HDRI Light → a softer fill environment → isolate to background objects
- Use HDRI Layers on the character dome to blend a secondary bounce HDRI at low strength
- Enable Affects Diffuse / GI on both, disable camera visibility
- Use the ◀ ▶ library arrows to cycle through environment options while in rendered viewport — changes preview live
Workflow C — Blending Multiple HDRIs
Goal: Create a hybrid environment that doesn't exist as a single HDRI
- Add HDRI Light → pick your base HDRI
- In HDRI Layers, click Add HDRI Layer
- Load a second HDRI into the new layer
- Set Strength to 0.5 and blend mode to Add or Mix
- Rotate the second layer independently using the XYZ rotation sliders
- Grade the dome to taste — the blend and rotation create a unique lighting environment no single HDRI could achieve
Workflow D — Animating HDRI Lighting
Goal: Animate HDRI rotation or swap environments over time
- Add HDRI Light and set up as normal
- Select the dome in the outliner
- Hover over the Z Rotation field in HDRI Layers → right-click → Insert Keyframe
- Move to another frame, change the rotation, insert another keyframe
- The HDRI rotates with the timeline — useful for sun animation or time-of-day transitions
- Alternatively, use Lock to Camera so the dome follows a camera move automatically
8. Tips & Best Practices
Matched brightness across domes All domes are brightness-compensated at creation using inverse-square law. If you still notice a difference in brightness between domes using the same HDRI, use the Exposure (EV) control to fine-tune per dome.
Reflections showing the wrong HDRI Each dome's Visible in Reflections toggle controls whether it appears in reflective surfaces. If a highly reflective object is picking up light from the wrong dome's reflection, disable Visible in Reflections on the domes not assigned to that object.
Transparent render background Set all domes to camera-invisible (Dome preset), then enable Film > Transparent in Render Properties. The HDRI lights the scene without contributing to the background pixel.
Slow thumbnail loading The HDRI Library generates thumbnails from your actual .hdr and .exr files. Large files or large libraries may take a moment to populate. The cache persists for the session — once loaded, browsing is fast.
Reloading after file moves All dome settings and HDRI assignments are saved with the .blend file. HDRIs are linked by file path. If you move your HDRI files to a different location, relink them via the image picker in HDRI Layers.
Multiple domes, one object One object can receive light from multiple domes simultaneously. Add both domes, isolate both, add the same object to both receiver lists. Useful for key + fill HDRI setups on a single object.
Using with existing lights HDRI Forge domes work alongside standard Blender lights. Area lights, point lights and spot lights are unaffected by dome light linking and continue to light objects normally unless you configure their light linking separately.
9. Troubleshooting
Panel doesn't appear in the N-panel Confirm the addon is enabled in Edit → Preferences → Add-ons. Search for HDRI Forge and check the box. If it still doesn't appear, restart Blender.
"Requires Cycles to isolate" warning Your renderer is set to EEVEE. Go to Properties → Render → Render Engine → Cycles. The warning disappears and light linking becomes available.
Dome added but objects are still lit the same Click Isolate (Enable Light Linking) in the Light Linking sub-panel, then add objects to the receiver list using Add Selected. Isolation is not automatic on dome creation — it must be explicitly enabled.
Objects go completely dark after isolation This is expected immediately after enabling isolation with an empty receiver list. Add your target objects to the receiver list using Add Selected and they will receive light from the dome.
Library thumbnails not appearing Confirm you have set an HDRI Folder in Edit → Preferences → Add-ons → HDRI Forge. The folder must contain .hdr or .exr files. If you recently added files, clear the cache by changing the folder path to anything, then changing it back.
HDRI Layers not visible The Layers sub-panel only appears when an HDRI dome is the active object. Click your dome in the viewport or select it via the Scene Manager.
Dome visible in render Open the Visibility sub-panel and click the Dome preset, or manually uncheck Visible to Camera. By default all new domes are camera-invisible.
Colour temperature has no visible effect Confirm your renderer is set to Cycles and you are viewing in Rendered viewport mode. The colour grading chain affects the emitted light — changes may be subtle at small Kelvin values. Try dragging from 3200K to 10000K for a dramatic test.
Dome disappeared from outliner HDRI domes are added to the HDRI Lights collection. Check your outliner's collection visibility — the HDRI Lights collection may be hidden. Click the eye icon next to it to make it visible.
Light linking not saving between sessions This is a known Blender behaviour in some 4.x versions. Ensure you save your .blend file after setting up light linking. On reopening, select each dome and verify its receiver list is intact before rendering.
10. FAQ
Does this work in EEVEE? Light isolation requires Cycles. EEVEE does not support Blender's light linking system. Domes still render as emissive backdrop objects in EEVEE but cannot be isolated per object. A warning is shown in the panel when EEVEE is detected.
Do I need to buy HDRIs? No. HDRI Forge works with any .hdr or .exr file you already own. It does not include an HDRI library. Poly Haven (polyhaven.com) provides 750+ free HDRIs in both formats.
How many domes can I have in one scene? Unlimited. Each dome auto-staggers its radius and compensates brightness automatically.
Can the same object receive light from multiple domes? Yes. Add the object to the receiver list of each dome you want it to receive. Useful for key and fill HDRI setups.
Can I use HDRI Forge with GPU rendering? Yes. HDRI Forge is fully compatible with Cycles GPU rendering via CUDA, OptiX and Metal.
Will the dome appear in my render? No by default. Domes are camera-invisible on creation. Enable Visible to Camera in the Visibility sub-panel, or click the Backdrop preset, if you want the HDRI to appear as a background.
Can I animate the HDRI? Yes. Each dome is a real Blender object — keyframe its location, rotation and scale. You can also keyframe the HDRI Layers rotation values directly for animated environment rotation.
Does it work with motion blur and depth of field? Yes. As real objects in the scene, domes interact with Cycles rendering normally including motion blur on animated domes.
Can I convert my existing World HDRI into a dome? Yes. Use From World HDRI to convert your current World shader HDRI into an HDRI Forge dome object in one click.
Is this a one-time purchase? Yes. One purchase covers all v1.x updates. Major version updates may be separate.
What does DOME10 do? DOME10 is a 10% discount code available for use at checkout on Gumroad.
11. Changelog
v1.0.0 — Initial Release
- Per-object HDRI isolation via Cycles light linking
- HDRI Layers — unlimited layer stacking with blend modes
- Exposure & Grading — EV exposure, colour temperature, saturation, value, contrast, tint
- Colour temperature fix — always-active correction normalised to 6500K neutral
- Visibility — per-ray toggles with Dome / Backdrop / Light Only presets
- Light Linking — receiver list, Add Selected, Light Everything, Light Group / AOV
- Tools — Fit Dome to Selected, Lock to Camera, Push to World
- HDRI Library — thumbnail browser with recursive subfolder scanning and prev / next preview arrows
- Scene Manager — solo, mute, camera toggle per dome
- Radius compensation — matched brightness across multiple domes via inverse-square law
- EEVEE warning — clear in-panel notice when Cycles is not active
- Blender 4.0+ / Cycles / GPL licensed
HDRI Forge v1.0.0 — Built by BrockCreative
Have questions about this product?
Login to message
| Sales | 10+ |
| Published | 3 months ago |
| Blender Version | 4.0 - 5.2 |
| Extension Type | N/A |
| Render Engine Used | Cycles |
| License | GPL |

Discover more products like this
3D Art HDRi 3d-lighting 360 hdri environment 360 degree lighting 1 click light setup 1 click light hdri addon blender 360 HDRi