Imagegis2Camera
 jangstudio


ImageGIS2Camera FAQ
10 common questions and answers for ImageGIS2Camera v1.0.46This FAQ explains the most common practical questions about importing cameras from images and GIS data, matching photographs, using the timeline sequence, setting per-camera resolution and rendering outputs with camera-based filenames.
1. Can I import cameras without a SHP or GPKG file?
Yes. Enable Images Only (no vector file), choose an Images Folder and click Import Cameras. The add-on scans the folder recursively and creates cameras from images that contain GPS EXIF latitude and longitude.
2. What happens to images that do not contain GPS EXIF coordinates?
They are skipped in Images Only mode because the add-on does not have a location from which to create the camera. If you want to use photos without GPS data, create a SHP/GPKG point layer and match the photos to the point names.
3. Can I use a SHP/GPKG point layer and attach photographs to the created cameras?
Yes. Use vector mode, select the point SHP/GPKG file, choose the Images Folder and make sure the vector name field matches image filenames without extensions. The default field is Name, but you can change it through Images Name Field.
4. How are camera names created?
In Images Only mode, camera names are generated from image filenames. In vector mode, camera names are taken from the selected attribute field. These names are also used for viewport labels, timeline camera markers and optional rendered output filenames.
5. Does the add-on create keyframes?
The add-on creates Blender camera markers on consecutive timeline frames. This gives a frame-by-frame camera-switching workflow: when you move along the timeline, the active camera changes. Technically these are timeline camera markers, not transform keyframes on the camera objects.
6. Can every imported camera have a different render resolution?
Yes. Each camera has Use Custom Resolution plus X and Y values. When a background image is attached, ImageGIS2Camera automatically stores the source image pixel dimensions on that camera. Live Preview and the add-on render buttons then apply the correct resolution for the active camera/frame.
7. Will rendered files be saved using photo or camera names?
Yes. Enable file name = camera name and render through Render Active Frame (per-camera res) or Render Animation (per-camera res). Single-frame renders use the active camera name. Animation/batch rendering also adds a numeric suffix so every output file remains unique.
8. Can the add-on read focal length and heading from photos?
Yes, if the metadata exists. Import Lens Parameters (EXIF) reads focal length and 35 mm equivalent focal length. Import Heading from EXIF reads GPS image direction/azimuth and rotates the camera. Photos without these fields are still imported, but those specific adjustments are skipped.
9. What should I do if my vector data uses a projected coordinate system?
Enable Transform to EPSG:4326 (WGS84). If the source CRS is not recognised, enter Source EPSG. Coordinate transformation and GPKG conversion require GDAL/ogr2ogr to be available in the Blender environment. After import, adjust Scale (XY) and Import at World Origin to make the camera set practical in Blender.
10. Can cameras follow a terrain mesh, and can I create panoramic cameras?
Yes. For terrain, enable Eye level location, choose a mesh in Ground Geometry and set Eye level offset; the add-on ray-casts to the mesh and places cameras above it. For panoramas, enable Set Panoramic (equirectangular) before import or select existing cameras and run Set Selected Cameras Panoramic.
Quick troubleshooting summary
No cameras in Images Only mode: check GPS EXIF coordinates.
No image backgrounds in vector mode: check filename/name-field matching and try Fuzzy image name match.
Wrong elevation: use Eye level location, Use Altitude, Z constant or Altitude Offset.
Wrong axes: try Swap X/Y.
Wrong render size: enable Live Preview, check Use Custom Resolution on the active camera, or click Apply to Scene Now.
Wrong output names: enable file name = camera name and render with the ImageGIS2Camera render buttons.
Illustrated interface overview

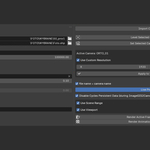
Main ImageGIS2Camera sidebar panel with import, georeferencing, EXIF, resolution and render controls.

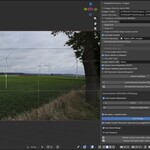
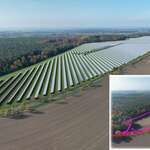
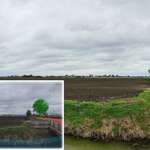
Camera view with a loaded photo background, active camera information and per-camera custom resolution.

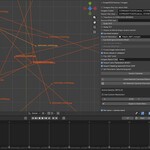
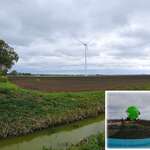
Top orthographic view showing generated camera positions, camera names, timeline frames and the ImageGIS2Camera collection.
Have questions about this product?
Login to message
| Blender Extension Compatible | Yes |
| Dev Fund Contributor | |
| Published | 4 months ago |
| Blender Version | 4.5 |
| Extension Type | Add-on |
| Render Engine Used | Cycles, Eevee, Freestyle, Luxrender, Mental-Ray, Octane, Vray, Yafaray |
| License | GPL |
Discover more products like this
blender addon panoramic camera Visualization GIS camera matching Batch rendering camera import shapefile EXIF GPS Blender GIS georeferenced images photomontage