Iridescence
 Egret Studios LLC
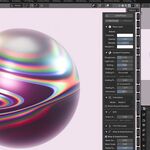
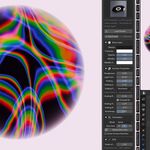
Iridescence — User Documentation
Physical Optics Materials for Blender
1. Installing
- Edit → Preferences → Add-ons
- Click the ▾ at the top right → Install from Disk…
- Choose
iridescence-1.0.0.zip - It enables itself.
The panel appears in the 3D View sidebar (press N) under the Iridescence tab, and in Properties → Material as well.
Requires Blender 4.2 LTS or newer. Works in Cycles (CPU and GPU) and EEVEE Next. Nothing else to install.
2. Quick start
The fastest route to a convincing render, from an empty scene:
- Open the sidebar (N) → Iridescence tab.
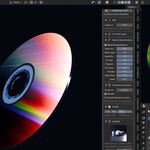
- In Create, click Optical Disc — CD.
- In Lighting, pick Strip Sweep and click Build Light Rig.
- Switch the viewport to Rendered shading.
- Orbit the camera. The rainbow sweeps.
That last step is the point. If the colours sit still as you orbit, something is wrong — see Troubleshooting.
To put the material on your own object instead: select it, click APPLY IRIDESCENCE, then pick a preset.
3. Where the panel lives
Two places, showing the same controls:
- 3D View → sidebar (N) → Iridescence — the tab name is configurable in preferences
- Properties → Material tab → Iridescence
Sections are collapsible and remember their open state in the .blend file. Surface Properties, Orientation, Quality, Lighting and Utilities start open; the rest start closed.
A control is only shown when it does something. Parameters reserved for a later release exist on the node group so your files stay compatible, but they are not given rows in the panel.
4. Creating objects
The Create section makes geometry with the material already on it. It is also available from Add → Mesh → Iridescence.
Optical Disc
Variants: CD, DVD, Blu-ray, Mini CD (80 mm), Blank Disc.
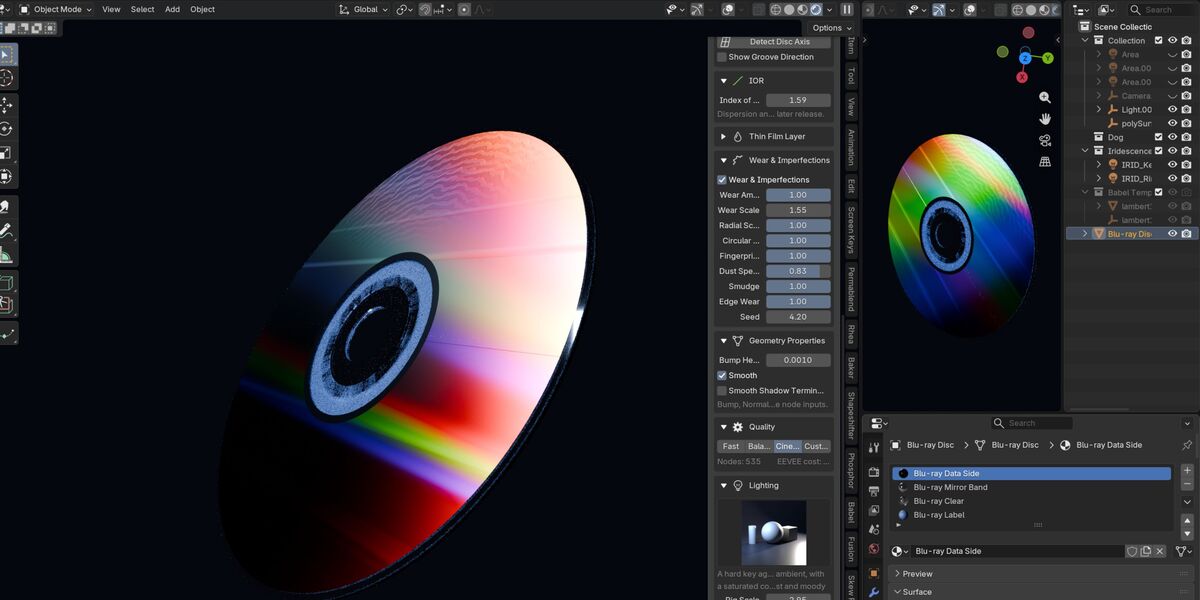
Built to real dimensions — 120 mm across, 15 mm centre hole, 1.2 mm thick, with the clamping area and the raised stacking ring at the hub. Radial UVs are already unwrapped: U runs around the disc, V from hub to rim.
It arrives with four material slots, because a disc really is four surfaces:
| Slot | Surface | Where |
|---|---|---|
| 0 | Data Side | metallised and pitted — the only part that diffracts |
| 1 | Mirror Band | metallised, unpitted — a plain mirror, no rainbow |
| 2 | Clear Polycarbonate | hub, rim and centre-hole wall — unmetallised |
| 3 | Label | the printed reverse face |
The clear hub is why a real disc shows a cream ring in the middle: you are looking at the printed label through the plastic.
Only slot 0 carries an Iridescence material. To change the disc's look, make sure slot 0 is the active slot before loading a preset.
Options (in the operator panel, bottom left after adding):
- Segments — ring subdivision, default 128. Raise it for extreme close-ups.
- Apply Materials — build the four materials, on by default
- Data Side Up — face the iridescent side upwards. Turn off to show the label
- At 3D Cursor — place it at the cursor rather than the origin
Preview objects
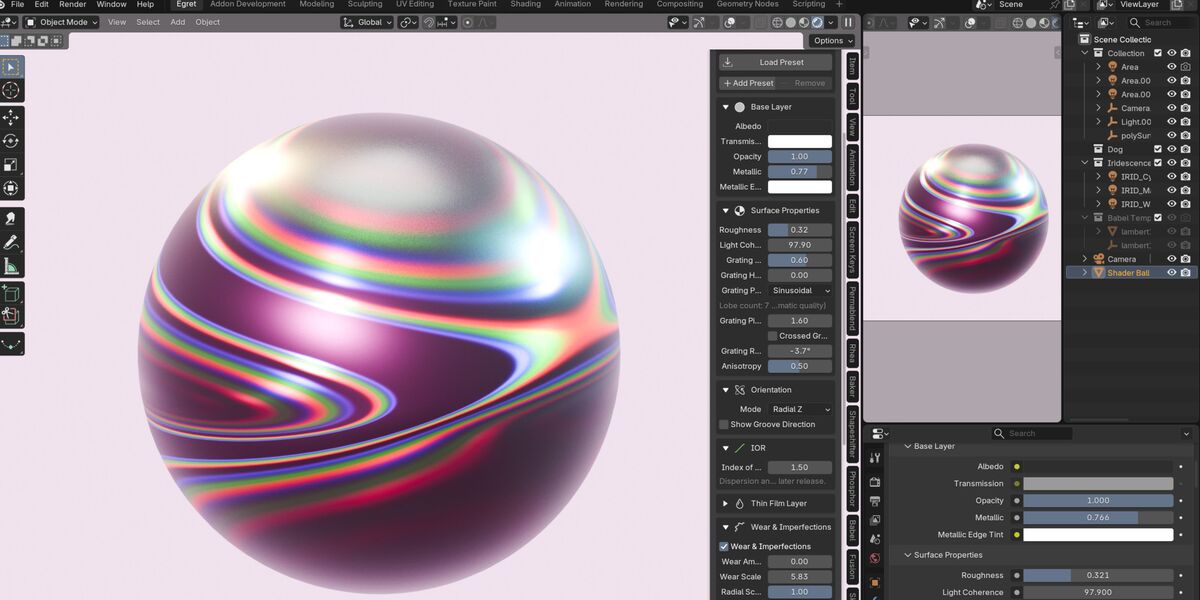
- Shader Ball — a sphere on a low plinth. The standard way to judge a material
- Sphere — plain and smooth, curvature only
- Foil Sheet — a gently rippled sheet, the right subject for foils and wraps
- Flat Plane — a flat panel, for stickers and printed films
All are generated procedurally and arrive with the material applied.
5. Presets
At the top of the panel: a category dropdown, a thumbnail browser, and Load / Add / Remove.
Every thumbnail is a render of that actual preset — none are illustrations.
Loading
Pick a category, click through the thumbnails, press Load Preset. The notes under the browser explain what the preset is modelling.
Loading is smart about rebuilds: values that only need writing into sockets are written directly, and the node tree is only rebuilt when the preset genuinely changes its structure.
Saving your own
Add Preset writes the current settings to {user_scripts}/presets/iridescence/ as plain JSON. Give it a name and optional notes. User presets appear under a User category, can be deleted from the panel, and are ordinary files you can share.
Refresh Presets rescans both folders if you have added files by hand.
The catalogue
| Category | Presets |
|---|---|
| Optical Media | CD (Data Side), CD-R (Cyanine), DVD, DVD-R, Blu-ray, LaserDisc, Vinyl LP, MiniDisc |
| Films & Foils | Holographic Foil, Rainbow Wrap Vinyl, Security Hologram, Dichroic Glass, Mylar Balloon, Diffraction Sticker |
| Liquids | Soap Bubble, Oil Slick, Petrol on Water, Fuel Rainbow |
| Nature | Jewel Beetle, Morpho Butterfly, Peacock Feather, Nacre / Mother of Pearl, Abalone Shell, Hummingbird Throat, Bismuth Crystal |
| Metals | Anodized Titanium, Heat-Treated Steel, Tempered Copper, Iridescent Chrome |
| Stylised | Soft Pearl, Subtle Sheen, Aggressive Rainbow, Cyber Holo |
6. Lighting
This section matters more than you would expect. A diffraction material is nearly black until something reflects in it — the diffracted lobe is the reflection. In an empty scene it will look broken, and that is not the shader's fault.
Three things were measured while building this add-on, and they explain the rigs:
- A bright uniform environment destroys the effect. Reflecting every direction at once averages the spectrum back to grey.
- Over-bright close lights destroy it too, from the other end — the surface blows out to white and buries the colour.
- Colour needs a small, directional source.
The rigs
| Rig | What it does |
|---|---|
| Single Spec | One small hard source. Classic point-light-on-a-CD spokes |
| Strip Sweep | A long thin source. Gives the continuous rainbow arc — start here |
| Ring | Eight sources about the view axis. Concentric rainbow rings |
| Three Point Studio | Key, fill and rim. The safe general-purpose rig |
| Softbox Product | Large softboxes. Deliberately suppresses the rainbow — right for pearl and anodized metal |
| Cinematic Low Key | Hard key, near-black ambient, saturated cool rim |
| Neon Kickers | Three coloured sources. Cyber-holo, wrap vinyl |
| Environment Only | No hard sources. The honest baseline |
Options
- Rig Scale — multiplies the automatic size. Rigs already scale themselves to your object, so you rarely need this
- Face Camera — orient the rig to the active camera. The sweep is view-dependent, so where the light sits relative to the camera is what sets the look. On by default
- Drive Light Vector — point the material's Light Vector Override at the rig's key light with a driver, so the diffraction responds to the light you just placed rather than to the mirror approximation. On by default
- Dim World — darken the background. Diffraction needs contrast. On by default; a world whose colour is driven by a texture is left alone
Housekeeping
Everything generated goes into an Iridescence Lighting collection and is tagged. Remove deletes only what the add-on made — your own lights are never touched.
Turntable Camera adds a camera orbiting the active object over the scene frame range, and makes it active. A view-dependent effect deserves an honest way to show it.
7. The material, section by section
Base Layer
| Control | Default | What it does |
|---|---|---|
| Albedo | black | Diffuse colour under the grating. Black is right for most optical media |
| Transmission | white | Tint of light passing through the surface |
| Opacity | 1.0 | Below 1 the surface becomes transmissive (glass), tinted by Transmission. This is refraction, not an alpha cutout |
| Metallic | 0.0 | Metallic character of the base |
| Metallic Edge Tint | white | Colour a metal reflects at grazing angles |
Surface Properties
| Control | Default | Range | What it does |
|---|---|---|---|
| Roughness | 0.0 | 0–1 | Microfacet roughness of every lobe |
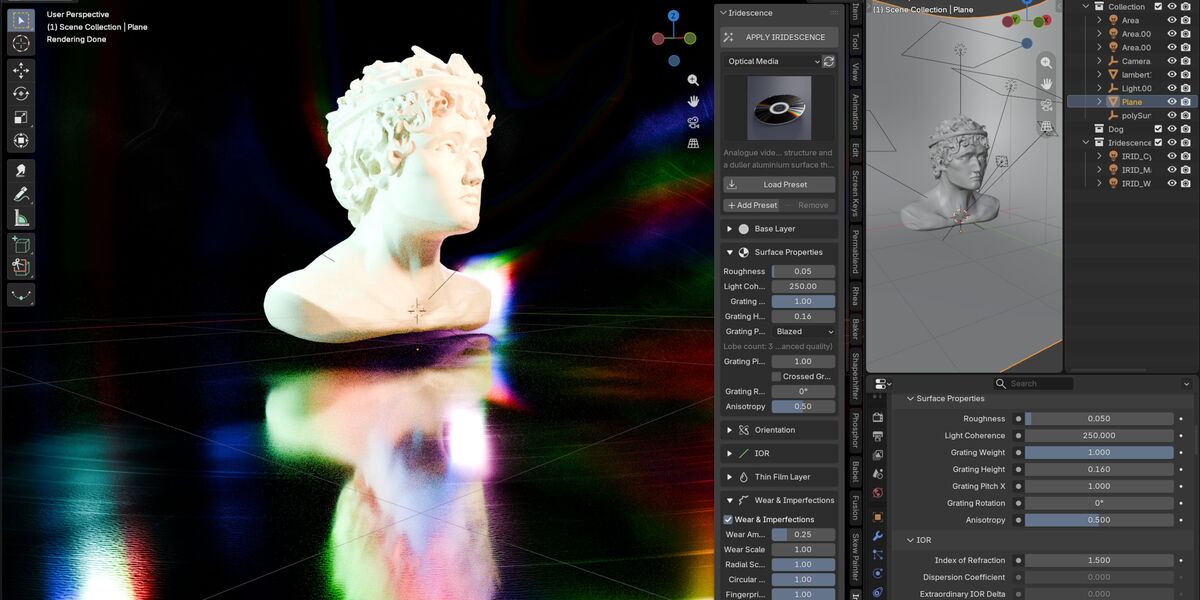
| Light Coherence (µm) | 100 | 0.1–10000 | Spectral blur. Low is washed-out and broad like a real area light; high separates the bands sharply |
| Grating Weight | 1.0 | 0–1 | Share of the reflection that is diffracted. At 0 you get a plain glossy surface |
| Grating Height (µm) | 0.0 | 0–5 | Groove depth. This is the control that decides how much of the surface shows colour — see below |
| Grating Profile | Sinusoidal | — | Groove cross-section |
| Grating Lobe Count | 3 | 0–9 | Diffraction orders evaluated. Set by Quality unless Quality is Custom |
| Grating Pitch X (µm) | 1.600 | 0.05–500 | Groove spacing. The single most important value |
| Crossed Grating | off | — | Adds a second grating at right angles — foil and CD-R dye patterns |
| Grating Pitch Y (µm) | 1.6 | Pitch of that second grating | |
| Grating Rotation | 0° | ±180° | Turns the grooves about the frame axis |
| Anisotropy | 0.5 | 0–1 | Stretch of the specular streak along the grooves |
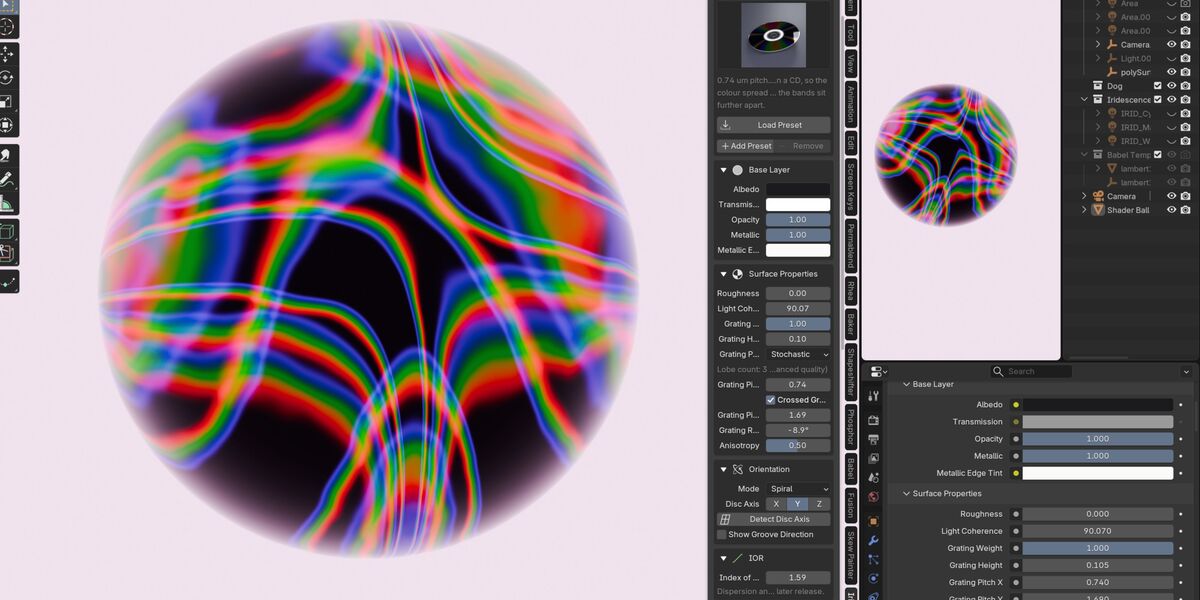
On Grating Pitch. Pitch sets how far apart the colours land. Tighter pitch spreads them wider. Real values: CD 1.600, DVD 0.740, HD DVD 0.400, Blu-ray 0.320, vinyl ~100 µm (too coarse to diffract visible light at all — you get an anisotropic sheen instead).
On Grating Height. Groove depth only matters relative to a wavelength, so it is measured against a quarter wave. At 0 the surface is smooth and only the first order carries energy, which gives one narrow rainbow band. At a real pit depth — a CD's is about 0.125 µm — several orders carry energy and you get the broad fan a real disc shows. If your disc looks too sparse, this is the control to reach for.
Grating Profile:
- Sinusoidal — strong first order, rapid falloff. Matches a CD
- Square — odd orders only, slow 1/m² falloff. Harsher rainbow. Even orders are not built at all, so it is cheaper too
- Blazed — energy biased to one side, so the sweep is asymmetric. Security holograms
- Stochastic — orders smeared by noise. Foil and brushed looks
IOR
Index of Refraction (default 1.50) — the substrate. Polycarbonate, the material of an optical disc, is 1.585. It also acts as the substrate index for thin film interference, which matters more than it sounds — see below.
Dispersion and birefringence are planned for a later release. Their sockets already exist on the node group so your files stay compatible, but they are not drawn in the panel because they would do nothing.
Thin Film Layer
Tick Thin Film to add it. Soap bubbles, oil slicks, anodized metal, beetle shells.
| Control | Default | What it does |
|---|---|---|
| Film Thickness (µm) | 0.3 | Visible colour needs roughly 0.1–1.0 |
| Film Roughness | 0.0 | Roughness of the film's own lobe |
| Film IOR | 1.45 | Refractive index of the film |
The one thing to get right. Interference needs both faces of the film to reflect. If Film IOR equals Index of Refraction, the second reflection vanishes and the film does nothing at all. Keep them apart. A soap film has air behind it, so its substrate IOR is 1.0; nacre is aragonite (1.68) over an organic matrix (1.435).
Thickness Variation — tick it for uneven films:
- Noise Scale — size of the variation
- Contrast — how hard the bands separate
- Flow Direction — the direction the film is stretched along, as it would flow
- Gravity Bias — thins the film at the top and thickens it at the bottom, the way a real bubble drains before it pops
Geometry Properties
- Bump Height — distance the Bump input displaces the normal
- Smooth — shade the meshes using this material smoothly
- Smooth Shadow Terminator — offsets the Cycles shadow terminator, hiding faceting on low-poly curved surfaces
Bump, Normal and Displacement are node inputs rather than panel rows — plug textures into them on the IRID_Iridescence group node. The group's Displacement output is already wired to the Material Output.
8. Orientation — the most important setting
Getting the groove direction right is the single biggest correctness factor. On a disc the grooves are concentric, so the direction across them is radial.
| Mode | Use it for |
|---|---|
| Auto Disc | Detects the object's flattest bounding-box axis and builds a radial frame. Correct for discs in any orientation |
| Spiral | Radial, offset by the angle a real track spirals through. What an optical disc physically is |
| Radial X / Y / Z | Radial about a specific object axis |
| Linear | Parallel grooves along the object X axis, turned by Grating Rotation. Foil, brushed metal, guilloche |
| UV | Grooves follow a UV map's V direction, so they follow the unwrap however the surface curves |
| Custom Vector | Groove direction read from a named vector attribute — for grooves authored in geometry nodes |
Detect Disc Axis re-runs the bounding-box detection. It runs automatically when you first apply the material, so you only need it after changing the geometry.
Show Groove Direction
Tick this. It draws the actual groove direction over your object in the viewport, computed from the same maths the shader uses — so what you see is what is being rendered.
If the material looks wrong, turn this on first. On a disc the segments should form concentric circles. If they run radially or in parallel lines, the orientation mode or the disc axis is wrong, and you have found your problem in about two seconds.
Light Vector Override
By default the light direction is approximated from the view direction, which is what makes the sweep correct as you orbit. Plug a direction in here — or let a light rig drive it — and the real grating equation is evaluated against that direction instead. Leave it at zero to use the default.
9. Wear & imperfections
Off by default. This is what takes a render from "shader demo" to "photo".
Tick Wear & Imperfections, then set Wear Amount — that one slider scales everything. The per-channel sliders below set the mix.
| Channel | What it does |
|---|---|
| Radial Scratches | Fine scratches running across the grooves |
| Circular Scuffs | Scuffing that follows the groove direction |
| Fingerprints | Greasy prints, which also locally thicken the film |
| Dust Specks | Small settled specks |
| Smudge | Broad haze that lifts roughness and dulls the rainbow |
| Edge Wear | Handling damage concentrated on the rim |
Wear Scale sets the overall size of the pattern. Seed varies it per-object.
All of it is oriented to the grooves, and all of it has actual relief — scratches cut into the surface, dust sits proud of it. Damage also kills the rainbow locally, the way it does on a real disc.
Note: Fast quality builds without wear, by design. Use Balanced or Cinematic.
10. Quality and performance
| Mode | Orders | Coherence samples | Wear | Nodes |
|---|---|---|---|---|
| Fast | 1 | 1 | off | ~90 |
| Balanced | 3 | 3 | on | ~220 |
| Cinematic | 7 | 3 | on | ~480 |
| Custom | you choose | you choose | on | — |
Shader nodes have no loops, so the diffraction orders are unrolled when the tree is built. Changing quality therefore rebuilds the node tree — which happens automatically, and preserves every value you have set.
The panel shows a live node count and an EEVEE cost indicator.
Automatic rebuild. Structural changes — quality, orientation mode, profile, turning film or wear on — rebuild the tree by themselves a moment after you change them. If you prefer to control it, turn Rebuild Automatically off in preferences and a Rebuild button appears when one is pending.
11. Baking and export
Bake to Texture Set
Requires Cycles, a mesh with a UV map, and an Iridescence material.
Produces five maps:
*_basecolor.png-
*_roughness.png— including wear *_normal.png-
*_iridescence_mask.png— grating weight × wear *_thinfilm_thickness.png
Be aware: the diffraction response is view-dependent and cannot be baked to a static texture. These maps drive an iridescence shader in your target engine — they are not a picture of the effect.
Bake Spectral LUT
An optional optimisation, off by default. It replaces the spectral fit with a 512 × 1 lookup texture, cutting node count by roughly 30 %. The LUT is computed directly from the same constants the node graph uses, so it cannot drift from the maths. Toggle it back off at any time.
12. Utilities
- Randomize Variation — gives every selected object its own seed, so a stack of fifty discs never repeats. Materials shared between objects are made single user first
- Copy to Selected — copies the active object's settings to every other selected object, building the material where it is missing. Each object keeps its own seed unless you say otherwise
- Bake to Texture Set — see above
- Add Disc Object — a shortcut to the CD
- Documentation — opens this online
13. Preferences
Edit → Preferences → Add-ons → Iridescence
-
Sidebar Category — which N-panel tab the panel appears in. Default
Iridescence - Rebuild Automatically — rebuild on structural changes without asking. On by default
- Groove Overlay Colour / Length / Segments — appearance and cost of the Show Groove Direction overlay
- Developer Mode — adds a Development section with a spectral validation sweep, for checking the colour maths against a reference spectrum
14. Working with the node groups
Everything is built from stock shader nodes and is meant to be opened.
| Group | What it does |
|---|---|
IRID_Iridescence_* |
The top-level material. Every parameter is on its interface |
IRID_Spectral_λ_to_RGB |
Wavelength → linear sRGB, via the CIE 1931 fit |
IRID_Diffraction_Grating_* |
The grating, with orders unrolled |
IRID_Grating_Frame_* |
Groove orientation |
IRID_Thin_Film |
Two-beam interference |
IRID_Film_Thickness_Variation |
Uneven film |
IRID_Wear |
Procedural damage |
Group names carry their build signature — profile, order count, coherence samples — so two materials at different settings never fight over one datablock. Materials with identical settings deliberately share one group; your per-material values live on the group node, not inside the group, so this is safe.
Every group carries an irid_version custom property. Open a file made by a different version and the panel offers to upgrade it rather than silently breaking it.
If you edit a group by hand, the add-on notices (it records the authored node count) and warns you before a rebuild replaces your changes. To keep custom work, copy the group and give it a name that does not start with IRID_.
15. Troubleshooting
The object is black. Almost always lighting. A diffraction material only shows what reflects in it. Build a light rig — Strip Sweep is the reliable one. If you are using your own lights, make sure at least one is small and directional.
The rainbow doesn't move when I orbit. Check Grating Weight is above 0 and Grating Lobe Count is at least 1. If the colour is coming from the Thin Film layer rather than the grating, it will shift with angle but will not sweep in the same way — that is correct behaviour for a film.
Everything is washed out / grey. A bright uniform environment kills diffraction. Turn Dim World on when building a rig, or darken your world manually. Blender's default AgX view transform also desaturates these colours noticeably; try Standard for a punchier result.
Only a thin band of colour shows. Raise Grating Height. At 0 only the first order carries energy. A real pit depth (~0.125 µm for a CD) spreads energy across several orders and fills the surface.
The thin film does nothing. Film IOR is probably too close to Index of Refraction. Interference needs both faces to reflect; if the two indices match, the second reflection vanishes.
The grooves look wrong. Turn on Show Groove Direction. On a disc the segments should form concentric circles. If not, fix the orientation mode or run Detect Disc Axis.
My disc's label side is iridescent too. Only slot 0 of a generated disc is an Iridescence material. If you applied the material with a different slot active, it went to the wrong one.
The panel says a material is from another version. Click Upgrade Materials. It rebuilds them and preserves every setting.
Nothing renders in the viewport. Workbench cannot shade this material. The panel offers a one-click switch to EEVEE Next when it detects this.
16. Reference tables
Real-world track pitches
| Medium | Pitch | Notes |
|---|---|---|
| CD | 1.600 µm | Polycarbonate IOR 1.585, aluminium layer |
| DVD | 0.740 µm | Tighter → wider colour spread |
| HD DVD | 0.400 µm | |
| Blu-ray | 0.320 µm | Very wide spread, strong first order |
| Vinyl LP | ~100 µm | Sub-diffractive; anisotropic sheen only |
| Holographic foil | 1.0–2.0 µm | Stochastic profile |
| Security hologram | 0.5–1.5 µm | Blazed profile |
| Morpho butterfly | 0.7 µm | Grating plus a thin film stack |
Optical disc geometry (radii)
| Dimension | CD / DVD / Blu-ray | Mini CD |
|---|---|---|
| Centre hole | 7.5 mm | 7.5 mm |
| Stacking ring | 12.8 mm | 12.8 mm |
| Clamping area to | 16.5 mm | 16.5 mm |
| Metallisation starts | 21–23 mm | 23 mm |
| Data area starts | 23–25 mm | 25 mm |
| Data area ends | 58.5 mm | 38.5 mm |
| Outer edge | 60 mm | 40 mm |
| Thickness | 1.2 mm | 1.2 mm |
Operators
| Operator | Purpose |
|---|---|
iridescence.apply_material |
Build the tree on the active material |
iridescence.rebuild_nodes |
Rebuild, preserving values |
iridescence.load_preset |
Apply a preset |
iridescence.save_preset |
Save current settings as a user preset |
iridescence.delete_preset |
Delete a user preset |
iridescence.refresh_presets |
Rescan the preset folders |
iridescence.add_disc |
Add an optical disc |
iridescence.add_preview_object |
Add a shader ball, sphere or sheet |
iridescence.add_lighting |
Build a light rig |
iridescence.remove_lighting |
Remove the generated rig |
iridescence.add_turntable |
Add an orbiting camera |
iridescence.detect_disc_axis |
Re-detect the disc axis |
iridescence.randomize_variation |
Per-object seeds |
iridescence.copy_to_selected |
Copy settings to selected objects |
iridescence.bake_texture_set |
Bake the texture set |
iridescence.bake_spectral_lut |
Toggle the spectral LUT |
iridescence.toggle_groove_overlay |
Toggle the groove overlay |
iridescence.upgrade_materials |
Rebuild materials from another version |
iridescence.open_docs |
Open the documentation |
All operators support undo and carry tooltips.
Iridescence 1.0 | Egret Studios, LLC
Feel free to inbox me for support.
 Included
Includes 12 months of
- Support from Egret Studios LLC
- Product updates
Extend this product’s Support Period +12 months: 50% of product price
Have questions before purchasing?
Login to message
| Blender Extension Compatible | Yes |
| Published | 13 days ago |
| Blender Version | 4.2 - 5.2 |
| Extension Type | Add-on |
| Render Engine Used | Cycles, Eevee |
| License | GPL |

Discover more products like this
procedural materials thin film physically based spectral iridescence procedural shader Geonodes diffraction cd Cycles optical materials