Lazy Cracker
 Casey_Sheep



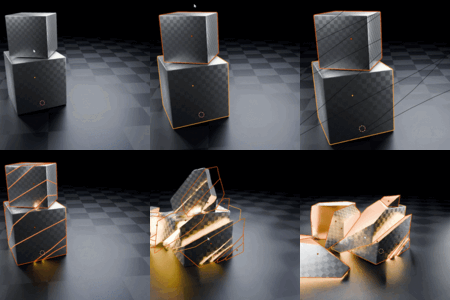





Recommended Workflow
Follow this order for stable crack simulation from setup to final result.
1. Set Passive Bodies + Shape/Margin: Set the ground as a collision object first.
2. Add Rigid Body World + Split Impulse: If this option appears, make sure Split Impulse is enabled.
3. Draw Crack Path / Auto Crack: Cut the target object, then start the simulation.
4. Freeze Rigid Body State / Bake Physics: After simulation, freeze the current state or adjust settings and simulate again.
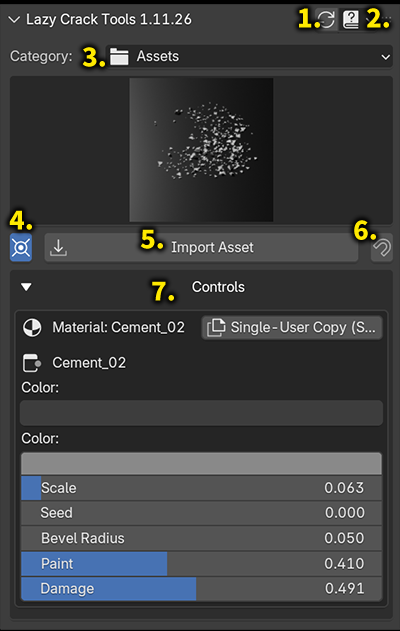
Lazy Drop Library
When to use: drop built-in materials or ready-made assets quickly while working.
1. Refresh: Refresh library
2. Help: Open documentation
3. Category: Switch library between Materials and Assets.
4. At 3D Cursor: Spawn at cursor when on; world center when off.
5. Apply Material / Import Asset: One-click apply current thumbnail choice.
6. Snap Preset: Fine tune active item and speed up asset placement.
7. Controls: Adjust material Shader parameters for the selected asset.
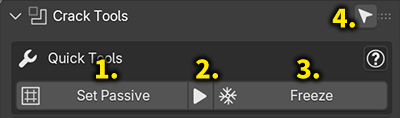
Quick Tools
Fast rigid-body utility access from Crack panel.
1. Set Passive: turn selected objects into passive colliders.
2. Prep Rigid Bodies (quick access): prepare rigid bodies directly from Crack panel.
3. Freeze RB: keep current pose and stop motion for selected bodies.
4. Select Crack Group: Select pieces from the same crack pass.
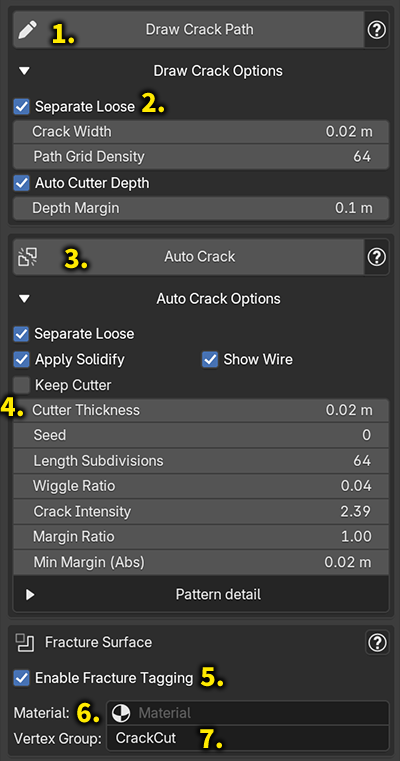
Crack Tools
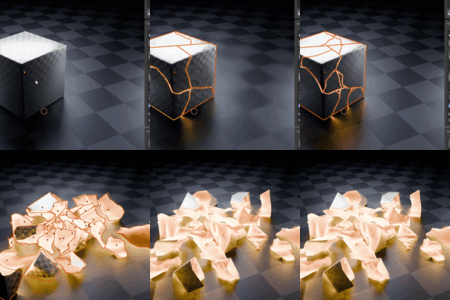
Main crack workflow in addon order: Draw Crack Path → Auto Crack → Fracture Surface.
Draw Crack Path
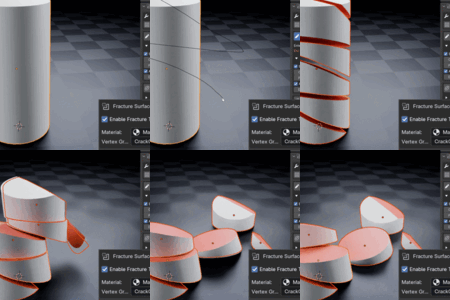
1. Draw Crack Path: draw in viewport, then Enter to apply.
2. Separate Loose (Draw/Auto): split loose islands into separate pieces after cut.
Auto Crack
3. Auto Crack: generate procedural cracks for selected meshes.
4. Cutter Thickness: control crack width.
Fracture Surface
5. Enable Fracture Tagging: tag newly created fracture faces.
6. Material: assign interior fracture material.
7. Vertex Group: write fracture vertices into a named group.
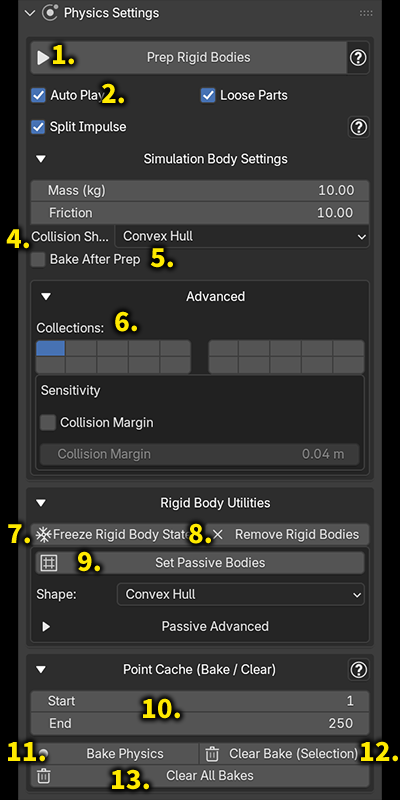
Physics Settings
Full rigid body preparation, world setup, utilities, baking, and cleanup.
1. Prep Rigid Bodies: optional split, origin setup, mass/friction/shape, optional bake.
2. Auto Play: timeline starts after prep.
3. Add Rigid Body World + Split Impulse:
create world and improve contact stability.
(Only visible when Split Impulse is not enabled and Rigid Body World does not exist, thus not shown in the screenshot.)
Simulation Body Defaults
4. Mass / Friction / Collision Shape: shard behavior realism and speed/accuracy trade-off.
5. Bake After Prep: write simulation automatically for render consistency.
6. Advanced Collections: selective collision layer control.
Rigid Body Utilities
7. Freeze Rigid Body State: lock a good frame quickly.
8. Remove Rigid Bodies: revert selection to normal meshes.
9. Set Passive Bodies + Shape/Margin: configure environment colliders.
Point Cache (Bake / Clear)
10. Frame Start / End: define bake range by shot duration.
11. Bake Physics: write simulation for repeatable playback and render.
12. Clear Bake (Selection): clear relevant cache for selected workflow objects.
13. Clear All Bakes: global cache reset for full re-simulation.
-
$12
-
$29
【Lazy Cracker+Bonus】 【Drop Cast+Bonus】 【BlendShop】 【BetterLightingV2】
Have questions about this product?
Login to message