Light Juggler
 KalthireddyAbhishek




Thank you for choosing Light Juggler! This addon is designed to streamline your lighting workflow in Blender, helping you manage scene lights, experiment with setups, and stay focused on your creative process.
1. Installation
Download: Download the
light_juggler.zipfile from your SuperHive purchase. Do not unpack it.Open Blender: Go to
Edit > Preferences > Add-ons.Install: Click the
Install...button at the top right.Select File: Navigate to the downloaded
light_juggler.zipfile and select it. ClickInstall Add-on.Enable: Once installed, search for "Light Juggler" in the add-ons list. Check the box next to its name to enable it.
Save Preferences (Optional but Recommended): Click
Save Preferencesat the bottom left of the Preferences window to ensure the addon remains enabled when you restart Blender.
2. Accessing the Panel
Once enabled, you'll find the Light Juggler panel in the 3D Viewport sidebar:
Open the 3D Viewport.
Press the
Nkey to open the sidebar (if it's not already open).Look for a new tab named "Light Juggle". Click on it to expand the Light Juggler panel.
3. Panel Overview
The Light Juggler panel is divided into two main sections: Scene Lights and Utilities.
3.1. Scene Lights
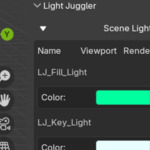
This section lists all Light objects currently present in your Blender scene.
Toggle Lights List: At the top of the "Scene Lights" section, you'll see a
Show Lightstoggle. This allows you to collapse or expand the list of lights, keeping your sidebar tidy.-
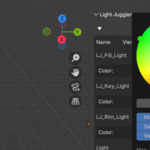
Individual Light Controls: For each light in your scene, you will see:
Light Name: The name of the light object. You can directly click and edit the name here.
Viewport Visibility (Eye Icon 👁️): Toggles whether the light is visible in the 3D Viewport.
Render Visibility (Camera Icon 📷): Toggles whether the light contributes to the final render.
Solo Toggle (Speaker/Headphone Icon 🎧): Controls the powerful Solo Mode (explained below).
Color Picker: Adjusts the light's color.
Power (Energy) Slider: Changes the light's intensity.
3.2. Utilities
This section provides convenient scene-wide operations:
-
Exit Solo / Show All Lights:
If Solo Mode is active, clicking this button will exit solo mode and restore all lights to their original visibility states before soloing.
If Solo Mode is NOT active, clicking this button will make all lights in your scene visible in both the viewport and render, which is useful if you've accidentally hidden too many.
-
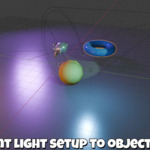
Add 3-Point Light Setup: This operator will automatically create a standard three-point lighting setup (Key, Fill, and Rim lights) around your currently selected object. It's a great starting point for studio-style renders!
How to use: Select the object you want to light, then click this button.
4. Understanding Solo Mode (The Juggler's Magic!)
Solo Mode is the heart of Light Juggler, allowing for incredibly fast iteration and analysis of your lighting.
-
Entering Solo Mode:
Click the Solo Toggle (🎧 icon) next to any light.
The addon will remember the current visibility state of all lights in your scene.
All lights except the one you clicked will immediately become hidden (both viewport and render).
The Solo Toggle for the active solo light will change to
SOLO_OFF, indicating it's part of the solo group. The "Exit Solo" button will appear.All other lights' Color and Power controls will become temporarily disabled, indicating they are not currently active.
-
Adding More Lights to Solo:
Once in solo mode, click the Solo Toggle (🎧 icon) of any other light you want to include.
That light will immediately become visible, joining the solo group.
-
Removing Lights from Solo:
Click the Solo Toggle (🎧 icon) of any light currently in the solo group.
That light will immediately become hidden.
If you remove the last light from the solo group, Solo Mode will automatically deactivate, and all lights will revert to their pre-solo visibility states.
-
Exiting Solo Mode:
Click the "Exit Solo / Show All Lights" button in the Utilities section.
All lights will return to how they were before you entered solo mode, allowing you to seamlessly switch between broad and focused lighting adjustments.
5. Tips for Best Use
Name Your Lights: Giving your lights meaningful names (e.g., "Key_Light," "Window_Fill," "Rim_Back") makes the panel much easier to navigate.
Iterate Quickly: Use Solo Mode to quickly test the impact of individual lights or small groups. Rapidly adjust power and color without interruption.
Start with 3-Point: For new scenes or character renders, the "Add 3-Point Light Setup" is an excellent starting point, giving you a balanced foundation to build upon.
6. Support & Feedback
If you encounter any issues, have questions, or want to provide feedback, please use the contact information provided on the SuperHive product page.
We hope Light Juggler becomes an indispensable part of your Blender workflow!
Discover more products like this
1 click light setup Add-light-quickly 3d viewport fair price 2025-add-ons-for-blender easy 3d lighting Lighting-quick-setup 3d 3D Workflow Solutions Auto Lighting Setup Lightning 3d addon