Light Takes — One Scene, Multiple Looks (Blender)
 Light Labels



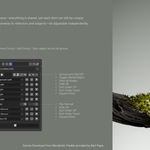
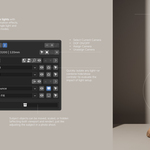

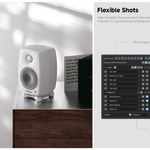
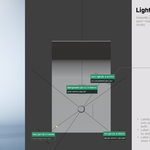
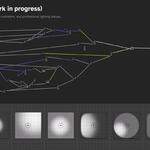
Light Takes 2.0 — One Scene, Multiple Looks
Save, switch and refine visual alternatives in one Blender scene. Each take coordinates managed lighting, camera framing, enabled Subject states and configured take-driven material parameters.
Requirements
Requires Blender 5.0 or newer. Cycles and EEVEE Next are supported. The release package has been installed and regression-tested on Blender 5.1.2 for Windows. Blender 5.0, macOS and Linux have not been separately tested for this release. Floating Viewport is Windows-only.
Install or update
- Download light_takes-2.0.0.zip; do not unzip it.
- Open Edit → Preferences → Get Extensions in Blender.
- Open the upper-right menu and choose Install from Disk….
- Select the ZIP and enable Light Takes if needed.
- Open 3D View → Sidebar (N) → Light Takes.
When updating from Light Labels 1.x, keep a backup of important files. Install the new ZIP, open your existing .blend and check the migrated take data and helper nodes before saving.
Create and switch takes
- In the Takes panel, press + to create the first take.
- Set the camera and lighting for that shot.
- Press + again to copy the current setup, then relight or reframe.
- Click a take to restore its camera, lights, visibility, world and render resolution.
- Right-click a take to name it Main, Hero, Night or another name.
Use Global for a light present in every take with per-take settings; use Solo for a light belonging only to the current take. In Object Mode, Ctrl+Shift+Left/Right Arrow cycles between takes.
Bind a camera
Select a camera and use the camera control in the Takes panel. One camera can be bound to several takes, each remembering its transform, lens, shift and depth-of-field settings. Takes can also use different cameras.
Include subject and material variations
Mark a Subject collection and enable snapshots when object transforms, visibility or material assignments should vary between takes. Configure Info, Logic and Index Switch nodes to let materials respond to the active take. Use Per-Take Parameters for supported numeric, color and boolean properties on tracked objects.
A take stores the states you configure; arbitrary scene edits and every material socket are not captured automatically. For shared materials with per-object variations, read object attributes into the material, using Index Switch for discrete branches.
Render your finished options and create a contact sheet
- Save the .blend file and click Render All.
- Choose the take range, render scale and output subfolder.
- Enable Contact Sheet and choose Masonry, Fill or Hero if desired.
- Confirm the job. Press Esc to cancel; the original take, palette and render settings are restored.
Each output keeps its take number. Re-roll creates another contact-sheet layout from the completed renders without rendering again.
Render Global Palette variants
On one Global Palette node, click Render Palette Variants…. Default is the base palette rendered once per take. All Palettes adds every other named palette; Selected adds the palettes you check. All Takes applies extras everywhere. Logic applies them only to takes matched by a directly connected Light Logic Match → Take Filter link. Only one Global Palette node controls render variants at a time.
Edit collection and Geometry Nodes sources
Use Ctrl+Shift+Click in Object Mode on a collection instance or Geometry-Nodes-driven object. Click an editable nested source to go deeper; click empty space to step out. Shift+V hides unselected source members while editing. Original collection visibility and selection are restored when you finish.
Core shortcuts
- V: hide/show selected objects with render visibility synchronized
- Alt+V: show everything
- Ctrl+Shift+Left/Right Arrow: previous/next take
- Ctrl+Shift+Click: edit a collection instance or GN source
- Shift+Q: Quick Light
- Ctrl+Alt+R: Reflection Place
- Ctrl+Alt+F: interactive DOF focus
- Ctrl+Alt+P: Floating Viewport (Windows)
Shortcuts can be changed or disabled in Add-on Preferences.
Support and full manual
Open the complete Light Takes manual for screenshots, detailed instructions and troubleshooting. Contact [email protected] or use the Superhive product inbox. Include your Blender version, operating system, reproduction steps and any console traceback when reporting a problem.
Have questions about this product?
Login to message
| Published | about 1 year ago |
| Blender Version | 5.0 - 5.1 |
| Render Engine Used | Cycles, Eevee |
| License | GPL |

Discover more products like this
geometry nodes product-visualization light-labels Lighting contact sheet lighting-takes light manager lookdev batch render light-linking blender addon Camera Management