 Skava
Skava


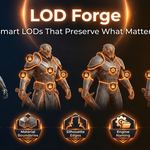
LOD FORGE DOCUMENTATION
Version 1.0.0 · Blender 3.0 – 4.4+
------------------------------------------------------------
TABLE OF CONTENTS
- 1. Installation
- 2. Getting Started
- 3. Smart Decimation 3.1 How Protection Weights Work
- 3.2 UV Seam Detection
- 3.3 Material Boundary Detection
- 3.4 Silhouette Edge Detection
- 3.5 Adaptive Protection Scaling
- 3.6 Decimate Modifier Integration
- 3.7 Skip Decimation (Target >= Source)
4. Engine Profiles
- 4.1 Unity LODGroup
- 4.2 Unreal Engine
- 4.3 Custom Naming
5. LOD Presets
6. Custom Targets
7. Feature Protection Settings
8. Budget Enforcement
9. LOD Preview
10. LOD Metrics
11. Batch Generation
12. Operator Reference
13. Python API Examples
14. Troubleshooting
15. FAQ
------------------------------------------------------------
1. INSTALLATION
METHOD A — INSTALL FROM ZIP
1. Download the lod_forge.zip file from Blender Market.
2. Open Blender → Edit → Preferences → Add-ons.
3. Click Install... and select the downloaded .zip file.
4. Enable the addon by checking the box next to LOD Forge.
5. The LOD Forge panel appears in the 3D Viewport sidebar under the LOD Forge tab.
METHOD B — MANUAL INSTALL
1. Extract the lod_forge folder from the ZIP archive.
2. Copy it to your Blender addons directory: Windows: %APPDATA%\Blender Foundation\Blender\4.4\scripts\addons\ macOS: ~/Library/Application Support/Blender/4.4/scripts/addons/ Linux: ~/.config/blender/4.4/scripts/addons/
3. Restart Blender and enable the addon in Edit > Preferences > Add-ons.
Note:
Do not extract the ZIP before installing via Method A. Blender expects the ZIP archive directly. For other Blender versions, replace 4.4 with your version number in the manual install path.
Important:
Blender 3.0 minimum. LOD Forge uses APIs introduced in Blender 3.0. Earlier versions are not supported.
------------------------------------------------------------
2. GETTING STARTED
PANEL LOCATION
Press N in the 3D Viewport to open the sidebar, then click the
LOD Forge tab.
QUICK START — 6 STEPS
1. Select a mesh object in the viewport.
2. Open the sidebar (N) and switch to the LOD Forge tab.
3. Under Preset, pick Desktop Character (or any preset that matches your use case).
4. Under Engine, pick Unity or Unreal.
5. Leave all three protection options enabled (UV Seams, Material Boundaries, Silhouette Edges).
6. Click Generate LODs.
LOD Forge will create LOD0 through LOD3, name them according to the selected engine convention,
apply adaptive protection scaling for each level, check each level against the preset's polygon
budget, and parent everything under an empty. The metrics panel below the button shows tri counts,
vertex counts, reduction percentages, and budget pass/fail status for every level.
Note:
Tip: When a preset is selected, the triangle targets are displayed as read-only info in the panel.
If any target exceeds the source mesh's actual triangle count, an info icon appears next to that level,
indicating it will be created as an exact copy rather than decimated.
------------------------------------------------------------
3. SMART DECIMATION
The core of LOD Forge is its protection weight system combined with adaptive scaling. Before
applying the Decimate modifier, LOD Forge analyses the mesh and creates a vertex group called
_lodforge_protect. Vertices that sit on important features receive a weight of
1.0 (fully protected), while all other vertices receive 0.0
(free to collapse). For aggressive LOD levels, these weights are then scaled down so the
decimator can reach the target triangle count.
3.1 HOW PROTECTION WEIGHTS WORK
LOD Forge creates a vertex group named _lodforge_protect on the mesh. The initial
weight assignment is binary:
- 1.0 — Vertex is on a protected feature (UV seam, material boundary, or silhouette edge)
- 0.0 — Vertex has no special importance and can be freely collapsed
If a vertex qualifies for protection under multiple criteria (e.g., it sits on both a UV seam
and a material boundary), it still receives 1.0 — protection is a flag, not additive.
Note:
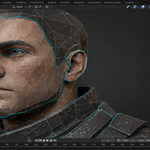
Inspect weights: You can view the protection weights by switching to Weight Paint mode
and selecting the _lodforge_protect vertex group. Red vertices are protected;
blue vertices will be decimated first.
3.2 UV SEAM DETECTION
LOD Forge uses bmesh to iterate over every edge in the mesh. For each edge where
edge.seam is True, both vertices of that edge receive a protection
weight of 1.0. This ensures that UV island boundaries remain intact during decimation,
preventing the texture tearing that plagues standard Decimate results.
Note:
Tip: Make sure your UV seams are properly marked before generating LODs.
LOD Forge reads edge.seam in bmesh — if seams are not marked, there is nothing to protect.
3.3 MATERIAL BOUNDARY DETECTION
For every edge in the mesh, LOD Forge checks the two faces that share it. If those adjacent
faces have different material_index values, the edge sits on a material boundary.
Both vertices of that edge are assigned a protection weight of 1.0. This prevents the
Decimate modifier from collapsing edges where two materials meet, which would cause color
bleeding and shading artifacts.
3.4 SILHOUETTE EDGE DETECTION
Silhouette edges are detected by measuring the angle between the normals of two adjacent faces
that share an edge. If this angle exceeds the Angle Threshold (default: 40°),
the edge is considered a silhouette-defining feature and both its vertices are protected.
The calculation works as follows:
# Pseudocode for silhouette detection
for edge in bmesh.edges:
if len(edge.link_faces) == 2:
face_a, face_b = edge.link_faces
angle = angle_between(face_a.normal, face_b.normal)
if angle > threshold:
for vert in edge.verts:
protect(vert, weight=1.0)
Lower threshold values protect more edges (aggressive protection); higher values protect
only the sharpest creases (relaxed protection). See the
Feature Protection Settings section for recommended values.
3.5 ADAPTIVE PROTECTION SCALING
This is the key innovation in LOD Forge. Standard protection works well for gentle decimation
(LOD1 at 50% of the original), but for aggressive LOD levels (LOD3 at 10% of the original),
full protection can prevent the decimator from reaching the target triangle count. Adaptive
protection solves this by automatically scaling down protection weights for aggressive levels.
THE FORMULA
scaled_weight = original_weight × max(0.2, ratio)
Where:
- original_weight is the binary protection weight (0.0 or 1.0)
- ratio is the decimation ratio = target_tris / source_tris
- 0.2 is the floor — protection never drops below 20% of the original weight
WHEN ADAPTIVE SCALING ACTIVATES
Adaptive scaling only activates when ratio . For ratios of 0.3 and above,
protection weights remain at full strength (1.0). This means:
LOD Level Typical Ratio Scaling Active? Effective Protection Weight Result
--------- ------------- --------------- --------------------------- ---------------------------------------------
LOD0 1.0 (copy) No 1.0 Exact copy of source
LOD1 ~0.5 No 1.0 Full protection — UVs and silhouette perfect
LOD2 ~0.2 Yes 0.2 Reduced protection — decimator can reach ta..
LOD3 ~0.1 Yes 0.2 (floor) Minimal protection — aggressive reduction, ..
EXAMPLE
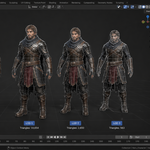
Consider a mesh with 15,000 triangles using the Desktop Character preset (LOD0: 15K, LOD1: 7.5K, LOD2: 3K, LOD3: 1.5K):
- LOD1: ratio = 7500/15000 = 0.5 → ratio >= 0.3 → weight stays 1.0. Full protection.
- LOD2: ratio = 3000/15000 = 0.2 → ratio Why this matters: Without adaptive protection, enabling feature protection on aggressive
LOD levels often results in the decimator failing to reach the target — you end up with LOD3
that is still 5,000 triangles instead of the target 1,500. Adaptive protection solves this by
gradually releasing the hold on protected vertices, letting the decimator do its job while still
prioritizing important features over flat areas.
3.6 DECIMATE MODIFIER INTEGRATION
LOD Forge uses the DECIMATE modifier with mode COLLAPSE. It configures:
- modifier.vertex_group = "_lodforge_protect"
- modifier.invert_vertex_group = True
With invert_vertex_group enabled, the modifier reads the vertex group weights
in reverse: vertices with weight 1.0 are treated as having 0.0 influence on decimation
(they resist collapse), while vertices with weight 0.0 are treated as having full influence
(they collapse first). This is Blender's built-in mechanism — LOD Forge leverages it
with intelligently computed and adaptively scaled weights.
3.7 SKIP DECIMATION (TARGET >= SOURCE)
If the target triangle count for a given LOD level is greater than or equal to the source mesh's
actual triangle count, LOD Forge skips decimation entirely and creates the LOD as an exact copy
of the source mesh. No Decimate modifier is applied, no vertices are collapsed — the mesh
is duplicated as-is. This prevents unnecessary decimation when the source mesh already meets
the budget.
Note:
Example: Your mesh has 4,000 triangles and you use the Desktop Character preset
(LOD0: 15,000). Since 15,000 > 4,000, LOD0 is created as an exact copy. LOD1 (7,500) is also
an exact copy. LOD2 (3,000) and LOD3 (1,500) are decimated normally.
------------------------------------------------------------
4. ENGINE PROFILES
LOD Forge supports three naming modes that control how generated LOD meshes are named and
organized in the outliner.
4.1 UNITY LODGROUP
Unity's LOD Group component expects child objects named with an _LOD0, _LOD1,
etc. suffix. When you select the Unity profile, LOD Forge names each level as:
MeshName_LOD0 (highest detail)
MeshName_LOD1
MeshName_LOD2
MeshName_LOD3
All LODs are parented under an empty named MeshName_LODGroup. When exported as FBX and
imported into Unity, the LOD Group component auto-detects the naming and sets up screen-size
transitions automatically.
Object Name Type
------ ------------- -----
Parent Hero_LODGroup Empty
LOD 0 Hero_LOD0 Mesh
LOD 1 Hero_LOD1 Mesh
LOD 2 Hero_LOD2 Mesh
LOD 3 Hero_LOD3 Mesh
4.2 UNREAL ENGINE
Unreal Engine uses the same _LOD0 through _LOD3 suffix convention.
LOD Forge names levels identically but parents them under an empty named
MeshName_LODs (note the _LODs suffix). This grouping convention
allows Unreal's FBX import pipeline to recognize the LOD chain as a single asset.
Object Name Type
------ --------- -----
Parent Hero_LODs Empty
LOD 0 Hero_LOD0 Mesh
LOD 1 Hero_LOD1 Mesh
LOD 2 Hero_LOD2 Mesh
LOD 3 Hero_LOD3 Mesh
4.3 CUSTOM NAMING
If you are targeting a proprietary engine or have a studio-specific naming convention, select
Custom. You can define your own suffix pattern in the text field. The token
{level} is replaced with the LOD index (0, 1, 2, 3).
Example pattern: _detail{level}
Result: MeshName_detail0, MeshName_detail1, ...
NAMING CONVENTION COMPARISON
Profile LOD0 Name LOD3 Name Parent Empty
------------------- --------- --------- -------------
Unity Hero_LOD0 Hero_LOD3 Hero_LODGroup
Unreal Hero_LOD0 Hero_LOD3 Hero_LODs
Custom (_lv{level}) Hero_lv0 Hero_lv3 Hero
------------------------------------------------------------
5. LOD PRESETS
LOD Forge ships with four built-in presets that cover common production scenarios. Each
preset defines triangle count targets for four LOD levels. When a preset is selected, the
targets are displayed as read-only info in the panel — you can see
exactly what will be generated without accidentally changing values.
DESKTOP CHARACTER
Level Max Triangles Typical Use
----- ------------- ---------------------
LOD0 15,000 Close-up / hero shot
LOD1 7,500 Mid-range gameplay
LOD2 3,000 Background characters
LOD3 1,500 Far distance / crowd
When to use: Third-person or first-person player characters, important NPCs, and hero enemies on PC or console.
DESKTOP ENVIRONMENT
Level Max Triangles Typical Use
----- ------------- ----------------------------------
LOD0 25,000 Near-camera props and architecture
LOD1 12,000 Mid-distance structures
LOD2 5,000 Background buildings
LOD3 2,000 Horizon / skyline fill
When to use: Buildings, terrain features, large props, vehicles, and set-dressing elements in desktop/console games.
MOBILE CHARACTER
Level Max Triangles Typical Use
----- ------------- ------------------
LOD0 5,000 Close-up on mobile
LOD1 2,500 Gameplay distance
LOD2 1,000 Background
LOD3 500 Far / minimap icon
When to use: Player characters and NPCs in mobile games targeting a wide range of devices including low-end hardware.
MOBILE PROP
Level Max Triangles Typical Use
----- ------------- ------------------------
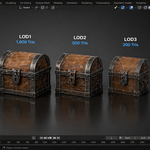
LOD0 2,000 Nearby interactive props
LOD1 1,000 Mid-range scenery
LOD2 500 Background detail
LOD3 200 Minimal-distance fill
When to use: Small to medium props, pickups, environmental decorations, and UI-preview meshes in mobile games.
Note:
Info icon: If any preset target exceeds the source mesh's current triangle count,
an info icon appears next to that level in the panel. This indicates the LOD will be created as
an exact copy of the source mesh — no decimation applied.
------------------------------------------------------------
6. CUSTOM TARGETS
If none of the built-in presets match your requirements, select Custom from the
Preset dropdown. This reveals four editable numeric input fields — one per LOD level —
where you can type exact triangle count targets.
- LOD0 Tris: Target triangle count for the highest-detail level.
- LOD1 Tris: Target for the second level.
- LOD2 Tris: Target for the third level.
- LOD3 Tris: Target for the lowest-detail level.
Custom target fields are only visible when the Custom preset is selected.
When any other preset is active, the triangle targets are shown as read-only information.
Note:
Tip: LOD0 should typically match or be close to your source mesh triangle count.
If the source mesh has 12,000 triangles and you set LOD0 to 12,000, LOD Forge will skip decimation
for that level and simply create an exact copy of the original.
Important:
Warning: Setting a target higher than the source mesh's triangle count will not add
geometry. The level will be created as an exact copy of the source mesh.
------------------------------------------------------------
7. FEATURE PROTECTION SETTINGS
The protection panel exposes three toggles and one slider:
UV SEAMS
Toggle: On by default. When enabled, vertices on UV seam edges
(edge.seam == True in bmesh) receive protection weight. Disable this only if your mesh
has no meaningful UV layout (e.g., procedurally textured or vertex-colored assets).
MATERIAL BOUNDARIES
Toggle: On by default. When enabled, vertices on edges shared by faces with
different material_index values are protected. Disable if your mesh uses a single
material or if material zone integrity is not important.
SILHOUETTE EDGES
Toggle: On by default. When enabled, vertices on edges where the angle between
adjacent face normals exceeds the angle threshold are protected. Disable for organic meshes
where you want maximum decimation freedom and silhouette is less critical.
ANGLE THRESHOLD
Slider: Range 0° to 180°, default 40°. Controls how aggressively
silhouette edges are detected.
Value Effect Best For
----- --------------------------------------------- ---------------------------------------------
30° Aggressive — protects most creases and hard.. Hard-surface models, mechanical parts, weap..
60° Balanced — protects distinct creases, allow.. General characters, props, vehicles (recomm..
90° Relaxed — only very sharp angles (right-ang.. Organic meshes, terrain, foliage, rounded s..
Rule of thumb: Start at 60° for most assets. Lower it to 30° for hard-surface
models with important chamfers. Raise it to 90° for organic shapes where smooth reduction
matters more than crease preservation.
------------------------------------------------------------
8. BUDGET ENFORCEMENT
After LOD generation, LOD Forge compares the actual triangle count of each level against the
target defined by the selected preset or custom values.
HOW IT WORKS
1. LOD Forge generates the decimated mesh for a given level.
2. It counts the actual triangles in the resulting mesh.
3. If actual , the level is marked PASS.
4. If actual > target, the level is marked FAIL and a warning icon is displayed.
WHY A LEVEL MIGHT FAIL
- Too many protected vertices: If a large portion of the mesh is protected and adaptive scaling cannot free enough vertices, the decimator may not reach the target.
- Target too aggressive: Extremely low targets on high-poly meshes with many protected features may not be achievable even with adaptive scaling.
WHAT TO DO WHEN A LEVEL FAILS
- Increase the target triangle count for that level (use Custom preset).
- Disable one or more protection options (try disabling silhouette protection first).
- Increase the silhouette angle threshold to free up more vertices.
- For the failing level specifically, consider disabling all protection — adaptive scaling already reduces protection for aggressive levels, but disabling it completely gives the decimator full freedom.
Note:
Note: Thanks to adaptive protection scaling, budget failures are much less common
than with fixed-weight protection systems. The adaptive system automatically loosens protection
for aggressive LOD levels, making it much more likely that the target will be reached.
------------------------------------------------------------
9. LOD PREVIEW
LOD Forge includes a viewport preview system to visually inspect each LOD level without
leaving the 3D view.
CYCLING THROUGH LEVELS
Use the LOD level buttons or click the ← Previous /
Next → buttons to step through LOD0, LOD1, LOD2, and LOD3. The selected
level becomes visible in the viewport; all other levels are hidden. This lets you quickly
compare how each reduction stage looks.
SHOW ALL LODS TOGGLE
Enable Show All LODs to display every LOD level simultaneously, offset along the
X-axis. This side-by-side view is useful for presentations, quality reviews, and screenshots.
KEYBOARD WORKFLOW
For rapid iteration, you can assign keyboard shortcuts to the preview operators via
Blender's keymap editor (Edit > Preferences > Keymap). Search for:
- lodforge.preview_prev — cycle to the previous LOD level
- lodforge.preview_next — cycle to the next LOD level
- lodforge.preview_show_all — toggle show-all mode
Note:
Tip: Combine LOD preview with wireframe overlay (Shift+Z)
to see exactly where triangles were removed.
------------------------------------------------------------
10. LOD METRICS
After generating LODs, the metrics panel displays a table with the following columns:
Column Description
----------- ---------------------------------------------
Level LOD level name (Source, LOD0, LOD1, LOD2, L..
Tris Actual triangle count of the mesh
Verts Actual vertex count of the mesh
Reduction % Percentage of triangles removed relative to..
Budget PASS if actual FAIL if actual > target
EXAMPLE METRICS OUTPUT
Level Tris Verts Reduction % Budget
------ ------ ----- ----------- ------
Source 14,832 7,520 Source —
LOD0 14,832 7,520 0.0% PASS
LOD1 7,416 3,812 50.0% PASS
LOD2 2,948 1,580 80.1% PASS
LOD3 1,488 802 90.0% PASS
Note:
Tip: If you manually edit an LOD mesh after generation, click Refresh Metrics
to recalculate the table with updated values.
------------------------------------------------------------
11. BATCH GENERATION
LOD Forge can process multiple objects in a single operation. This is essential for game
projects where you need LODs for dozens or hundreds of assets.
WORKFLOW
1. Select all target mesh objects in the viewport (hold Shift and click, or use A to select all).
2. Configure the preset, engine profile, and protection settings as usual.
3. Click Batch Generate (or Generate LODs with multiple objects selected).
4. LOD Forge iterates over every selected mesh object, generating a full LOD chain for each.
5. Each object gets its own parent empty and naming hierarchy.
6. The metrics panel shows results for all processed objects.
Important:
Important: Only mesh objects are processed during batch generation. Non-mesh objects
(cameras, lights, empties, armatures, curves) in your selection are automatically skipped.
Note:
Performance note: Generating LODs for very high-poly meshes (100K+ triangles)
across many objects can take time. LOD Forge shows a progress indicator in Blender's status bar
during batch operations.
------------------------------------------------------------
12. OPERATOR REFERENCE
Operator bl_idname Description Requirements
---------------- ------------------------- --------------------------------------------- ---------------------------------
Generate LODs lodforge.generate Generate LOD chain for selected object usin.. 1 mesh object selected
Batch Generate lodforge.batch_generate Generate LOD chains for all selected mesh o.. 1+ mesh objects selected
Remove LODs lodforge.remove Delete all generated LOD objects and clean .. Select an object with _LOD suffix
Preview Previous lodforge.preview_prev Show the previous LOD level in the viewport LODs generated for active object
Preview Next lodforge.preview_next Show the next LOD level in the viewport LODs generated for active object
Show All LODs lodforge.preview_show_all Toggle visibility of all LOD levels side by.. LODs generated for active object
Refresh Metrics lodforge.refresh_metrics Recalculate metrics table for existing LODs LODs generated for active object
------------------------------------------------------------
13. PYTHON API EXAMPLES
GENERATE LODS WITH DESKTOP CHARACTER PRESET
import bpy
# Select your object
obj = bpy.data.objects["MyCharacter"]
bpy.context.view_layer.objects.active = obj
obj.select_set(True)
# Generate LODs
bpy.ops.lodforge.generate(
preset='DESKTOP_CHARACTER',
engine='UNITY',
protect_uv_seams=True,
protect_material_boundaries=True,
protect_silhouette=True,
silhouette_angle=40.0
)
GENERATE LODS WITH CUSTOM TRIANGLE TARGETS
import bpy
obj = bpy.data.objects["EnvironmentProp"]
bpy.context.view_layer.objects.active = obj
obj.select_set(True)
bpy.ops.lodforge.generate(
preset='CUSTOM',
engine='UNREAL',
custom_lod0=10000,
custom_lod1=5000,
custom_lod2=2000,
custom_lod3=800,
protect_uv_seams=True,
protect_material_boundaries=True,
protect_silhouette=True,
silhouette_angle=35.0
)
BATCH GENERATE FOR ALL MESH OBJECTS IN THE SCENE
import bpy
bpy.ops.object.select_all(action='DESELECT')
for obj in bpy.data.objects:
if obj.type == 'MESH':
obj.select_set(True)
bpy.ops.lodforge.batch_generate(
preset='MOBILE_PROP',
engine='UNITY',
protect_uv_seams=True,
protect_material_boundaries=False,
protect_silhouette=True,
silhouette_angle=50.0
)
PREVIEW A SPECIFIC LOD LEVEL
import bpy
# Cycle to next LOD level
bpy.ops.lodforge.preview_next()
# Or show all LODs side by side
bpy.ops.lodforge.preview_show_all()
REFRESH METRICS AFTER MANUAL EDITS
import bpy
bpy.ops.lodforge.refresh_metrics()
REMOVE ALL LODS FROM SELECTED OBJECT
import bpy
obj = bpy.data.objects["MyCharacter_LOD0"]
bpy.context.view_layer.objects.active = obj
obj.select_set(True)
bpy.ops.lodforge.remove()
------------------------------------------------------------
14. TROUBLESHOOTING
LODS HAVE THE SAME TRIANGLE COUNT AS THE SOURCE
Cause: The target triangle count is higher than the source mesh's actual tri count.
When target >= source, LOD Forge creates an exact copy instead of decimating.
Fix: Use a lower preset (e.g., Mobile Character instead of Desktop Character) or
switch to Custom preset and enter targets below your source tri count.
PROTECTION DOES NOT SEEM TO WORK — UVS STILL BREAK
Cause: The UV seam, material boundary, or silhouette protection toggles may be
disabled in the panel.
Fix: Open the Feature Protection section in the LOD Forge panel and make sure
the relevant toggles are enabled. Also verify that your UV seams are actually marked on the mesh
(in Edit Mode, check Edge > Mark Seam).
LOD STILL TOO HIGH-POLY DESPITE ADAPTIVE PROTECTION
Cause: Adaptive protection scales weights down but uses a floor of 0.2, which
may not be aggressive enough for extreme reduction targets.
Fix: Try disabling one or more protection options for that level. Alternatively,
increase the silhouette angle threshold to reduce the number of protected vertices. For extreme
cases, you can disable all protection for the lowest LOD level.
NAMING CONFLICTS — OBJECTS GET .001 SUFFIX
Cause: Blender automatically appends .001, .002 suffixes
when an object with the same name already exists in the scene.
Fix: LOD Forge handles this internally by checking for existing names and cleaning
up before generation. If you still see suffixed names, run Remove LODs first
to clean up the previous generation, then regenerate.
REMOVE LODS DOES NOT WORK
Cause: You need to select an object that is part of an LOD chain (has an
_LOD suffix) for the removal operator to identify which LODs to delete.
Fix: Select any object with an _LOD0, _LOD1, etc. suffix,
then click Remove LODs.
BATCH GENERATE SKIPS SOME OBJECTS
Cause: LOD Forge only processes mesh objects. Non-mesh objects (cameras, lights,
empties, armatures, curves, text) in your selection are automatically skipped.
Fix: Convert non-mesh objects to mesh first (Ctrl+A
> Mesh) if you need LODs for them.
ANGLE THRESHOLD TOO HIGH OR TOO LOW
Cause: An incorrect angle threshold can either protect too many edges (low value)
or too few edges (high value).
Fix: Use 60° as a starting point for most assets. Lower to 30° for
hard-surface models, raise to 90° for organic meshes. You can use Apply Protection
to preview the weight paint before committing to full LOD generation.
METRICS SHOW WRONG DATA
Cause: If you manually edit LOD meshes after generation, the metrics table
still shows the values from generation time.
Fix: Click Refresh Metrics to recalculate the table with
current mesh data.
LOD FORGE PANEL DOES NOT APPEAR IN THE SIDEBAR
Cause: The addon is not enabled, or a conflicting addon is registered to the
same panel category.
Fix: Go to Edit > Preferences > Add-ons, search for
"LOD Forge", and make sure the checkbox is enabled. Press N in
the 3D Viewport and check the tab list on the right side of the sidebar.
------------------------------------------------------------
15. FAQ
Q: DOES LOD FORGE WORK WITH BLENDER 4.X?
Yes. LOD Forge is tested with Blender 3.0 through 4.4+. It uses stable API features that are
compatible across all recent versions.
Q: CAN I UNDO LOD GENERATION?
Yes. All operators support Ctrl+Z undo. The entire LOD generation
operation is registered as a single undo step, so one undo reverts everything.
Q: DOES LOD FORGE MODIFY MY ORIGINAL MESH?
No. LOD Forge duplicates your mesh for each LOD level and applies decimation to the copies.
Your original mesh is never altered. If the LOD0 target matches or exceeds the source tri count,
LOD0 is created as an exact copy.
Q: CAN I EXPORT THE LODS DIRECTLY TO FBX/GLTF?
LOD Forge does not include its own exporter. Use Blender's built-in FBX or glTF exporters.
The engine-correct naming applied by LOD Forge ensures that Unity and Unreal will auto-detect
the LOD hierarchy on import.
Q: HOW DOES ADAPTIVE PROTECTION AFFECT VISUAL QUALITY?
For LOD1 and LOD2 (where the decimation ratio is moderate), adaptive protection keeps weights at
full strength — UVs, material boundaries, and silhouette are preserved perfectly. For LOD3
and beyond (aggressive reduction), protection is scaled down so the decimator can reach the target.
The visual quality at LOD3 is slightly lower than with full protection, but the mesh actually reaches
the target triangle count, which is the entire point of aggressive LOD levels.
Q: DOES IT WORK WITH MULTI-MATERIAL MESHES?
Yes. Multi-material meshes benefit the most from LOD Forge's material boundary protection.
Without it, the Decimate modifier would collapse edges between material zones, causing materials
to bleed into each other.
Q: CAN I USE LOD FORGE WITH MESHES THAT HAVE SHAPE KEYS?
The Decimate modifier cannot be applied to meshes with shape keys in Blender. LOD Forge will
warn you if it detects shape keys on the selected object. Apply the shape keys first, or
duplicate the mesh with the desired shape key applied and generate LODs from the duplicate.
Q: HOW MANY LOD LEVELS CAN I GENERATE?
LOD Forge generates 4 levels (LOD0 through LOD3) by default. This matches the standard used
by Unity's LOD Group and Unreal Engine. Custom level counts may be supported in a future update.
Q: WILL LOD FORGE WORK ON MESHES WITH MODIFIERS?
LOD Forge operates on the evaluated (final) mesh. If your object has unapplied modifiers
(Subdivision Surface, Mirror, etc.), LOD Forge applies them to the LOD copies before
decimation. Your original object's modifier stack remains untouched.
Q: WHAT HAPPENS WITH VERY HIGH-POLY MESHES (100K+ TRIANGLES)?
LOD Forge handles high-poly meshes without issues. The protection analysis and decimation are
performed using Blender's native bmesh and modifier systems, which are well-optimized. Processing
time increases linearly with polygon count. For batch operations on many high-poly meshes, expect
longer processing times — a progress indicator is shown in Blender's status bar.
Q: CAN I USE LOD FORGE IN A COMMERCIAL PROJECT?
Yes. The license permits use in any personal or commercial project. You may not redistribute
the addon itself.
Q: DOES LOD FORGE SUPPORT CURVES, TEXT, OR OTHER NON-MESH OBJECTS?
No. LOD Forge requires mesh objects. Convert curves, text, or other objects to mesh first
(Ctrl+A > Mesh) before using LOD Forge.
------------------------------------------------------------
LOD Forge v1.0.0
Smart LOD generation for Blender · Preserve what matters, decimate the rest.
Have questions about this product?
Login to message
| Sales | 10 |
| Published | 5 months ago |
| Blender Version | 3.1 - 5.1 |
| Extension Type | N/A |
| Render Engine Used | Arnold, Blender-Internal, Blender-Game-Engine, Cycles, Eevee, Freestyle, Luxrender, Mental-Ray, Octane, Vray, Yafaray |
| License | GPL |
Discover more products like this
performance uv-preservation silhouette-protection unreal LOD level of detail game optimization smart-decimation unity LOD polygon budget Batch processing LOD mesh tools