Merger - Your Tool for Simplifying Complex Blender Scenes
 Andrew Luzhetskyi
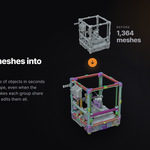
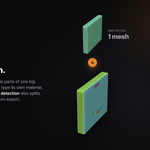
Documentation · version 1.9.1
Merger user guide
Everything Merger does, in the order the panel shows it.
What's in this guide
Install, open the panel, pick a tool.
Step by step, and where else Merger appears.
Join meshes into one, or one per group or material.
Find identical copies and link them.
Find the separate pieces inside one mesh.
Remove Empties with nothing under them.
Four ways to put the tools together.
Tolerances, color sharing and safety.
When a button is grey or nothing is found.
Quick start
Download merger-1.9.1.zip and drag it onto the Blender window. Do not unzip it. Merger needs Blender 4.5 or newer (tested on 4.5, 5.0, 5.1 and 5.2). The Install section below has more detail.
In the 3D Viewport, press N and open the Merger tab.


Install
Merger is a Blender extension. It needs Blender 4.5 or newer (tested on 4.5, 5.0, 5.1 and 5.2).
- Download the ZIP (merger-1.9.1.zip). Do not unzip it.
- Drag the ZIP onto the Blender window and confirm. Or go to Edit > Preferences > Get Extensions, open the drop-down menu in the top right, choose Install from Disk... and pick the ZIP.
- In the 3D Viewport, press N and open the Merger tab.
To update, drop in the newer ZIP. Blender replaces the old version.
Other places to find Merger
The tools are also in the Object menu, under Merger, in the 3D Viewport and in the Outliner. The merge entries there act on the selected Empties and have slightly different names:
| Panel | Object > Merger menu |
|---|---|
| Merge into One | Merge All (Selected Empties) |
| Merge by Material | Merge by Materials |
| Merge by Group | Merge by Groups |
Find Twins, Find All Twins, Link Object Data, Identify Parts and Delete Childless Empties keep their panel names.
Merge
Merge whole assemblies
at once.
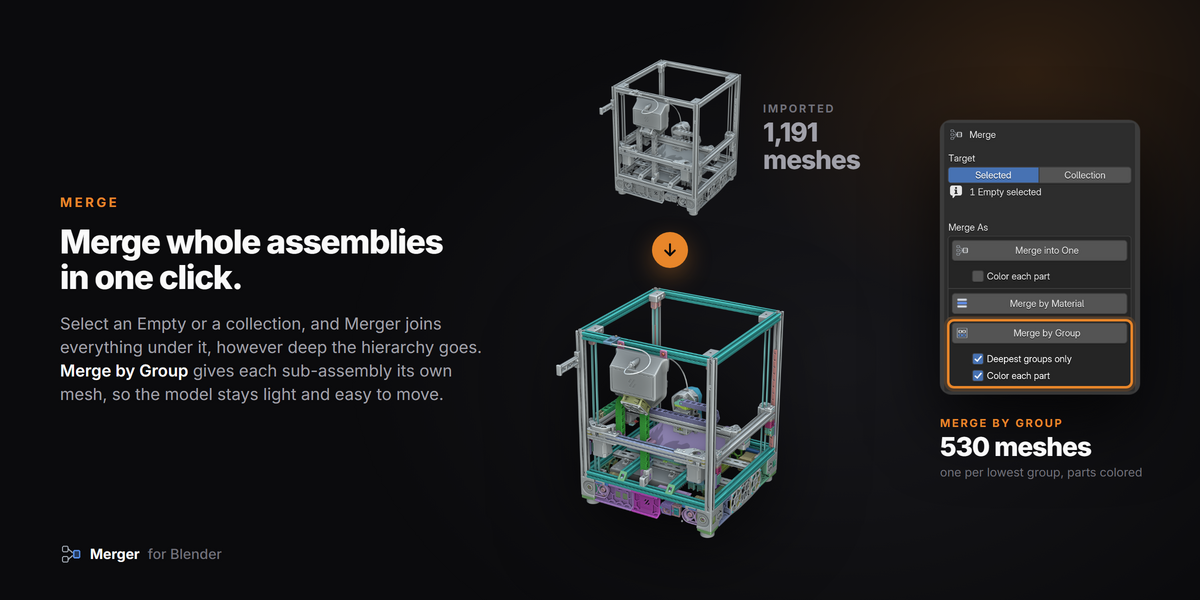
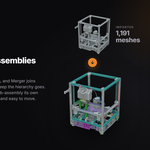
Select an Empty or a collection, and Merger joins the meshes under it, however deep the hierarchy goes.
Every Merge option, in the panel
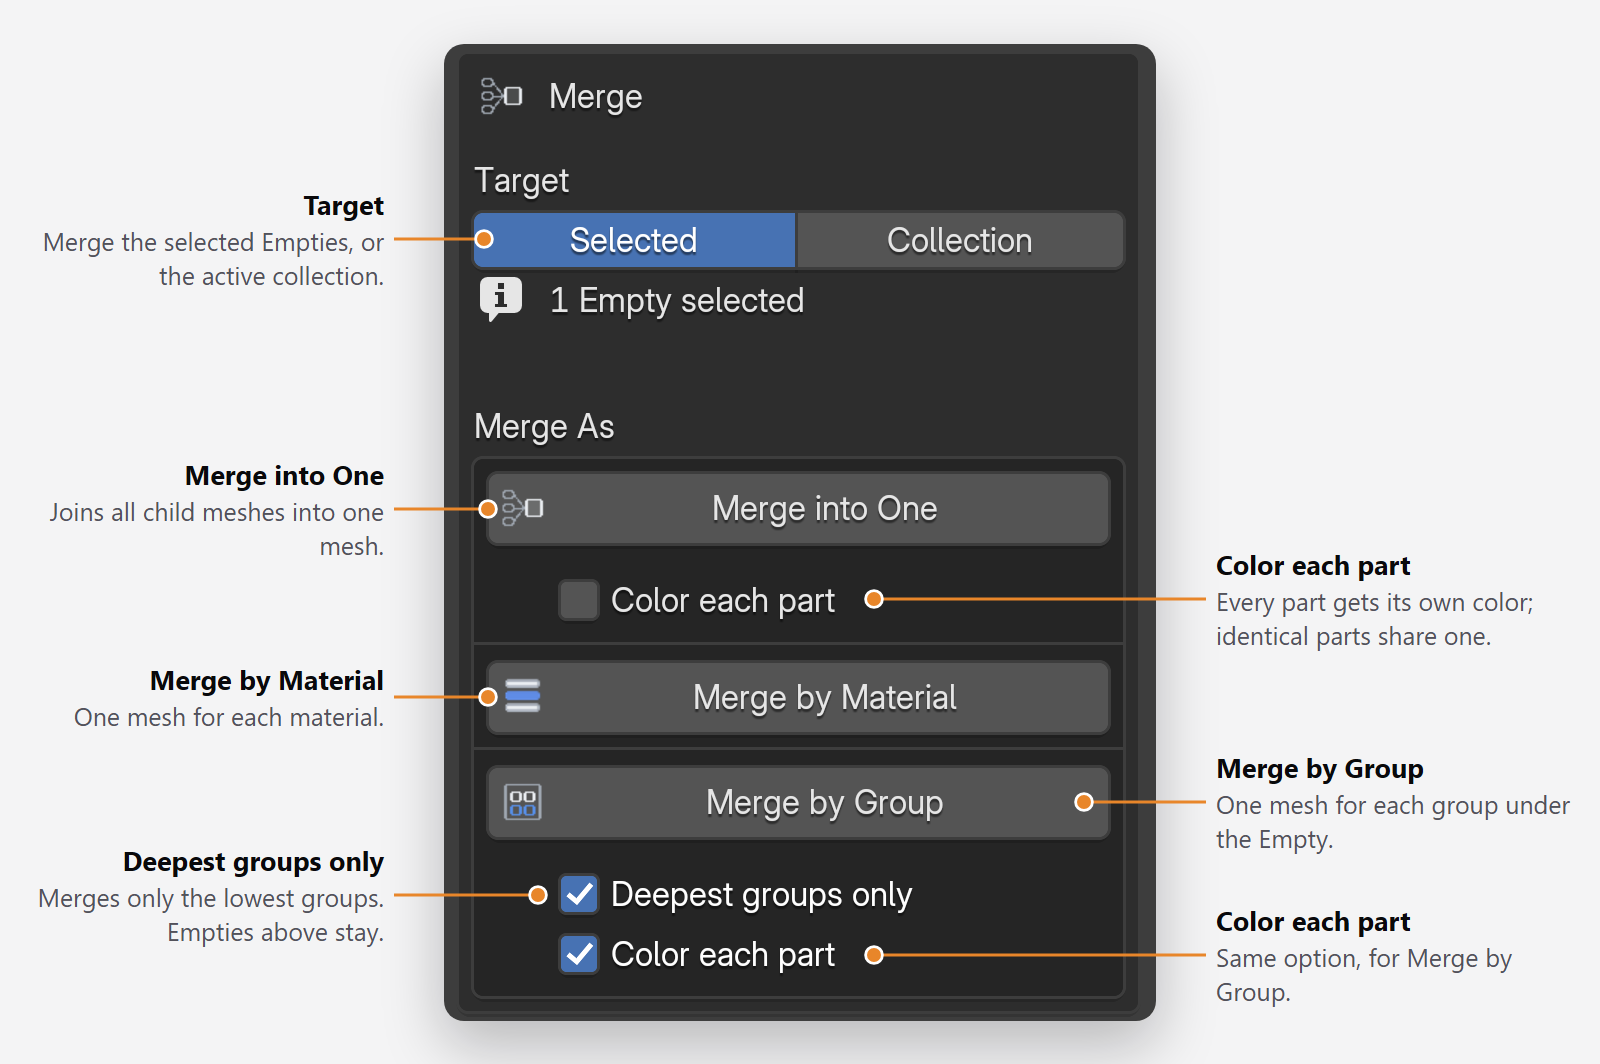
Target
SwitchDecides what the three merge buttons act on.
- Selected - the selected Empties. Each one is merged on its own.
- Collection - the active collection in the Outliner, with its child collections.
The line under Target shows what is targeted right now: "1 Empty selected", "Select an Empty to merge", or the collection name. With Selected, the buttons grey out until an Empty is selected.
Merge into One
Joins all the meshes under the target into one mesh.
With Selected, the new mesh is named after the Empty and takes its place in the hierarchy. With Collection, every mesh in the collection and its child collections becomes one mesh.
Tip. Good when you only need the shape, for example to scatter or duplicate a whole model.

Color each part
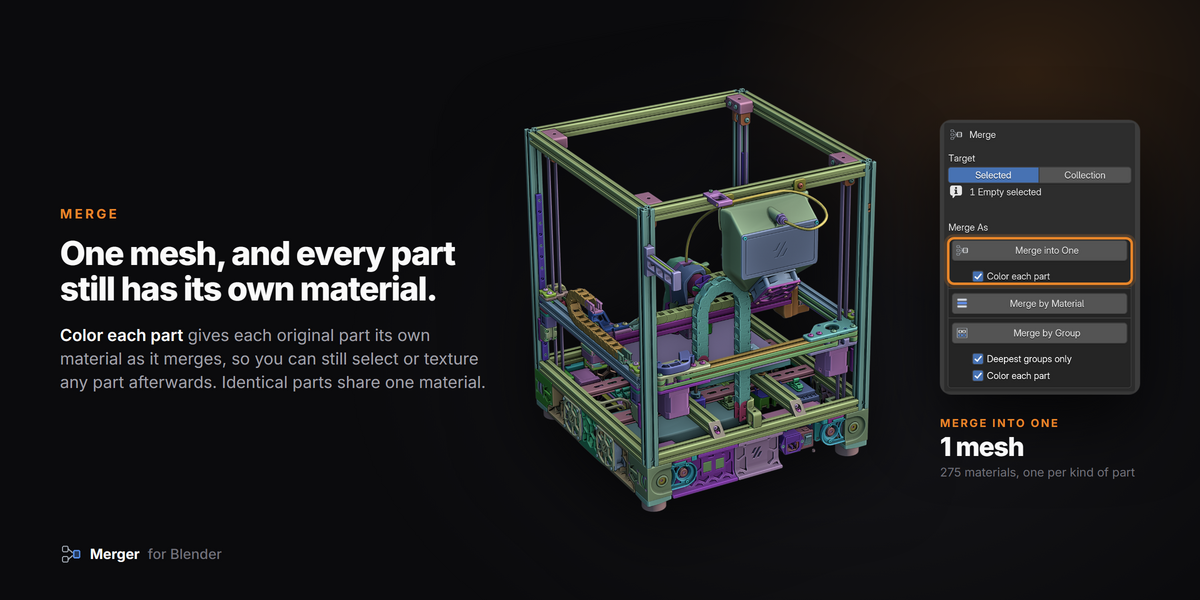
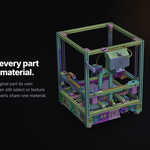
OptionGives every original part its own bright material before the merge. The merged mesh keeps one material slot per part, so you can still select a whole part by its material and texture it.
Identical and nearly identical parts share one color. Ten bolts get one material, even if one was exported with slightly different geometry. The tolerance is Part Color Tolerance (%) in Preferences (default 2%). Off by default.
It is available on Merge into One, and on Merge by Group when Target is Selected. Each has its own checkbox.
Tip. In Edit Mode, open the Material tab, pick a slot and click Select to grab one whole part.

Merge by Material
Makes one mesh per material. An object that uses several materials is never split. Objects with the same combination of materials are merged together.
With Selected, the selected Empty is kept as the parent of the new meshes and nested Empties are deleted.
Tip. Gives a light scene with one object per material, ready for texturing or export.

Merge by Group
Makes one mesh per sub-group, so the model stays easy to move and edit.
- Selected - each child Empty of the selected Empty becomes one mesh, parented to the selected Empty.
- Collection - each Empty directly in the collection becomes one mesh from the meshes under it. The new meshes are not parented to anything.

Deepest groups only
OptionMerges only under the deepest Empties that hold meshes. Every Empty above them stays, so a model with many nested groups keeps its structure instead of being flattened. Off by default.
Available on Merge by Group when Target is Selected.
Tip. Use it on a whole machine: each lowest sub-assembly becomes one mesh and still moves with its parent.
Twins
Turn identical meshes
into linked copies.
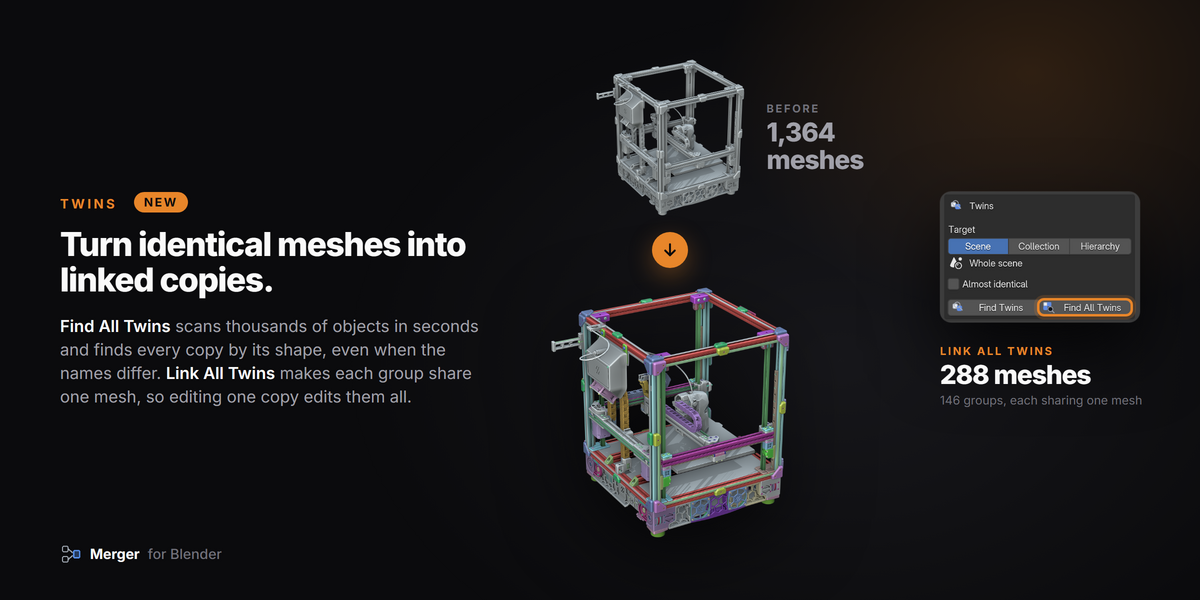
CAD imports store every identical part, such as a wheel, a bolt or a bracket, as its own mesh. Twins finds those copies by their shape, never by their names, and links them so they share one mesh.
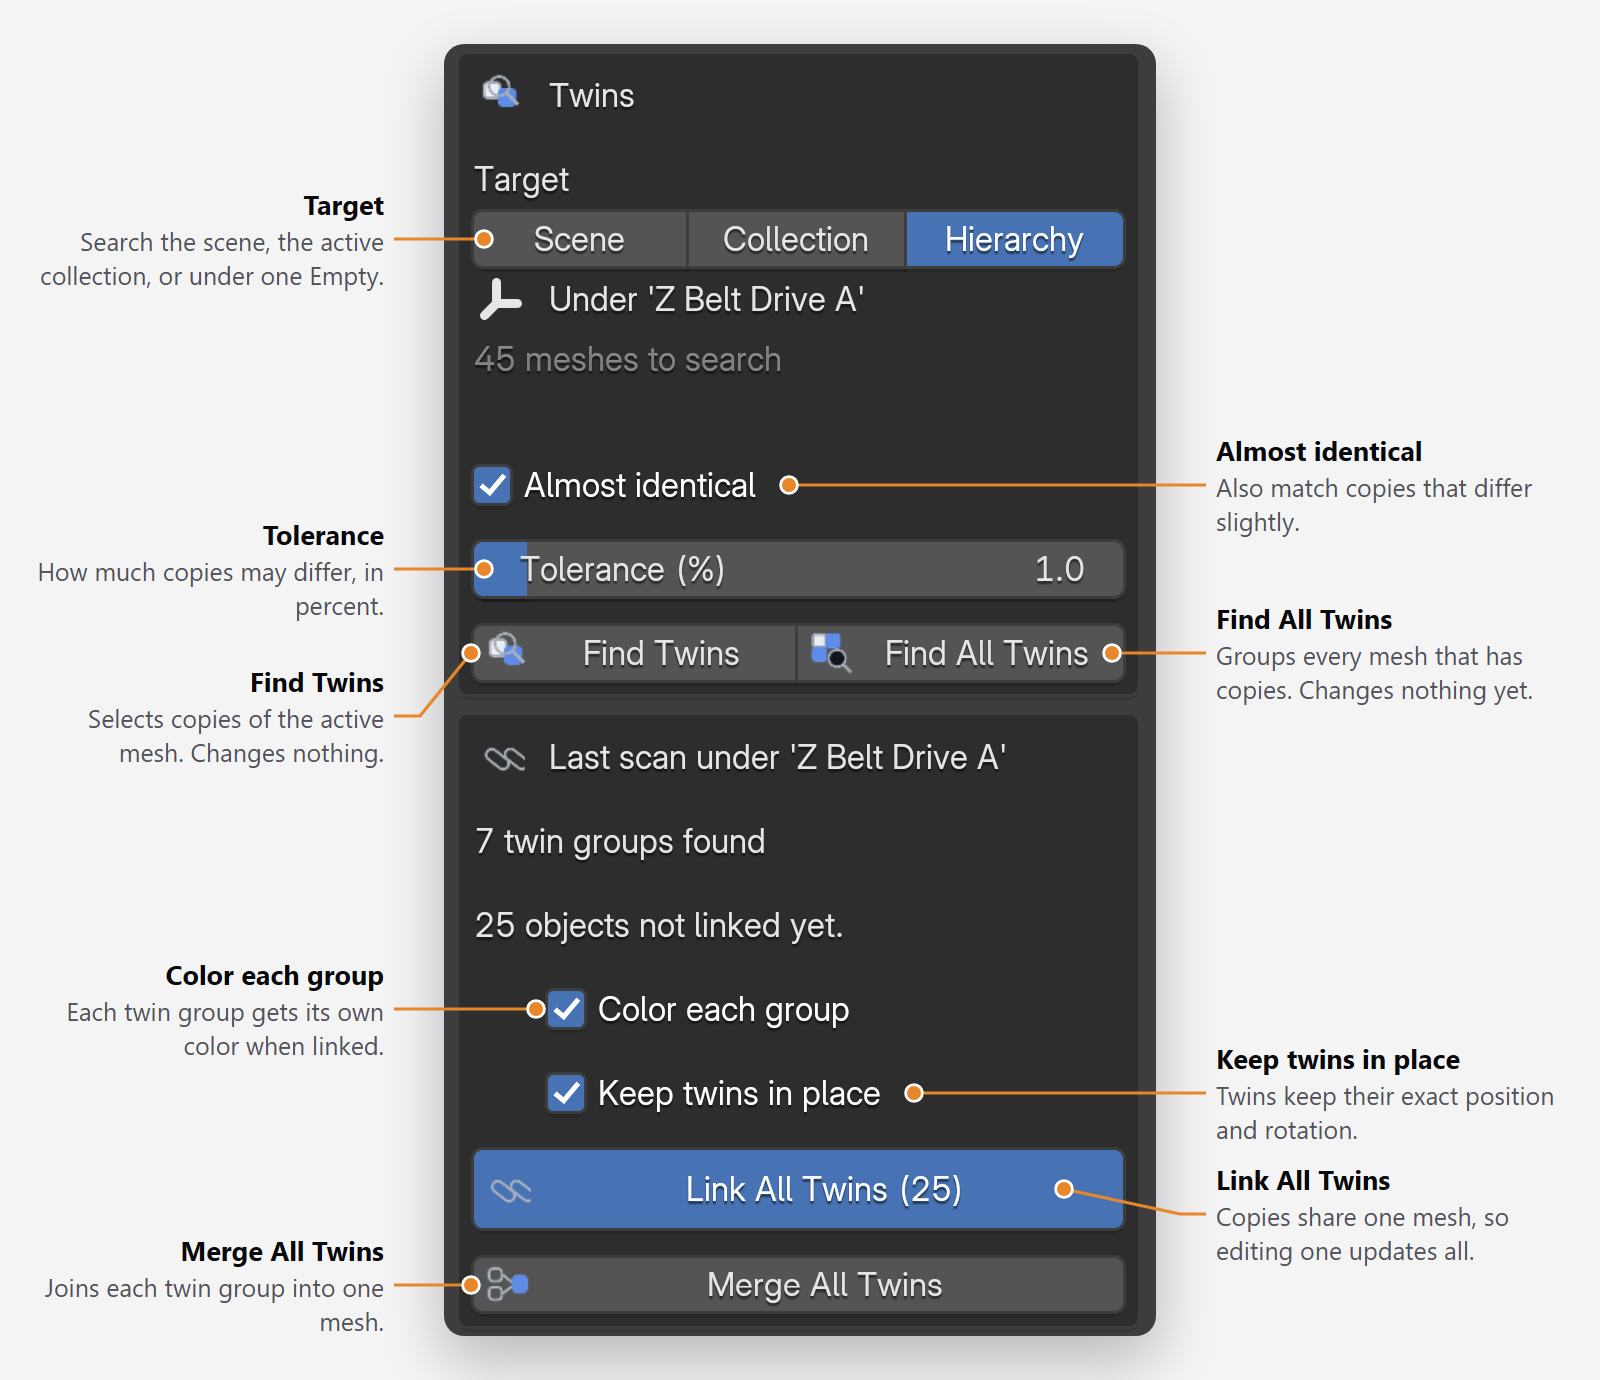
Every Twins option, after Find All Twins
The same section after Find Twins on one object
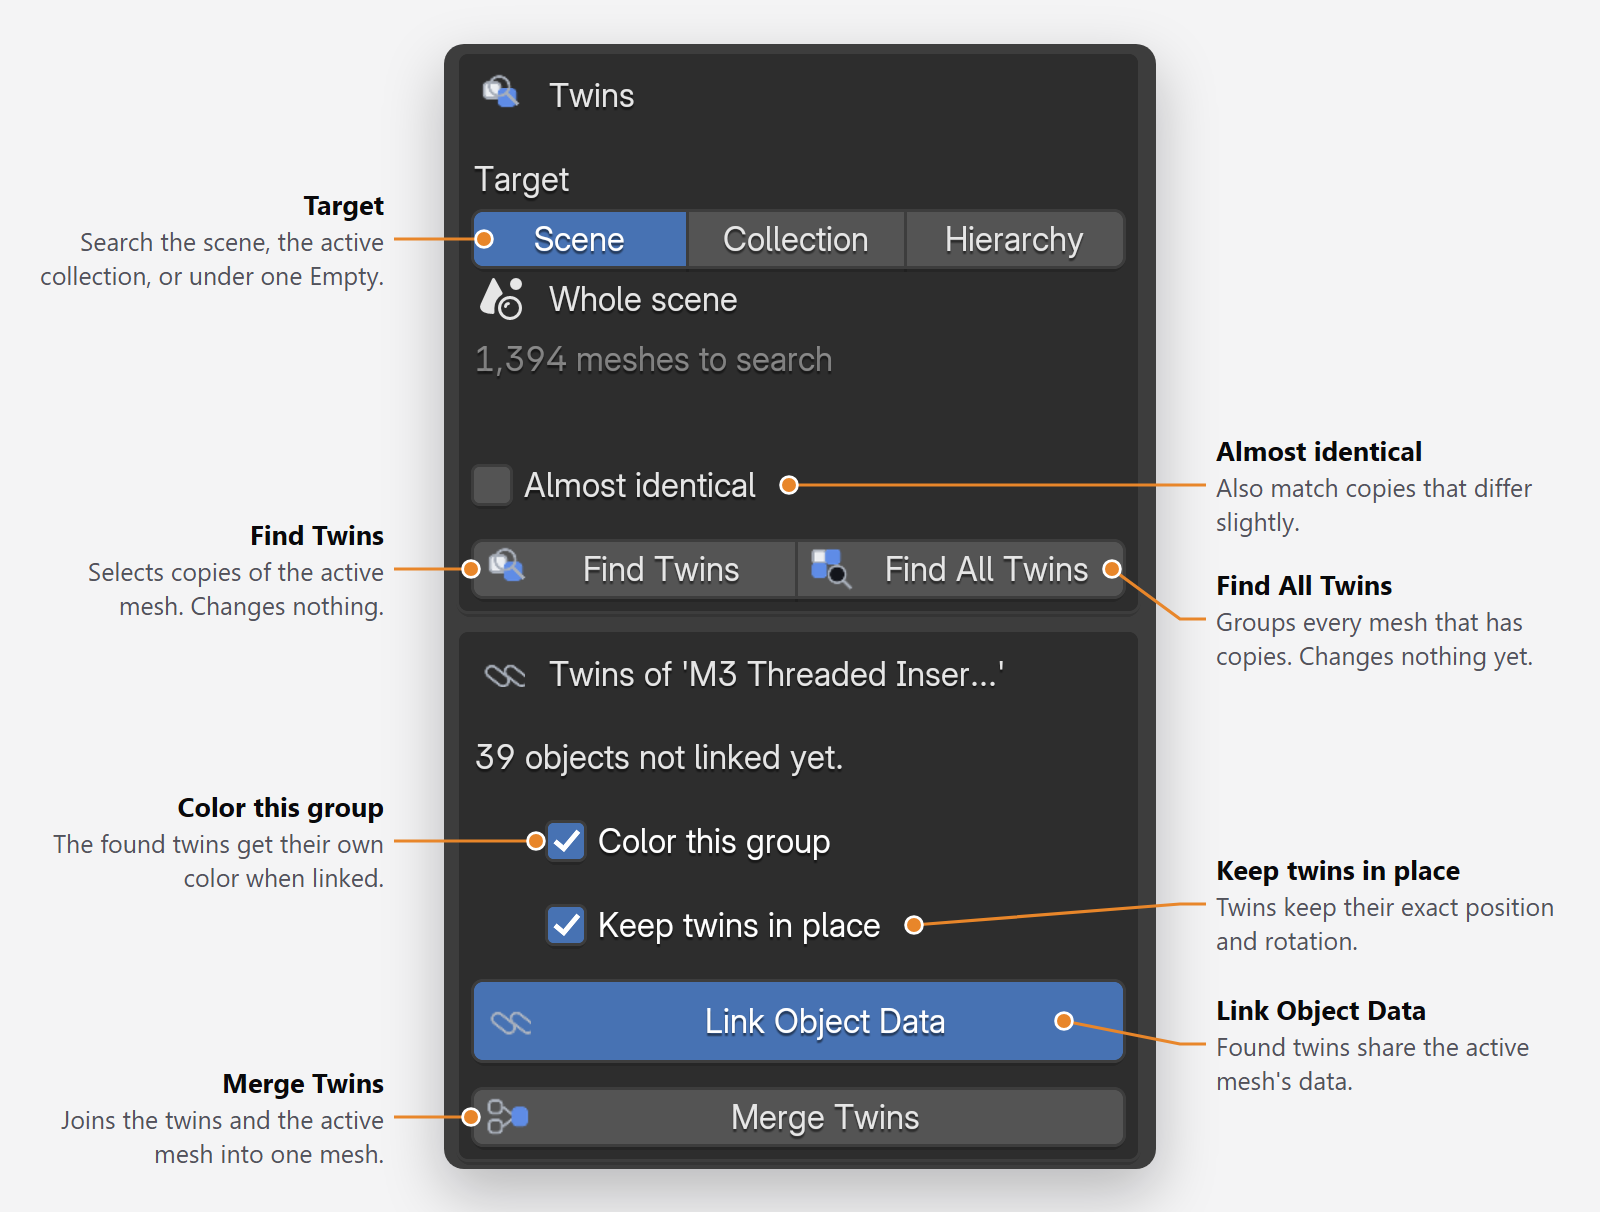
Target
SwitchDecides where both Find buttons search. It has its own row in the Twins section.
- Scene - the whole current scene. Other scenes in the file are not searched.
- Collection - the active collection and its child collections.
- Hierarchy - everything under the selected Empties, however deep. If only a Mesh is selected, Merger searches under that Mesh's direct parent. Select a higher Empty to search more.
The lines under Target name the area and how many meshes it holds. A scan remembers its area: Link All Twins and Merge All Twins work only inside it, even if you select something else afterward. Switching Target clears earlier results.
Tip. Use Collection or Hierarchy when you bring one machine into a big scene. Only that machine is read, and nothing is linked to an identical part of another machine.
Almost identical
OptionThe exact scan only matches copies with identical geometry. Tick Almost identical to also match copies that are nearly the same: a different tessellation, a nudged vertex, or rotation baked into the mesh on re-import. Off by default.
Tolerance (%) appears when the box is ticked. Default 1%, from 0.1% to 10%. It is the same setting as Almost Identical Tolerance (%) in Preferences.
One trade-off: in this mode a left part and its mirrored right part also match, because shape alone cannot tell left from right. Use the exact scan when that matters. Changing this setting clears earlier results.
Tip. If re-imported copies still do not match, raise the Tolerance toward 10%.
Find Twins
Select one mesh and click Find Twins. Merger selects every mesh with identical geometry in the Target area and shows how many are not linked yet. It changes nothing else.
It needs a selected Mesh. A hint line says so when there is none. The result goes away when you make another object active. Exact matching never links a mirrored part to its original.

Find All Twins
Scans the whole Target area and groups every mesh that has copies. It reports how many twin groups exist and how many objects can be linked. Nothing changes yet.
The scan runs with a progress bar and does not freeze Blender. Keep working, or press Esc to cancel. Copies that are already linked are skipped, and objects linked in from library files are never touched.

Color this group / Color each group
OptionGives every twin group its own bright material when it is linked, and no two groups share a color. It is called Color this group under Find Twins and Color each group under Find All Twins. Off by default.
Existing materials on the linked meshes are replaced. It also works after everything is linked: the Link button then becomes Color This Group or Color Twin Groups.
Keep twins in place
OptionA copy whose geometry was stored at a different offset or rotation would jump when it takes on the shared mesh. With this on, Merger measures each copy against the source and adjusts its transform, so every copy keeps its exact position and rotation. Off by default.
A mirrored copy keeps its place too, with a negative scale on one axis. If a copy cannot be aligned with confidence, its center is kept in place instead.
Tip. Turn it on whenever the copies were exported at different angles.
Link Object Data
The blue button under Find Twins. All found copies now share the source mesh, so editing or texturing one updates all of them. Positions, parents, collections and modifiers stay as they are.
Link All Twins
The blue button under Find All Twins. It shows how many objects it will link, for example Link All Twins (25). A dialog states exactly what will happen, then every group is linked.

Merge Twins
Joins the found copies and the source into one single mesh instead of linking them. The separate copies are removed, so it asks first.
Merge All Twins
Joins every twin group from the last scan into one mesh per group, placed at the group's first copy. The separate copies are removed, so it asks first.
Parts
Find the parts
inside a single mesh.
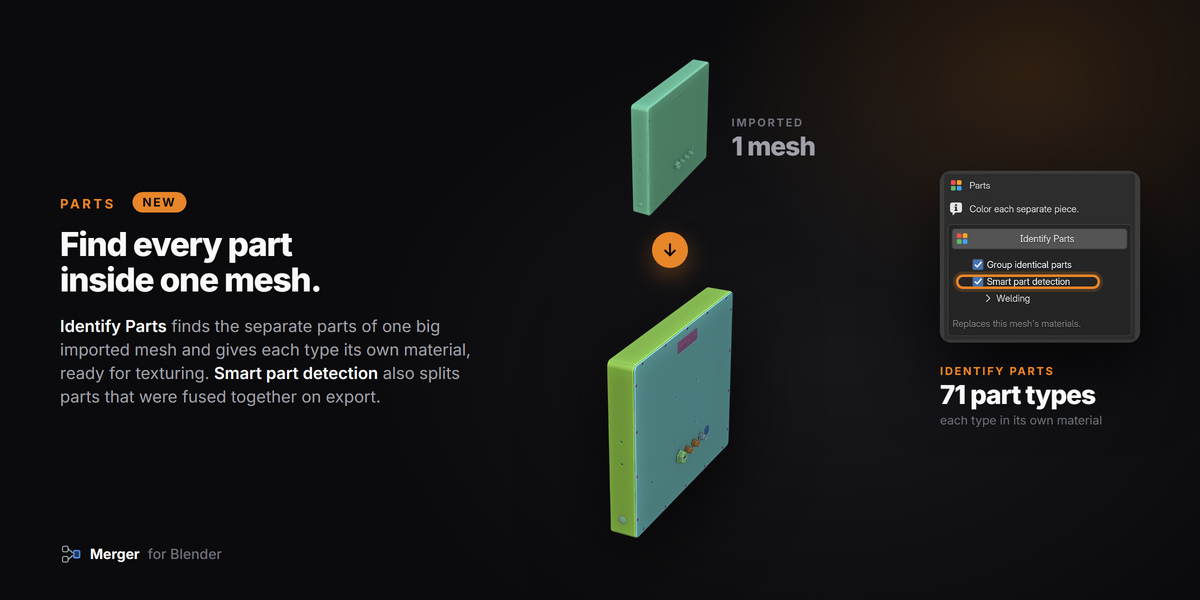
An import that arrives as one big mesh gets each part its own material, so you can select and texture parts again.
Every Parts option, in the panel
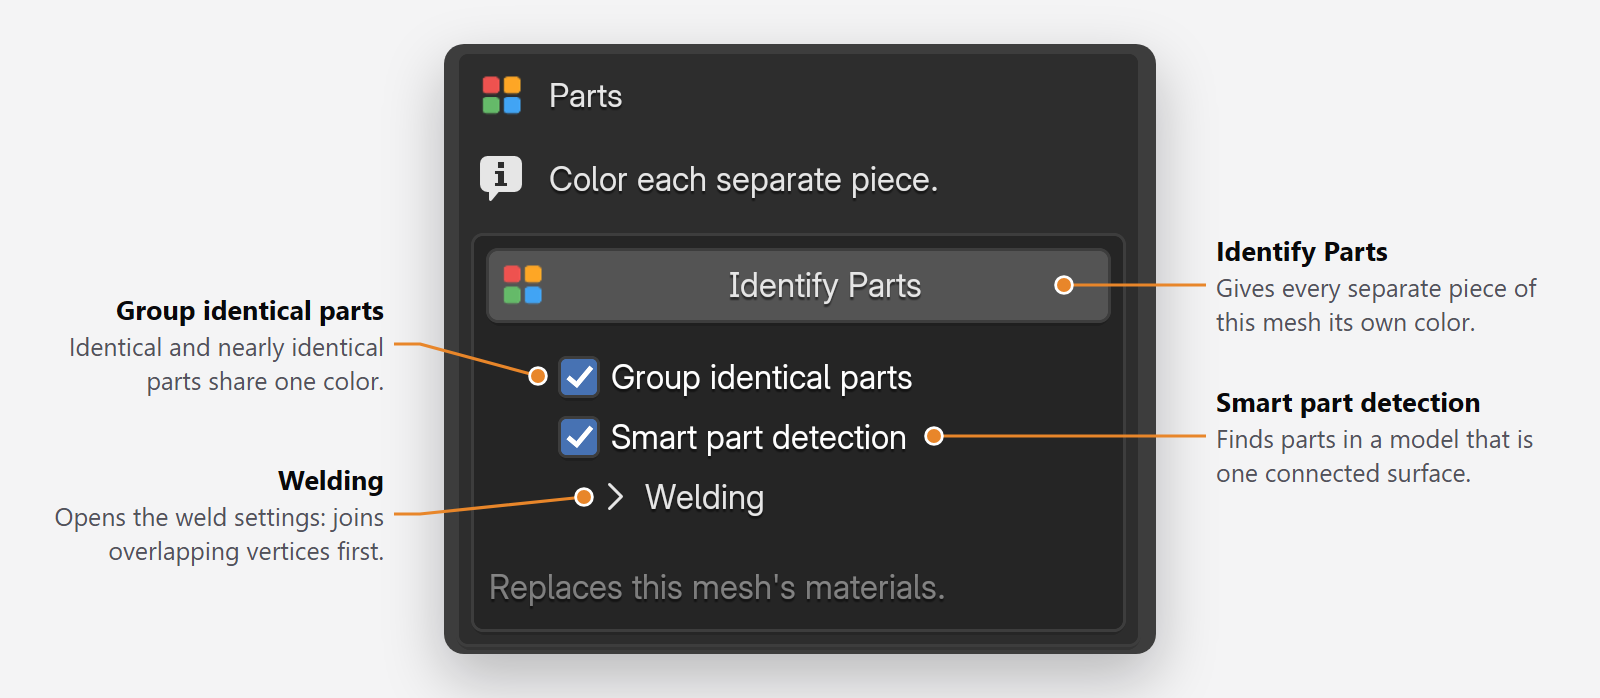
Identify Parts
Select a mesh and click Identify Parts. Every separate piece inside it gets a material, and identical pieces share one, however they are placed or rotated. It runs at once, with a progress counter on the cursor.
It needs a selected Mesh with faces. The mesh's existing materials are replaced. Press F9 after a run to change its options, including its Tolerance (%), and run it again.
Tip. If other objects share this mesh data, the new materials apply to them too. Merger tells you when that happens.
Group identical parts
OptionOn by default. Identical and nearly identical pieces share one color. "Nearly" is set by Part Color Tolerance (%) in Preferences (default 2%). Untick it for one material per piece.
Smart part detection
OptionOff by default. For CAD assemblies exported as one connected surface, where connectors and screws share vertices with the panel they sit on. Merger cuts the surface where one part sits on another, keeps big surfaces such as a panel or a frame as parts of their own, and keeps small features whole.
It is a shape-based guess, so leave it off for models whose parts are already separate. Turning it on also turns welding on, because it needs it.
Tip. On the display model below it finds 80 part types, against 8 without it. With Group identical parts at 2%, 71.
Welding
OptionA closed sub-section of the Parts card. Imported meshes often arrive unwelded, which would make every polygon its own "part". Welding joins vertices that sit on top of each other first, and it keeps the existing normals, so shading looks exactly as before.
- Merge by distance first - on by default. Smart part detection always welds, and the checkbox is locked while it is on.
- Distance - 0.0001 m by default. Vertices closer than this are welded.
Meshes with shape keys are never welded.
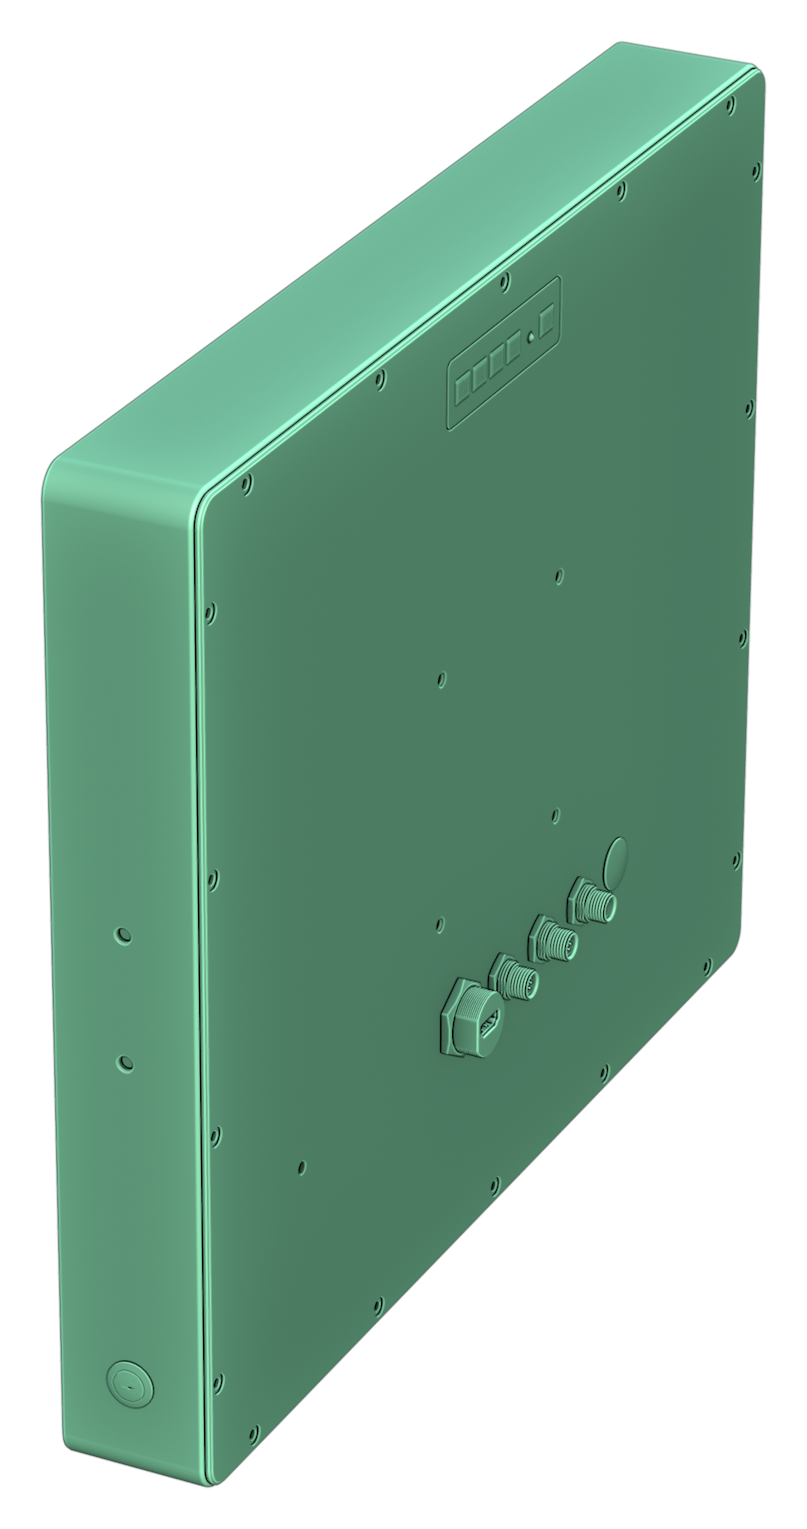
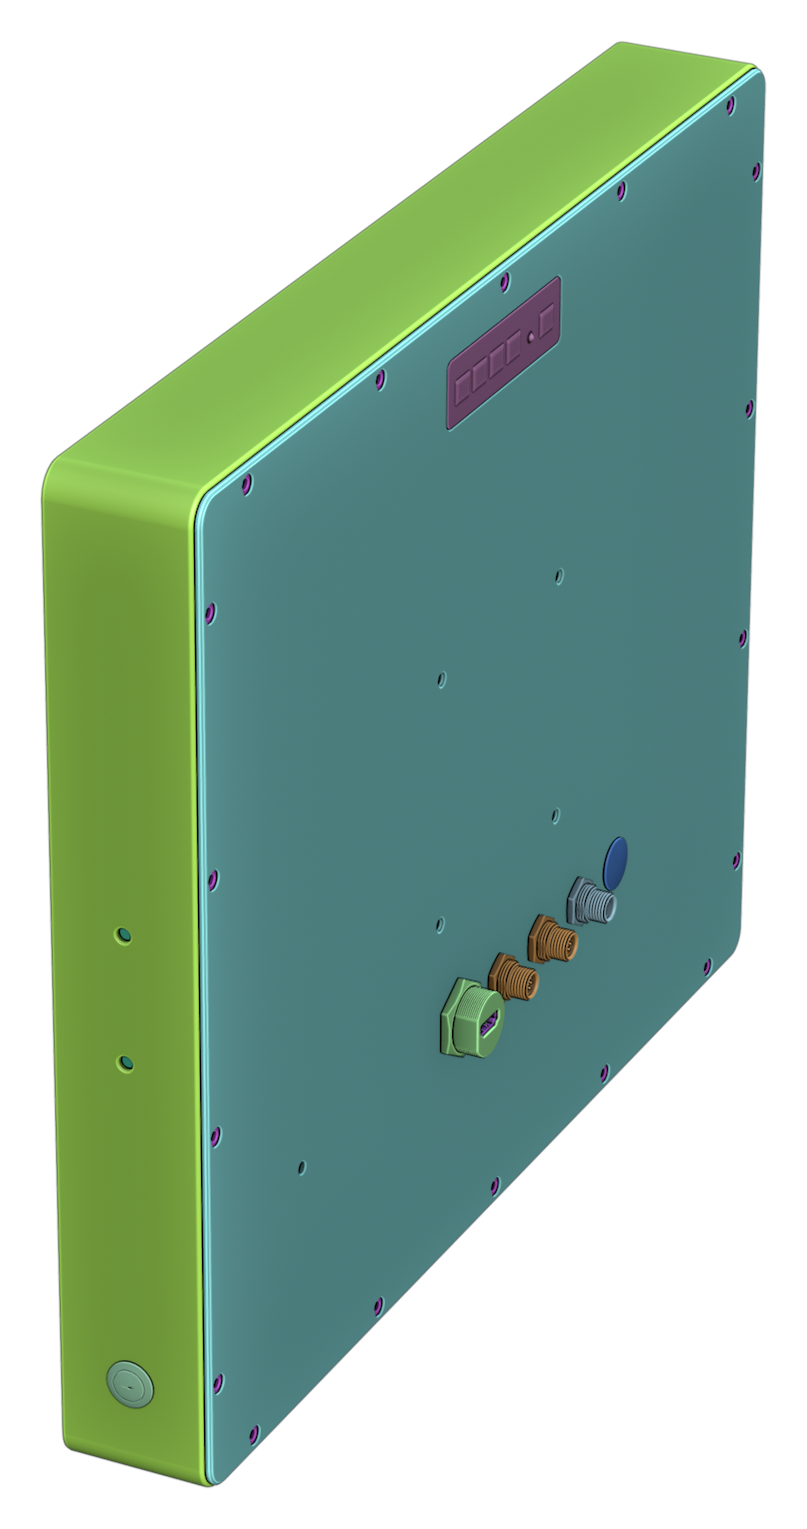
One mesh, one material
Identify Parts with Smart part detection: 71 part types
Cleanup
Delete Childless Empties
Delete the parts you do not need by hand, and their Empties stay behind in the Outliner. One click removes them.
Delete Childless Empties
Deletes every Empty in the scene that has nothing under it. It repeats the pass, so Empties that only held other empty ones go too. A short line under the button reports the last result.
It is one button at the bottom of the Merger panel, and it is also in the Object > Merger menu. It asks first if you turn on Confirm Before Collection Merge / Cleanup in Preferences.
Tip. Merger's own merges do not leave childless Empties. They appear when you delete parts by hand.
Common recipes
A CAD assembly, ready to texture
Select the top Empty, then Merge by Group with Deepest groups only. Next Find All Twins, then Link All Twins with Keep twins in place. Texture one copy of each part.
A downloaded model with messy objects
Set the Merge Target to Collection. Click Merge by Material for a light scene with one object per material, or Merge into One with Color each part to keep every part selectable by material.
One machine in a big scene
Set the Twins Target to Hierarchy and select the machine's top Empty. Click Find All Twins, then Link All Twins. Nothing outside the machine is read or linked.
One big mesh, parts unknown
Select it and click Identify Parts. Tick Smart part detection if it is one connected surface. In Edit Mode, use Select on a material slot to grab a whole part.
Preferences
Set your usual values
once.
Open Edit > Preferences > Add-ons > Merger. Each setting explains itself in short lines under it.

Every setting, in Preferences
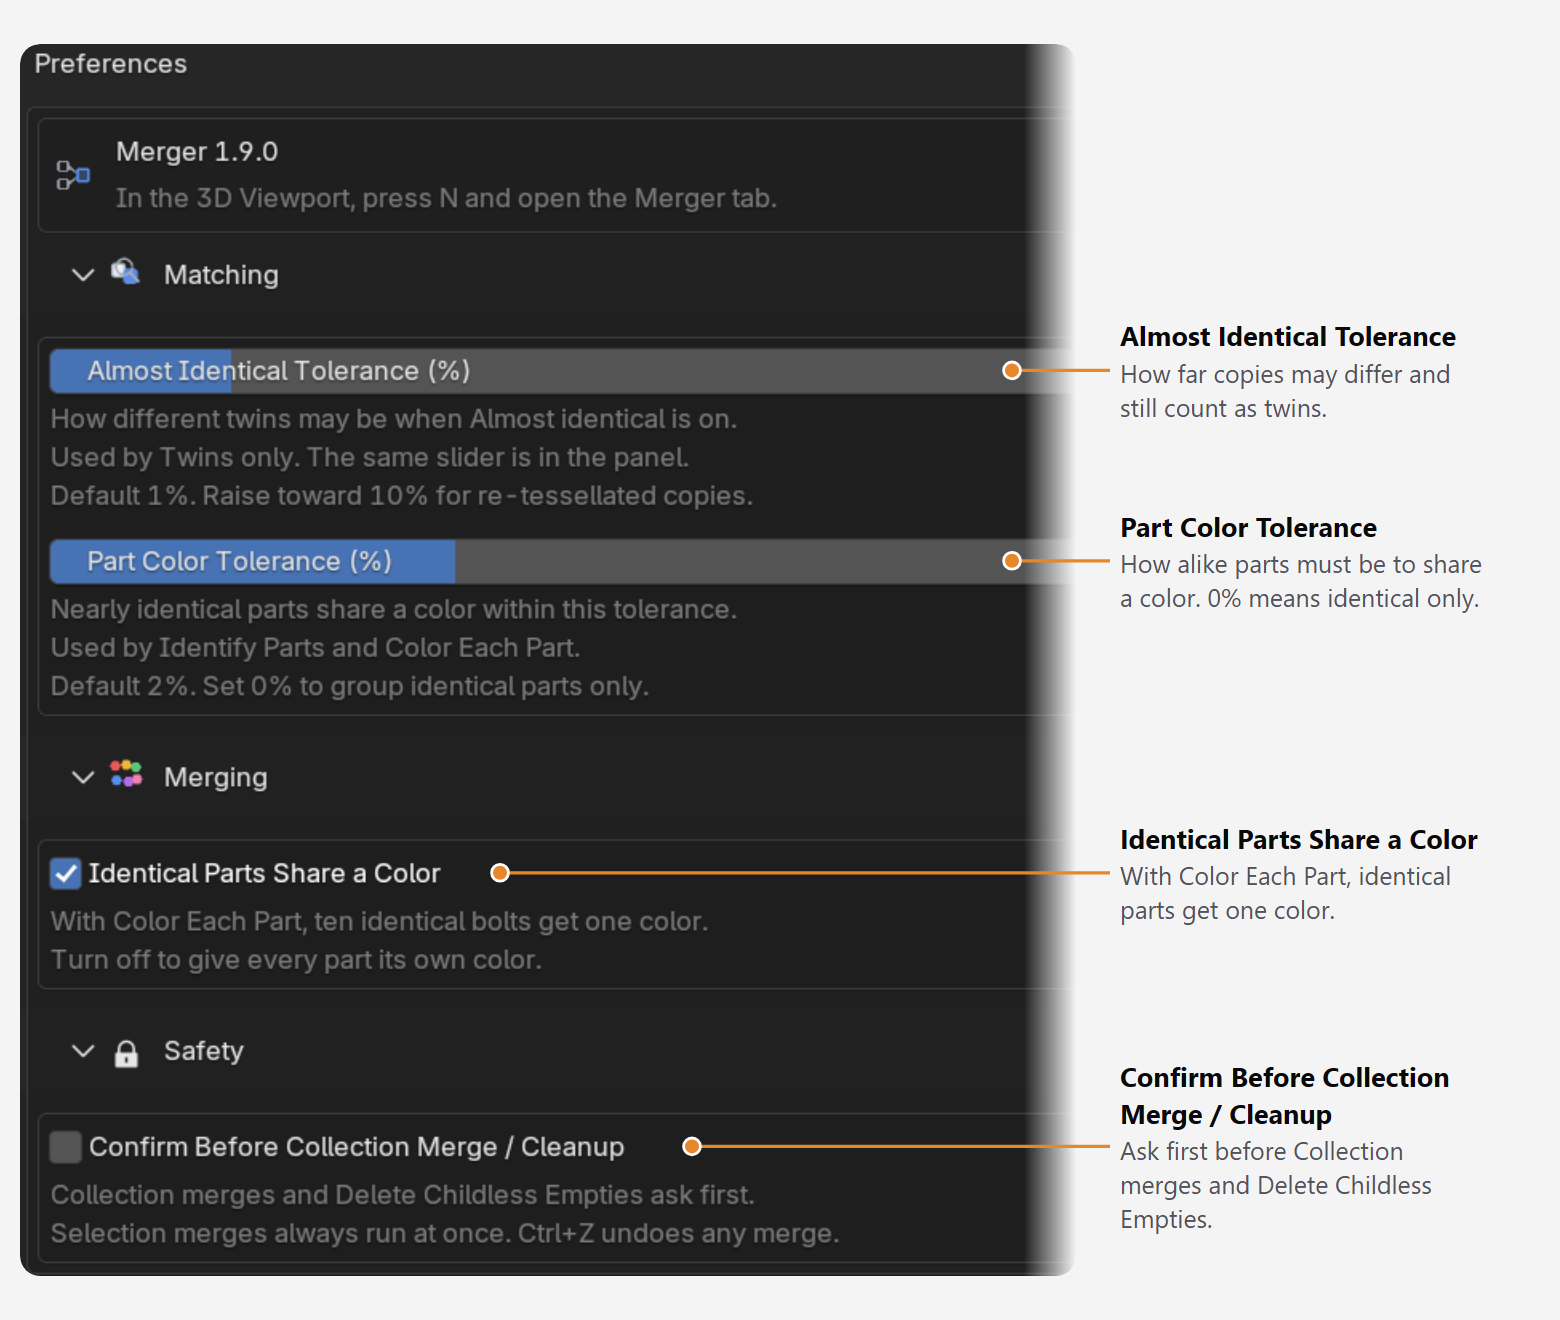
Almost Identical Tolerance (%)
MatchingHow different twins may be when Almost identical is on. Default 1%, from 0.1% to 10%. It is the same slider as the Tolerance in the Twins section, so set your usual value once here. Twins only.
Part Color Tolerance (%)
MatchingHow alike parts must be to share a color in Identify Parts and Color each part. Default 2%, from 0% to 10%. 0% means identical parts only. It is separate from the Twins tolerance, so it never changes what gets linked.
Identical Parts Share a Color
MergingOn by default. With Color each part, identical parts get one shared material, so ten identical bolts get one color. Turn it off for one color per part.
Confirm Before Collection Merge / Cleanup
SafetyOff by default. When on, Collection merges and Delete Childless Empties ask before they run. Merges on selected Empties always run at once. Ctrl+Z undoes any of them.
Troubleshooting
When something
does not work.
The usual causes, with the quick fix for each.
The Merger tab does not appear
Install the ZIP itself (do not unzip it) in a Blender version that meets Blender 4.5 or newer (tested on 4.5, 5.0, 5.1 and 5.2), then press N in the 3D Viewport.
A button is grey
The merge buttons need a selected Empty, or Target set to Collection. Find Twins and Identify Parts need a selected Mesh, and a hint line says so when one is missing. Find All Twins needs at least one mesh in the Target area.
Find Twins finds nothing
The exact scan matches identical geometry only, so nothing is linked by mistake. For nearly identical copies, tick Almost identical and raise the Tolerance. Also check the Twins Target: with Collection or Hierarchy, copies outside that area are not searched.
"Changed since Find Twins - skipped"
That twin was edited after the scan, so Merger did not overwrite it. Run Find Twins again.
Link All Twins reopened its dialog
The scanned area changed since the scan, so Merger scanned it again and shows fresh counts. Nothing was linked from the old result.
A twin got its own mesh back
It was made single-user, or an undo restored it. Run Find Twins and link again. Linked copies are skipped.
Something else
Open Window > Toggle System Console, repeat the step, and send me what it says through the message button on this page.
A note from me
Merger is a one-person project. I built it for my own CAD work, it saves me a lot of time, and I hope it does the same for you. I test every release myself, but I'm not a professional developer, so I may have missed something. If you find a bug or there's a feature you'd like, please send me a message from this page. I have a full-time job, but I read every message and do my best to reply quickly and work on what you ask for.
- Andrew Luzhetskyi
Have questions about this product?
Login to message
| Blender Extension Compatible | Yes |
| Sales | 80+ |
| Rating | 11 ratings |
| Dev Fund Contributor | |
| Published | over 1 year ago |
| Blender Version | 4.5 - 5.2 |
| Extension Type | Add-on |
| License | GPL |

Discover more products like this
optimize Merge color-parts engineering import instancing empties linked duplicates cad scene cleanup hierarchy step