Mesh Painter
 Egret Studios LLC


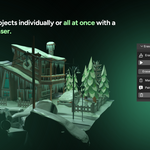
Mesh Painter Documentation
Installation
- Download
mesh_painter.zip - Open Blender 4.0 or later
- Go to Edit > Preferences > Add-ons
- Click Install and select the downloaded zip file
- Enable Mesh Painter in the addon list
- The panel will appear in 3D View Sidebar > Mesh Painter tab

Overview
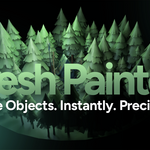
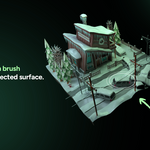
Mesh Painter is a Blender addon that transforms object placement into an intuitive painting workflow. Select any mesh object as a brush and paint it directly onto surfaces in real time. Whether you are populating game environments, creating architectural visualizations, or building complex scenes, Mesh Painter saves hours of manual work.
Quick Start?
Your First Paint.
- Open a new Blender scene (Delete a cube if you must is a tradition)
- Add a Plane (Shift+A → Mesh → Plane) and scale it up (S, 10, Enter)
- Add a UV Sphere (Shift+A → Mesh → UV Sphere) — this will be your brush object
- Select the UV Sphere
- Open the Mesh Painter panel in the sidebar
- In the Brushes section click "Create from 'Sphere'"
- Go to Brush Tool section and click "Start Painting"
- Move your mouse over the plane — you will see a white circle cursor
- Left click and drag to paint spheres onto the plane
- Press RMB or ESC to exit paint mode

Panel Structure
The Mesh Painter panel is organized into six sections:
| Section | Purpose |
|---|---|
| Brushes | Create and manage brush objects |
| Brush Tool | Enter paint mode and control brush settings |
| Precision Placer | Single click placement with snapping |
| Erase Tool | Remove painted objects |
| Stroke Editing | Edit painted objects after placement |
| Setup | Target object and collection settings |
Brushes
The Brushes section is where you create and manage your brush library.
Creating a Brush
- Select any mesh object in the viewport or outliner
- In the Brushes section click "Create from '[ObjectName]'"
- The brush appears in the Brush Library with its settings
Brush Library
Each brush in the library shows:
- Active indicator (radio button) — click to set as active brush
- Brush name — displays the source object name
- Usage count — number of times this brush has been used
- Delete button (X) — removes the brush from the library
Brush Settings
When a brush is active, its settings are displayed below it in the library.
Placement
| Setting | Description |
|---|---|
| Scale | Base size of placed objects (0.01 - 10.0) |
| Spacing | Minimum world space distance between placed objects |
| Offset X/Y/Z | Position offset applied to every placed object |
Alignment
| Setting | Description |
|---|---|
| Align to Surface Normal | Objects orient to face the surface they are placed on |
| Follow Stroke Direction | Objects align along the direction of your stroke |
Randomization
| Setting | Description |
|---|---|
| Rotation X/Y/Z | Random rotation range per axis during painting |
| Scale Variation | Random scale variation percentage during painting |
| Random Seed | Change this value for different random results |
Brush Tool
The Brush Tool section controls the painting experience.
Starting Paint Mode
- Make sure you have at least one brush created
- Click "Start Painting"
- The header shows "●PAINT MODE"
- Move your mouse over any surface to see the white circle cursor
- Left click or click and drag to paint
Brush Tool Settings
| Setting | Description |
|---|---|
| Brush Radius | Size of the white circle cursor in the viewport |
| Density | How many objects are placed per stroke |
Understanding Brush Radius vs Spacing
- Brush Radius controls the size of your cursor (visual only)
- Spacing (in brush settings) controls the minimum distance between placed objects in world space
- For dense painting lower the Spacing value in your brush settings
- For sparse painting increase the Spacing value
Density Guide
| Density | Use Case |
|---|---|
| 0.1 - 0.5 | Sparse placement, large individual objects like trees |
| 1.0 | Default balanced placement |
| 2.0 - 5.0 | Dense placement, small objects like rocks or pebbles |
Exiting Paint Mode
Press RMB or ESC to exit paint mode at any time.
Precision Placer
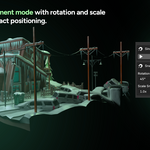
Precision Placer allows single click placement with rotation and scale snapping for exact positioning.
Starting Precision Mode
- Make sure you have at least one brush created
- In the Precision Placer section click "Start Precision Place"
- A blue crosshair cursor appears at your mouse position
- Click once to place a single object
Snapping Controls
| Key | Action |
|---|---|
| LMB | Place object with current settings |
| Ctrl + LMB | Place object with rotation snapped |
| Shift + LMB | Place object with scale snapped |
| Ctrl + Shift + LMB | Place object with both rotation and scale snapped |
Snap Settings
| Setting | Options |
|---|---|
| Rotation Snap | 15°, 30°, 45°, 90° |
| Scale Snap | 0.25x, 0.5x, 1.0x, 2.0x |
Exiting Precision Mode
Press RMB or ESC to exit precision mode.
Erase Tool
The Erase Tool removes painted objects from your scene.
Erase Mode
- Click "Start Erasing"
- A red circle cursor appears
- Left click or drag over objects to erase them
- The painted object count updates in real time
- Press RMB or ESC to exit erase mode
Erase Settings
| Setting | Description |
|---|---|
| Erase Radius | Size of the erase cursor area |
Mass Erase
The Mass Erase section shows the total count of painted objects in your scene. Click "Erase All Objects" to remove every painted object at once. A confirmation dialog will appear before deletion.

Stroke Editing
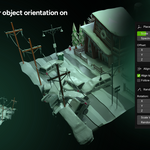
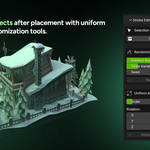
Stroke Editing allows you to adjust painted objects after placement without repainting. This is one of the most powerful features of Mesh Painter.

Selection
Before editing, select the objects you want to adjust:
- Click "Select All Painted" to select every painted object in the scene
- Or manually select objects in the viewport using box select (B key)
- The panel shows how many objects are currently selected
Randomize Adjust
Randomize adds controlled variation to selected objects. Each click of Apply gives fresh results — it does not stack.
| Setting | Description |
|---|---|
| Rotation X | Random rotation range on X axis (0° - 360°) |
| Rotation Y | Random rotation range on Y axis (0° - 360°) |
| Rotation Z | Random rotation range on Z axis (0° - 360°) |
| Scale Variation | Random scale variation percentage |
| Seed | Change this for different random patterns with same settings |
Apply — Applies randomization to selected objects
Reset — Resets all selected objects to scale 1.0 and rotation 0°
Uniform Adjust
Uniform Adjust sets every selected object to the exact same scale and rotation values.
| Setting | Description |
|---|---|
| Scale | Sets all selected objects to this exact scale |
| Rotation X | Sets all selected objects to this exact X rotation |
| Rotation Y | Sets all selected objects to this exact Y rotation |
| Rotation Z | Sets all selected objects to this exact Z rotation |
Apply — Applies uniform values to selected objects
Reset — Resets all selected objects to scale 1.0 and rotation 0°
Stroke Editing Workflow
Paint objects → Exit paint mode → Select objects →
Adjust sliders → Click Apply → Don't like it? Ctrl+Z → Adjust again
Setup
The Setup section configures global painting settings.
Target Object
By default Mesh Painter paints on any visible mesh surface. Setting a target object restricts painting to that object only.
- Select a mesh object in the viewport
- Click "Set '[ObjectName]' as Target"
- Now painting only works on that specific object
- Click X next to the target field to clear it

Collection Settings
| Setting | Description |
|---|---|
| Auto Collection | Automatically creates collections for painted objects |
| Collection Name | Base name for created collections |
When Auto Collection is enabled, painted objects are automatically organized into named collections using the format:
MeshPainter_[BrushName]_[Date]
Example: MeshPainter_Sphere_Feb11
Keyboard Shortcuts
Paint Mode
| Shortcut | Action |
|---|---|
| LMB Hold + Drag | Paint stroke of objects |
| LMB Release | Stop painting current stroke |
| RMB / ESC | Exit paint mode |
Precision Mode
| Shortcut | Action |
|---|---|
| LMB | Place object |
| Ctrl + LMB | Place with rotation snap |
| Shift + LMB | Place with scale snap |
| Ctrl + Shift + LMB | Place with both snaps |
| RMB / ESC | Exit precision mode |
Erase Mode
| Shortcut | Action |
|---|---|
| LMB Click | Erase single object |
| LMB Drag | Erase multiple objects |
| RMB / ESC | Exit erase mode |
General
| Shortcut | Action |
|---|---|
| Ctrl + Z | Undo last action |
| Ctrl + Shift + Z | Redo last action |
| B | Box select in viewport |
Tips & Tricks
For Game Environments
- Set a low Spacing value (0.5m) with medium Density (1.0 - 2.0) for natural coverage
- Use Randomize after painting with Rotation Z set to 360° for natural variation
- Create separate brushes for different asset types and switch between them
- Use collections to organize painted objects by area
For Architectural Visualization
- Use Precision Placer for furniture and prop placement
- Enable rotation snapping (45° or 90°) for aligned objects
- Set a Target Object to restrict painting to specific surfaces
- Use Uniform Adjust to set consistent scale for all furniture pieces
For Natural Scenes
- Paint multiple passes with different brushes for variety
- Use Randomize with Scale Variation around 20% - 40% for natural size differences
- Keep Rotation X and Y at 0° for upright objects, only randomize Z
- Combine different sized brushes for realistic distribution
Performance Tips
- Keep brush source objects low polygon count
- Use instancing (enabled by default in preferences) for large scenes
- Monitor the painted object count in the Erase Tool section
- Use collections to hide and show groups of painted objects
Troubleshooting
Objects not appearing when painting
- Check that your brush has a valid source object in the Brushes section
- Make sure your mouse is over a visible mesh surface
- Try reducing the Spacing value in brush settings
- Check the Blender console for error messages
White cursor not visible
- Make sure you have clicked "Start Painting" and are in Paint Mode
- Your mouse must be hovering over a mesh surface for the cursor to appear
- Check that the target object (if set) is visible in the viewport
Objects placing in wrong location
- Check the Offset values in brush settings are set to 0
- Make sure your source object has its origin set correctly
- Try applying scale and rotation to your source object (Ctrl+A in viewport)
Erase mode not detecting objects
- Make sure objects are inside a MeshPainter collection
- Objects must have been painted using Mesh Painter to be detected
- Try increasing the Erase Radius value
Performance slowing down
- Reduce the number of objects using Erase Tool
- Enable instancing in addon preferences
- Hide collections you are not currently working on
Changelog
Version 1.0.0 (Feb 2026)
- Initial release
- Paint mode with real time cursor feedback
- Precision placement mode with Ctrl and Shift snapping
- Erase mode with adjustable radius and mass erase
- Brush system with unlimited brushes and full settings
- Post paint stroke editing with Randomize and Uniform Adjust
- Smart collection management with automatic naming
- Surface normal alignment
- Full randomization control per axis
- Undo and redo support
Support
For bug reports, feature requests and support contact me, don't hesitate to inbox.
[email protected]
Mesh Painter by Egret — Keep creating beauty in the world! Forza Michelangelo.
Have questions about this product?
Login to message
| Blender Extension Compatible | Yes |
| Sales | 70+ |
| Published | 8 months ago |
| Blender Version | 4.0 - 5.1 |
| Extension Type | Add-on |
| Render Engine Used | Cycles, Eevee |
| License | GPL |

Discover more products like this
austin raycasting 3D Object Placement bcon26 scatter placement