Meshcutter
 CreateVisions



What is MeshCutter?
MeshCutter is an add-on that lets you cut meshes quickly, precisely, and with minimal effort. It automates many repetitive tasks such as separating objects and generating cap surfaces, while relying on ’s built-in tools in the background.
Key Features
- No need to enter Edit Mode
- Automatic separation of cut objects
- Cap faces are generated automatically
- Works with high-poly meshes
- Draw cutting curves directly in the viewport
- New in v1.1: 90° angle snapping in Bisect Mode
- Multiple cutter modes for flexible workflows
For best accuracy, always work in orthographic view when using "Cut Selected", "Start Bisect Cut", "Draw & Cut", or "Project & Cut". Perspective view can distort placement and lead to imprecise results. To switch to orthographic view, press Numpad 5 or click the "Switch between perspective/orthographic projection" button just below the navigation gizmo in the viewport.
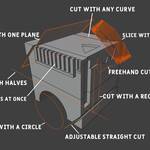
Place any mesh object (e.g., a plane) where you want the cut to occur. Select the target mesh first, then the cutter object last. Click "Cut Selected" — the mesh will be sliced and automatically separated into two individual objects. No modifiers, no manual steps required.
In this mode, you’ll also find a checkbox labeled "Global Cut".
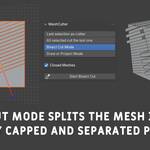
Global Cut ON: Uses ’s Bisect method when cutting with a plane. The plane acts only as a directional guide — you don’t need to position it exactly. The cut goes straight through the entire mesh based on the plane’s orientation.Global Cut OFF: The plane acts as a true cutting object, with its position and size determining the cut. MeshCutter automatically switches to a Boolean operation — no manual setup needed.
Note: When using a regular mesh (not a plane) as the cutter, the Global Cut option has no effect.All Selected Cut the Last One
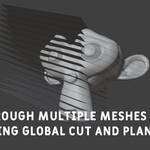
Use multiple planes or cutter objects to slice a single mesh into several parts. Select all cutter objects first, then the target mesh last. Click "Cut Selected" — the mesh will be cut by each selected object. All resulting parts are automatically separated and capped.
This mode also includes the "Global Cut" option:
Global Cut ON: All selected planes use the Bisect method. Each plane defines a slicing direction, cutting through the entire mesh without precise placement.Global Cut OFF: Cuts are based on the actual plane size and placement. The tool automatically switches to Boolean mode.
Note: When using regular meshes as cutters, the Global Cut checkbox has no effect.
Cut through all selected meshes with a single stroke. Just click and drag a line across the objects — every selected mesh will be sliced and automatically separated. To create perfect horizontal or vertical cuts, hold down the CTRL key to snap the line to 90-degree angles. Everything happens in the background, no manual cleanup required.
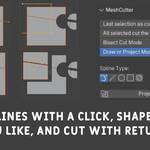
When you activate "Draw or Project Mode", you’ll see a list of available spline types. By default, the Bezier spline is selected.
You’ll also see a button labeled "Draw or Project Cut". Important: do not click this button until at least one mesh is selected.
Once a mesh (or multiple meshes) is selected, the button will automatically change to "Draw & Cut". Click "Draw & Cut" to begin drawing directly over the selected geometry. The spline type you selected will be used for the shape.
To draw, hold down the left mouse button:
- For Bezier and Linear splines, draw the curve or line in one continuous stroke.
- For Circle and Rectangle, drag to define the shape’s size.
- For Polygon splines, drag to set the size and scroll the mouse wheel (while holding the mouse button) to adjust the number of edges (minimum 3 for a triangle).
Once you release the mouse button, the spline will be created and remain editable. You can move the control points or adjust the shape as needed. When you're ready, press Return to cut the mesh along the drawn spline.
In Project Mode, you use an existing spline without needing to draw a new one. This can be a curve you previously created with MeshCutter or any custom spline from your scene.
Place the spline in front of the mesh you want to cut. It’s important to leave a bit of distance between the spline and the mesh — not too close and not too far. If the spline is misaligned or doesn’t fully cover the mesh, the cut may not happen.
Once the spline is correctly positioned, select the mesh (or multiple meshes) first, and the spline last. The button will change from "Draw & Cut" to "Project & Cut". Click it to apply the cut based on the projected shape of the spline. And don’t forget to work in orthographic view — it's really important for getting accurate results. I mentioned it earlier, but it’s worth repeating: in perspective view, cuts can easily become imprecise.
Reusable Cutting Curves
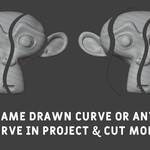
Any spline created in Draw Mode can be reused at any time. Simply select the mesh first and the spline last — the mode will automatically switch to "Project & Cut". This allows you to cut multiple objects using the same shape without needing to redraw it.
High-Poly Performance
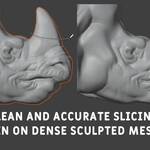
MeshCutter also works reliably with high-poly models. It has been tested on a 3-million-polygon scan model with stable and accurate results. Processing time depends on the cutter type, mesh density, and curve complexity — especially fine cuts with Bezier splines may take a bit longer, but the results remain clean and precise.
In some cases, the calculation can take a while. My personal record was around two minutes for a complex cut — but in the end, I had a perfect result with two cleanly separated parts. So if the operation seems to hang, don’t immediately assume has crashed. Just be patient — the tool is working in the background, and the result is worth the wait.
Discover more products like this
cut slice cutter split mesh mesh modeling slicer Bisect meshcutter boolean separate hard surface blender addon