Mouldcast Studio
 Quadrivium369



MouldCast Studio
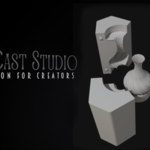
Mold Generator for Blender
MouldCast Studio converts a 3D object into a clean, printable mold system ready for
casting workflows such as ceramics, resin, plaster, wax, or silicone.
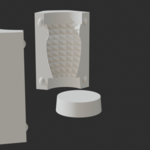
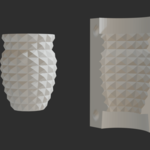
The tool automatically generates mold blocks, separation parts, alignment keys, and
pouring holes while keeping the system fully procedural and editable.
1. Install the Add-on
1. Download the
MouldCast Studio .zip file.
Blender.
3. Go to Edit → Preferences → Add-ons.
4. Click Install...
5. Select the downloaded .zip file.
6. Enable MouldCast Studio in the add-on list.
2. Open
Once installed, the MouldCast Studio panel will appear in the
Sidebar (N panel).
2. Prepare Your Model
Before generating a mold, ensure the object is properly prepared.
Recommended setup:
real-world scale
watertight (manifold)
outward
• The model should be at
• The mesh should be
• Normals should face
• Avoid internal geometry or loose parts
The object should represent the
final shape of the piece to be cast.
3. Open the Add-on Panel
1. Select your object in the viewport.
Sidebar (press N).
3. Go to the MouldCast Studio tab.
2. Open the
Select your 3d model in the dropdown or with the eye-dropper.This operation will:
• center the object for mold generation
• apply transforms (location, rotation, scale)
• prepare the mesh for procedural processing
This ensures the mold system is generated correctly.
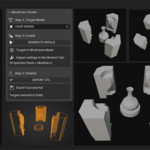
4. Generate the Mold
Press
Generate.
The add-on will automatically:
• build the mold structure around the object
• divide it into mold parts
• generate mold shells
• apply the procedural modifier system
The mold is now ready to be adjusted.
5. Customize the Mold
The generated mold can be adjusted using the
modifier controls.
These parameters allow you to modify the mold structure without rebuilding it.
Every time one of these controls is changed, the Mold regenerates,
so make one change at a time and wait. If the system seems slow, you can use the
BYPASS MODE wich will bypass the boolean operations for making the overall shaping
and placement of KEYS lighter and responsive. Be sure to uncheck Bypass Mode before
you export.
See the
Controls section below for details.
6. Export the Mold
Once you are satisfied with the mold setup, press
Export.
This will:
• separate the mold pieces into individual objects
• apply the procedural geometry
• export each mold part as
.STL files
These files are ready for 3D printing or fabrication.Controls Overview
Geometry
MODEL Object
MOULD Parts
SEPARATE (view)
BYPASS MODE
Source object used to generate the mold.
Number of mold sections created around the object.
Visually spreads the mold parts for inspection.
Temporarily disables the mold system while keeping the
object visible. Use this to generate the basic shape if you
system runs slow.
Mould
MOULD Height
MOULD Width
MOULD Crop
MOULD Rounded
Tolerance Gap
Vertical size of the mold block.
Horizontal size of the mold block.
Reduces excess mold volume around the
object.
Adds rounded edges to the mold block.
Adds clearance between mold parts for easy
separation.
Top Hole (Pouring Hole)
TOP HOLE Radius
TOP HOLE Depth
Size of the pouring
hole.
Depth of the pouring
channel.
Base
BASE Radius Top
BASE Height Add
BASE Radius Bottom
Radius of the upper base
section.
Extra height added to the
base.
Radius of the lower base
section.Key Knobs (Alignment Keys)
Enables alignment keys between
mold parts.
Knob Wall Resolution Smoothness of the alignment knobs.
KEY Circles Size
Diameter of the alignment key circles.
KEYS Depth
Depth of the alignment keys.
KEYS Offset W
Horizontal placement of keys.
KEYS Offset H
Vertical placement of keys.
KEY KNOBS
Typical Applications
MouldCast Studio is useful for:
• ceramic slip casting
• candle molds
• resin casting
• plaster molds
• silicone master molds
• craft prototyping
• small product manufacturing
Recommended Workflow
For best results:
realistic scale objects
manifold
2–4 mold parts for most objects
• use
• ensure meshes are
• use
• Enable Bypass Mode if system is slow
• test with
before export
SEPARATE (view)
Have questions about this product?
Login to message
| Blender Extension Compatible | Yes |
| Sales | 60+ |
| Published | 6 months ago |
| Blender Version | 4.5 - 5.0 |
| Extension Type | Add-on |
| Render Engine Used | Cycles |
| License | Mit |